# 3D Modeling
# Blender
# Blender Tutorials
Here are a list of various tutorials and a brief description on what you can learn. Blender (or any other application) requires some devotion and mastery of skills that build off each other. You can expect to become a great modeller for furniture fairly quickly, but animation-ready characters will consume more time (but totally worth it!!!)
##### **Quick-start modelling**
[https://www.youtube.com/watch?v=ICBP-7x7Chc&t=1613s](https://www.youtube.com/watch?v=ICBP-7x7Chc&t=1613s)
This video is a few years old and uses a version prior to 2.80. Newer versions, such as 4.0 work pretty much the same but you will notice a difference in the UI. The newer versions use icons and a modern UI where this older version has text on buttons instead. Nevertheless, this is my ABSOLUTE favorite first dive into Blender because the instructor goes through core modelling features, with shortcuts, and preps you to be ready to model.
##### **Quick-start materials**
[https://www.youtube.com/watch?v=Oko7kas-fu4](https://www.youtube.com/watch?v=Oko7kas-fu4)
The sequel to the above video, but now focuses on getting started with materials and basic texturing. This is a great guide too because after finishing, your next learning task would be to dive into a texturing tool such as Substance Painter to bring your models to a professional level.
##### **Full beginner course (*the infamous donut*)**
[https://www.youtube.com/playlist?list=PLjEaoINr3zgEPv5y--4MKpciLaoQYZB1Z](https://www.youtube.com/playlist?list=PLjEaoINr3zgEPv5y--4MKpciLaoQYZB1Z)
A complete beginners course that breaks down just about everything at a decent pace. This is a FULL course/playlist! When you finish Part 6 or Part 7, to me the rest of the parts are kinda optional (they are dives into rendering, lighting etc. where typically you would move your models into a game engine that supplies its own rendering).
##### **Full intermediate course (requires finishing the donut tutorial)**
[https://www.youtube.com/playlist?list=PLjEaoINr3zgHJVJF3T3CFUAZ6z11jKg6a](https://www.youtube.com/playlist?list=PLjEaoINr3zgHJVJF3T3CFUAZ6z11jKg6a)
This is considered an intermediate tutorial and requires either the quick-start tutorials completed above or the beginner playlist featuring the donut. This tutorial series uses references images and a pretty professional work-flow that you could expect in a professional environment. After you finish here, practice some additional modelling work and move on to texturing with something like Substance Painter.
# Blender Shortcuts
[Blender Shortcuts Link](https://www.dropbox.com/s/jg4fs4i8zw5bxt7/Blender%203.0%20Shortcuts%20v1.2.pdf?dl=0)
Print this PDF or store on something like an iPad. This is a comprehensive list of shortcuts used for Blender.
Shortcuts, although not required, dramatically improve the speed when modelling with Blender and every user should at least know the basics.
# Importing Armatures, Animations, and Shaders
This tutorial focuses on settings that should be configured in Blender before importing into a game engine. The import process will not be covered on this page and can be found on the pages of the game engine you wish to learn the import process for, as each one is different.
---
#### [>>GAME ENGINES PAGE<<](https://scil-wiki.su.edu/shelves/engines)
---
[](https://scil-wiki.su.edu/uploads/images/gallery/2023-11/animated-sword-snippet.PNG)
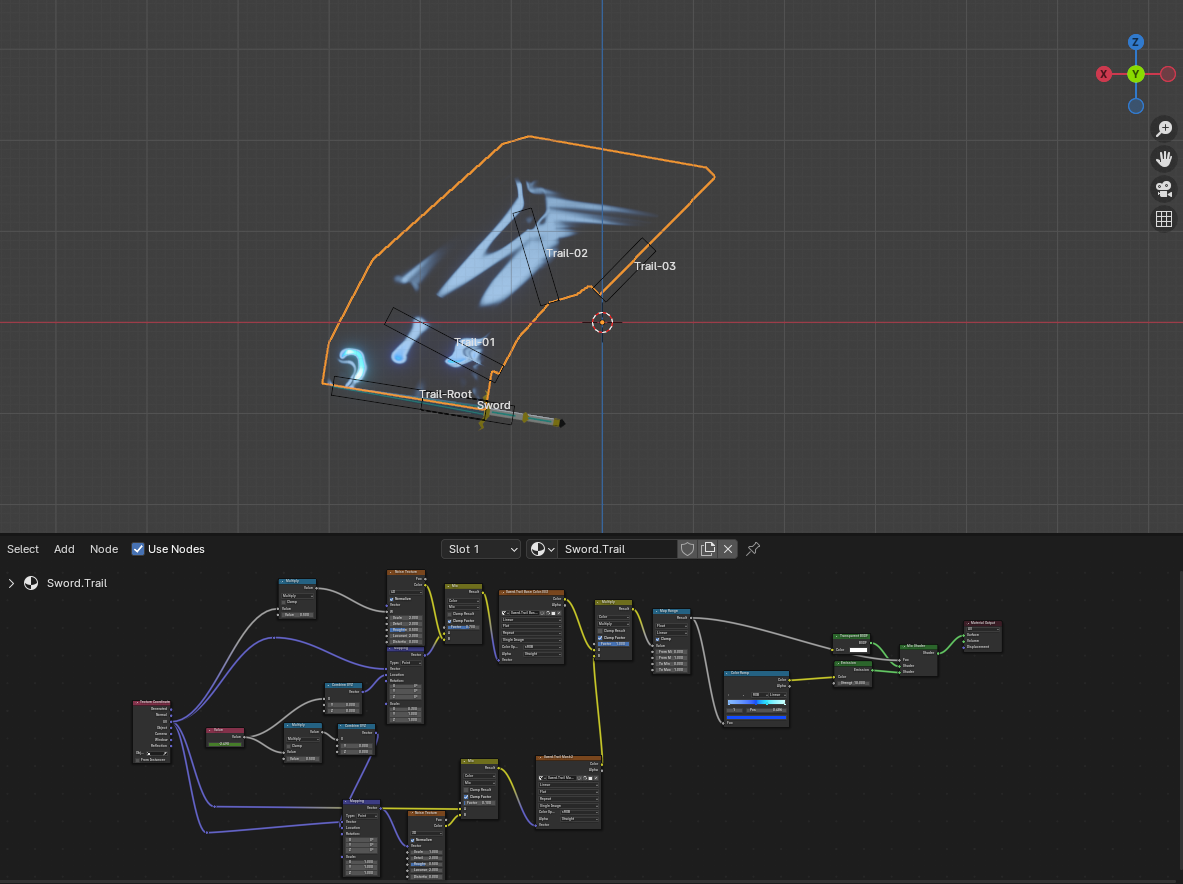
If you've configured animations, effects, or armatures in Blender, then you should bear in mind that the export process from a 3D Modeling software to a Game Engine (i.e. Unreal, Unity, Godot) will change, to accommodate additional features that your 3D Model possesses.
[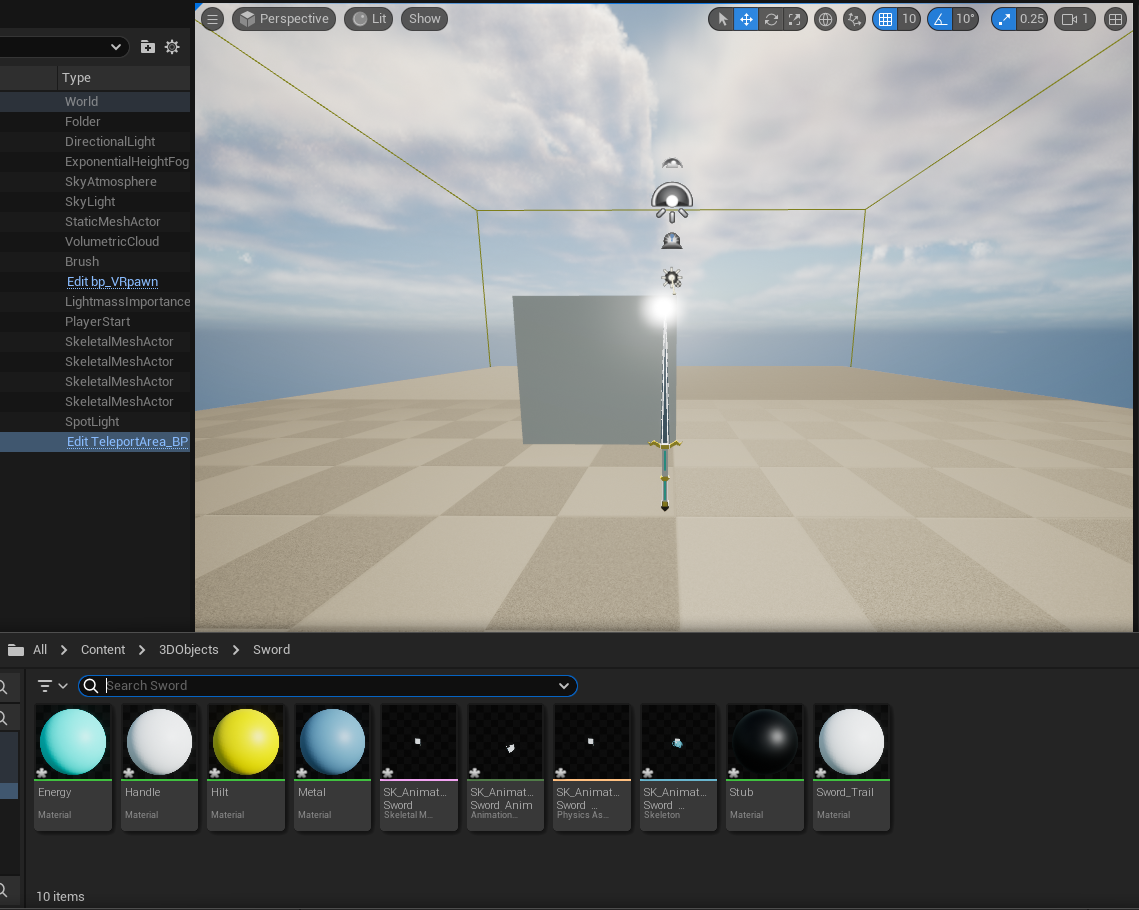](https://scil-wiki.su.edu/uploads/images/gallery/2023-11/ue-sword-imported-snippet.PNG)
Each setting or property that accommodates a feature of your 3D object will be addressed in separate sections of this paper, rather than all at once. You can use the table of contents to jump around. **Some parts of this tutorial reference guides on separate web pages that will be referenced and linked throughout the page. Below is a list of all references you can choose to explore:**
- [Export Animations from Blender to Unreal Engine 5](https://www.immersivelimit.com/tutorials/export-animations-from-blender-to-unreal-engine)
# Maya
# Basics of Maya
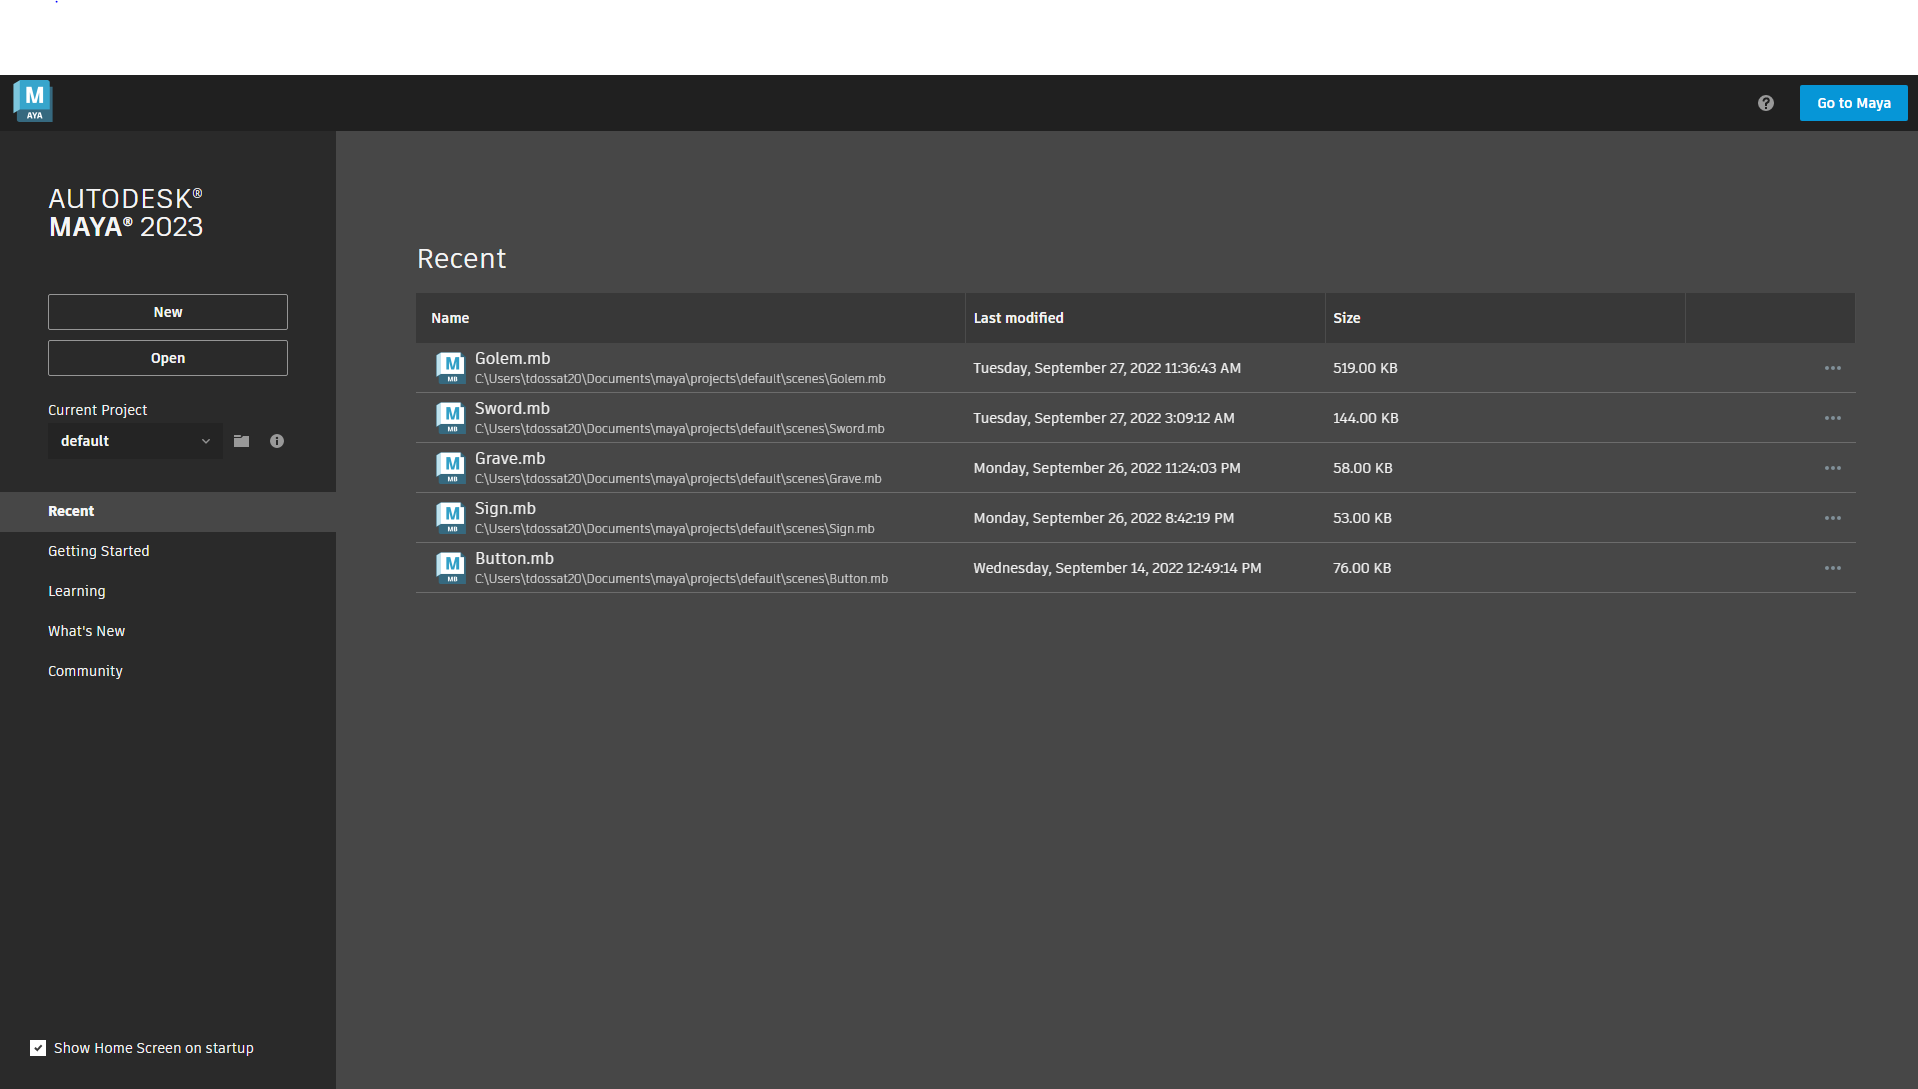
When you boot up Maya, You will see a similar screen. On the left side of the screen you can find a few buttons. New, Which creates a new Maya file, Open which opens a existing file, and a drop down menu called current project. This drop down menu is basically the folder where your Maya files are stored. Creating a project is helpful for when you need to organize a project. You will see your recent files taking up most of your screen.
[](https://scil-wiki.su.edu/uploads/images/gallery/2023-11/maaimage.png)
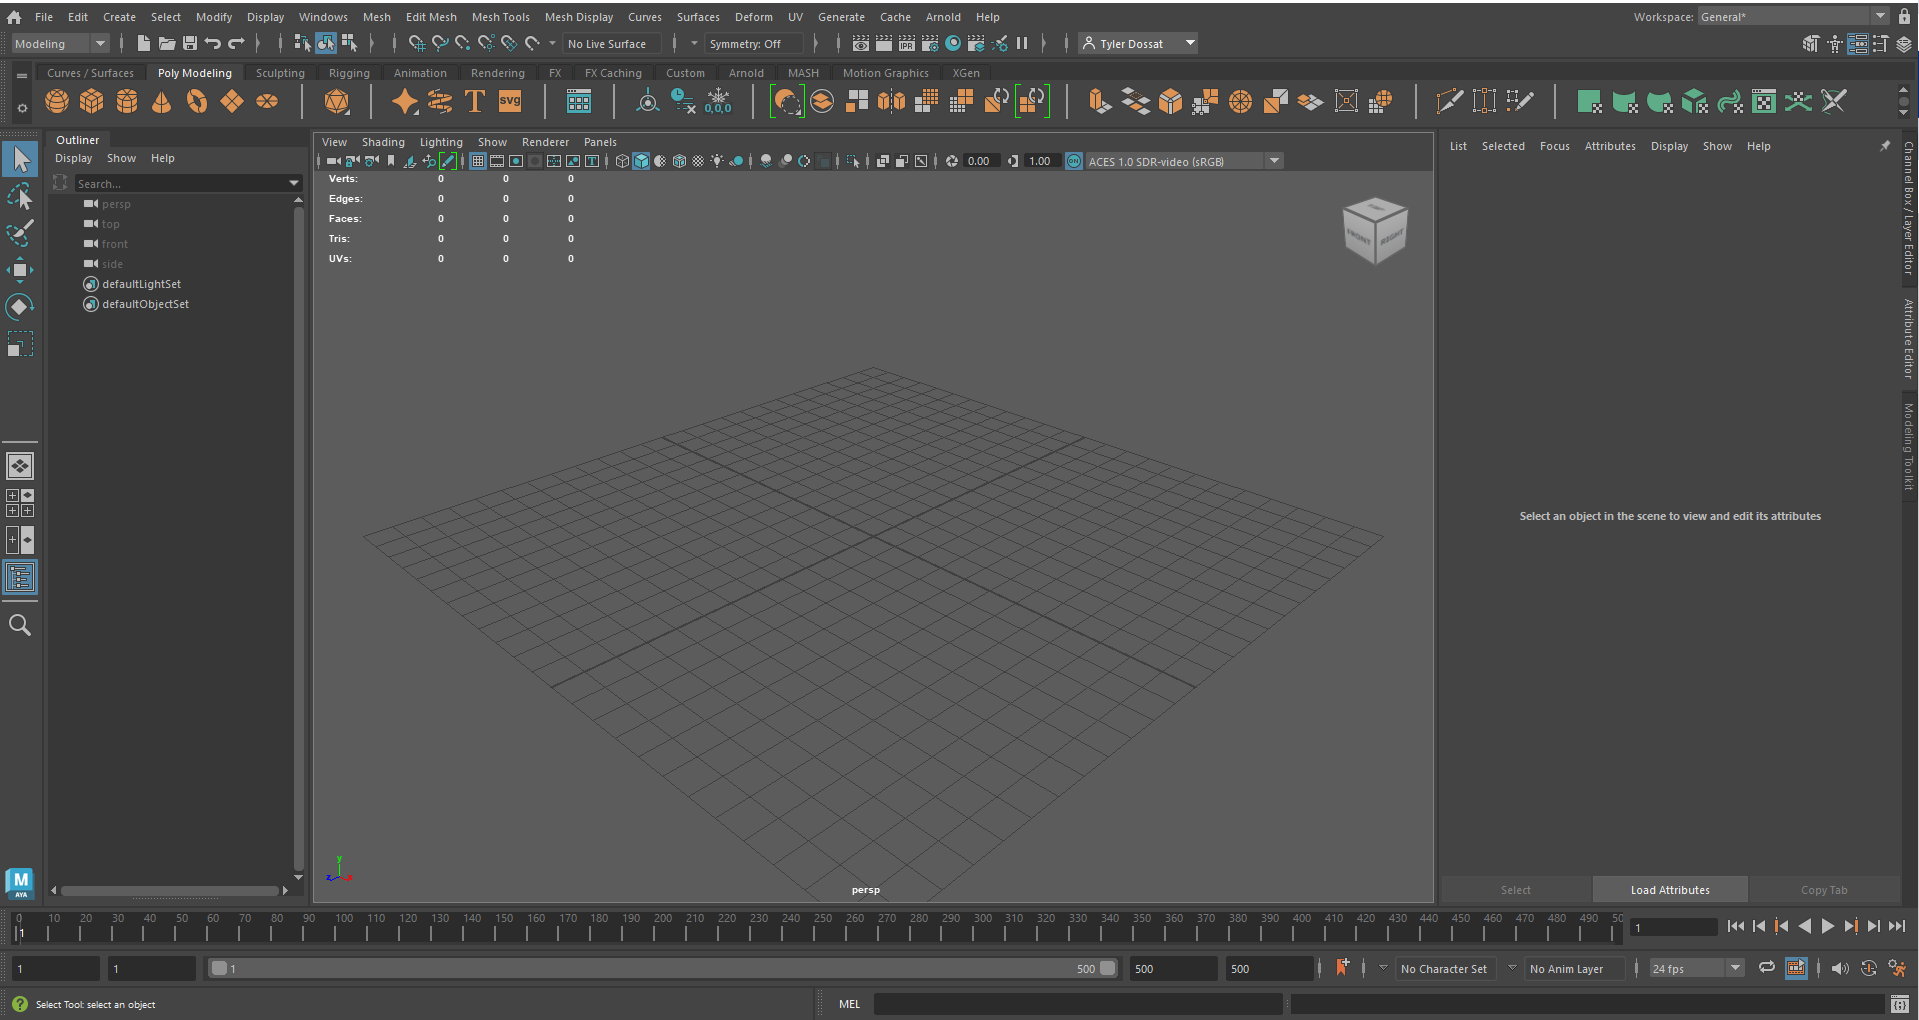
Once you open a new file, you will see this scene by default.
[](https://scil-wiki.su.edu/uploads/images/gallery/2023-11/wwsimage.png)
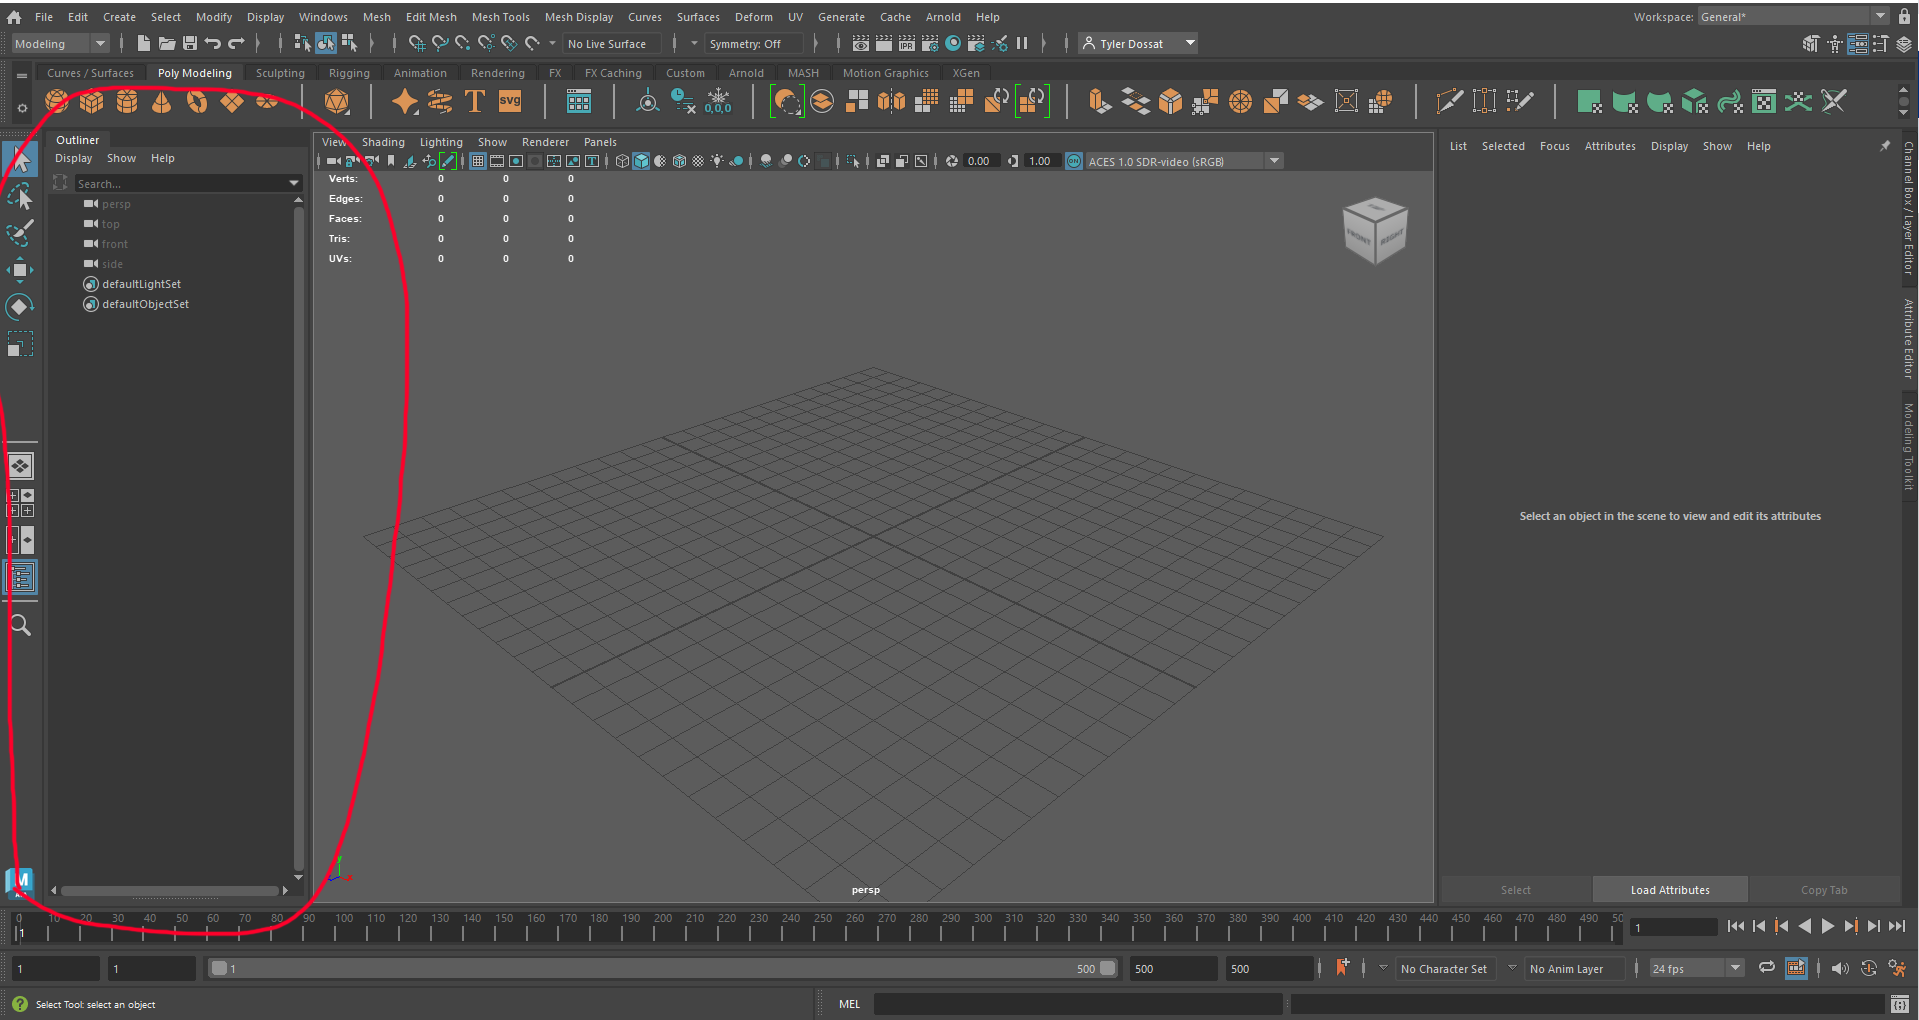
On the left side you will see the outline. The outline is where all of your meshes. It is where you can organize all of the parts of your scene. All the things you add will appear here.
[](https://scil-wiki.su.edu/uploads/images/gallery/2023-11/right.png)
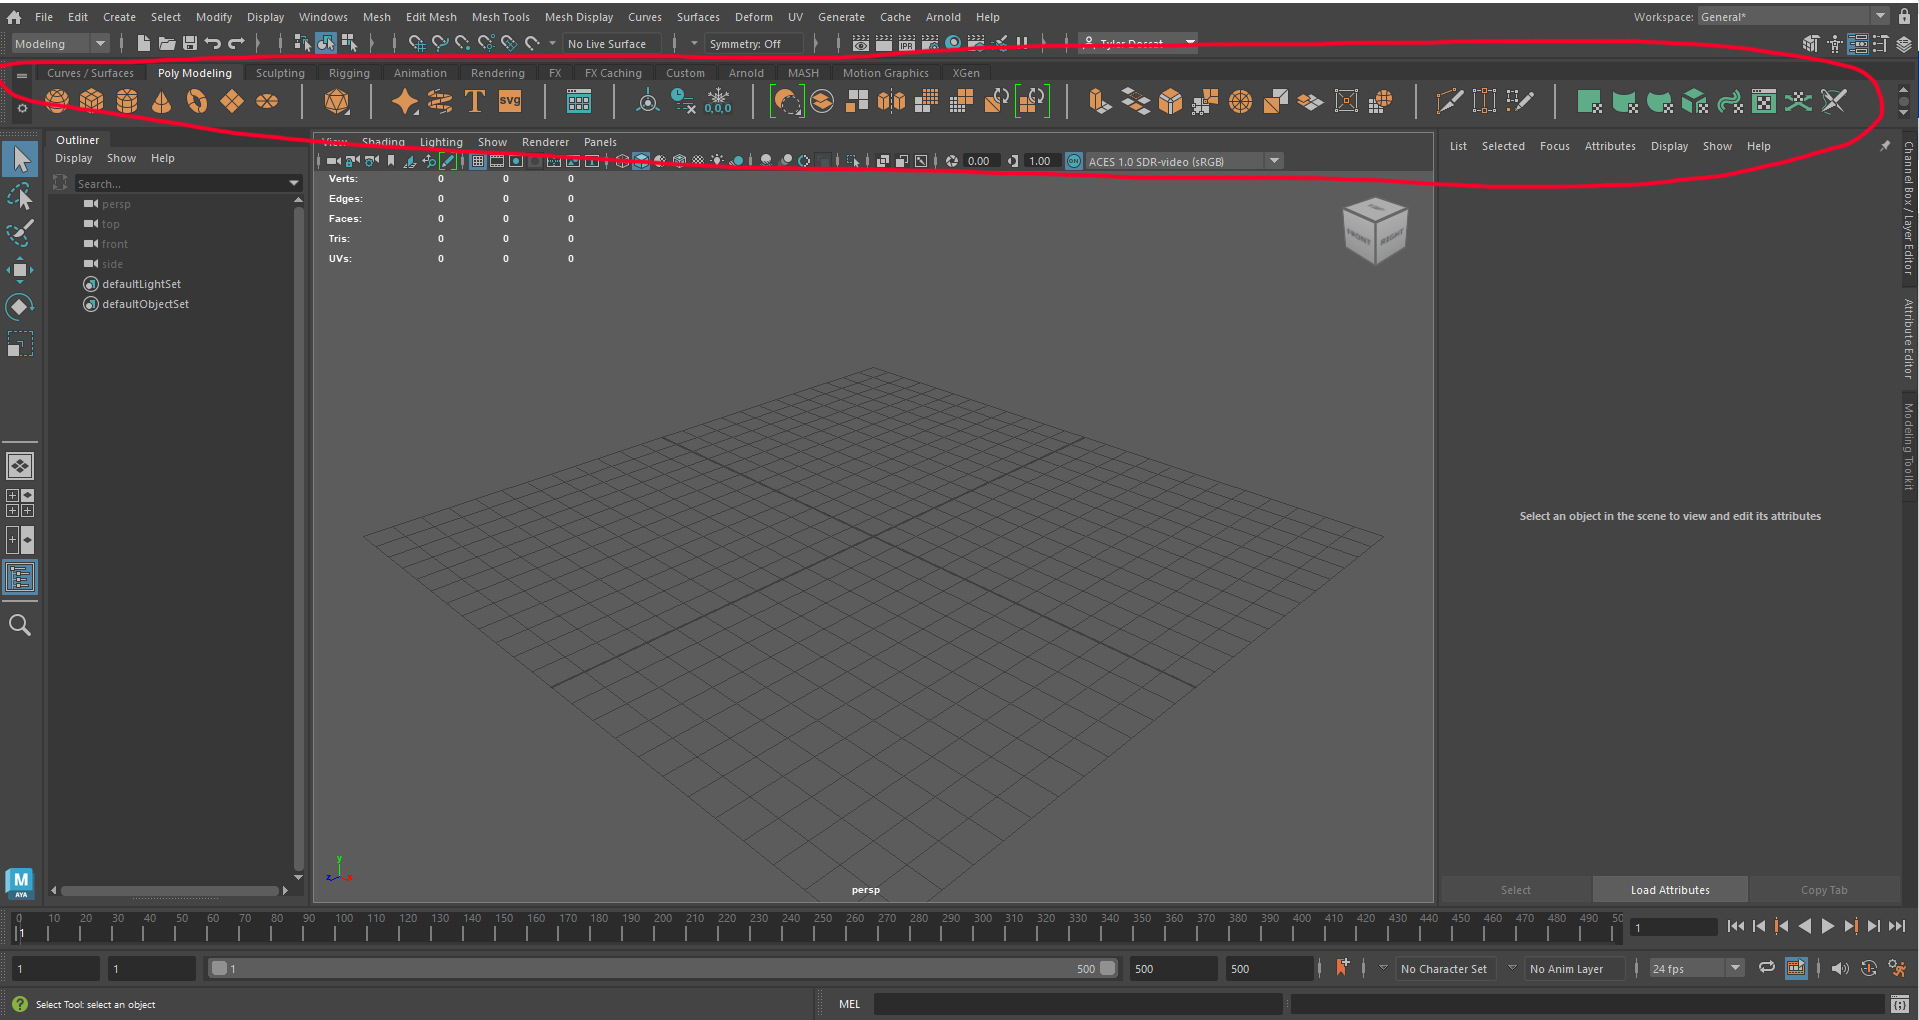
The top is your short cut bar. A lot of the basic things that you want to do you can find up top. Most of the time you will have the Poly Modeling tab selected as that is where you can add a cube, sphere, etc. The other tabs have useful short cuts to help you out. The bar above are useful and have alternate ways to get what your looking for. Exploring these features is recommended.
[](https://scil-wiki.su.edu/uploads/images/gallery/2023-11/top.png)
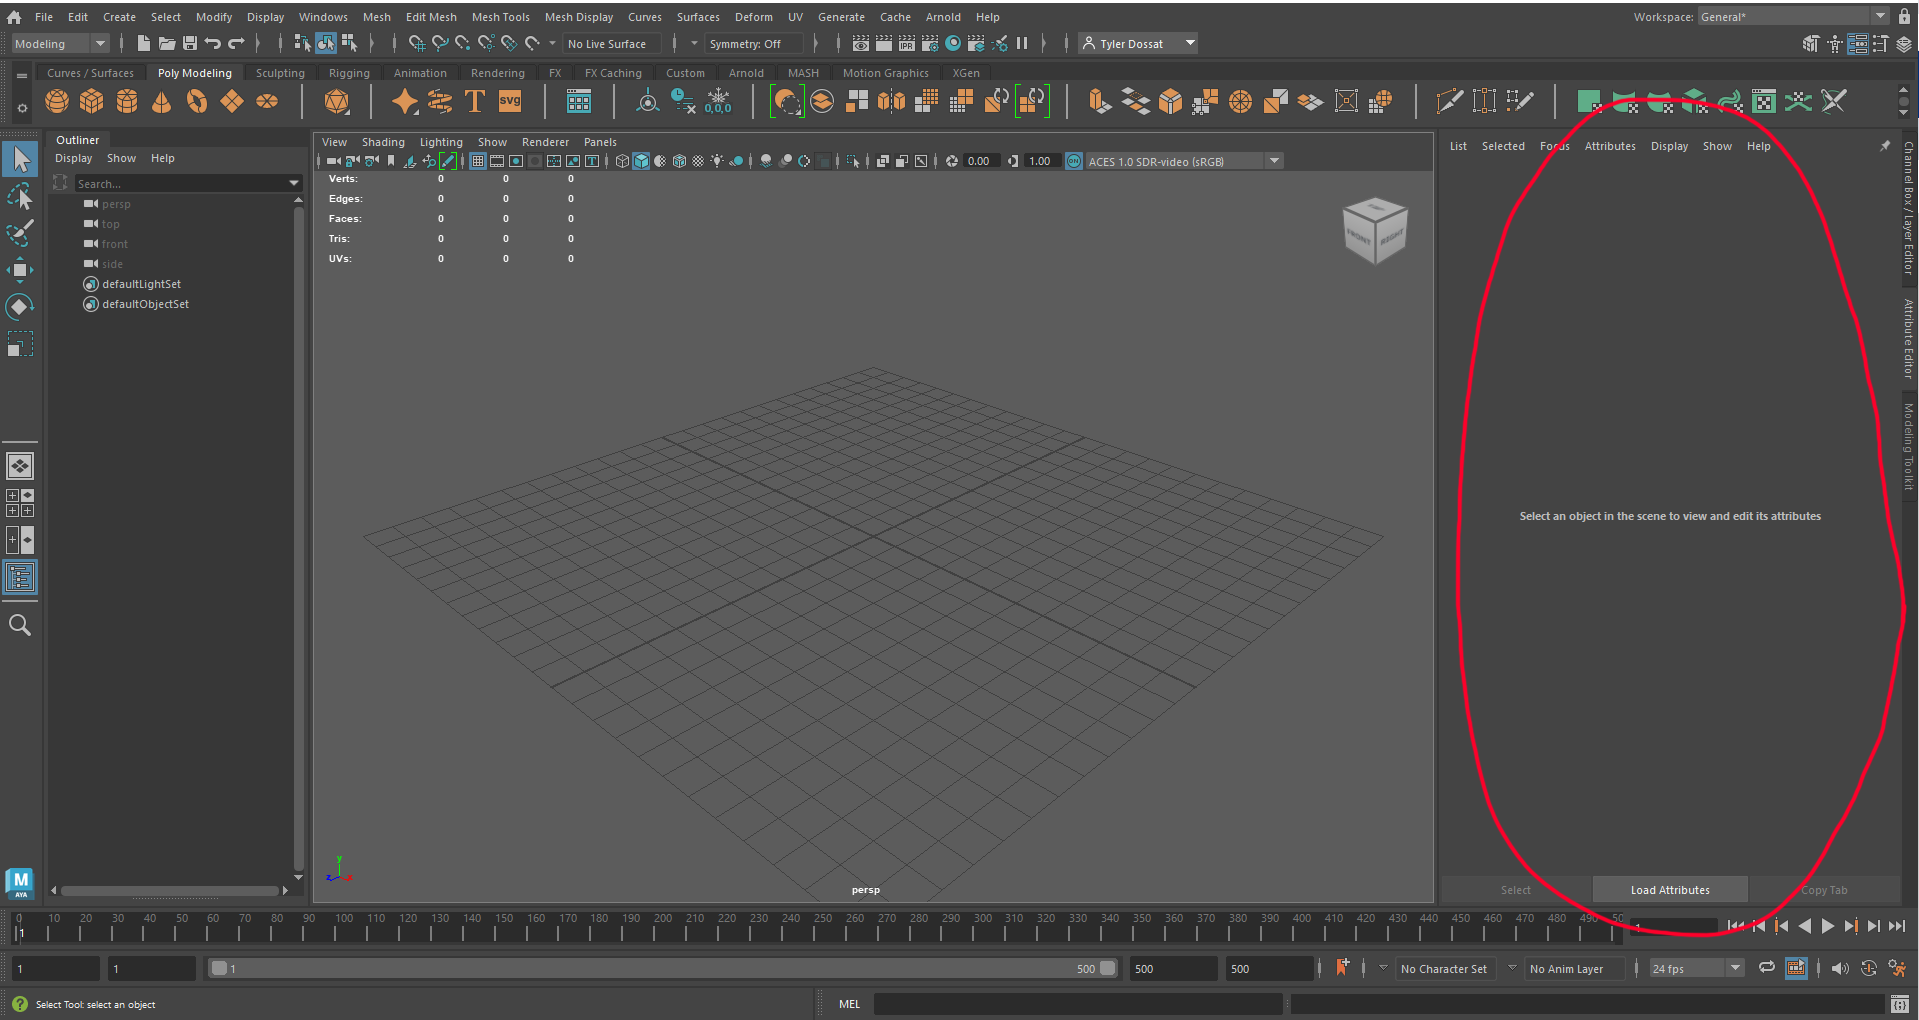
The right side of this is the attribute editor. This is for editing the small details of your mesh. When you click your mesh you can find ways to edit, position, scale, rotation, subdivisions, materials. If those terms mean nothing to you, there is a page on the attribute editor.
[](https://scil-wiki.su.edu/uploads/images/gallery/2023-11/left.png)
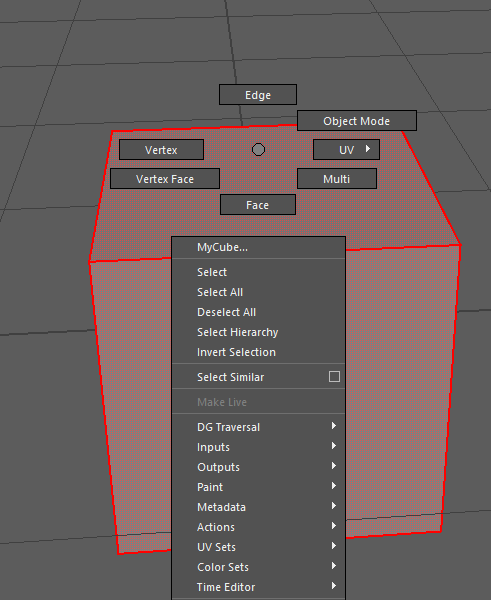
You can get to this menu by holding right click on your mouse. This menu is a super helpful short cut menu. This is where you can accesses certain modes to help you edit. The main to worry about now being Face, Edge, and Vertex.
To understand what these mean you need to understand how a mesh is made. A vertex is a point in space. These points in space are then connected by lines which we call edges and when edges connect 3 or more vertex's together, we get a face. Put a bunch of faces together and you get the mesh. In the example photo below, you can see the cube. This cube is 6 faces. These faces are made up of edges connected by points called vertex's.
Armed with that knowledge, The face option will allow you to select faces individually. The Edge option will allow you to select edges individually. The vertex option will allow you to select the vertexes individually. You can use the transformations to edit each of these parts of your mesh. (Info on transformations found in Attribute Editor article)
[](https://scil-wiki.su.edu/uploads/images/gallery/2023-11/7oiimage.png)
That's the basics of Maya. Good Luck
# Attribute Editor
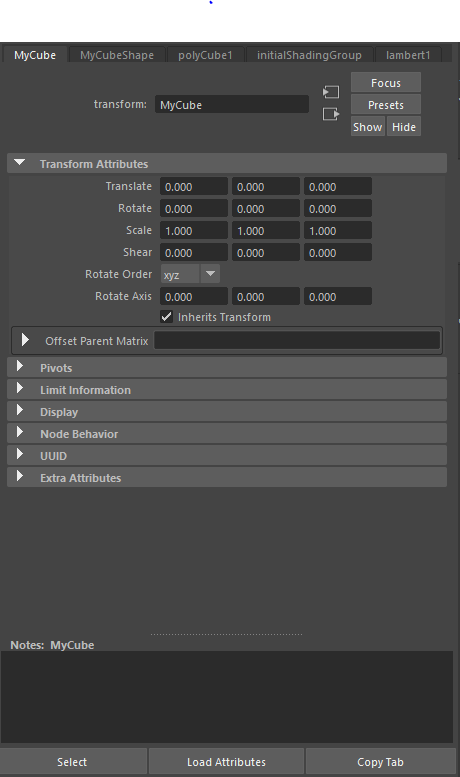
The Attribute editor has a couple of tabs when you click on an mesh.
The first is the transformations of the mesh. Translate, Rotate, Scale.
Translate is the position in the scene. X Y and Z are what is used to note the position of the mesh. Z being the first number and corresponding to left and right , Y being the second and corresponding to up and down, Z being the last and being forward and back.
Rotate is edited in the same way you translate. Rotate is what it sounds like. It turns the mesh from its pivot (which is usually in the middle).
Scale is also edited the same way you translate. Scale will edit the size of an object in the direction picked.
(You can do a short cut for each by clicked the mesh and then hitting W for Translate, E for Rotate, or R for Scale.)
[](https://scil-wiki.su.edu/uploads/images/gallery/2023-11/yd7image.png)
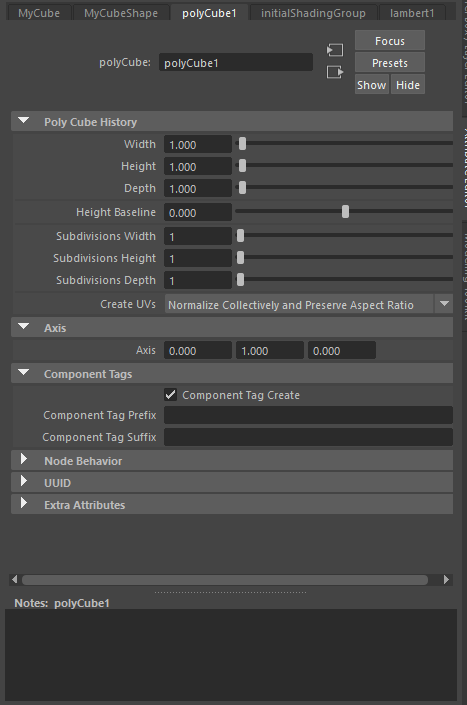
The poly tab is another way to edit your mesh.
Width, Height, and Depth can be used similarly to the scale tool. The more important part of this tab is the subdivisions. Subdivisions are used to split the object into more faces. This allows you to edit more of the mesh as you have more vertexes, edges, and faces.
[](https://scil-wiki.su.edu/uploads/images/gallery/2023-11/ebaimage.png)
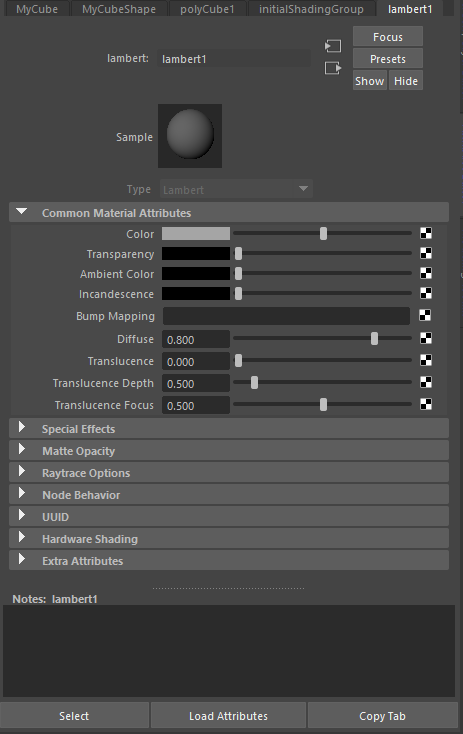
The lambert1 tab is a default tab. It is the material that is assigned to every mesh by default. In this part of the editor you can add a different material if you do not want the flat look of lambert.
(Hold Right Click the Mash ~ Assign New Material ~ Click Desired Material.)
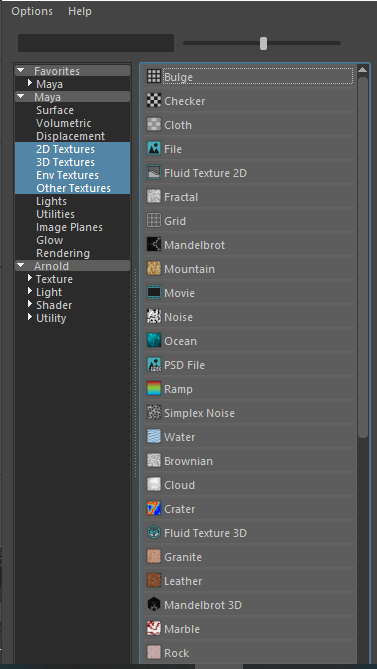
Once you have the material, You can edit the color, Transparency, Ambient Color, Incandescence, and other small settings of the material. Clicking the Black and white checkered will pullup a screen that allows you to assign a pre existing texture or one you have made yourself.
[](https://scil-wiki.su.edu/uploads/images/gallery/2023-11/0fmimage-1.png)
[](https://scil-wiki.su.edu/uploads/images/gallery/2023-11/rmuimage.png)
# Tinkercad
Basic Controls
- Copy: ctrl + C
- Paste: ctrl + V
- Duplicate: ctrl + D
- Delete: Delete
- Undo: ctrl + Z
- Redo: ctrl + Y
- Show all: ctrl + shift + H
- Bundle group (ctrl + B) -Join shapes together so you can move and resize them at the same time without making them one shape.
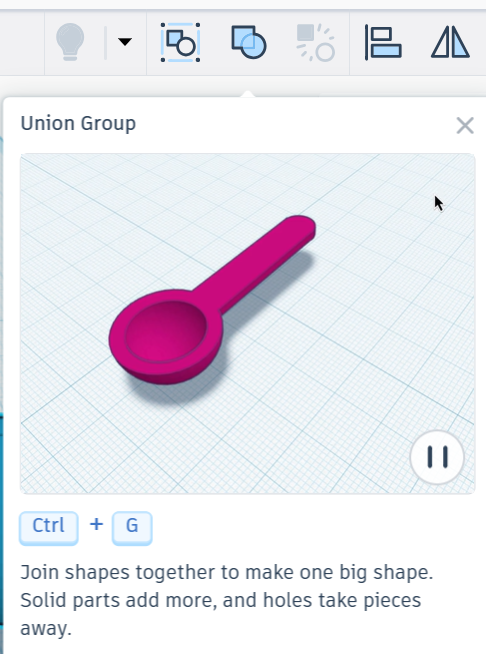
- Union group (ctrl + G) - Join shapes together to make one big shape. Solid parts add more, and holes take pieces away.
- Ungroup (ctrl + shift + G) -Break apart any group into its original shapes.
- Align (L) - Arrange shapes by their sides, centers, tops, or bottoms. Use the dot handles to preview alignment. Pin a shape so others align to it while it stays in place. Select it again to unpin.
- Mirror (M) - Flip shapes front to back, side to side, or up and down by pressing the arrows.
- Cruise ( C ) - Slide a shape smoothly along another surface to place it just where you want it.
- Shape Workplace (E) -Use the shape’s original work surface to make changes to it.
- Drop to workplane (D) - drop any selected shapes to the workplane.
- Rotate plate: hold right mouse button
- Select object: click left mouse
- Center on object: F
- Ruler: R
- Lock editing : ctrl +L
- Change workplane: W
[](https://scil-wiki.su.edu/uploads/images/gallery/2026-06/4tcscreenshot-2026-06-05-130835.png)[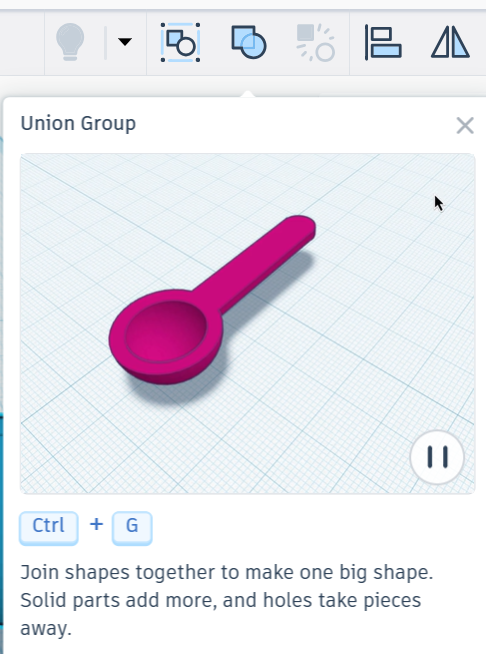](https://scil-wiki.su.edu/uploads/images/gallery/2026-06/screenshot-2026-06-05-130835.png)[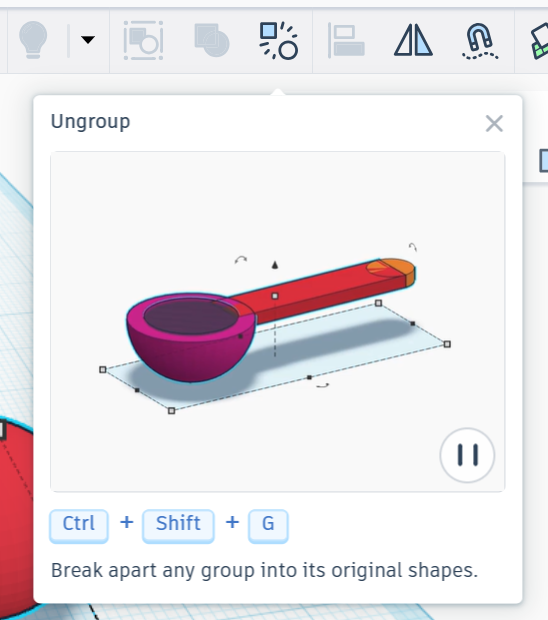](https://scil-wiki.su.edu/uploads/images/gallery/2026-06/lmXimage.png)
[](https://scil-wiki.su.edu/uploads/images/gallery/2026-06/7I0image.png)[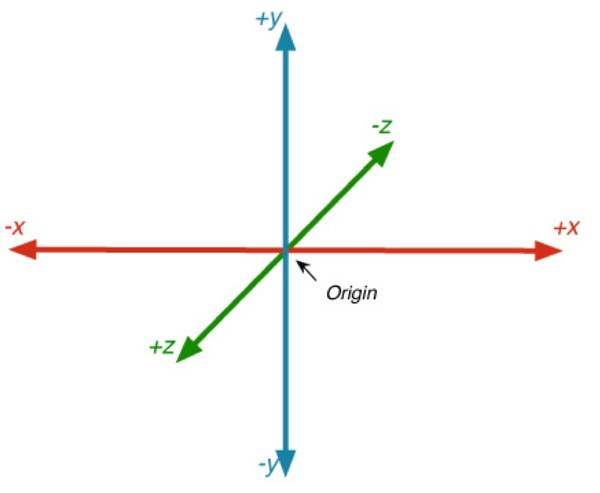](https://scil-wiki.su.edu/uploads/images/gallery/2026-06/jL1image.png)
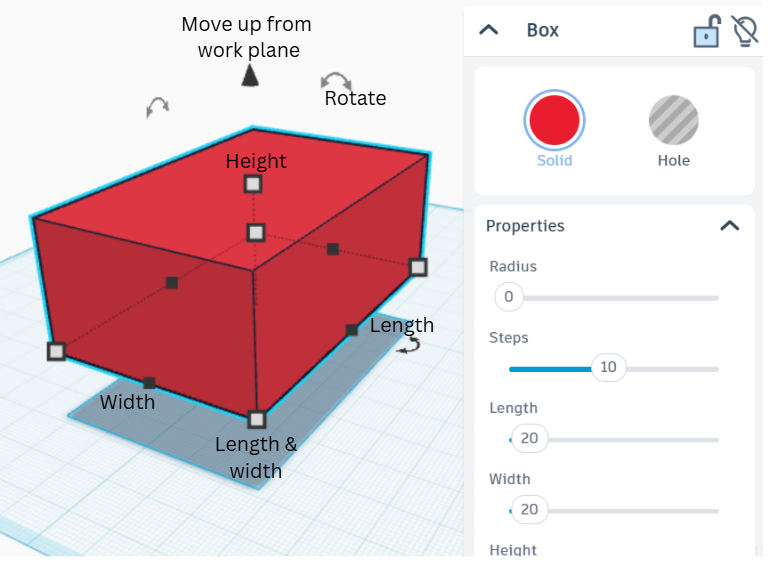
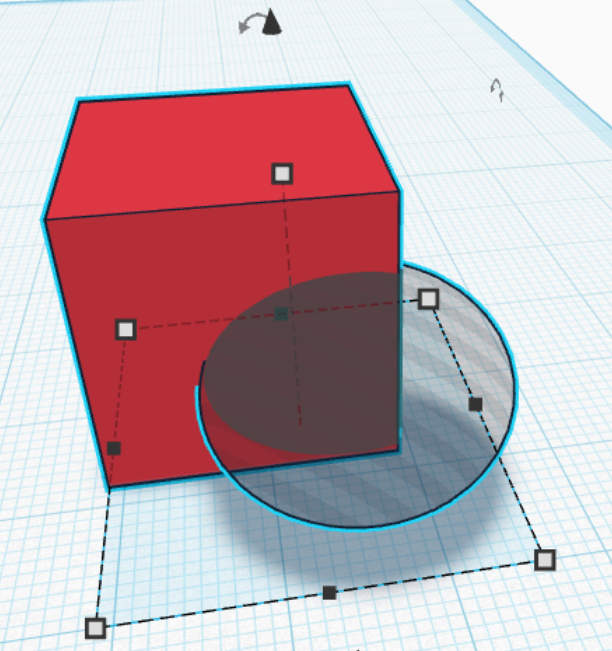
- Intersecting a solid object with a hole object will remove the intersecting space
[](https://scil-wiki.su.edu/uploads/images/gallery/2026-06/screenshot-2026-06-05-131340.png)
# 3D Modeling for Printing Workshop: Tinkercad
Open Tinkercad and select the **+Create** button in the top right corner.
##### The Main Body
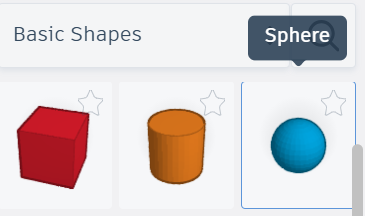
1. Select a sphere from the Basic Shapes menu on the right and adjust the shape using the scale handles (square boxes). This will be the **body** of your turtle.
[](https://scil-wiki.su.edu/uploads/images/gallery/2026-07/S0fimage.png)[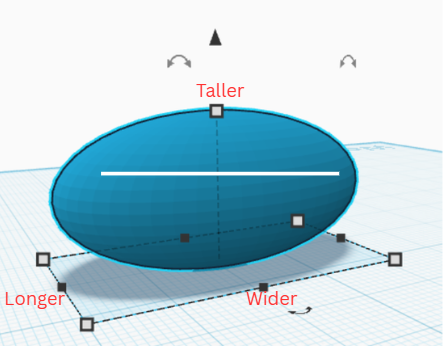](https://scil-wiki.su.edu/uploads/images/gallery/2026-07/screenshot-2026-07-23-094217.png)
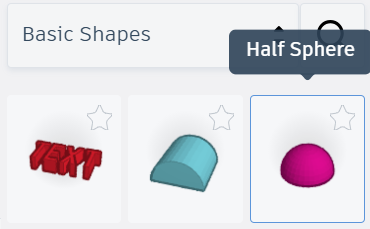
2\. Select a half sphere the Basic Shapes menu on the right and adjust the shape using the scale handles. This will be the **turtle's shell.** The **shell** should be just a little bigger than the size of the turtle **body**.
*Note: You can get precise measurements by hovering over the corner scale handles.*
[](https://scil-wiki.su.edu/uploads/images/gallery/2026-07/JVvimage.png)[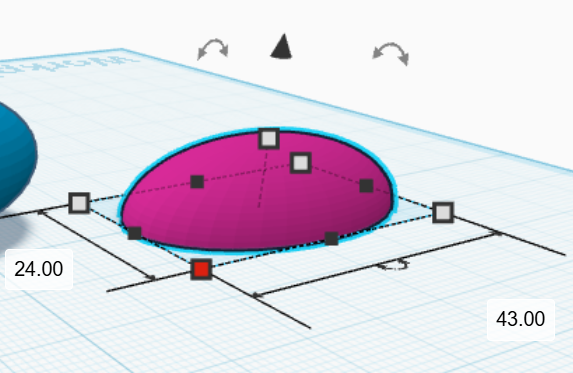](https://scil-wiki.su.edu/uploads/images/gallery/2026-07/3SFimage.png)
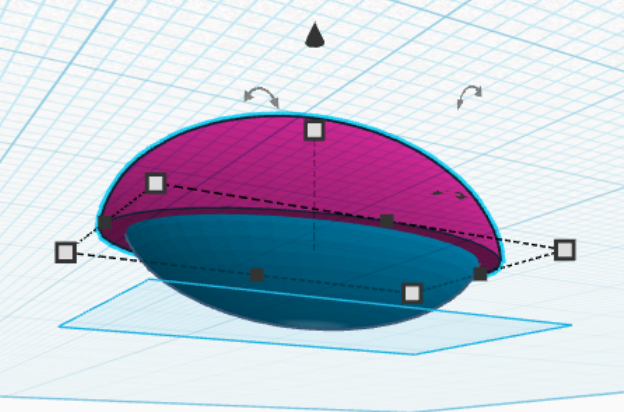
3\. Move the **shell** up using the z-axis arrow (the triangle above the model) and align it with the top of the **body** so it overlaps. You may need to adjust the size of your **shell** to match the **body**. Be sure to check the **body** at all angles to be sure the **shell** is positioned the way you want.
[](https://scil-wiki.su.edu/uploads/images/gallery/2026-07/screenshot-2026-07-24-100311.png)
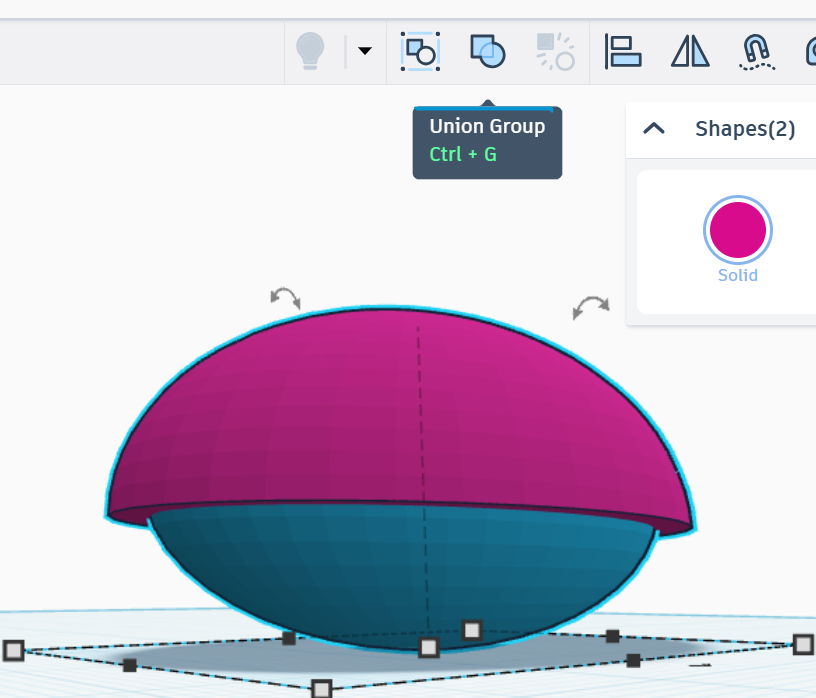
4\. Select both the **shell** and the **body** and combine them into one object using the "Union Group" option in the top tool bar. Now the **body** is in one piece!
[ ](https://scil-wiki.su.edu/uploads/images/gallery/2026-07/z0Simage.png)[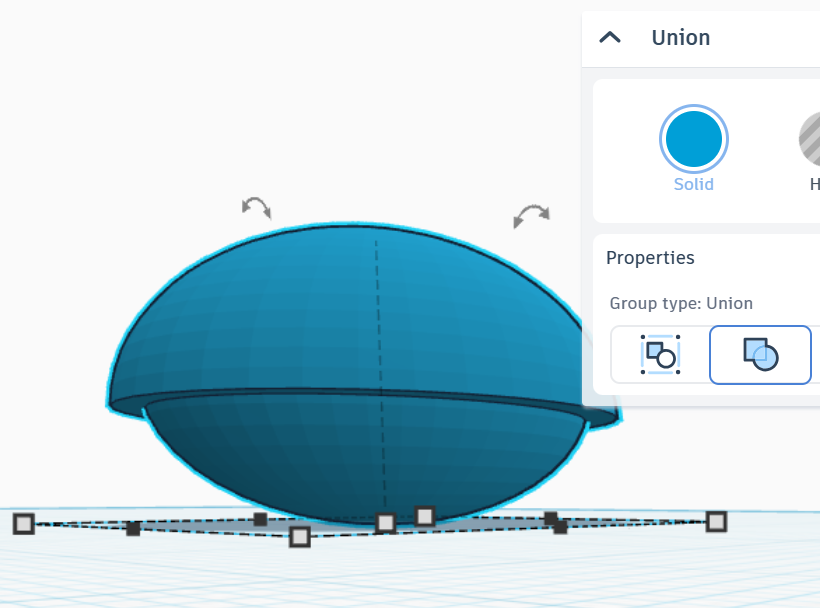](https://scil-wiki.su.edu/uploads/images/gallery/2026-07/8eaimage.png)
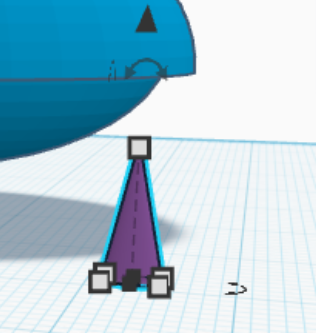
5\. Add a cone to the grid. This will be the **tail.** Adjust the length, diameter, and angle (using rotation arrows above the **tail**) to the shape you want.
[](https://scil-wiki.su.edu/uploads/images/gallery/2026-07/5yEscreenshot-2026-07-24-132317.png)[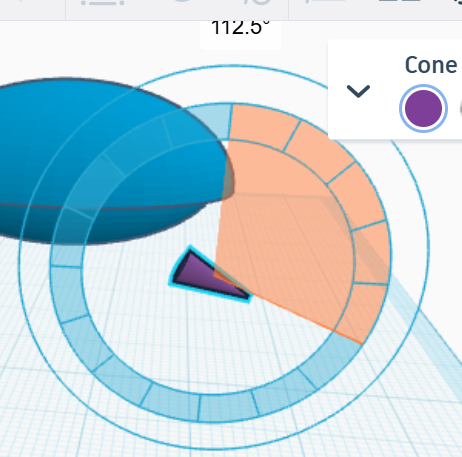](https://scil-wiki.su.edu/uploads/images/gallery/2026-07/QZZimage.png)
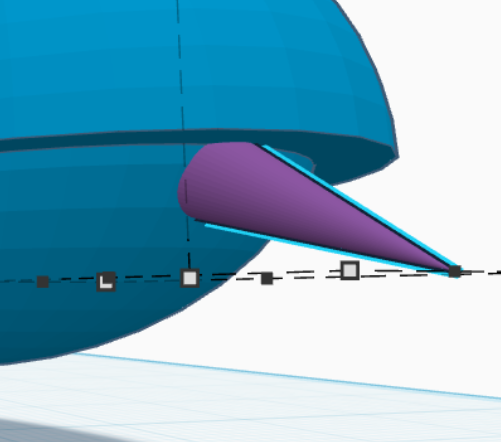
6\. Move the **tail** to the back of the **body** underneath the **shell**. Combine the **tail** and the **body** into one object using the "Union Group."
[](https://scil-wiki.su.edu/uploads/images/gallery/2026-07/rbtimage.png)
##### The Head
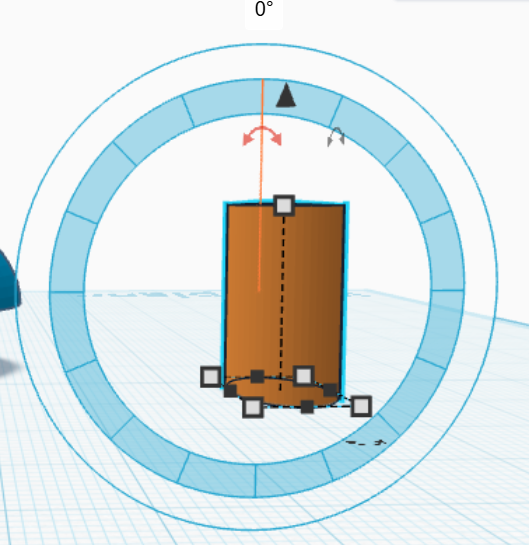
1\. Add a cylinder to the grid. This will be the **neck**. Adjust the length, diameter, and angle (using rotation arrows above the cylinder) to the shape you want.
[](https://scil-wiki.su.edu/uploads/images/gallery/2026-07/rKUimage.png)[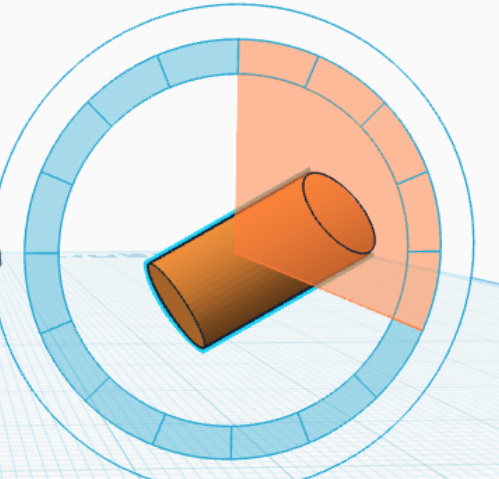](https://scil-wiki.su.edu/uploads/images/gallery/2026-07/u0eimage.png)
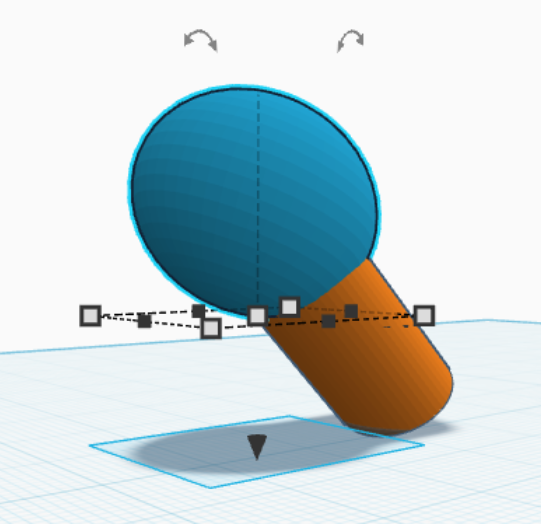
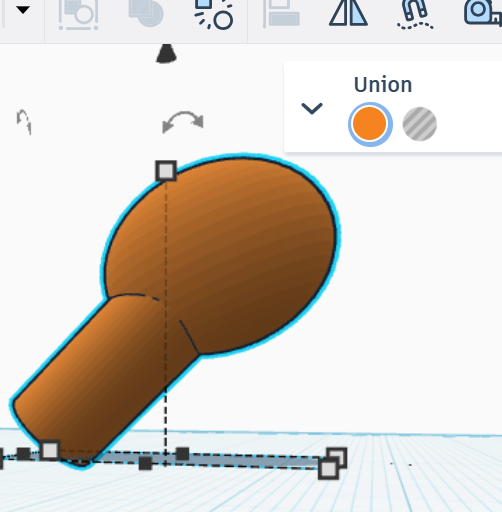
2\. Add a circle to the grid and attach it to one end of the cylinder. This is the **head. **Tinkercad gives you the option to auto-connect it to a plane on the cylinder, or you can move the sphere the same way you did the **shell**. Adjust the **head** to the shape and size you want and align it with the **neck** so it overlaps with the entire top of the **neck**. Be sure to check from all angles to be sure the **head** and **neck** are positioned the way you want.
[](https://scil-wiki.su.edu/uploads/images/gallery/2026-07/screenshot-2026-07-24-102213.png)[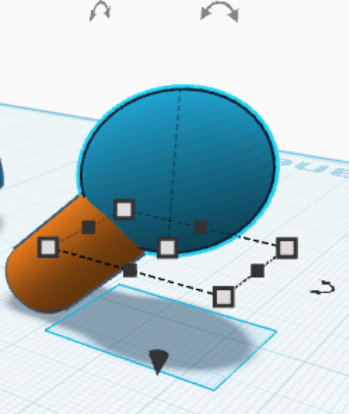](https://scil-wiki.su.edu/uploads/images/gallery/2026-07/screenshot-2026-07-24-102227.png)
3\. Combine the two shapes using "Union Group."
[](https://scil-wiki.su.edu/uploads/images/gallery/2026-07/ai8image.png)
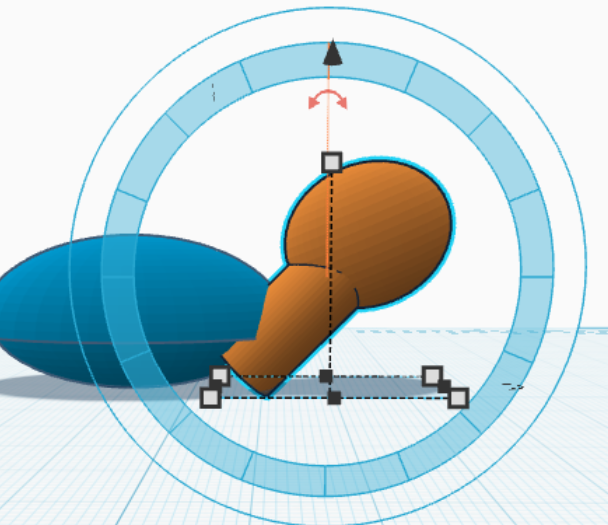
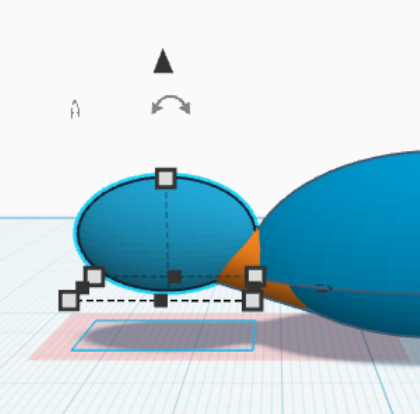
4\. Move the **neck of the turtle to align with the front of the **body** with the end of the **neck** hidden inside the **body** of the turtle. Adjust the size and angle to fit the turtle's **body**. Be sure to check from all angles to be sure the **head** and **body** are positioned the way you want.
[](https://scil-wiki.su.edu/uploads/images/gallery/2026-07/VTeimage.png)[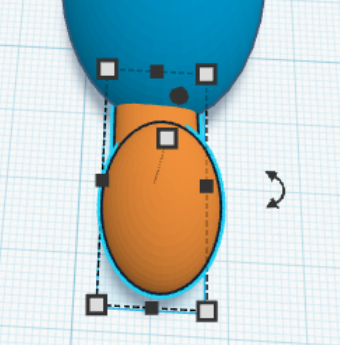](https://scil-wiki.su.edu/uploads/images/gallery/2026-07/Qeximage.png)[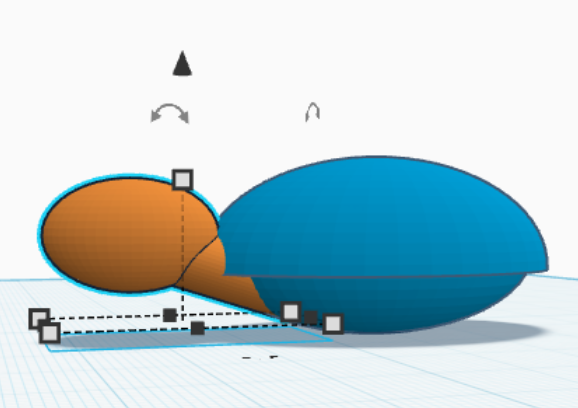](https://scil-wiki.su.edu/uploads/images/gallery/2026-07/Dw8image.png)
*Note: You are able to adjust the size and shape of any of your individual objects by double clicking on them.*
[](https://scil-wiki.su.edu/uploads/images/gallery/2026-07/JBFimage.png)
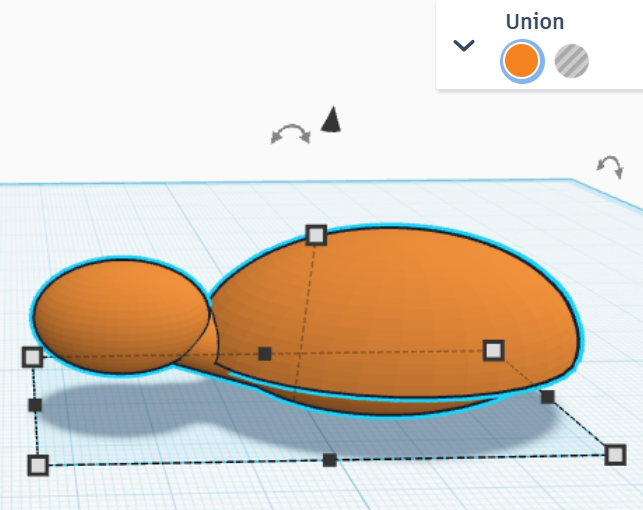
5\. Combine the **head **and **body** using "Union Group."
[](https://scil-wiki.su.edu/uploads/images/gallery/2026-07/q8Rimage.png)
##### The Legs
1. Add a cylinder to the grid. This is a **leg.** Adjust the cylinder to the size, shape, and angle you want.[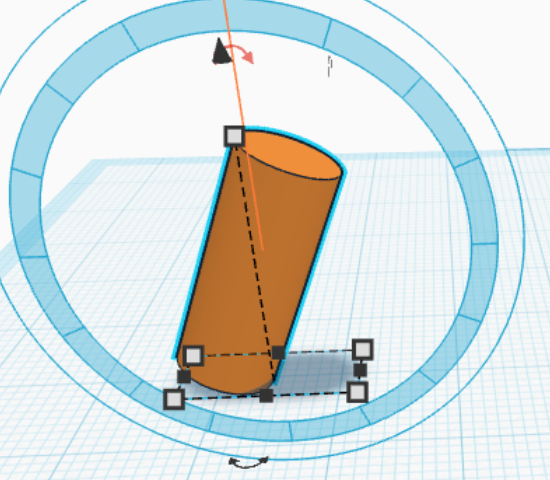](https://scil-wiki.su.edu/uploads/images/gallery/2026-07/hj3image.png)
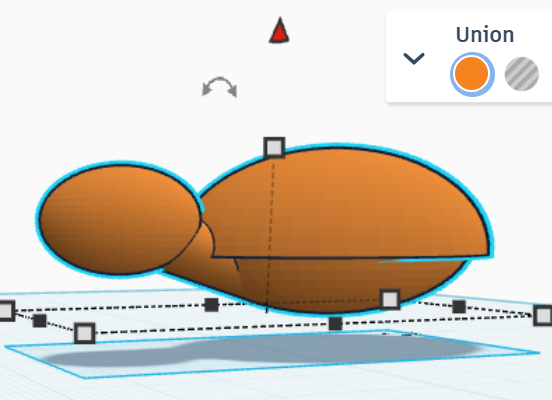
2. Move the **body** of the turtle up using the z-axis arrow and position the **leg** so the top is hidden in the **body**, underneath the **shell**. You may need to adjust the size and angle of the **leg** or height of the **body**. Be sure to check from all angles to be sure the top of the **leg** is entirely hidden in the **body** of the turtle.
[](https://scil-wiki.su.edu/uploads/images/gallery/2026-07/VlQimage.png)[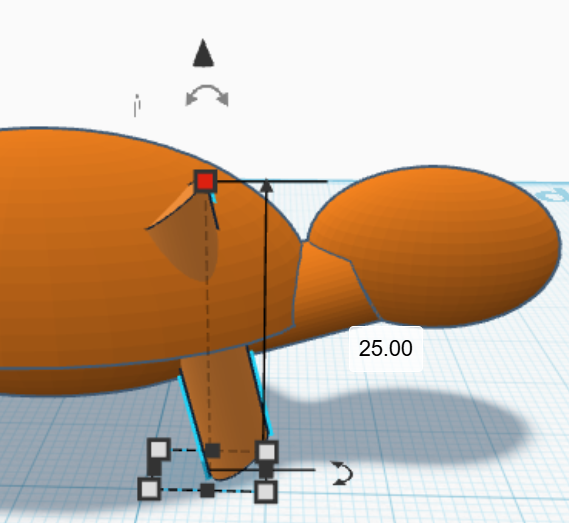](https://scil-wiki.su.edu/uploads/images/gallery/2026-07/Ip4image.png)[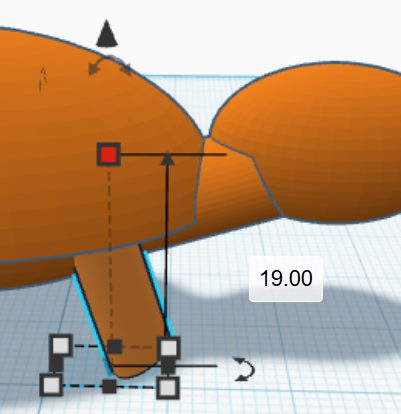](https://scil-wiki.su.edu/uploads/images/gallery/2026-07/UhIimage.png)
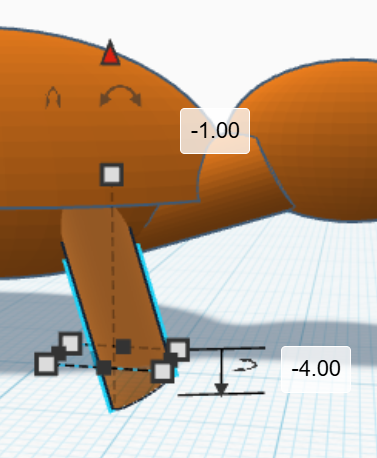
*Note: Make sure the turtle's leg does not go below the grid. If this happens, adjust the height using the z-axis arrows.*
[](https://scil-wiki.su.edu/uploads/images/gallery/2026-07/SSYimage.png)[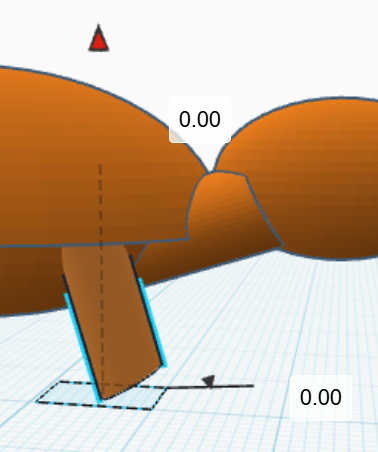](https://scil-wiki.su.edu/uploads/images/gallery/2026-07/screenshot-2026-07-24-110424.png)
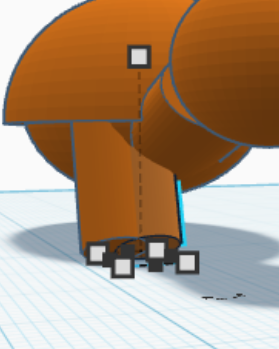
3\. Select the **leg** and copy it using **Ctrl+C**. Paste the copy using **Ctrl+V**. The copied **leg** will appear next to the first one. Move the **leg** to the other side of the turtle.
[](https://scil-wiki.su.edu/uploads/images/gallery/2026-07/wLnimage.png)[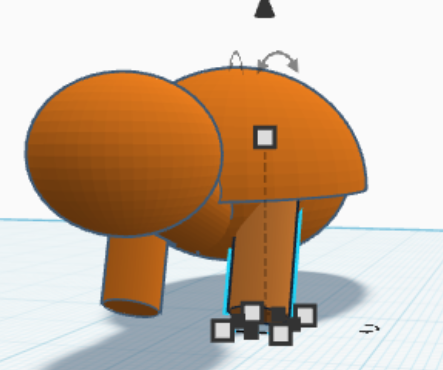](https://scil-wiki.su.edu/uploads/images/gallery/2026-07/FAaimage.png)
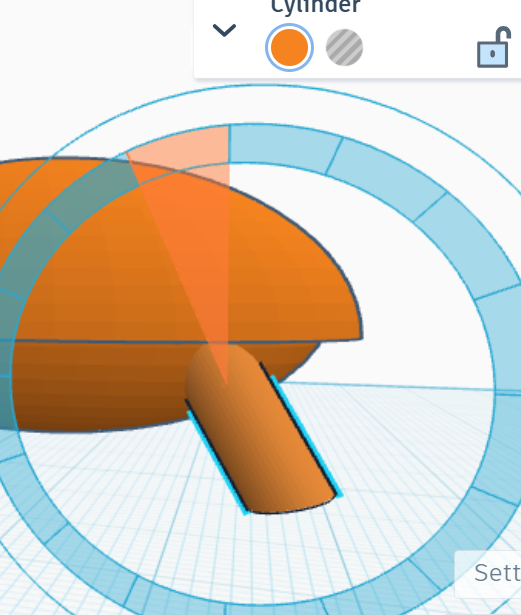
4\. Repeat the process of copying (**Ctrl+C)** and pasting (**Ctrl+V)** for the back **legs** of the turtle. You may have to adjust the angle.
[](https://scil-wiki.su.edu/uploads/images/gallery/2026-07/screenshot-2026-07-24-111952.png)[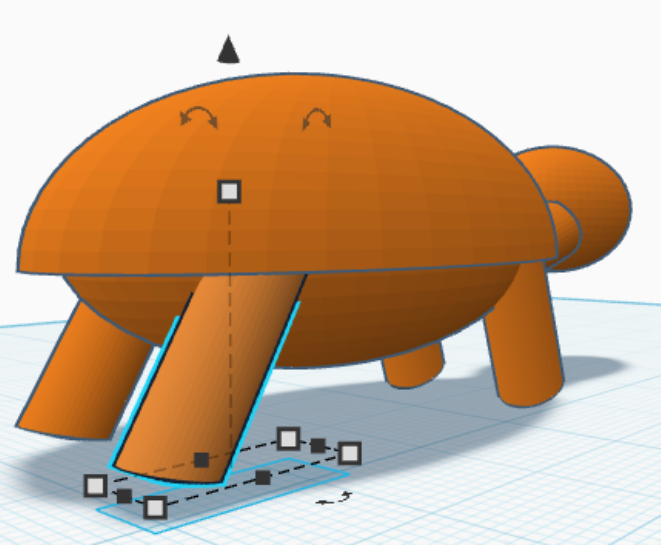](https://scil-wiki.su.edu/uploads/images/gallery/2026-07/H3eimage.png)
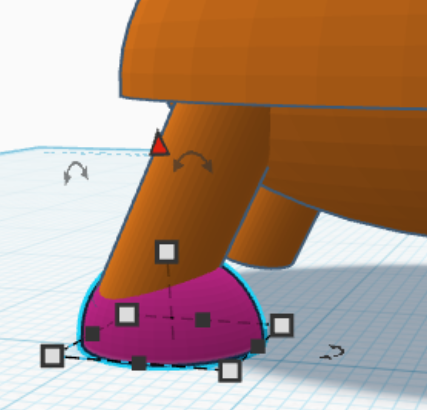
5\. Add a half sphere to the grid. This is a **foot.** Adjust the size and shape of the **foot** and align it with the bottom of the **leg**. Be sure the end of the **leg** is entirely hidden within the shape of the **foot**. You many need to adjust size or angle of the **leg.** Be sure to check from all angles to be sure the **feet** are positioned the way you want.
[](https://scil-wiki.su.edu/uploads/images/gallery/2026-07/efVimage.png)
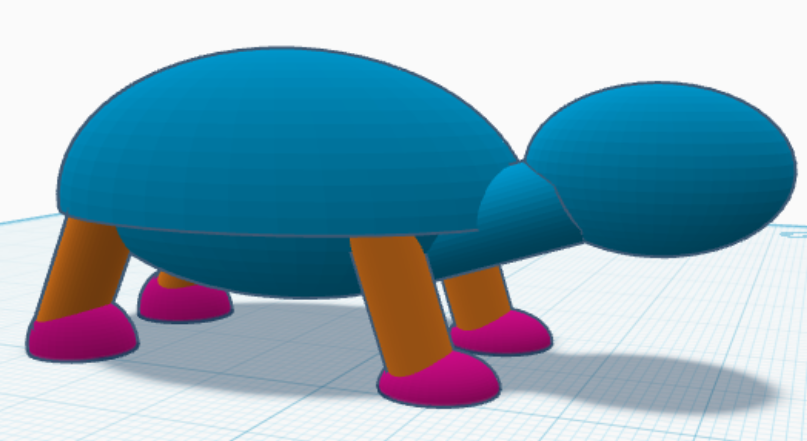
6\. Copy (**Ctrl+C)** and paste (**Ctrl+V)** the **foot** for the other three **legs**. Be sure to check from all angles to be sure the **feet** are positioned the way you want.
[](https://scil-wiki.su.edu/uploads/images/gallery/2026-07/zYuimage.png)
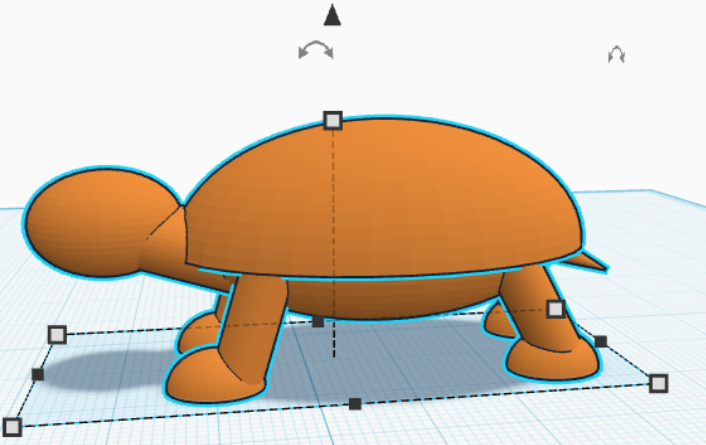
7\. Select all the parts and group them using "Union Group".
[](https://scil-wiki.su.edu/uploads/images/gallery/2026-07/DEQimage.png)
##### The Face
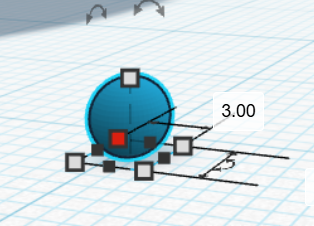
1. Add a sphere to the grid. This will be an **eye**. Resize the **eye** and position it on the head of your turtle. Be sure the **eye** overlaps.
[](https://scil-wiki.su.edu/uploads/images/gallery/2026-07/ijFimage.png)[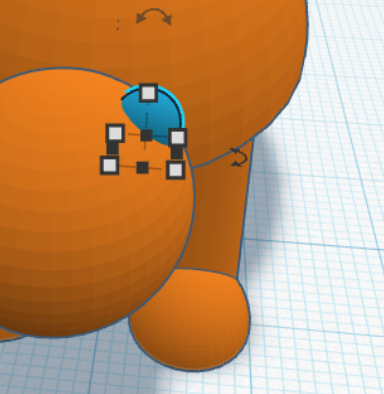](https://scil-wiki.su.edu/uploads/images/gallery/2026-07/Fscimage.png)
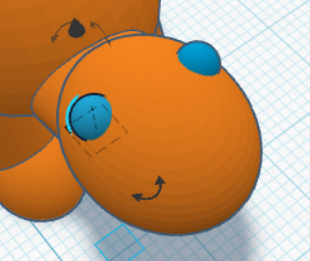
2\. Copy **(Ctrl+C)** and paste **(Ctrl+V)** the second **eye** and position it.
[](https://scil-wiki.su.edu/uploads/images/gallery/2026-07/screenshot-2026-07-24-135255.png)
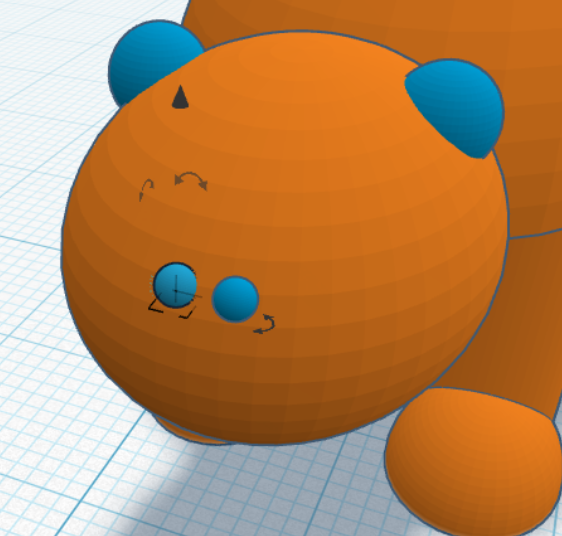
3\. Add another sphere to the grid. This will be the turtle's **nostril**. Resize the **nostril** so it's very small and position it on the end of the **head.** Copy **(Ctrl+C)** and paste **(Ctrl+V)** a second **nostril** and position it next to the first. Be sure the **nostrils** overlap with the **head**. Check at all angles to be sure they are positioned correctly.
[ ](https://scil-wiki.su.edu/uploads/images/gallery/2026-07/hqsscreenshot-2026-07-24-141510.png)[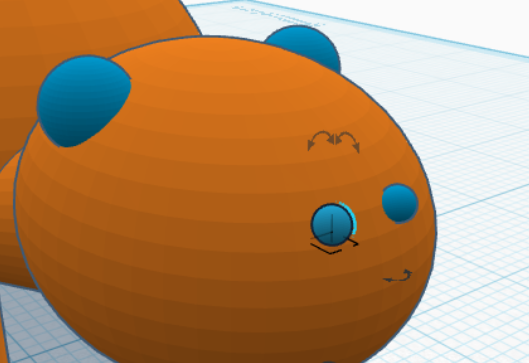](https://scil-wiki.su.edu/uploads/images/gallery/2026-07/wKBimage.png)
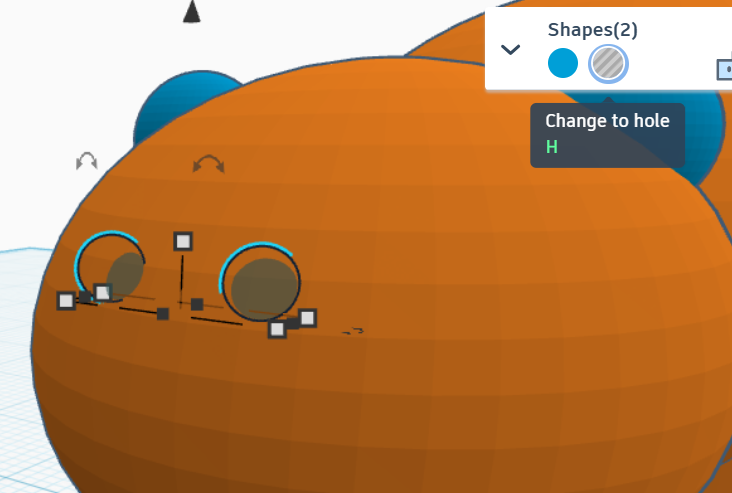
4\. Select both **nostrils** (select one, hold shift and select the second) and select "Change to hole" under Shapes. This will subtract the shape of the **nostrils** from the **head**. Now you have **nostril holes**!
[](https://scil-wiki.su.edu/uploads/images/gallery/2026-07/screenshot-2026-07-24-142157.png)
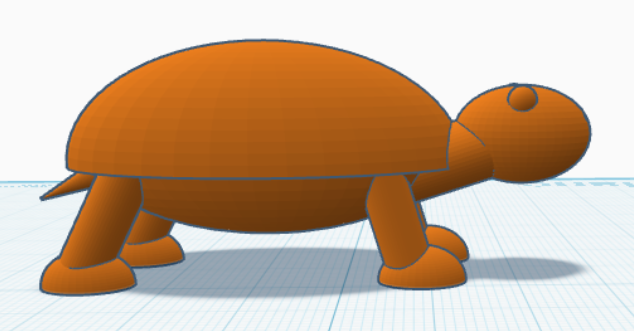
5\. Select all the parts and group them using "Union Group". Congratulations! You've made a turtle! Download your project as an .stl file and you are ready to print!
[](https://scil-wiki.su.edu/uploads/images/gallery/2026-07/BuOimage.png)[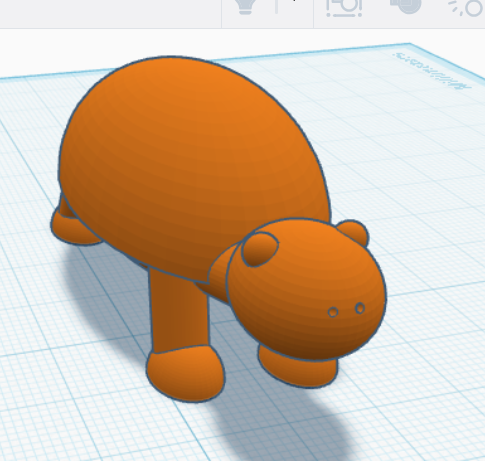](https://scil-wiki.su.edu/uploads/images/gallery/2026-07/Z9timage.png)
#####