# 3D Modeling for Printing Workshop: Tinkercad

Open Tinkercad and select the **<span style="color: rgb(53, 152, 219);">+Create</span>** button in the top right corner.

##### <span style="color: rgb(22, 145, 121);">The Main Body</span>

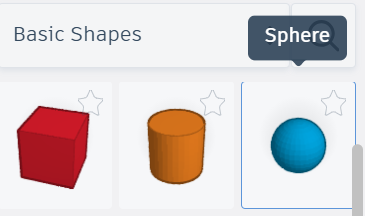
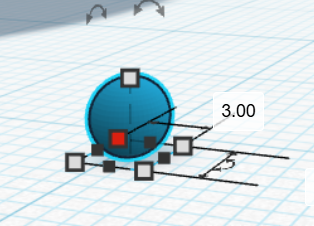
1. Select a sphere from the Basic Shapes menu on the right and adjust the shape using the scale handles (square boxes). This will be the <span style="color: rgb(22, 145, 121);">**body**</span> of your turtle. [![image.png](https://scil-wiki.su.edu/uploads/images/gallery/2026-07/scaled-1680-/S0fimage.png)](https://scil-wiki.su.edu/uploads/images/gallery/2026-07/S0fimage.png)[![Screenshot 2026-07-23 094217.png](https://scil-wiki.su.edu/uploads/images/gallery/2026-07/scaled-1680-/screenshot-2026-07-23-094217.png)](https://scil-wiki.su.edu/uploads/images/gallery/2026-07/screenshot-2026-07-23-094217.png)
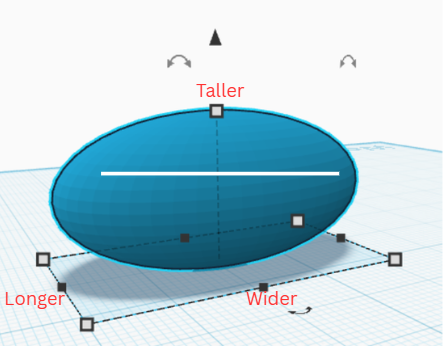
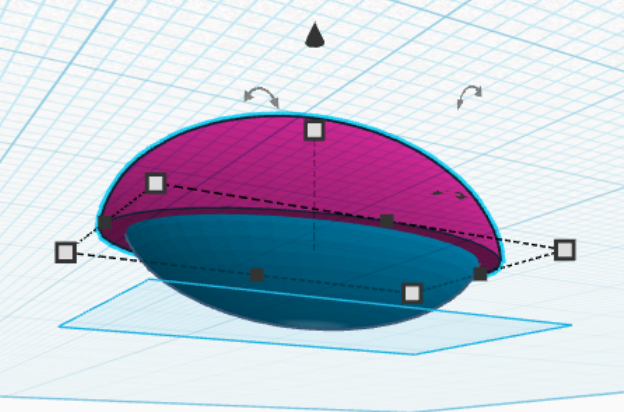
2\. Select a half sphere the Basic Shapes menu on the right and adjust the shape using the scale handles. This will be the <span style="color: rgb(22, 145, 121);">**turtle's shell.** </span>The<span style="color: rgb(22, 145, 121);"> **shell**</span> should be just a little bigger than the size of the turtle <span style="color: rgb(22, 145, 121);">**body**</span>.

*Note: You can get precise measurements by hovering over the corner scale handles.*

[![image.png](https://scil-wiki.su.edu/uploads/images/gallery/2026-07/scaled-1680-/JVvimage.png)](https://scil-wiki.su.edu/uploads/images/gallery/2026-07/JVvimage.png)[![image.png](https://scil-wiki.su.edu/uploads/images/gallery/2026-07/scaled-1680-/3SFimage.png)](https://scil-wiki.su.edu/uploads/images/gallery/2026-07/3SFimage.png)
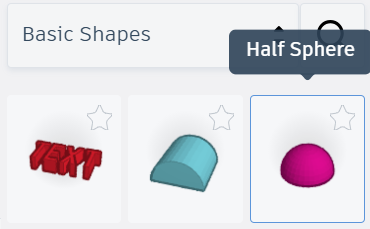
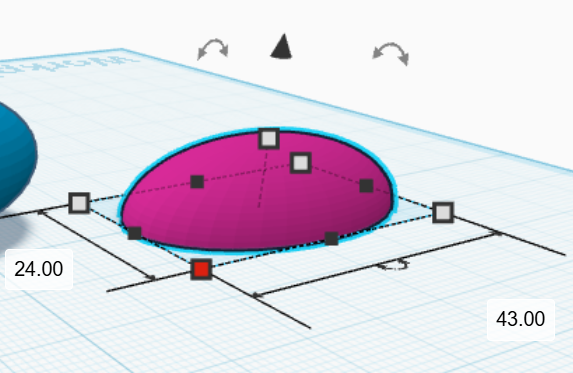
3\. Move the <span style="color: rgb(22, 145, 121);">**shell**</span> up using the z-axis arrow (the triangle above the model) and align it with the top of the <span style="color: rgb(22, 145, 121);">**body**</span> so it overlaps. You may need to adjust the size of your <span style="color: rgb(22, 145, 121);">**shell**</span> to match the <span style="color: rgb(22, 145, 121);">**body**</span>. Be sure to check the <span style="color: rgb(22, 145, 121);">**body**</span> at all angles to be sure the <span style="color: rgb(22, 145, 121);">**shell** </span>is positioned the way you want.

[![Screenshot 2026-07-24 100311.png](https://scil-wiki.su.edu/uploads/images/gallery/2026-07/scaled-1680-/screenshot-2026-07-24-100311.png)](https://scil-wiki.su.edu/uploads/images/gallery/2026-07/screenshot-2026-07-24-100311.png)

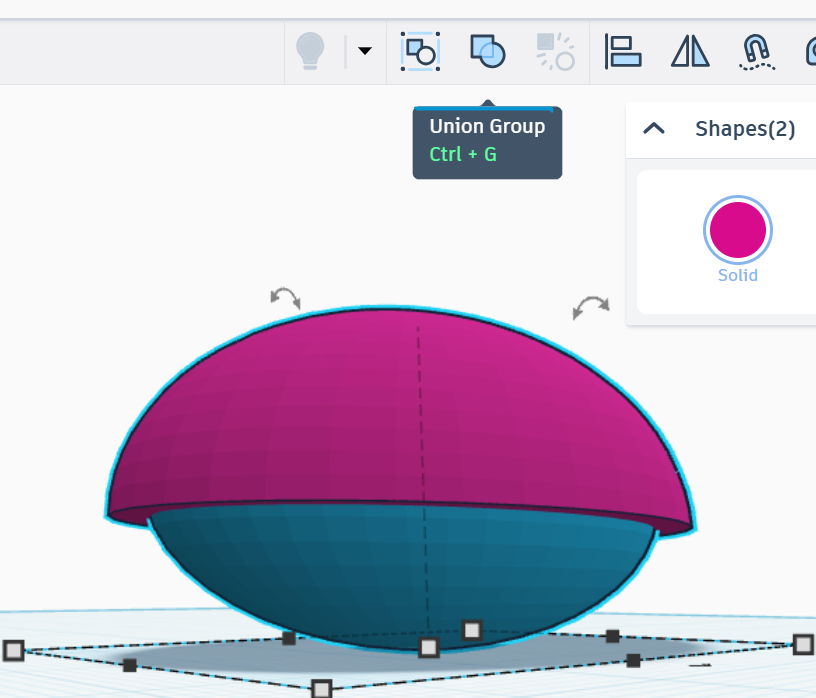
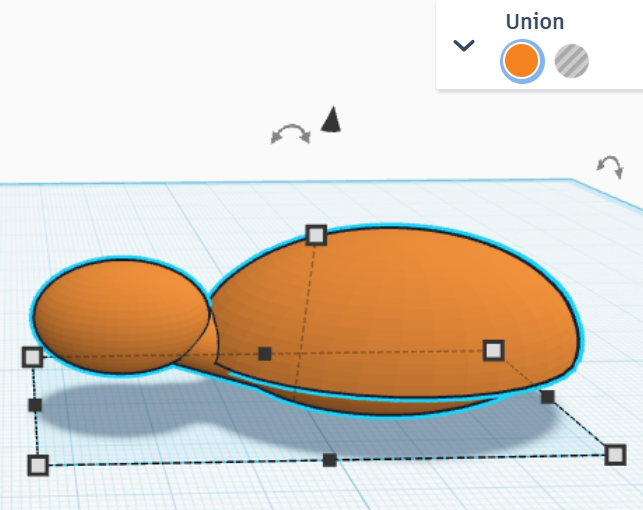
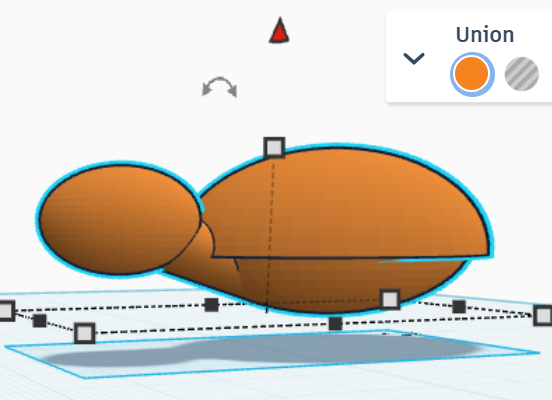
4\. Select both the <span style="color: rgb(22, 145, 121);">**shell**</span> and the <span style="color: rgb(22, 145, 121);">**body**</span> and combine them into one object using the "Union Group" option in the top tool bar. Now the <span style="color: rgb(22, 145, 121);">**body**</span> is in one piece!

[![image.png](https://scil-wiki.su.edu/uploads/images/gallery/2026-07/scaled-1680-/z0Simage.png) ](https://scil-wiki.su.edu/uploads/images/gallery/2026-07/z0Simage.png)[![image.png](https://scil-wiki.su.edu/uploads/images/gallery/2026-07/scaled-1680-/8eaimage.png)](https://scil-wiki.su.edu/uploads/images/gallery/2026-07/8eaimage.png)
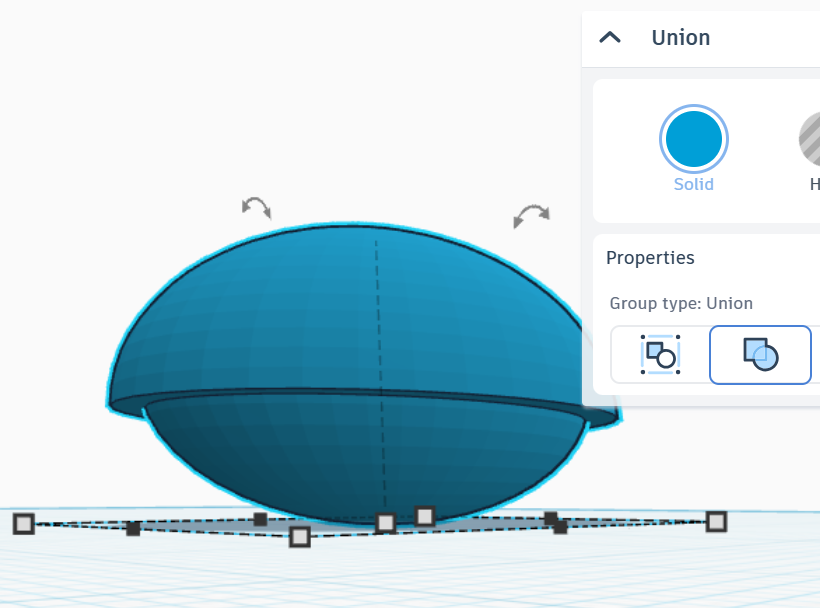
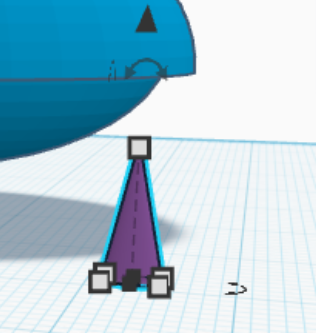
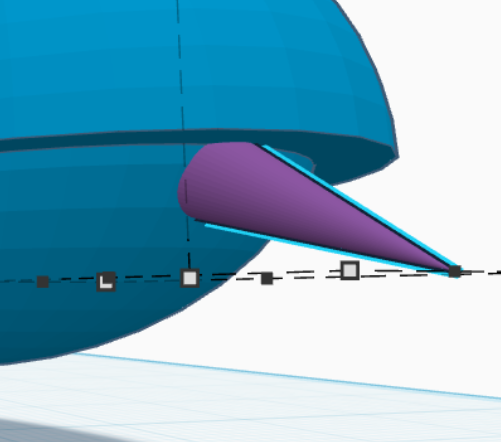
5\. Add a cone to the grid. This will be the **<span style="color: rgb(22, 145, 121);">tail</span>.** Adjust the length, diameter, and angle (using rotation arrows above the **<span style="color: rgb(22, 145, 121);">tail</span>**) to the shape you want.

[![Screenshot 2026-07-24 132317.png](https://scil-wiki.su.edu/uploads/images/gallery/2026-07/scaled-1680-/5yEscreenshot-2026-07-24-132317.png)](https://scil-wiki.su.edu/uploads/images/gallery/2026-07/5yEscreenshot-2026-07-24-132317.png)[![image.png](https://scil-wiki.su.edu/uploads/images/gallery/2026-07/scaled-1680-/QZZimage.png)](https://scil-wiki.su.edu/uploads/images/gallery/2026-07/QZZimage.png)
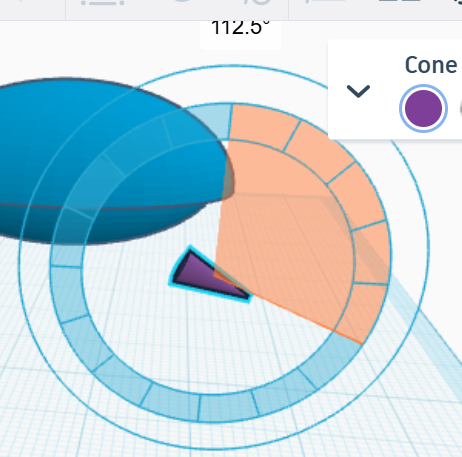
6\. Move the <span style="color: rgb(22, 145, 121);">**tail**</span> to the back of the <span style="color: rgb(22, 145, 121);">**body** </span>underneath the **<span style="color: rgb(22, 145, 121);">shell</span>**. Combine the <span style="color: rgb(22, 145, 121);">**tail**</span> and the<span style="color: rgb(22, 145, 121);"> **body**</span> into one object using the "Union Group."

[![image.png](https://scil-wiki.su.edu/uploads/images/gallery/2026-07/scaled-1680-/rbtimage.png)](https://scil-wiki.su.edu/uploads/images/gallery/2026-07/rbtimage.png)
##### <span style="color: rgb(22, 145, 121);">The Head</span>

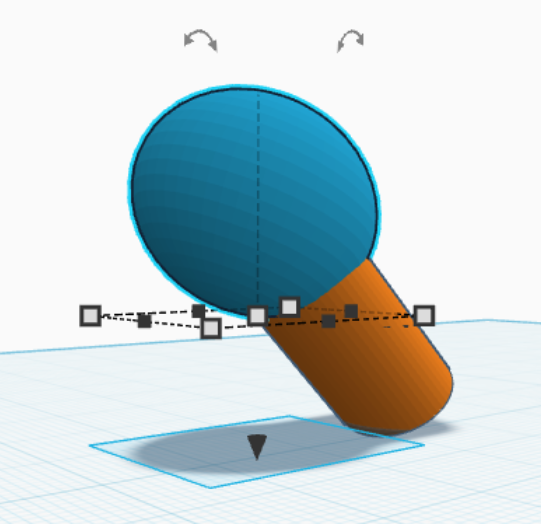
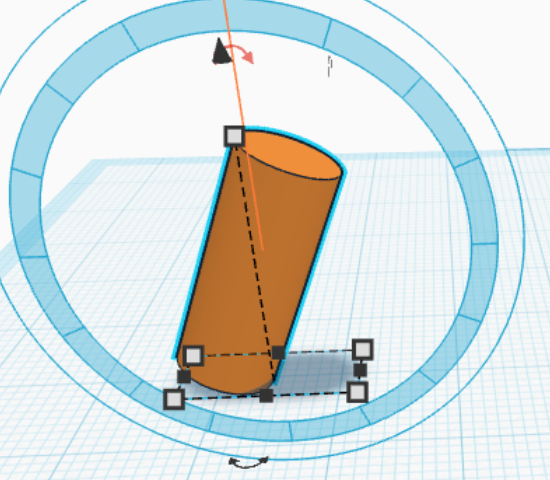
1\. Add a cylinder to the grid. This will be the <span style="color: rgb(22, 145, 121);">**neck**.</span> Adjust the length, diameter, and angle (using rotation arrows above the cylinder) to the shape you want.

[![image.png](https://scil-wiki.su.edu/uploads/images/gallery/2026-07/scaled-1680-/rKUimage.png)](https://scil-wiki.su.edu/uploads/images/gallery/2026-07/rKUimage.png)[![image.png](https://scil-wiki.su.edu/uploads/images/gallery/2026-07/scaled-1680-/u0eimage.png)](https://scil-wiki.su.edu/uploads/images/gallery/2026-07/u0eimage.png)
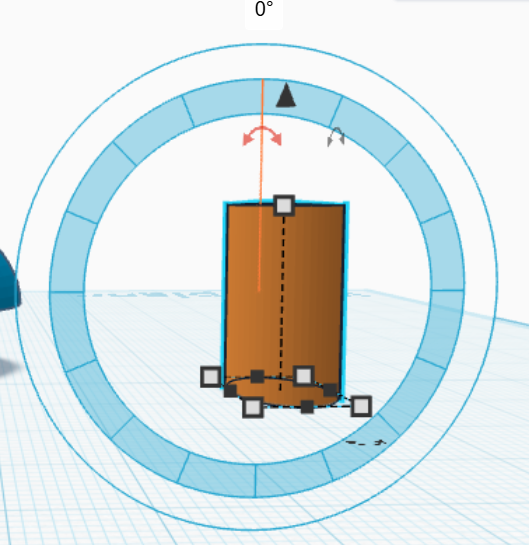
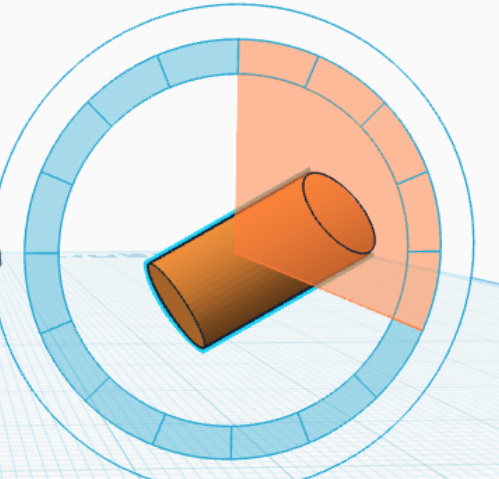
2\. Add a circle to the grid and attach it to one end of the cylinder. This is the **<span style="color: rgb(22, 145, 121);">head. </span>**Tinkercad gives you the option to auto-connect it to a plane on the cylinder, or you can move the sphere the same way you did the <span style="color: rgb(22, 145, 121);">**shell**</span>.  Adjust the **<span style="color: rgb(22, 145, 121);">head</span>** to the shape and size you want and align it with the <span style="color: rgb(22, 145, 121);">**neck**</span> so it overlaps with the entire top of the <span style="color: rgb(22, 145, 121);">**neck**</span>. Be sure to check from all angles to be sure the <span style="color: rgb(22, 145, 121);">**head**</span> and <span style="color: rgb(22, 145, 121);">**neck**</span> are positioned the way you want.

[![Screenshot 2026-07-24 102213.png](https://scil-wiki.su.edu/uploads/images/gallery/2026-07/scaled-1680-/screenshot-2026-07-24-102213.png)](https://scil-wiki.su.edu/uploads/images/gallery/2026-07/screenshot-2026-07-24-102213.png)[![Screenshot 2026-07-24 102227.png](https://scil-wiki.su.edu/uploads/images/gallery/2026-07/scaled-1680-/screenshot-2026-07-24-102227.png)](https://scil-wiki.su.edu/uploads/images/gallery/2026-07/screenshot-2026-07-24-102227.png)
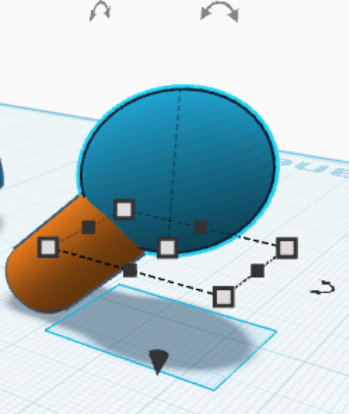
3\. Combine the two shapes using "Union Group."

[![image.png](https://scil-wiki.su.edu/uploads/images/gallery/2026-07/scaled-1680-/ai8image.png)](https://scil-wiki.su.edu/uploads/images/gallery/2026-07/ai8image.png)
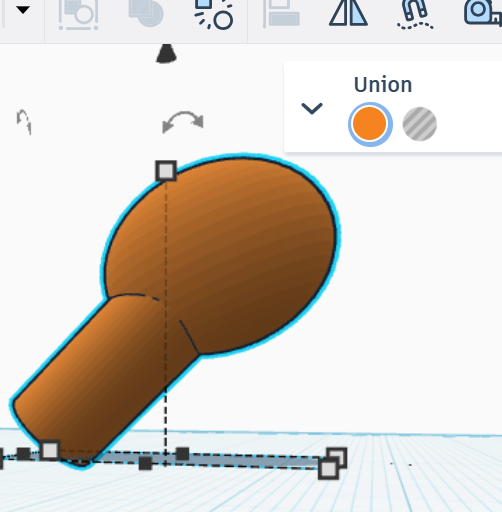
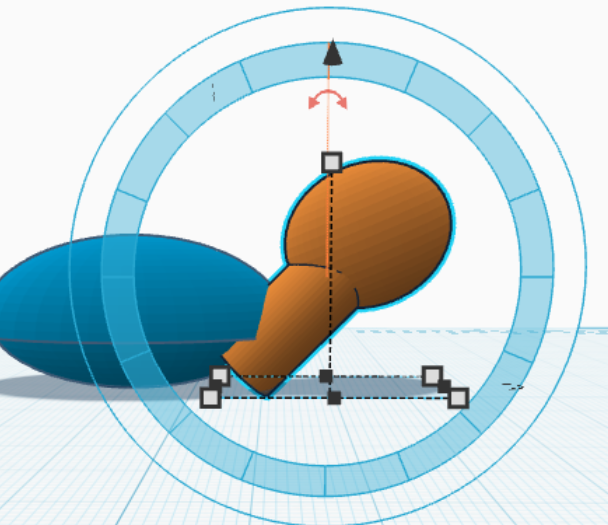
4\. Move the <span style="color: rgb(22, 145, 121);">**neck </span>of the turtle to align with the front of the **<span style="color: rgb(22, 145, 121);">body</span>**<span style="color: rgb(22, 145, 121);"> <span style="color: rgb(0, 0, 0);">with the end of the <span style="color: rgb(22, 145, 121);">**neck**</span> hidden inside the <span style="color: rgb(22, 145, 121);">**body**</span> of the turtle. </span></span><span style="color: rgb(0, 0, 0);">Adjust the size and angle to fit the turtle's **<span style="color: rgb(22, 145, 121);">body</span>**. Be sure to check from all angles to be sure the **<span style="color: rgb(22, 145, 121);">head</span>** and <span style="color: rgb(22, 145, 121);">**body**</span> are positioned the way you want. </span>

[![image.png](https://scil-wiki.su.edu/uploads/images/gallery/2026-07/scaled-1680-/VTeimage.png)](https://scil-wiki.su.edu/uploads/images/gallery/2026-07/VTeimage.png)[![image.png](https://scil-wiki.su.edu/uploads/images/gallery/2026-07/scaled-1680-/Qeximage.png)](https://scil-wiki.su.edu/uploads/images/gallery/2026-07/Qeximage.png)[![image.png](https://scil-wiki.su.edu/uploads/images/gallery/2026-07/scaled-1680-/Dw8image.png)](https://scil-wiki.su.edu/uploads/images/gallery/2026-07/Dw8image.png)
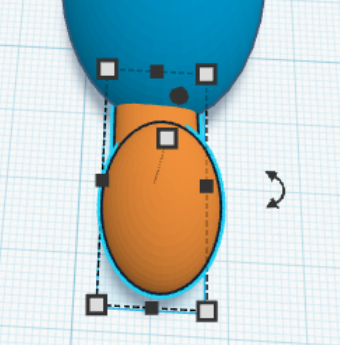
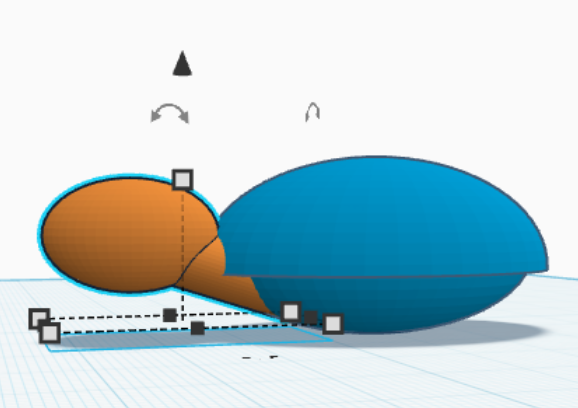
*Note: You are able to adjust the size and shape of any of your individual objects by double clicking on them.*

[![image.png](https://scil-wiki.su.edu/uploads/images/gallery/2026-07/scaled-1680-/JBFimage.png)](https://scil-wiki.su.edu/uploads/images/gallery/2026-07/JBFimage.png)
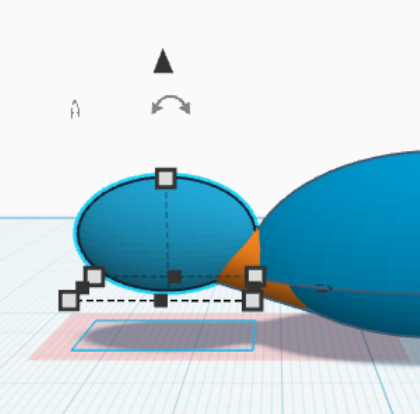
5\. Combine the **<span style="color: rgb(22, 145, 121);">head </span>**and <span style="color: rgb(22, 145, 121);">**body**</span> using "Union Group."

[![image.png](https://scil-wiki.su.edu/uploads/images/gallery/2026-07/scaled-1680-/q8Rimage.png)](https://scil-wiki.su.edu/uploads/images/gallery/2026-07/q8Rimage.png)

##### The Legs

1. Add a cylinder to the grid. This is a <span style="color: rgb(22, 145, 121);">**leg.** <span style="color: rgb(0, 0, 0);">Adjust the cylinder to the size, shape, and angle you want.</span></span>[![image.png](https://scil-wiki.su.edu/uploads/images/gallery/2026-07/scaled-1680-/hj3image.png)](https://scil-wiki.su.edu/uploads/images/gallery/2026-07/hj3image.png)
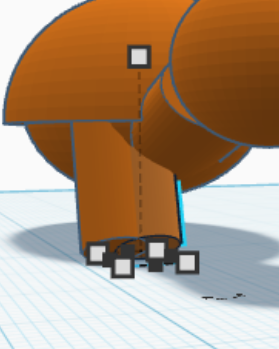
2. Move the <span style="color: rgb(22, 145, 121);">**body**</span> of the turtle up using the z-axis arrow and position the <span style="color: rgb(22, 145, 121);">**leg** </span>so the top is hidden in the **<span style="color: rgb(22, 145, 121);">body</span>**, underneath the <span style="color: rgb(22, 145, 121);">**shell**</span>. You may need to adjust the size and angle of the <span style="color: rgb(22, 145, 121);">**leg**</span> or height of the <span style="color: rgb(22, 145, 121);">**body**</span>. Be sure to check from all angles to be sure the top of the <span style="color: rgb(22, 145, 121);">**leg**</span> is entirely hidden in the <span style="color: rgb(22, 145, 121);">**body**</span> of the turtle.

[![image.png](https://scil-wiki.su.edu/uploads/images/gallery/2026-07/scaled-1680-/VlQimage.png)](https://scil-wiki.su.edu/uploads/images/gallery/2026-07/VlQimage.png)[![image.png](https://scil-wiki.su.edu/uploads/images/gallery/2026-07/scaled-1680-/Ip4image.png)](https://scil-wiki.su.edu/uploads/images/gallery/2026-07/Ip4image.png)[![image.png](https://scil-wiki.su.edu/uploads/images/gallery/2026-07/scaled-1680-/UhIimage.png)](https://scil-wiki.su.edu/uploads/images/gallery/2026-07/UhIimage.png)
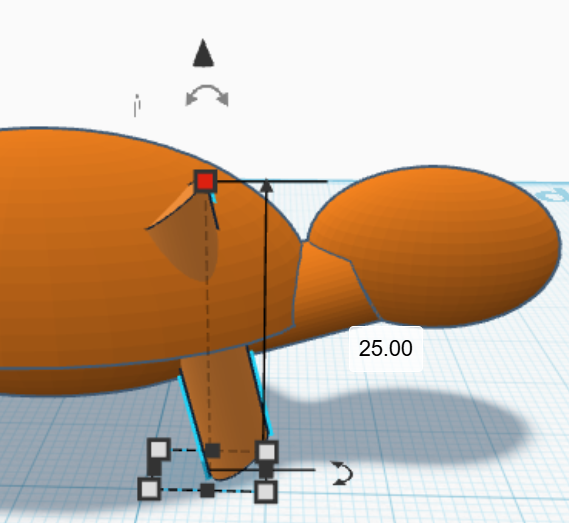
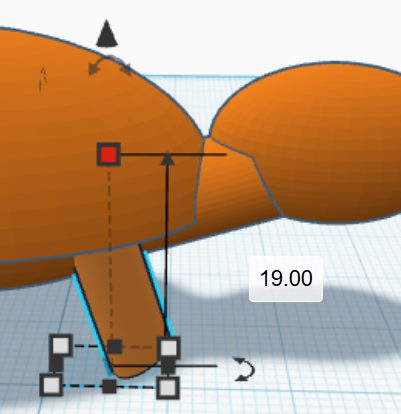
*Note: Make sure the turtle's leg does not go below the grid. If this happens, adjust the height using the z-axis arrows.*

[![image.png](https://scil-wiki.su.edu/uploads/images/gallery/2026-07/scaled-1680-/SSYimage.png)](https://scil-wiki.su.edu/uploads/images/gallery/2026-07/SSYimage.png)[![Screenshot 2026-07-24 110424.png](https://scil-wiki.su.edu/uploads/images/gallery/2026-07/scaled-1680-/screenshot-2026-07-24-110424.png)](https://scil-wiki.su.edu/uploads/images/gallery/2026-07/screenshot-2026-07-24-110424.png)
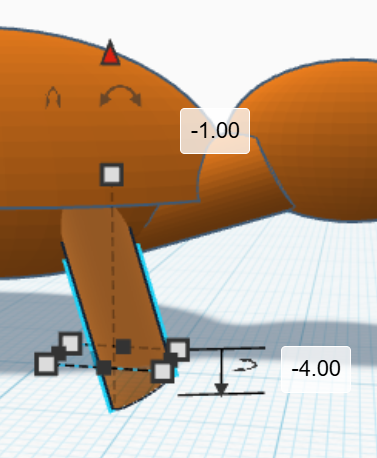
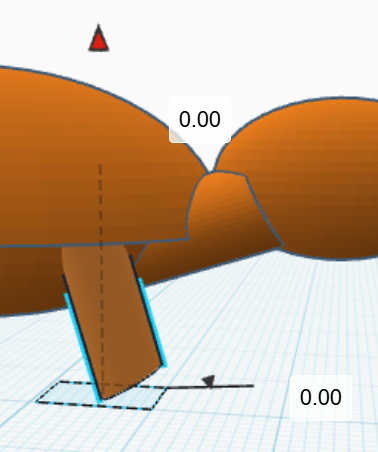
3\. Select the <span style="color: rgb(22, 145, 121);">**leg**</span> and copy it using **Ctrl+C**. Paste the copy using **Ctrl+V**. The copied <span style="color: rgb(22, 145, 121);">**leg**</span> will appear next to the first one. Move the <span style="color: rgb(22, 145, 121);">**leg** </span>to the other side of the turtle.

[![image.png](https://scil-wiki.su.edu/uploads/images/gallery/2026-07/scaled-1680-/wLnimage.png)](https://scil-wiki.su.edu/uploads/images/gallery/2026-07/wLnimage.png)[![image.png](https://scil-wiki.su.edu/uploads/images/gallery/2026-07/scaled-1680-/FAaimage.png)](https://scil-wiki.su.edu/uploads/images/gallery/2026-07/FAaimage.png)
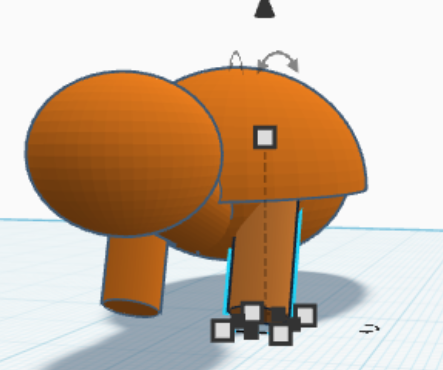
4\. Repeat the process of copying (**Ctrl+C)** and pasting (**Ctrl+V)** for the back <span style="color: rgb(22, 145, 121);">**legs**</span> of the turtle. You may have to adjust the angle.

[![Screenshot 2026-07-24 111952.png](https://scil-wiki.su.edu/uploads/images/gallery/2026-07/scaled-1680-/screenshot-2026-07-24-111952.png)](https://scil-wiki.su.edu/uploads/images/gallery/2026-07/screenshot-2026-07-24-111952.png)[![image.png](https://scil-wiki.su.edu/uploads/images/gallery/2026-07/scaled-1680-/H3eimage.png)](https://scil-wiki.su.edu/uploads/images/gallery/2026-07/H3eimage.png)
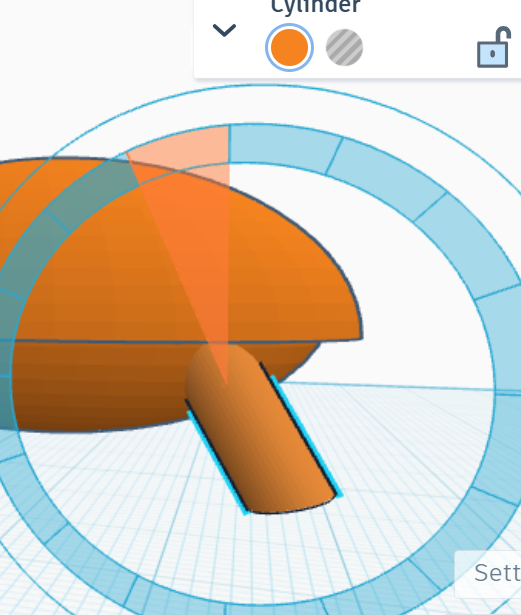
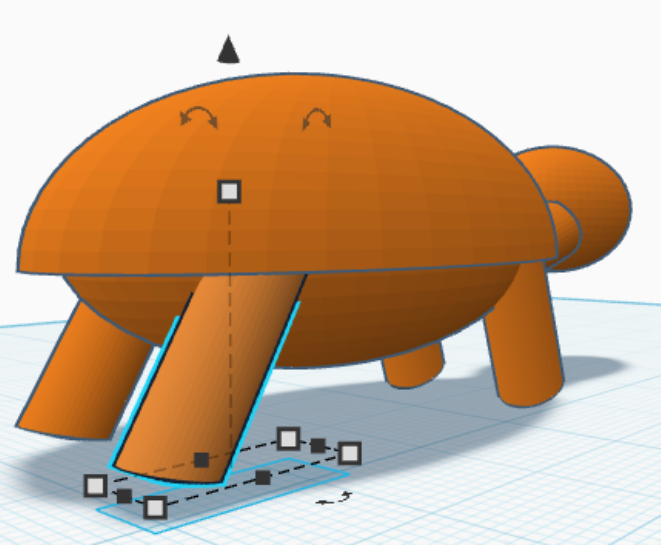
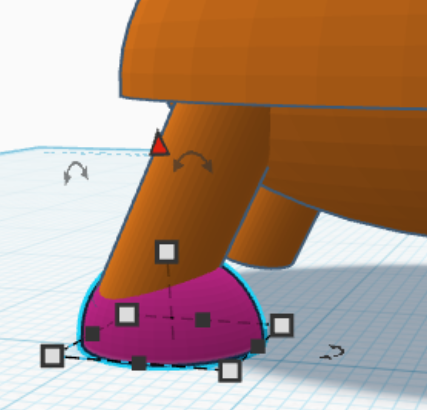
5\. Add a half sphere to the grid. This is a <span style="color: rgb(22, 145, 121);">**foot.**<span style="color: rgb(0, 0, 0);"> Adjust the size and shape of the **<span style="color: rgb(22, 145, 121);">foot</span>** and align it with the bottom of the **<span style="color: rgb(22, 145, 121);">leg</span>**. Be sure the end of the <span style="color: rgb(22, 145, 121);">**leg**</span> is entirely hidden within the shape of the **<span style="color: rgb(22, 145, 121);">foot</span>**. You many need to adjust size or angle of the <span style="color: rgb(22, 145, 121);">**leg.** <span style="color: rgb(0, 0, 0);">Be sure to check from all angles to be sure the <span style="color: rgb(22, 145, 121);">**feet** </span>are positioned the way you want. </span></span></span></span>

[![image.png](https://scil-wiki.su.edu/uploads/images/gallery/2026-07/scaled-1680-/efVimage.png)](https://scil-wiki.su.edu/uploads/images/gallery/2026-07/efVimage.png)

6\. Copy (**Ctrl+C)** and paste (**Ctrl+V)** the <span style="color: rgb(22, 145, 121);">**foot**</span> for the other three <span style="color: rgb(22, 145, 121);">**legs**</span>. <span style="color: rgb(0, 0, 0);">Be sure to check from all angles to be sure the <span style="color: rgb(22, 145, 121);">**feet** </span>are positioned the way you want. </span>

[![image.png](https://scil-wiki.su.edu/uploads/images/gallery/2026-07/scaled-1680-/zYuimage.png)](https://scil-wiki.su.edu/uploads/images/gallery/2026-07/zYuimage.png)

7\. Select all the parts and group them using "Union Group".

[![image.png](https://scil-wiki.su.edu/uploads/images/gallery/2026-07/scaled-1680-/DEQimage.png)](https://scil-wiki.su.edu/uploads/images/gallery/2026-07/DEQimage.png)
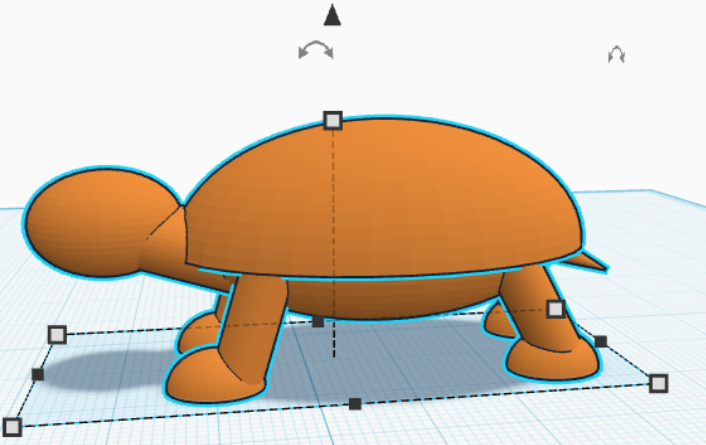
##### The Face

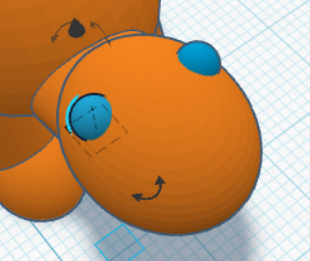
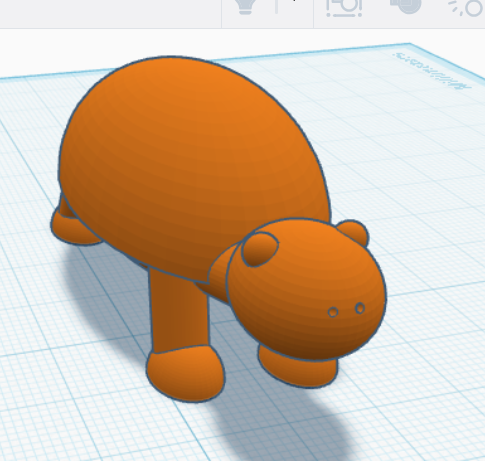
1. Add a sphere to the grid. This will be an <span style="color: rgb(22, 145, 121);">**eye**</span>. Resize the <span style="color: rgb(22, 145, 121);">**eye**</span> and position it on the head of your turtle. Be sure the <span style="color: rgb(22, 145, 121);">**eye**</span> overlaps.

[![image.png](https://scil-wiki.su.edu/uploads/images/gallery/2026-07/scaled-1680-/ijFimage.png)](https://scil-wiki.su.edu/uploads/images/gallery/2026-07/ijFimage.png)[![image.png](https://scil-wiki.su.edu/uploads/images/gallery/2026-07/scaled-1680-/Fscimage.png)](https://scil-wiki.su.edu/uploads/images/gallery/2026-07/Fscimage.png)
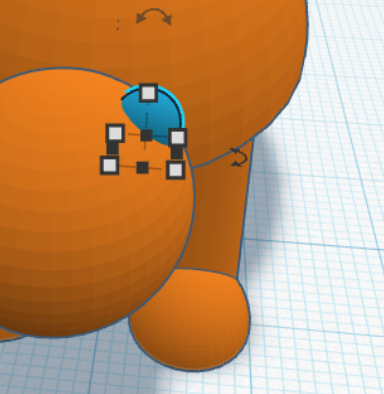
2\. Copy **(Ctrl+C)** and paste **(Ctrl+V)** the second **<span style="color: rgb(22, 145, 121);">eye</span>** and position it.

[![Screenshot 2026-07-24 135255.png](https://scil-wiki.su.edu/uploads/images/gallery/2026-07/scaled-1680-/screenshot-2026-07-24-135255.png)](https://scil-wiki.su.edu/uploads/images/gallery/2026-07/screenshot-2026-07-24-135255.png)

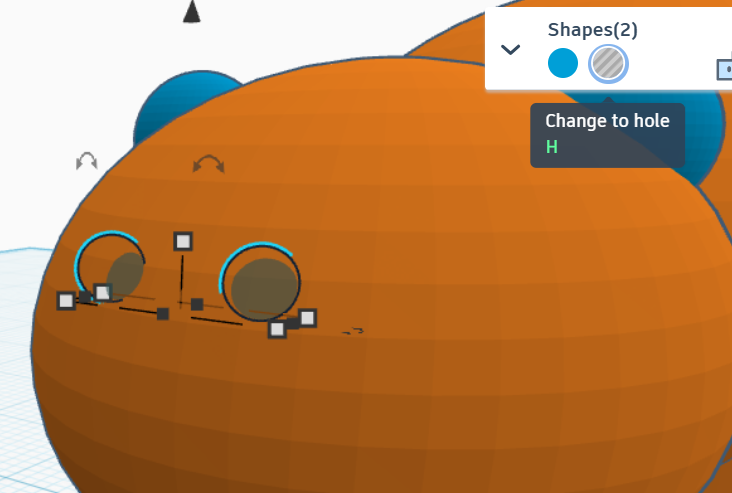
3\. Add another sphere to the grid. This will be the turtle's <span style="color: rgb(22, 145, 121);">**nostril**</span>. Resize the <span style="color: rgb(22, 145, 121);">**nostril**</span> so it's very small and position it on the end of the <span style="color: rgb(22, 145, 121);">**head.**</span> Copy **(Ctrl+C)** and paste **(Ctrl+V)** a second <span style="color: rgb(22, 145, 121);">**nostril**</span> and position it next to the first. Be sure the <span style="color: rgb(22, 145, 121);">**nostrils**</span> overlap with the <span style="color: rgb(22, 145, 121);">**head**.</span> Check at all angles to be sure they are positioned correctly.

[![Screenshot 2026-07-24 141510.png](https://scil-wiki.su.edu/uploads/images/gallery/2026-07/scaled-1680-/hqsscreenshot-2026-07-24-141510.png) ](https://scil-wiki.su.edu/uploads/images/gallery/2026-07/hqsscreenshot-2026-07-24-141510.png)[![image.png](https://scil-wiki.su.edu/uploads/images/gallery/2026-07/scaled-1680-/wKBimage.png)](https://scil-wiki.su.edu/uploads/images/gallery/2026-07/wKBimage.png)
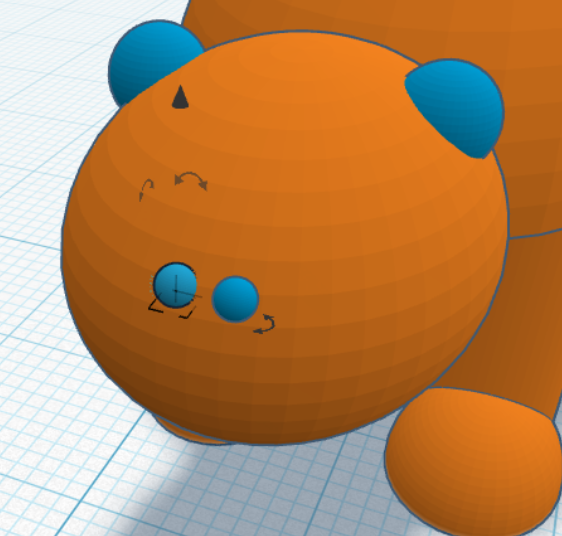
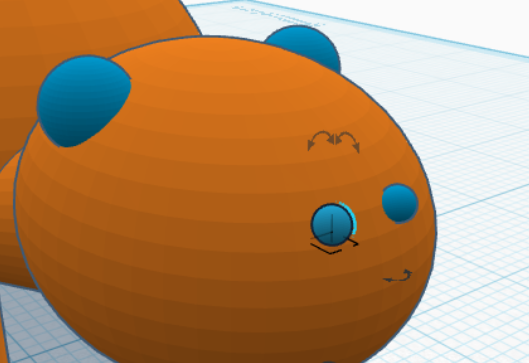
4\. Select both <span style="color: rgb(22, 145, 121);">**nostrils**</span> (select one, hold shift and select the second) and select "Change to hole" under Shapes. This will subtract the shape of the <span style="color: rgb(22, 145, 121);">**nostrils**</span> from the <span style="color: rgb(22, 145, 121);">**head**</span>. Now you have **<span style="color: rgb(22, 145, 121);">nostril holes</span>**!

[![Screenshot 2026-07-24 142157.png](https://scil-wiki.su.edu/uploads/images/gallery/2026-07/scaled-1680-/screenshot-2026-07-24-142157.png)](https://scil-wiki.su.edu/uploads/images/gallery/2026-07/screenshot-2026-07-24-142157.png)

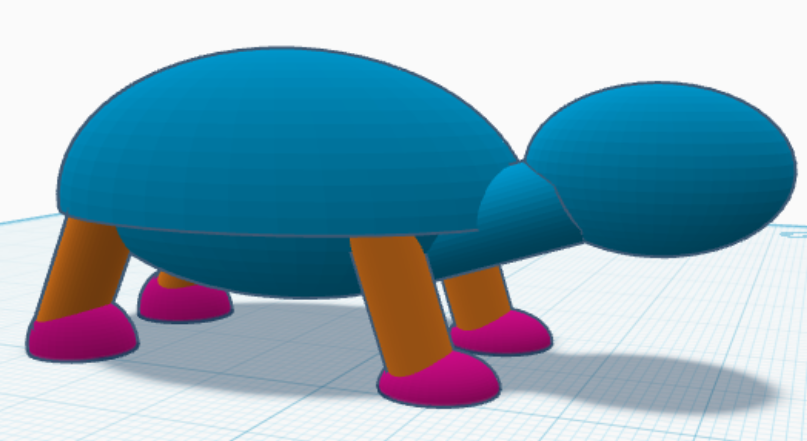
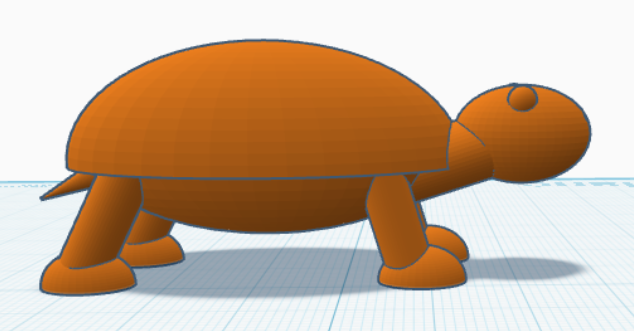
5\. Select all the parts and group them using "Union Group". Congratulations! You've made a turtle! Download your project as an .stl file and you are ready to print!

[![image.png](https://scil-wiki.su.edu/uploads/images/gallery/2026-07/scaled-1680-/BuOimage.png)](https://scil-wiki.su.edu/uploads/images/gallery/2026-07/BuOimage.png)[![image.png](https://scil-wiki.su.edu/uploads/images/gallery/2026-07/scaled-1680-/Z9timage.png)](https://scil-wiki.su.edu/uploads/images/gallery/2026-07/Z9timage.png)
#####