**IMPORTANT: Do not print with resin until you have been trained on this equipment.**
**WARNING!** Uncured resin is harmful! **Uncured resin should not be thrown away or sent down any drain.**
**WARNING!** You must always wear **gloves**, a **mask**, and **eye protection** when working with uncured resin.
After finishing a print, whether successful or unsuccessful, the resin 3D printer and tools must be properly cleaned. All waste materials must be safely and properly saved or discarded. **Waste materials may include** - Failed prints - Printed Support Structures - Resin-soaked paper towels - Water with resin in it #### Step 1: Cleaning the Print First, you should remove the 3D print (whether successful or not) from the printer base plate. Some prints may be challenging to remove. **Do not force the print off the plate.** You should work carefully and slowly, to avoid damage to the base plate or the print. Hot water can be used to soften the printed resin and make the print easier to remove, but this water should not go down the drain. If a print sticks excessively to the plate, you may need to adjust your print settings.**It is always preferrable** to damage your print rather than damaging the printer base plate.
Once the print is removed from the base plate, it will require additional clean-up to ensure quality. You should remove all supports using hand tools. Then either: - **Use the cleaning station** (preferred) to automatically clean the print and collect uncured resin. Cleaning water/alcohol can remain in the cleaning station for multiple prints before being properly disposed of. - **Hand-clean the print** using the provided "toothbrush" tool. Use water for water-based resin or alcohol for alcohol-based resin. You must hand clean the print in a separate basin (not the sink) so that uncured resin does not go down the drain. #### Step 2: Cure the Print You must now cure your print. Resin cures under ultraviolet (UV) light. Use the *Phrozen Cure Mega* UV curing station to cure your print. After thorough cleaning, the print may be placed on the turntable. Set a curing time and let the curing station run to completion.**WARNING!** **Do not open the curing station door while the UV light is operating.**
#### Step 3: Clean Up While your print is curing, you should begin the cleanup process. You must thoroughly and carefully clean the following: - The printer build plate - The printer itself (anywhere resin has dripped or spilled) - Tools such as the cleaning "toothbrush," scrapers, etc. - The workspace **Wearing gloves, mask, and eye protection**, use paper towels to wipe uncured resin from all of the above. Set aside all paper towels for final cleanup.**NOTE:** You do not need to clean the resin reservoir after every print. Uncured resin can remain in the reservoir for long periods.
**You should clean the resin reservoir only if:** - Your print has failed and left debris in the reservoir - If you intend to print with a new color or type of resin, and mixing colors would be unacceptable - If the uncured resin has been sitting for too long in the reservoir and is likely to cause print failure.**WARNING!** **Do not rinse items in water** until they are thoroughly wiped clean of resin.
**WARNING!** **Do not throw away paper towels** that are saturated with uncured resin.
Once you have **thoroughly** wiped away all uncured resin, such that there is virtually no resin left on these objects, you may rinse the tools and printer components (if needed) in running water. Replace the build plate. Remember to t**ighten the hold down screws**. Properly store all tools. If you hand-cleaned the print, you will have some amount of water or alcohol with uncured resin in it. This basin of water can be saved for use on future prints. If it must be disposed of, **cure the water and filter it as in step 5 below.** #### Step 4: Curing Waste Resin To complete the clean-up process, you must **cure all waste resin**, including support resin and all resin-saturated paper towels from clean up. **Continue to wear protective equipment** while doing this. Take all resin-saturated paper towels, uncured supports, failed prints, and other items with uncured resin on them and place them in the UV curing station. Make sure they are spread out enough that all objects will receive enough UV light on all sides. You may need to cure these items in batches, depending on how much curing is needed. Run these items through the UV curing process as you would a finished print. Don't forget to remove your finished print first!**Remember**, even a failed print must be cured before it is discarded.
**Remember to cure your gloves as well!**
Once all waste materials have been cured, they are safe to dispose of in the trash. Take a final look around the workspace to ensure that all **uncured resin has been taken care of**, the area is **clean and tidy**, and the **printer is cleaned and reset to operational configuration**. #### Step 5: Refreshing the Cleaning Station Wastewater**NOTE!** It is not necessary to discard cleaning station wastewater/alcohol after each print. This material can be **re-used.**
**WARNING!** Cleaning water/alcohol may have uncured resin in it. **Always wear gloves and other protective equipment.**
Periodically, it may become necessary to filter or dispose of the cleaning station water/alcohol when it becomes too saturated with uncured resin to be useful. To accomplish this: 1. Use the **cleaning station spigot** to drain cleaning water into one of the **transparent curing flasks** provided for this task. 2. Taking care not to spill or drip the contaminated cleaning water, **place the curing flask into the curing station**. 3. **Run the curing flask through a curing cycle** to cure any resin saturated into the water. 4. **Repeat** this process until the curing station is almost empty. 5. Pour the **last remaining water** (likely the most contaminated water) into a final flask and **cure as above**. The cleaning container may now be wiped clean.**Remember**, the paper towels used to wipe the cleaning station should also be cured as in step 4 above.
Using provided filters, the cured cleaning water can be poured back into the cleaning station for **re-use.** The used filters may be **discarded into the trash**. Infrequently, the cleaning water may be so dirty that it cannot be reused. In this event, SCiL staff will use a curing and evaporation process to safely dispose of it. #### Helpful Guidance The following video, by [Edward Peak](https://www.youtube.com/@edwardpeak01), provides helpful guidance for resin printing: # Resin Printing: CHITUBOX #### Step 1: Obtaining and the model to print First, you will need to make sure the file you would like to print is a .stl file. The slicer program only accepts .stl files, so something like .obj will not work. - To export a model as an stl file in Maya, first, go to Windows→Settings/Preferences→Plug-in Manager, then in the search bar, type in “stl”, and check the load and auto load boxes for the result titled “stlTranslator.mll”, then hit refresh, and close that window. Then, go to File, and instead of hitting export selection, click the box next to it. Under “General Options”, there is a drop down menu labeled “File type:”. Look for the “STLExport” option, then save and close that window. You can now export files from Maya in an stl format. Just make sure that when you do go to export the model(s), that you change the “Files of type:”drop down and select STLExport. - If you used blender to make the model, you can export as an stl without additional setup. Then, you will want to make sure you are using a computer with the slicer software CHITUBOX installed. These computers are located in the Makerspace. #### Step 2: Setting up the model to print When you open CHITUBOX, you may need to log in. The login info for that is: Email: scil-devices@su.edu Password: scil1234 After signing in, you will be directed to the home screen. In the main screen there will be two buttons at the top of the window, one labeled “New Project” and one labeled “Open File”. “Open File” will add any file(s) you select to the current project, which may or may not already have models in it. “New Project” is best if you want to just print a specific model or models.  If you select “New Project”, you will still need to import the model(s) you wish to print. On the left hand side of the screen, there is a tab that has the project settings/information. Near the bottom of this tab, there is a section labeled “Object(0)”. Click the button that has a cube with a plus icon on it, which will say “Add File” when hovered over. When clicked, it will bring up a file explorer window, then select the file(s) you wish to add. 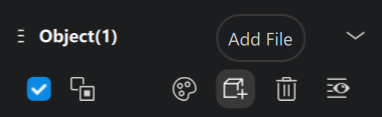 The controls to navigate the slicer are as follows: - Click Left mouse button: selects model(s) in the scene(select multiple models at once by dragging or holding shift when clicking specific models - Hold Right mouse button: pans camera around the scene - Hold Middle mouse button(down on scroll wheel): moves camera side to side/up and down From here, on the represented build plate, you can orient, change the size/scale, hollow, drill, duplicate, and mirror the model(s). You cannot add platform, split, cut, boolean, and the model(s) without paying for the upgraded version, which you will not do.  Don’t use anything that has either of these two icons on them(they require the paid version) #### Step 3: Adding Support Structure to the Model Once you have your model(s) positioned and scaled to how you want them, you can start adding supports. To do this, start by clicking on the Supports button at the top of the window. This will change the options at the top of the scene window to Edit Support, Manual Support, Batch Support, Auto Support, Magic Support, Mirror Support, Raft, Overhang Detection, Cross Bracing, and Merge Supports. You will only be able to use the Edit Support, Manual Support, Auto Support, Raft and Overhang Detection functions  When in the support editing mode, there will be some red areas on the underside(s) of the model. This is showing where support structure is recommended in order to print the model successfully. The best way to add supports to the model is by clicking the Auto Support button, and then giving details to the slicer in the menu on the right side of the screen. The light and Middle support options can have a difficult time holding onto the model while printing, most commonly, the print will fall off the support structure part-way through the print, or the print will cure to the film at the bottom of the reservoir, and the supports will not be strong enough to hold onto the model and pull it back up. More often than not, you will want to use the Heavy support option. This option provides the strongest connection to the model, which will mitigate problems while printing. 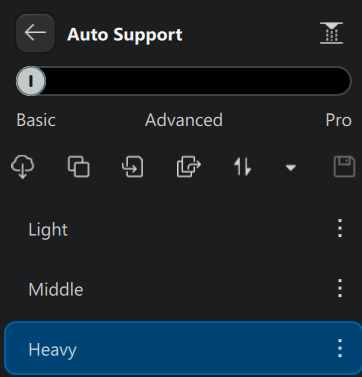 Under the Support Type tab, you can refine how you want the supports to generate, whether you want to change the shape/style of support, as well as change details about individual parts of the support structure. 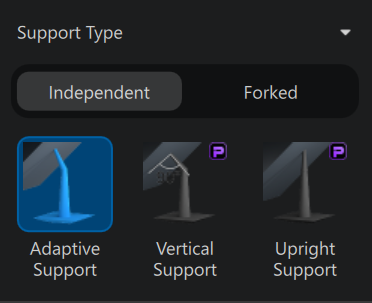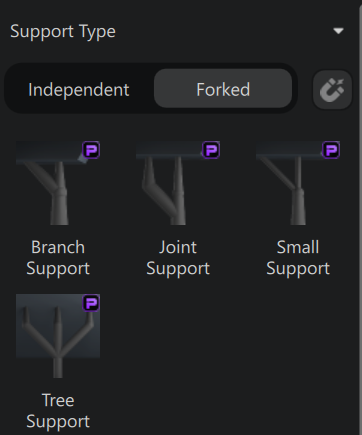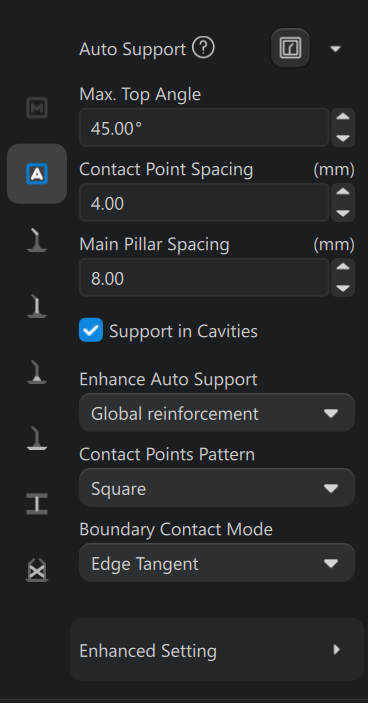 You will want to stick with Adaptive Support, and to not mess with the settings, however there may be instances where you need to change the settings based on the model you are printing. You can also manually add supports to the automatically generated supports, in case there is something specific that you think needs more supports. The other Support Type options are not available for us to use. Next, you will want to give the supports a raft. While still in the Supports menu, at the top of the window on the right side, hit the Raft button. From current testing, leaving the raft type as “None” and the Model Lift Height setting kept at 5mm seems to work the best. #### Step 4: Slicing the Model Once you have added supports to the model(s), you are ready to slice the model. To do this, start by clicking the Slice button at the top right of the window. Don’t change either of the two settings that come up on the right side of the window. After clicking the Slice button, there will be a tab on the left side of the window that shows the costs of the print. These costs include but are not limited to Volume, Weight, and Time. The volume refers to the amount of resin(in milliliters) that the print will use, the weight refers to the mass(in grams) of the print, and the time refers to how long(in hours and minutes) the print will take to complete. You will still need to save the file to print, which can be done by clicking on the grey Save button near the top middle of the window, then clicking the blue Save button on the right side of the window. If you instead click the Slice and Save button, you will be able to save the file for printing first, and then show you the same things as mentioned above. Regardless of which option you choose, you will need to save the .ctb file, which is the only file type that the resin printer accepts. You can save the file onto the orange thumb drive labeled RESIN PRINTER, which should be either in or next to the resin printer. Then, once the desired file is on the thumb drive, you can put it into the printer’s front facing USB port. Step 5: Printing the Model Finally, to start the print, make sure that the printer’s reservoir has enough resin for the print, and then on the screen at the base of the printer, click on the 3D Print button, and then select the file you wish to print, then hit the GO button. The printer will then run for the amount of time previously stated in CHITUBOX(as well as on the lcd screen on the printer once the print is started), and after that amount of time has elapsed, the print will be done and need to be washed and cured. WARNING! You must wear gloves, a mask, and eye protection to refill the reservoir. #### Additional Information Functions not previously talked about, such as; hollow, drill, duplicate, and mirror. The hollow function allows you to hollow out the inside of the model, and will let you determine the thickness of the walls of the print. It is not recommended to use this function unless you have a large model, as smaller models will be very fragile. Using this function can help with reducing the weight and amount of resin used for the print, which will help to make sure it does not fall off of the build plate due to being too heavy. Depending on the shape of the model, you may still need supports on the inside, to make sure that the model can be printed without falling apart due to overhang angles in the model itself. The drill function allows you to cut out part of a model, and print both pieces, detached from each other. (see below) 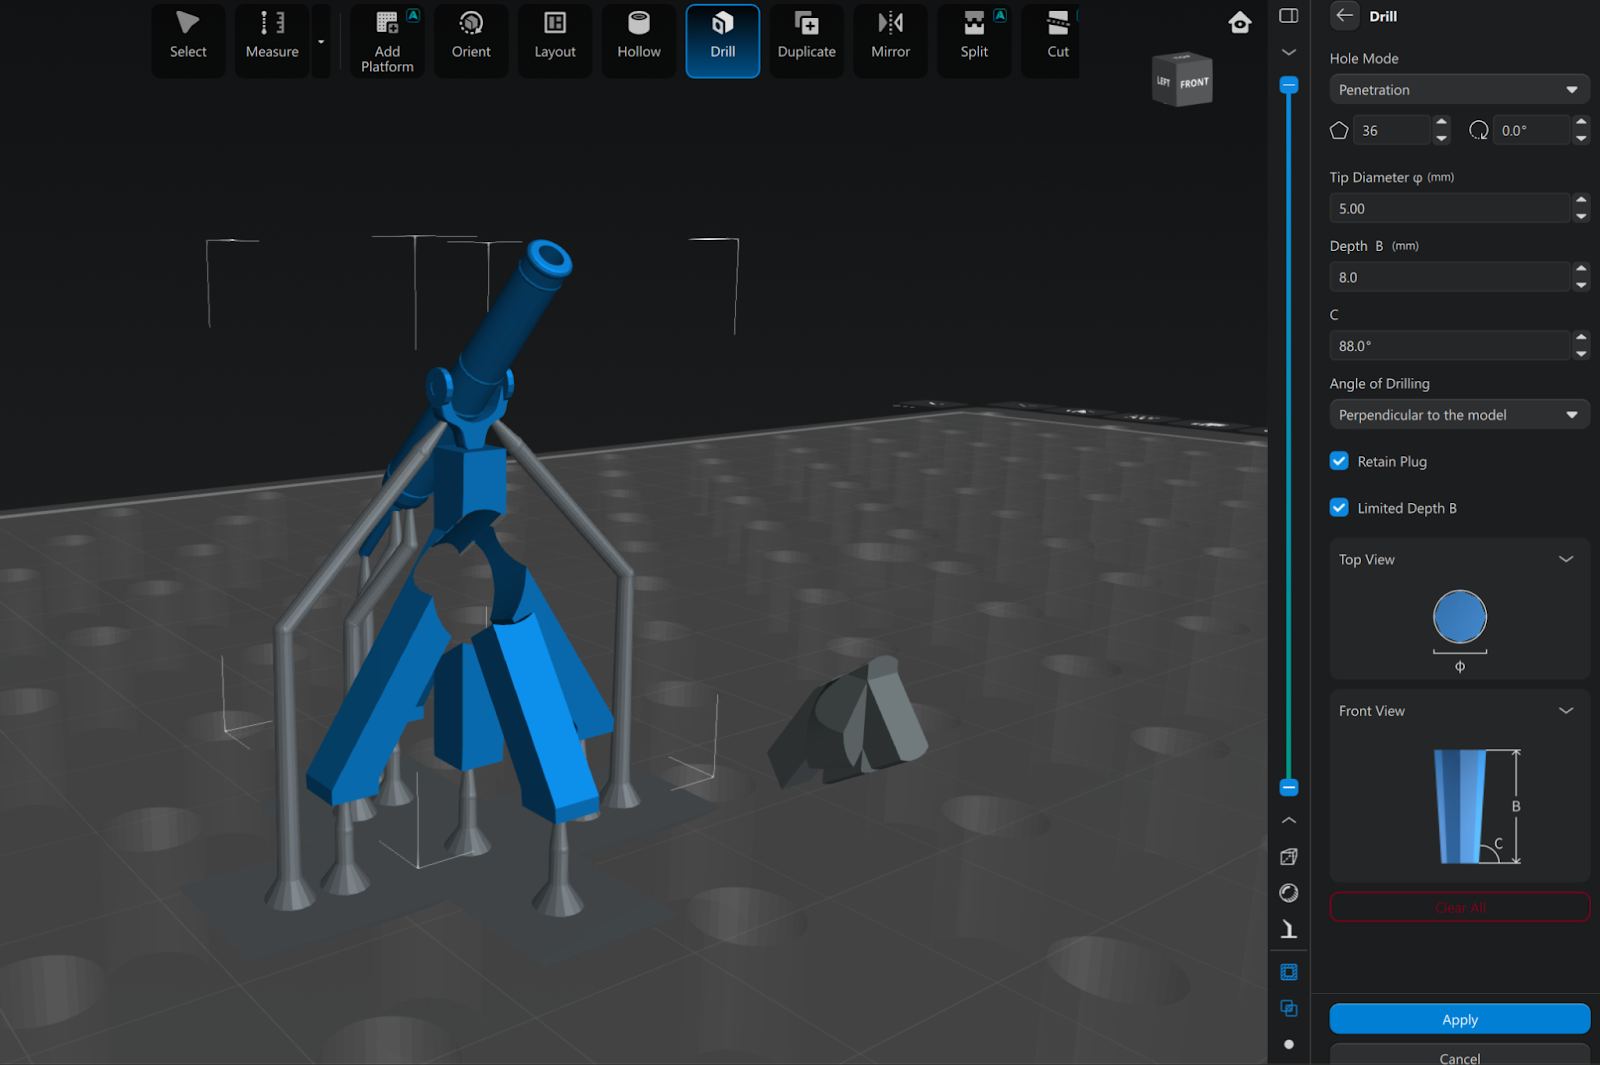 The duplicate and mirror functions do as the name suggests, and will allow you to either duplicate or mirror/reverse the model(s). The mirror function can just reverse the model on the selected axis, and you can optionally make a duplicate of the original model, and the model that is still selected will be the mirrored version. # Specs and Maintenance Specs: Phrozen Sonic resin 3D printers offer high-resolution, fast-printing LCD technology ranging from 4k to 14k, catering to various print volumes and detail requirements. Key models feature Mono-LCD screens, 4405nm light sources, and fast printing speeds. Maintenance: Maintaining a Phrozen Sonic resin printer involves a few steps. - Remove the vat, empty it, and clean with IPA and a soft cloth to remove residual resin. Use the "Vat Cleaning" function to remove cured debris before filtering resin back into the bottle. - Wipe the build plate with IPA to remove residue. If resin is cured on, use a soft scraper or soak in IPA. - Clean the LCD screen with a microfiber cloth and IPA to remove dust or smudges. - Inspect the FEP film for scratches or clouding. Replace if damaged to avoid leaks. - Apply dry PTFE-based lubricant to the Z-axis screw and linear guide rails to ensure smooth movement. - Keep resin in a cool, dark place.