# Using The Iso Booth

Recording? Composing? Editing? Here is a deeper dive into how you can get started doing this with Reaper and the Iso booth.

# Setting up the Iso Booth

<p class="callout info">**Any words in** *<span style="background-color: #fbeeb8;">this format</span>* **are defined in the dictionary.**</p>

<details id="bkmrk-"><summary>DICTIONARY</summary>

<span style="background-color: #fbeeb8;">*<span style="text-decoration: underline;">HA400 Microamp:</span>*</span> This Microamp serves as a distribution system, allowing multiple users to listen in on a session. It is powered with a 12V cable, make sure you have this plugged in!

<span style="background-color: #fbeeb8;">*<span style="text-decoration: underline;">Scarlett 2i2:</span>*</span>. Audio interface for mic and instrument plugins.

<span style="background-color: #fbeeb8;">*<span style="text-decoration: underline;">XLR:</span>*</span> Electrical connector used for professional audio. Connector can have 3-7 pins. Three is the industry standard, and each pin serves a different purpose. One is for positive signal, the other for negative, and the third for a 'balanced' ground connection.

<span style="text-decoration: underline; background-color: #fbeeb8;">Mackie Mixer:</span> 12-channel mixer that simultaneously controls levels of the desktop mic, and mics inside the booth. It is also used as a talkback system between the audio engineer and booth occupant.

</details>## **Whisper Booth**

[![a.jpeg](https://scil-wiki.su.edu/uploads/images/gallery/2023-11/scaled-1680-/a.jpeg)](https://scil-wiki.su.edu/uploads/images/gallery/2023-11/a.jpeg)

**The "SCiL booth" is an iso booth for professional recordings. You can record alone or in conjunction with another person. We will approach a recording session from a two-person perspective, helping to distinguish the roles between a Booth User and Audio Engineer.**``

[![zhZa.jpeg](https://scil-wiki.su.edu/uploads/images/gallery/2023-11/scaled-1680-/zhza.jpeg)](https://scil-wiki.su.edu/uploads/images/gallery/2023-11/zhza.jpeg)

### **Setting Up**

[![img-4075-2.jpg](https://scil-wiki.su.edu/uploads/images/gallery/2023-11/scaled-1680-/img-4075-2.jpg)](https://scil-wiki.su.edu/uploads/images/gallery/2023-11/img-4075-2.jpg)

#### Plugging in

- Beneath the table and to the left is a wall pocket that connects outside.
- Make sure <span style="background-color: #fbeeb8;">*XLR*</span> or 1/4" cables are properly laid out, avoidant of footpaths to prevent tripping.

*"What is the purpose of plugging into this wall?"*

- Plugs inserted into these wall pockets can be run outside from an outer wall pocket. This benefits the audio engineer in various ways. (see image below)

[![b.jpg](https://scil-wiki.su.edu/uploads/images/gallery/2023-11/scaled-1680-/b.jpg)](https://scil-wiki.su.edu/uploads/images/gallery/2023-11/b.jpg)

- Cables that run outside all connect to the <span style="background-color: #fbeeb8;">Mackie Mixer</span>*.* This connects your mic plugins to the computer, which is connected by USB-C.

[![a.jpg](https://scil-wiki.su.edu/uploads/images/gallery/2023-11/scaled-1680-/a.jpg)](https://scil-wiki.su.edu/uploads/images/gallery/2023-11/a.jpg)

- Let's take a closer look at the interface...

[![image.png](https://scil-wiki.su.edu/uploads/images/gallery/2023-11/scaled-1680-/2w9image.png)](https://scil-wiki.su.edu/uploads/images/gallery/2023-11/2w9image.png)

[`Refer to the equipment page if you are unfamiliar with this audio interface, or other equipment.`](http://10.42.32.18/books/audio/page/equipment)

- If the mic(s) and <span style="background-color: #fbeeb8;">*HA400 Microamp*</span> are hooked up to the inner wall pockets, they will run out the outer wall pockets and plug into this mixer.
- <span style="background-color: #fbeeb8;">*XLR*</span> inputs go into the combo jacks, which are connected to your mics.

[![kYeimage.png](https://scil-wiki.su.edu/uploads/images/gallery/2023-11/scaled-1680-/kyeimage.png)](https://scil-wiki.su.edu/uploads/images/gallery/2023-11/kyeimage.png)

- Combo jacks can accept XLR jacks, as seen above, as well as 1/4" inputs.
- There are seven channel inputs on the mixer. One will be for the outside mic, and two others for the mics inside the booth.

 [![5RGa.jpeg](https://scil-wiki.su.edu/uploads/images/gallery/2023-11/scaled-1680-/5rga.jpeg) ](https://scil-wiki.su.edu/uploads/images/gallery/2023-11/5rga.jpeg)[![Elaa.jpeg](https://scil-wiki.su.edu/uploads/images/gallery/2023-11/scaled-1680-/ZNTelaa.jpeg)](https://scil-wiki.su.edu/uploads/images/gallery/2023-11/ZNTelaa.jpeg)

**^As the Audio Engineer (left) speaks into the XM8500, the booth user (right) can hear his voice using the Audio Technica headphones. These are connected to the HA400.^**

- Before we get into recording, let's recap what you do to setup: 
    - Mics inside booth are plugged in, that you want to use, using XLR cable(s).
    - HA400 is set up: power supply unit, headphones, and the signal source 1/4" TRS connector (**t**rip, **r**ing, **s**leeve). Click [here](https://manuals.plus/behringer/ha400-microamp-manual#axzz7hbfcEqdt) for a deeper breakdown.
    - XLR cables are plugged into outer wall pocket, and run into the mixers combo jacks.
    - Mixer is plugged into computer via USB-C and is turnt on (on/off switch in the back).

You are now ready to move into ***Recording A Session***! Use that page to push forward.

### **Works Cited**  


<div class="csl-bib-body" id="bkmrk-in%2C-sign.-xlr-vs.-dm"><div><div class="csl-entry">In, Sign. *XLR vs. DMX | What Is the Difference?* 4 June 2019, showmecables.com/blog/post/how-can-you-tell-the-difference-between-xlr-and-dmx.</div><div class="csl-entry"><div class="csl-bib-body"><div><div class="csl-entry">engineer.ahsin. “Behringer HA400 Microamp User Guide - Manuals+.” *Manuals+*, 3 Dec. 2021, manuals.plus/behringer/ha400-microamp-manual#axzz7hbfcEqdt.</div></div></div></div></div></div>

# Recording A Session

<p class="callout info">**Any words in** *<span style="background-color: #fbeeb8;">this format</span>* **are defined in the dictionary.**</p>

<details id="bkmrk-%C2%A0-0"><summary>DICTIONARY</summary>

<span style="text-decoration: underline;"><span style="background-color: #fbeeb8;">Arm:</span></span> Places track/channel in a condition where it is ready to record audio when the system is placed in record mode.

</details>## **Reaper**

---

[![GOBa.jpeg](https://scil-wiki.su.edu/uploads/images/gallery/2023-11/scaled-1680-/goba.jpeg)](https://scil-wiki.su.edu/uploads/images/gallery/2023-11/goba.jpeg)

**It is now time to start a session on Reaper! With your desired equipment set up, we can go ahead and open up the software. To learn about Reaper's interface, we will go through a pre-made session that you have access to.**

[![a.png](http://10.42.32.18/uploads/images/gallery/2022-10/scaled-1680-/cLWa.png)](http://10.42.32.18/uploads/images/gallery/2022-10/cLWa.png)

1. Open the *WA 47 Polar Patterns Test* **project** file, not the backup one! Project files have the reaper icon symbol.
2. If you cannot see the file, a copy of this project was also left in the Downloads section of the File Explorer.

#### Main Interface

- Let's take a closer look at the interface. This is what your project should look like:

[![SUPa.png](https://scil-wiki.su.edu/uploads/images/gallery/2023-11/scaled-1680-/supa.png)](https://scil-wiki.su.edu/uploads/images/gallery/2023-11/supa.png)

- If the timelines (middle) says "offline," make sure you have clicked in the monitor space the software is pulled up in.
- There are currently four channels in the arrangement window (left), each given a color for sorting purposes.
- Also colored are your track editors in the mixer window (bottom)

*If your interface does not look like this, click Options --&gt; Themes --&gt; Default*

[![hgEa.jpeg](https://scil-wiki.su.edu/uploads/images/gallery/2023-11/scaled-1680-/hgea.jpeg)](https://scil-wiki.su.edu/uploads/images/gallery/2023-11/hgea.jpeg)

^The user is pointing at a switch on the WA-47 mic. This switch toggles between different polar patterns.^

- This project tested three polar patterns of the WA-47. For each polar pattern, a song was played from an IPhone12 and circulated around the mic. This test highlights each polar pattern's most/least sensitive range of pickup.

[![7SCa.png](https://scil-wiki.su.edu/uploads/images/gallery/2023-11/scaled-1680-/7sca.png)](https://scil-wiki.su.edu/uploads/images/gallery/2023-11/7sca.png)

- Above your timeline are specific marks for time, as well as bookmarks highlighting important parts of certain recordings.
- Left click the timeline at the **1.1.000** mark, or the **0:00.000** timestamp. Your cursor should already be at the beginning, but this is how you can place it at a desired location.
- (Check your device and volume before playing!) When you click **SPACE**, all channels will play their audio. You want to mute all except one, in order to hear what a specific polar pattern sounds like!

[![RZla.png](https://scil-wiki.su.edu/uploads/images/gallery/2023-11/scaled-1680-/rzla.png)](https://scil-wiki.su.edu/uploads/images/gallery/2023-11/rzla.png)

- Click the **M** button on three out of four tracks. You now have one channel playing, while the others are muted 
    - An easier method would be to click the **S** button, which solos the desired track. This is a one-click method that singles out the channel you want to listen to.
- Take note of what each polar pattern sounds like. The bookmarks on the timeline are colored in accordance to the track colors, highlighting insightful moments for better understanding the mics.
- You should test this on your own, messing with the patterns yourself to get a feel for the mics. To get started, let's create a new project.

[![jNja.png](https://scil-wiki.su.edu/uploads/images/gallery/2023-11/scaled-1680-/jnja.png)](https://scil-wiki.su.edu/uploads/images/gallery/2023-11/jnja.png)

- Go to *File* and click *New Project*, or use the shortcut keys **Ctrl + N**

[![FEZa.png](https://scil-wiki.su.edu/uploads/images/gallery/2023-11/scaled-1680-/feza.png)](https://scil-wiki.su.edu/uploads/images/gallery/2023-11/feza.png)

- Here is your barebones layout. The first thing we will need is a **Track**. Without a track, there is nowhere for our recordings to go, or mics to be routed.

[![i5Va.png](https://scil-wiki.su.edu/uploads/images/gallery/2023-11/scaled-1680-/i5va.png)](https://scil-wiki.su.edu/uploads/images/gallery/2023-11/i5va.png)

- Click *Track --&gt; Insert New Track*, or use the shortcut keys **Ctrl + T**.

[![U74a.png](https://scil-wiki.su.edu/uploads/images/gallery/2023-11/scaled-1680-/u74a.png)](https://scil-wiki.su.edu/uploads/images/gallery/2023-11/u74a.png)

- We now have a track in both the mixer window (bottom), and arrangement window (left).
- We are going to label this. Let's pretend you have a friend named Rando, who is an expert cowbell player. He wants to record his skills in the booth using the WA-47.

[![U5Ga.png](https://scil-wiki.su.edu/uploads/images/gallery/2023-11/scaled-1680-/u5ga.png)](https://scil-wiki.su.edu/uploads/images/gallery/2023-11/u5ga.png)

- Right-click your unnamed track in the arrangement window. In the dropdown menu, there is a **Track Color** and **Track Icon** option.
- Hover over **Track icon** and select **Set Track Icon**. Find the cowbell icon and double click that. 
    - You may also change the color of your track by reopening the menu.

[![MXra.png](https://scil-wiki.su.edu/uploads/images/gallery/2023-11/scaled-1680-/mxra.png)](https://scil-wiki.su.edu/uploads/images/gallery/2023-11/mxra.png)

- Almost done! On your track and next to the red button (Record Arm/Disarm), double click the black text box. It should turn white and a text cursor will appear. I am going to enter "Cowbell WA-47 Cardioid."

[![Dwea.png](https://scil-wiki.su.edu/uploads/images/gallery/2023-11/scaled-1680-/dwea.png)](https://scil-wiki.su.edu/uploads/images/gallery/2023-11/dwea.png)

- Click on an area away from the track to deselect it. It should look similar to the image above.
- We are now moving into <span style="background-color: #fbeeb8;">*arming*</span> your track. You cannot capture audio unless your track is armed, otherwise it will not let you hit record.

[![oGna.jpeg](https://scil-wiki.su.edu/uploads/images/gallery/2023-11/scaled-1680-/ogna.jpeg)](https://scil-wiki.su.edu/uploads/images/gallery/2023-11/ogna.jpeg)

- Circled in purple is the **Record Arm/Disarm** button. Clicking this button sets a condition where that specific track is ready to record.
- If you are ready to record, make sure your cursor on the timeline is placed where you want the recording to start. 
    - This is important for when you may be doing multiple takes on a single track, otherwise you risk recording on top of captured audio! (This is why we have **Ctrl + Z** for undoing actions...)

[![WeFa.jpeg](https://scil-wiki.su.edu/uploads/images/gallery/2023-11/scaled-1680-/wefa.jpeg)](https://scil-wiki.su.edu/uploads/images/gallery/2023-11/wefa.jpeg)

- Either click the red button in the circled area above, or use the shortcut **Ctrl + R** to start your recording. [![VaKa.png](https://scil-wiki.su.edu/uploads/images/gallery/2023-11/scaled-1680-/vaka.png)](https://scil-wiki.su.edu/uploads/images/gallery/2023-11/vaka.png)
- As you are recording, you can stop or "punch-out" your recording by clicking the same red button, or using the same shortcut key (Ctrl-R).
- If everything is set up properly, you SHOULD have a nice take. Here are some things to monitor while Rando is slaying with his cowbell:

**This portion assumes knowledge of equipment for the iso booth. Refer to [Audio Equipment Page ](http://10.42.32.18/books/audio/page/equipment)if you are unfamiliar with any terminology or functions pertaining to the equipment.**

[![2.jpeg](https://scil-wiki.su.edu/uploads/images/gallery/2023-11/scaled-1680-/2.jpeg) ](https://scil-wiki.su.edu/uploads/images/gallery/2023-11/2.jpeg)[![3.jpeg](https://scil-wiki.su.edu/uploads/images/gallery/2023-11/scaled-1680-/3.jpeg)](https://scil-wiki.su.edu/uploads/images/gallery/2023-11/3.jpeg)

[ ](http://10.42.32.18/uploads/images/gallery/2023-04/2.jpeg)

1. <span style="text-decoration: underline;">Talkback System:</span> If you are no recording alone, you will want to be using the talkback system. This is better for communication and is easy to do, once broken down.

- The 1/4" jacks in the Mackie mixer run into the microamp inside the booth. On both the Mixer and the MicroAmp, a pair of headphones are connected. Currently, the audio engineer outside the booth can hear the performer's voice, so long as phantom power is on for the condenser mics, and one of the first two channels has the sliders and gain knob turnt up in order to hear and receive from a mic. 
    - We want our voice from the desktop mic to transmit to the performer after a recording. Lets go over how to do this using the image below.

[![T8m1.jpeg](https://scil-wiki.su.edu/uploads/images/gallery/2023-11/scaled-1680-/t8m1.jpeg)](https://scil-wiki.su.edu/uploads/images/gallery/2023-11/t8m1.jpeg)

1. The 1/4" jacks plug into the *L/R Control Room* inputs on the mixer. The single jack on the cable's other end runs into the outer wall pocket. Another 1/4" cable runs from the inner wall pocket and into the *HA400 MicroAmp.*
2. A pair of headphones is plugged into the jacks for both the Mixer and MicroAmp.
3. Above the green channel labelled **<span style="background-color: #000000; color: #2dc26b;">SUB 1/2</span>** (Bottom right of the Mixer), there is a button above that says "To Phones/Control Rm" below the button. Click it and you will be sending input from both the Desktop mic and Reaper, to the performer. 
    1. <span style="background-color: #ecf0f1;">Make sure the channel slider and gain knob for the desktop mic is turnt up (Channel 9/10).</span>
    2. <span style="background-color: #ecf0f1;">Make sure the microamp is turnt on by being plugged in to one of the sockets beneath the table for 12V power. Also check that the gain knob for whichever channel the headphones are plugged into is turnt up.</span>
4. If the performer wants to hear their take, turn the *Blend knob* above the "To Phone/Control Rm" clockwise. USB 1-2 is you connection to the computer, meaning you are prioritizing the output from Reaper to send to the listener. Turning it to the left, where it says INPUTS prioritizes the mics connected to your mixer, meaning the listener will only hear your voice.
5. When you are done using the talkback system, click the button to turn it off or turn down the slider for your Desktop mic all the way down. In case you do another take, you want to do either of these so that the person inside doesn't hear any interference.

### **Works Cited**

<div class="csl-bib-body" id="bkmrk-%E2%80%9Creaper%C2%A0---tutorial-"><div><div class="csl-entry">“Reaper - Tutorial for Beginners in 13 MINUTES! [ COMPLETE ].” *YouTube*, 30 Aug. 2021, youtu.be/_shjd4GBILo.</div></div></div>

# Foley (SFX Recording)

<p class="callout info">This page will talk about using the Iso booth or field equipment for recording sound effects, be it for whatever project you require sound assets for.</p>

<p class="callout warning">If you are unfamiliar with any of the mentioned equipment, visit the [EQUIPMENT PAGE](http://10.42.32.18/books/audio/page/equipment) to learn more about tools available from the lab.</p>

Sound effects for movies, TV, video games, and other visual media commonly are acquired through Foley.

"What is *Foley*?"

Foley is a term derived from film, and it stands for the recreation of everyday sound effects you hear in your life. Upon recording sound effects, your assets would get implemented into a project post-production. However, this is something you can do in advanced, in anticipation of a project being finished. We're going to talk about using items around the lab to record either in the iso booth or on the field.

To learn more about editing your sound effects post production, visit the Adobe Audition Introduction page.

### <span style="text-decoration: underline;">Iso Booth</span>

At your disposal are two condenser mics: the AT2020 and the WA45. The mic outside the booth is a dynamic mic that you should not consider, as it is less sensitive and the environment in the lab is muddled with background noise and A/C (hopefully that will change when we move into the HIVE)

[![BXlc.png](https://scil-wiki.su.edu/uploads/images/gallery/2023-11/scaled-1680-/bxlc.png)
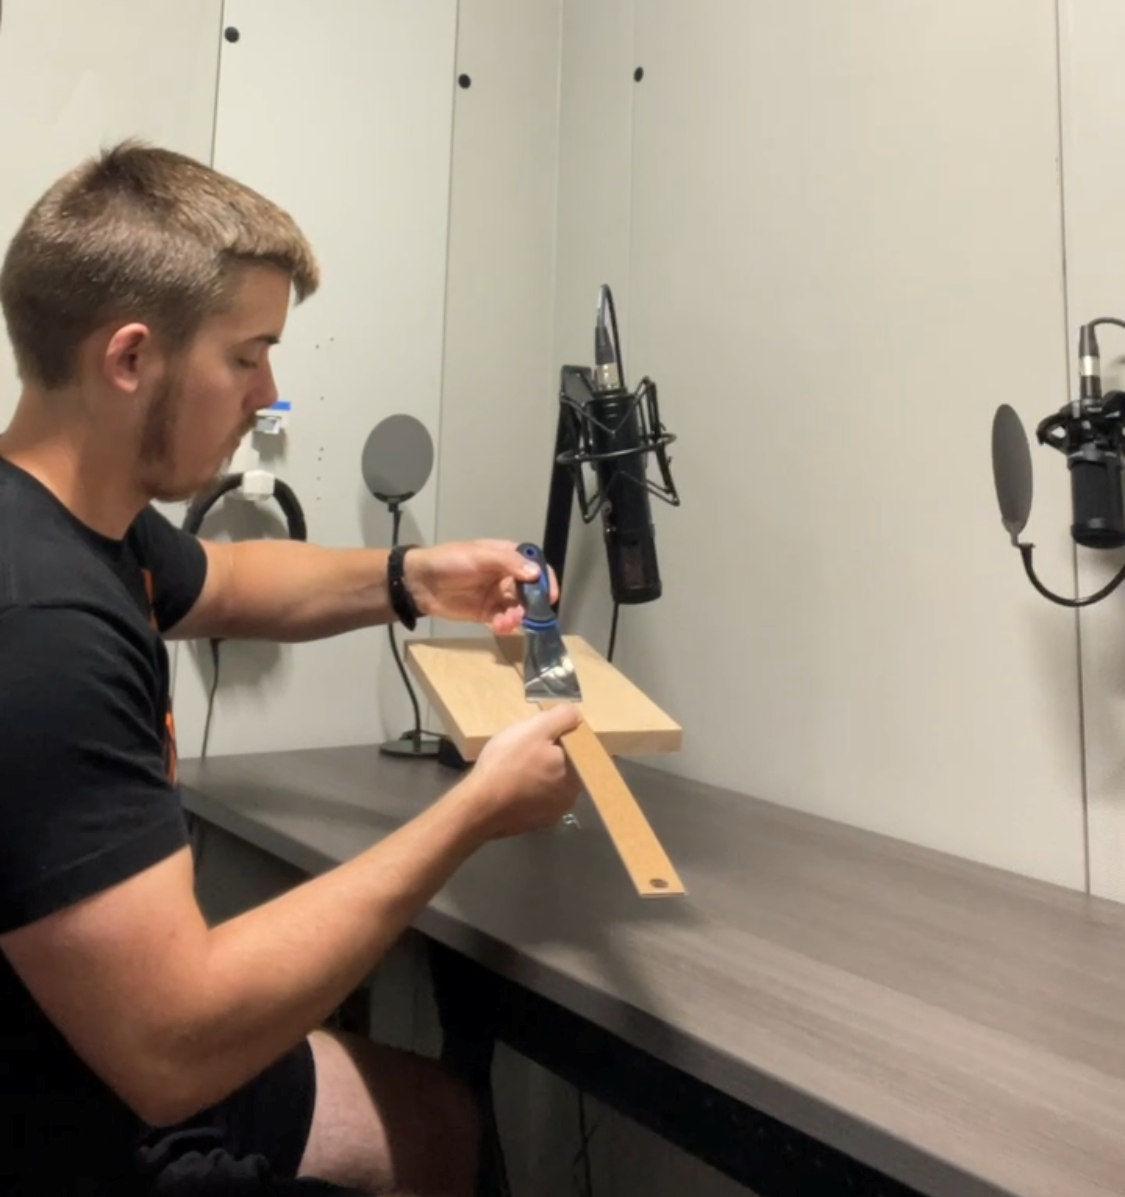
](https://scil-wiki.su.edu/uploads/images/gallery/2023-11/bxlc.png)

The sautering station has tools in the lockers and drawers that can be accessed, with permission from faculty. These tools are capable of creating sounds that can be edited and used for immersive experiences. An example of a VR experience that uses Foley is the French75 project.

Be sure to put the keys to the lockers and the booth back after borrowing them, as well as make sure to put the items used in their respective places.

### <span style="text-decoration: underline;">Field Equipment</span>

Should you want to record interactions outside the lab, you can always use the field mic and handy recorder. Depending on how long you'll be out of the lab, consider taking some batteries from the charging station to swap out.