# Cricut
# Cricut Basics
# Setting Up
New Device:
1. Download the Cricut Design Space app on the new device
2. Select Sign In
3. Use the email and password on the left side of the Cricut to sign in
4. After clicking “make”, click “set up a cutting machine.”
5. Select Cricut Maker 4
1. Follow the directions below for "Previously Connected Device" at this point
Previously Connected Device:
1. Open the Cricut by pulling the metallic/darker pink top part upwards
1. After doing so, press the power button (right side, above the three other buttons. It looks like a traditional on/off button.)
2. Plug the device into the Cricut using the USB-C cord that is connected to the Cricut (often already laid out next to it on the left side. If not there, look behind the Cricut to find the USB-C cord. It should be connected on the bottom-right side of the Cricut.)
3. After plugging in the device, open the Cricut Design Space app
1. If you get logged out, just log back into the Cricut Design Space app using the email and password located on the left side of the Cricut
# Designing Things
1. If your design needs to be on something specific, like a T-shirt or Vinyl Decal, you can select it as well as other kinds of templates for the base of your project. If you’re not making anything specific, you are able to select a blank canvas to start on
1. If making a sticker, it is recommended to simply select a blank canvas
2. Select whatever it is you want to use for the design from the left sidebar (Text, Shapes, Images, etc.)
3. Use the features above to create designs however you want, like combining shapes to make a figure or a new shape
Here is an image of the "tool bar" and what each feature does:
# When Done
Once you're done with the Cricut, you need to clean up your space. Here's how to do it:
1. Unplug the computer being used from the Cricut, close out of Design Space and any open tabs, and put it back in the original location it was taken from
1. Delete any files you no longer need from the computer
2. Be sure to plug it back into its charger when you return it
2. Press the power button to turn the Cricut back off
3. Push the light pink, plastic part of the Cricut up back into place until it "clicks"
4. Push the metallic, dark pink part down on top
5. Clean any remaining trash and throw it away, return all Cricut tools to their original location(s)
# Cricut Maintenance
# Callibration
1. Open the Cricut Design Space App
2. Locate the profile in the top right corner, and select the drop-down menu
1. Select “Settings”
4. When the Settings page pops up, select “Machines.”
5. Find “Machine Calibration,” then select the drop-down menu next to it and select “Maker 4.”
6. Hit the “Start” button
7. Three options for calibration should pop up: “Rotary Blade, Knife Blade, and Print Then Cut.”
1. Selection for calibration depends on what it is you’re trying to cut out. For stickers, do “Print Then Cut”; for vinyl, do “Knife Blade.”
1. Don’t have the blade needed for “Rotary Blade,” but if we did, it would be used for vinyl if you’re making a fun shape using the rotary blade
9. Follow the directions given by the Cricut for calibration
10. Evaluate the cuts made from the calibration process. If it isn’t right/accurate, do it again
1. If it keeps getting worse, try restarting the Cricut (power off, unplug for 10-15 minutes, plug back in, and turn back on)
# General Maintenance
Watch this video if you want a visual/audio description of taking care of the [Cricut](https://www.youtube.com/watch?v=u1kgOYmk_M4).
**Machine Maintenance**
1. Use the wipes to wipe around the Cricut on the outside (and the more plastic parts under the metallic cover)
1. Be careful not to rub it for too much/long on the buttons
2. DO NOT use any harsh chemicals/cleaners on the Cricut
2. Remove any material from the bar
3. Ensure that left and right wheel are still clean after use
1. If they aren't, use isopropyl alcohol and gently wipe
4. Every now and then, wipe down the tools with a wipe, too
**Cricut Mat Maintenance**
If the Cricut sticky mat seems to be collecting debris and losing its stickiness, it needs to be cleaned
1. Use the Cricut scraper to scrape what you can off
2. Take an alcohol-free baby wipe and wipe the Cricut mat with it
3. Leave outside (nice weather ONLY) to help some of the stickiness start to come back
1. Should be good in about 10 minutes or less
If the Cricut mat has a LOT of debris and it's hard to take off, it needs to be cleaned a little differently
1. Put some dish soap on the mat
2. Wash/scrub the mat like you would the dishes with lukewarm water
3. Lightly pat with a paper towel
4. Put out in the sun to dry
**Replacing Worn-Down Blades**
If the Cricut doesn't seem to be cutting very well, the blade may need to be replaced
1. Open the clamp holding the blade (should say B on it)
2. Pull the blade out of the machine
3. Press the "button" on the opposite side of the blade all the way down
1. This should make the blade pop outwards
4. Grab the blade while holding the button down and pull it out
5. While holding the button, put the new blade in
6. Remove finger from the button; the new blade should lock into place
# Major Maintenance
Cricut Breaking Down
This should only be done if it seems like the Cricut is doing really, really bad(shaking, jerking)
1. Pull out the tool holder
2. Clean and lubricate (some oil on) the inner gears
1. Use Q-Tips to reach all of them without damaging the machine
# Making Stickers
# Sticker Paper
[Print your own Vinyl Stickers at Home Tutorial](https://www.youtube.com/watch?v=7z_017X9J_Q)
### Preparing
1. Open Cricut Design studio, turn on the Cricut, and connect to your laptop using the USB cord.
2. Open a sticker project and adjust your design space to match the size of your sticker paper (8.5" x 11")
3. Upload your images to the design space, staying inside the cut lines. (Note: Put as many stickers as you can fit onto the page)
4. Hit the green "Make" button on the upper right corner.
5. On the left side of the screen, there will be “mat” options. Make sure you select “on mat" (12”x12”) and the correct paper size (8.5" x 11")
6. Hit the green "Continue" button in the lower right corner.
7. Select the green "Send to Printer" button.
### Printing
1. Save the page, and print it out on the bypass tray
- To do this, go to printer settings and select “printer options” (on Mac, “Preferences” on Windows), then “Printer Feed”, and change “Auto” to “Bypass Tray.”
2. Put the sticker paper into the printer in the bypass tray
- The bypass tray is a fold out “ledge” on the right side of the printer.
- When sticking paper into the bypass tray, it should be flat, face down (so the side that will have the pictures printed onto it will need to be in contact with the bypass tray)
3. Go to the printer and select “Print” on the screen (should be accompanied by an image of a printer on the bottom left side of the screen)
4. Select “Job Status” in the bottom right corner of the screen
- It should show you the printer with the bypass tray turned blue. If the bypass tray isn’t blue or it’s blinking, you need to open it before printing
5. Click the “start” button at the bottom right, NEXT to the screen (Big blue button with diamond shape and line inside)
- It shouldn’t take more than 5-10 seconds for the paper to pop out. When it does, close the Bypass Tray and go back to Makerspace
### Cutting
1. Put the sticker sheet onto the mat. Be sure it's straight and lined up with the left side of the mat.
2. Select sticker paper type.
3. Load the mat into the Cricut using the feed button (flashing up and down arrows) on the Cricut.
4. Press the go button (flashing arrow button) on the Cricut.
5. The Cricut will read the black guidelines, then cut the stickers out.
6. Remove the mat using the feed button, and pull off the sheet. If cut correctly/”strongly,” sticker cut-outs should stick to the mat
7. Use the spatula to gently scrape the stickers off the mat
# Vinyl Stickers
[Prepping and Cutting Vinyl Tutorial](https://www.youtube.com/watch?v=cx0KNe9THw4)
### Preparing and Cutting
1. Open Cricut Design studio, turn on the Cricut, and connect to your laptop using the USB cord.
2. Attach your vinyl to the mat or feed your vinyl sheet into the cricket if large enough. Be sure sure that the ends line up with the white wheels meant to hold it.
3. Start a new sticker project and adjust your design space to match the size of your material.
4. Upload your image to the design space and align it with your material. (Note: arrange your image close to the edge so you to use as little of the vinyl as you can to save material).
5. Hit the "Make" button in the upper right corner.
6. You will have a preview of your image arranged on your material. Select material size and whether you are using a mat or not.
7. Select "Continue" in the lower right corner.
8. Select the type of vinyl material you are using.
9. Feed your material into the Cricut by pressing the feed button (up and down arrows).
10. Press the go button (flashing arrow) on the Cricut.
### Transfering Design
1.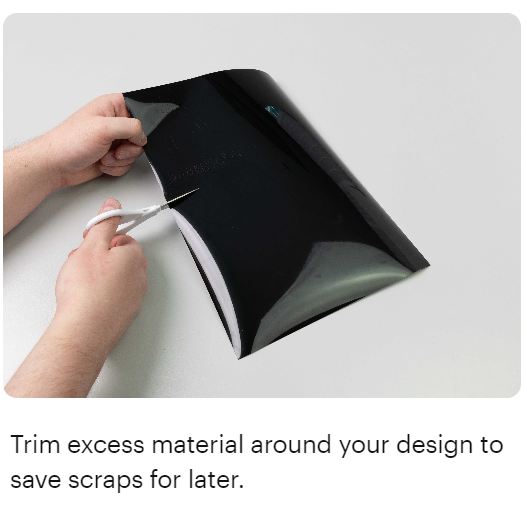2.
3\. Cut out a piece of transfer tape (large enough to go on top of your vinyl design) and peel off the white part. Stick the clear, sticky part of the transfer tape onto your vinyl design, then use the scraper (rectangular equipment in the same location as the pens and weeder in the Cricut that’s flat but then “bulges” up) to press the tape against the design to make sure it sticks.
4\. [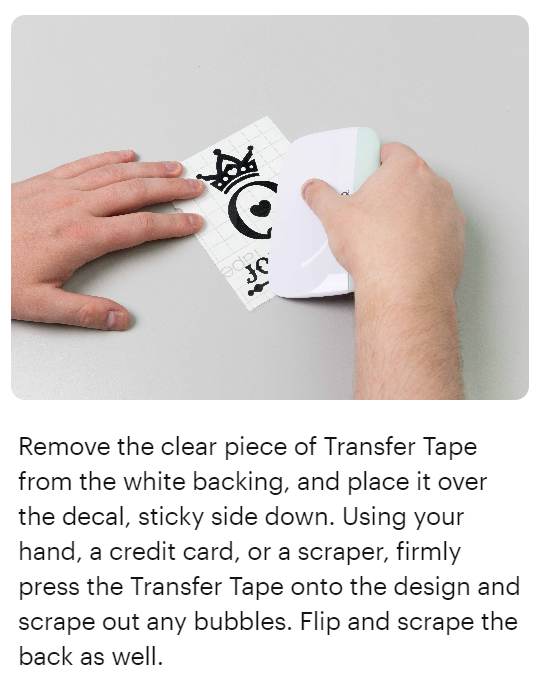](https://scil-wiki.su.edu/uploads/images/gallery/2026-07/6gSscreenshot-2026-07-01-144853.png)
5\. Peel off the transfer tape, and you’re done! (Note:If the vinyl keeps sticking to the transfer tape instead of your item, even after using the scraper, use your finger to hold the vinyl onto the item as you peel off the transfer tape.)
# Designing Stickers
1. Design the sticker
1. Typically best to design it in a drawing app or somewhere else and upload it to the Cricut Design Space Canvas
2. Open an app like Adobe Photoshop and open a page in size 8.5”x11”, make sure it’s transparent
1. 1. If you want them to have an outline, go to the bottom of the right side of the page and click the “fx” button
2. After, select “stroke” and then double check that the settings are right (outside instead of inside)
3. Adjust the size of the outline as needed
# Vinyl Cuts
# Shirt Vinyl Designing