Headsets
This is a good reference website for the specs of a variety of headsets: https://vr-compare.com/
- Quest Navigation
- Oculus Quest 1
- Oculus Quest 2
- Oculus Rift S
- Pico Neo 3 Eye
- Magic Leap
- Care and Maintenance
Quest Navigation
Basic Quest Navigation
Setting your playspace:
-
Turn on the Quest headset with the button on the side until the light next to it turns white
-
Follow the step-by-step instructions to create your boundary
-
Create a new boundary based on the experience you will be showing
-
Be sure the floor level is correct
-
DO NOT confirm a previous boundary unless you can clearly see the boundary underneath you
-
-
To reset your boundary: Go to settings and select "boundary." It should ask if you want to reset your boundary, select yes.
-
To reset your "center": Hold onto the Meta button on the controller until the white line that's circling it is complete
- This is also how to reset a stationary boundary
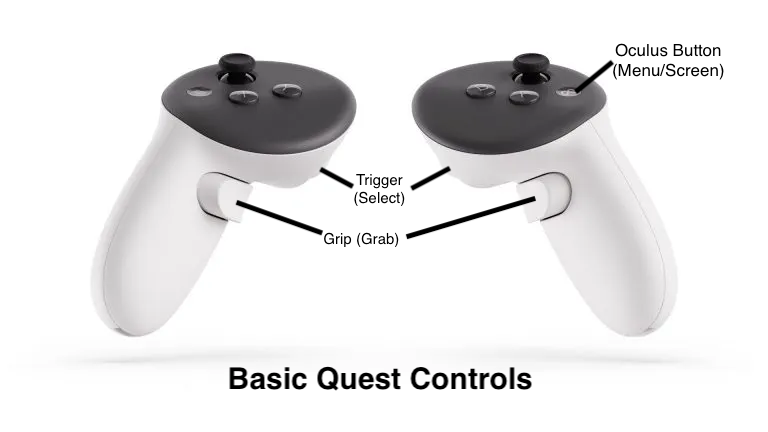
Quest Controls (Main Menu)
Below is an image of the controls and their names, as well as what they do in the main menu
Navigating inside the headset:
The bar at the bottom of the screen in front of you

-
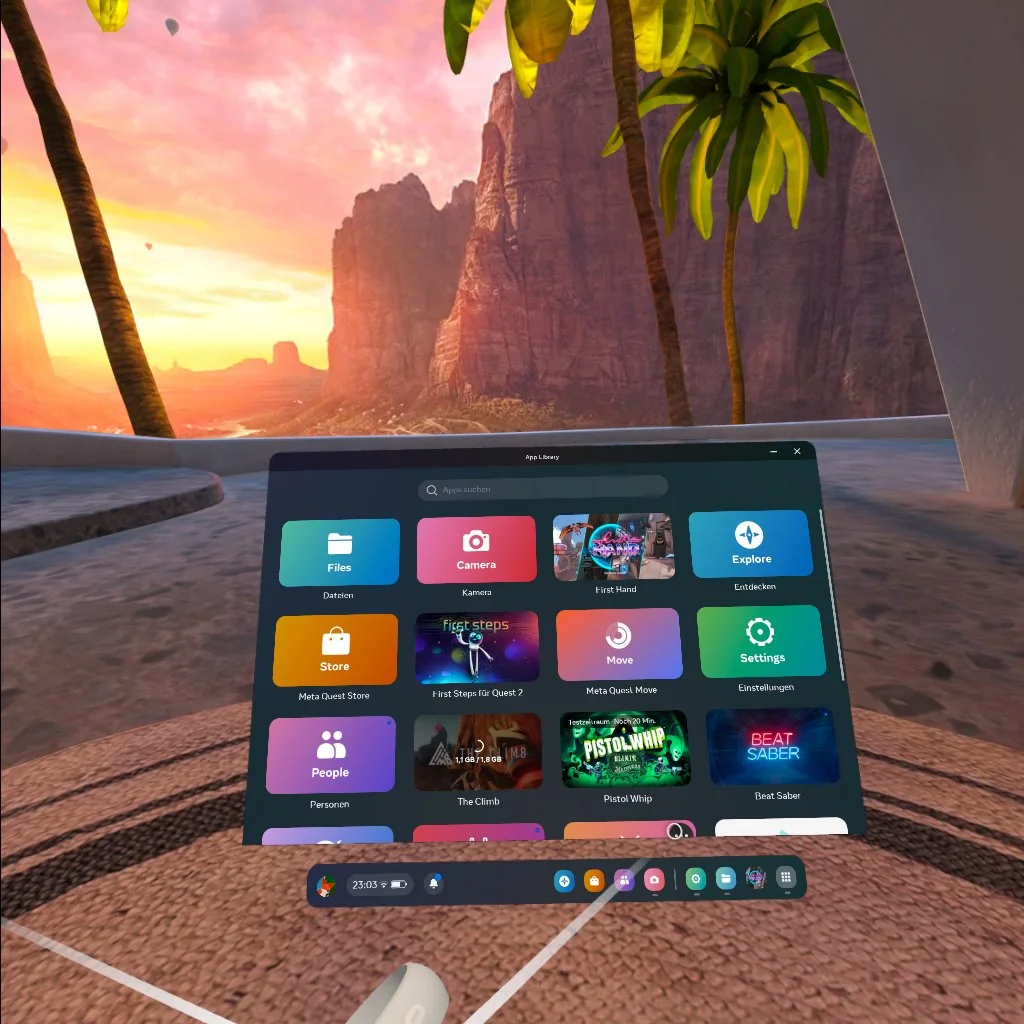
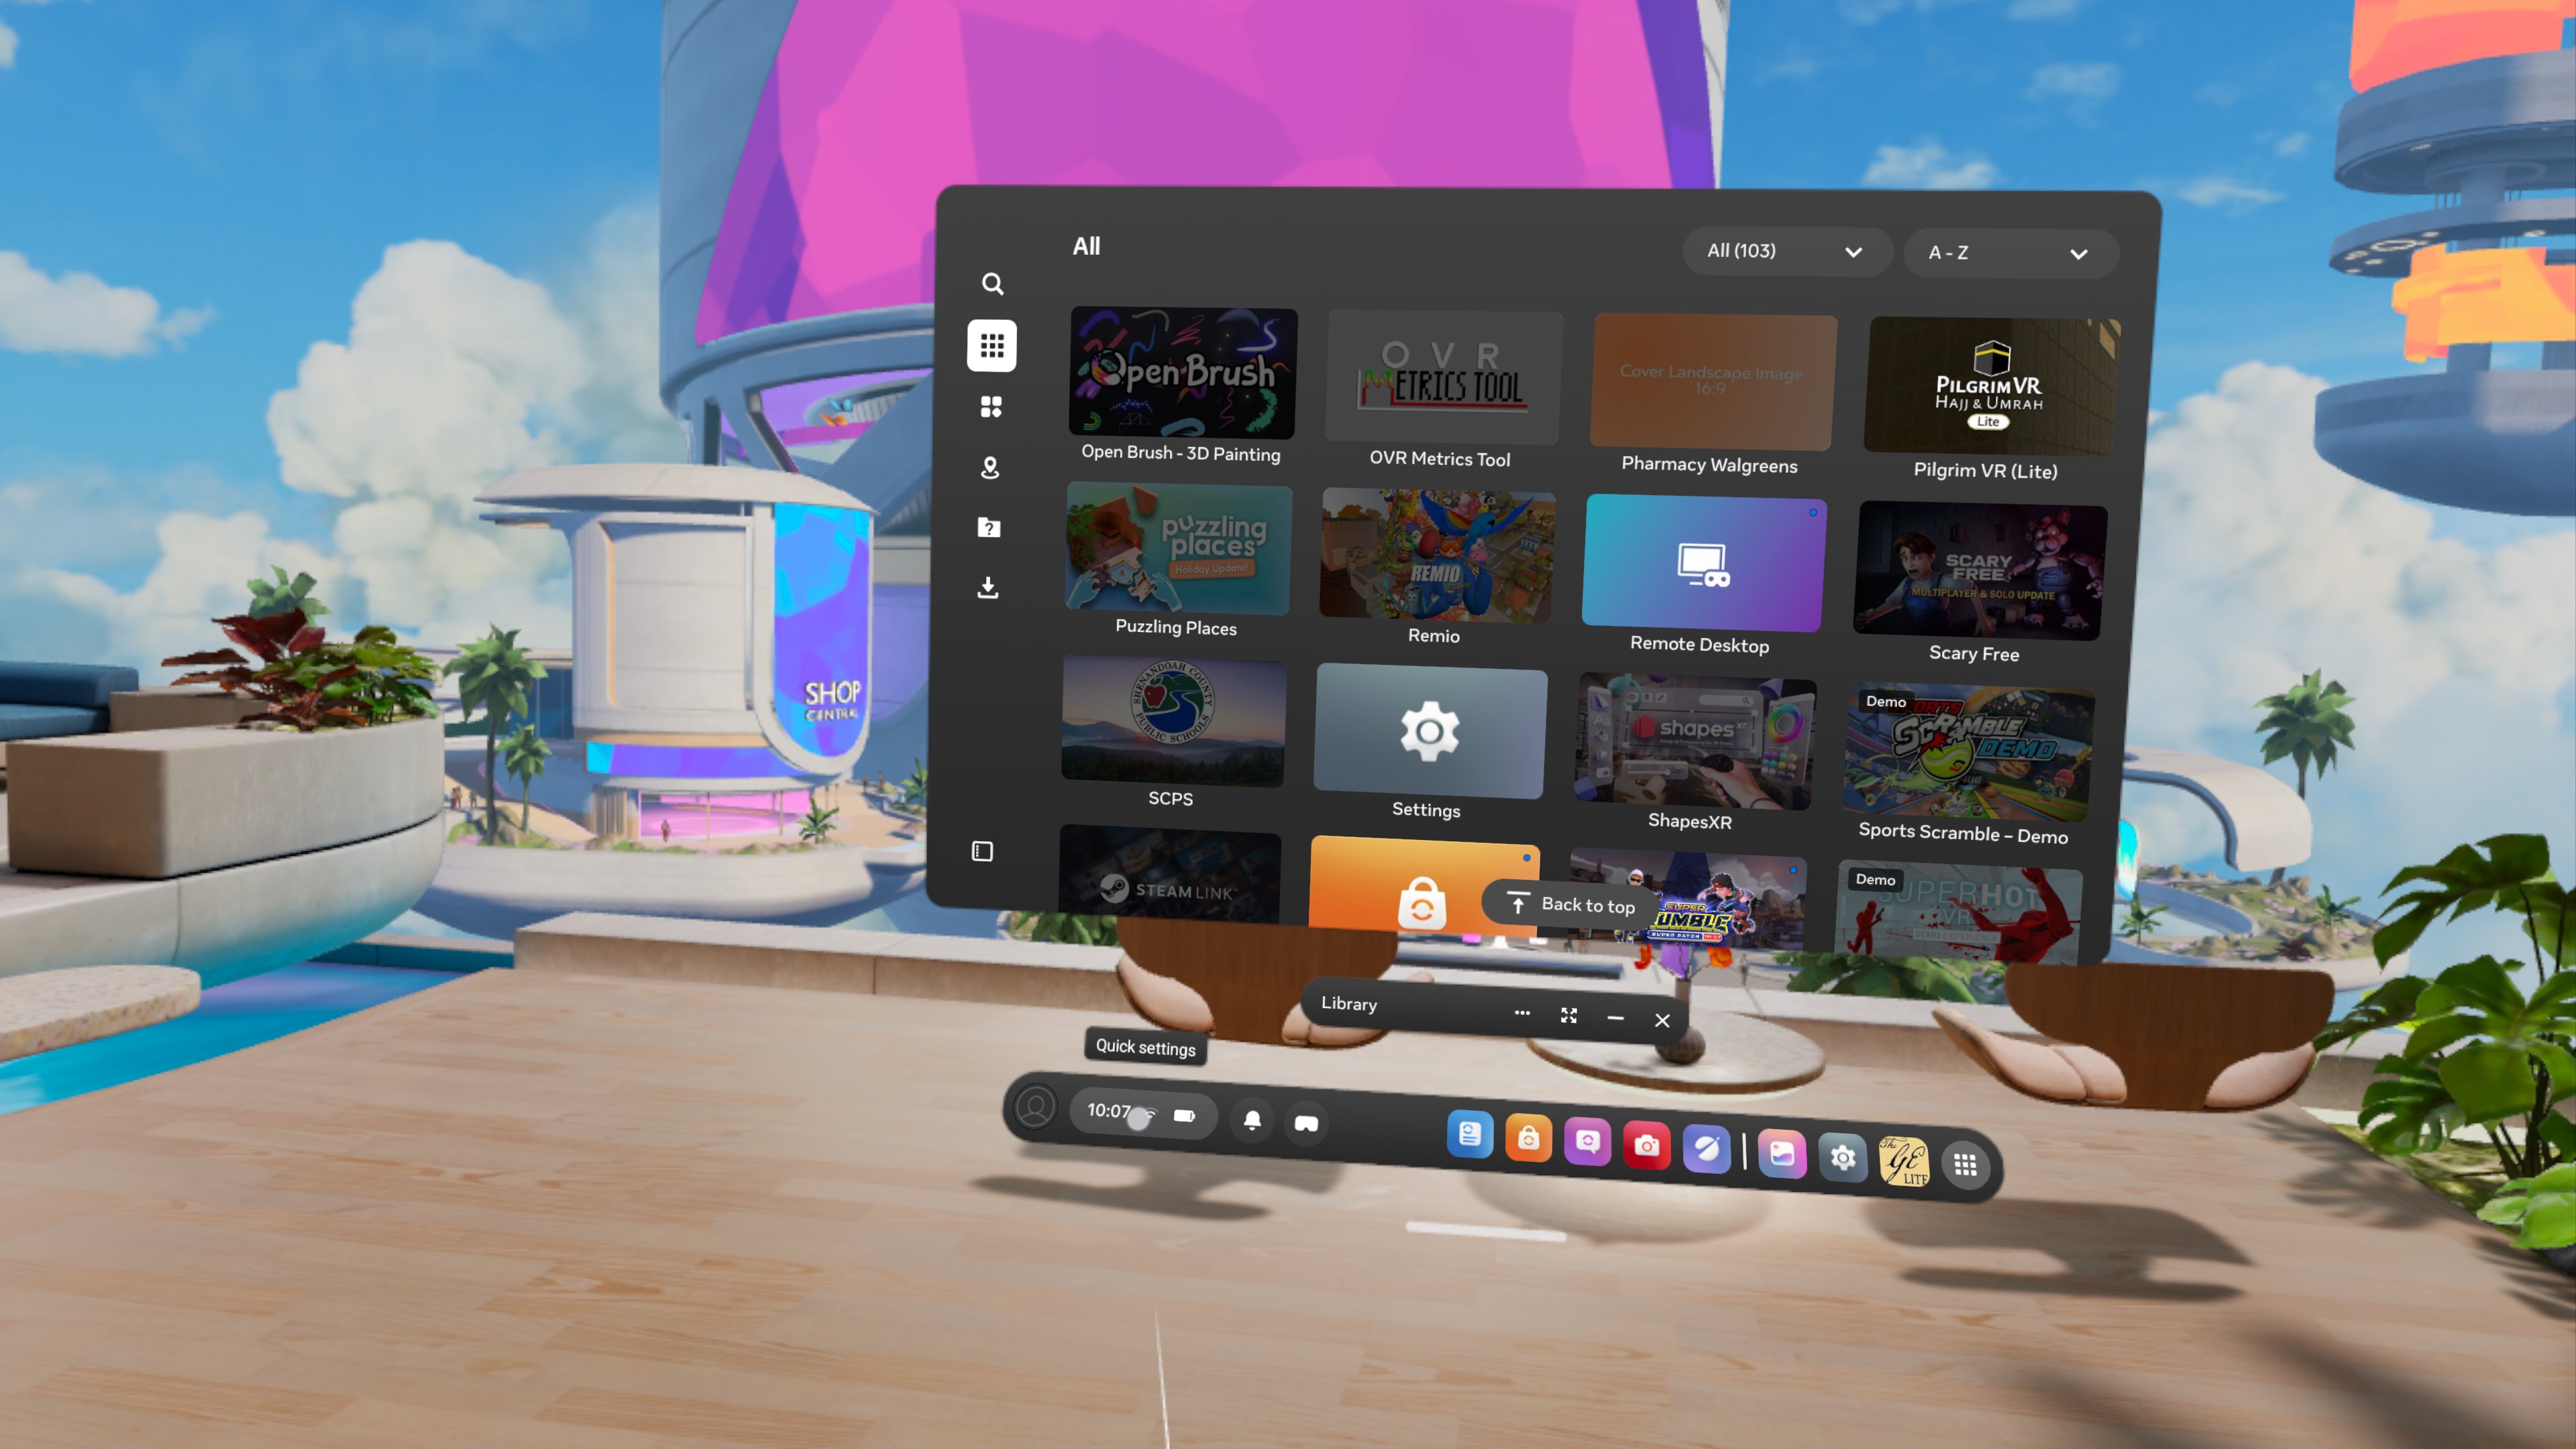
App Library
Lists all the apps downloaded on the headset. If you're looking for apps that are SCiL/student-specific, go to unknown sources by clicking the drop-down menu at the top of the screen and selecting unknown sources.
-
Closing open apps
Quest 3s: Hit the meta button on the controller, and an option (in blue) that says “quit app” should pop up. Select the “quit app” option to close the app.
Finding/watching 360 videos
Quest 3s: Open the DeoVR App in the App Library, then look towards the bottom. There should be a bar with different icons; select the folder icon. This should open a list of folders, select the folder labeled “Movies”. All 360 videos are in this folder. After selecting a 360 video, click the trigger button to have the video progress bar pop up. In the bottom left corner of the bar, there should be a TV screen that says “Flat”. Select the TV and choose the “360” option from the list that pops up.
Downloading Experiences
Getting Set-Up:
-
Have a headset, USB-C cable, and a Windows or Apple computer with Sidequest downloaded (all workstations should have Sidequest, it’s a big black circle with a white logo in the middle).
-
Connect the USB-C cable to the computer if not already connected
-
Connect the headset to the USB-C cable
-
Open Sidequest. In the upper left corner, it should show a green dot and say “Device Connected”. If it isn’t green, follow the actions necessary to finish connecting the headset
-
If you’re using a new headset and it says “Enable Dev Mode”, you’ll need an iPad to connect. Directions for enabling Dev Mode are listed below
-
If it says “unauthorized: Allow in headset”, put on the headset. There should be a box that says “Allow debugging” (or something along those lines). Either select “allow” or “always allow on this computer.”
-
Enabling Dev Mode:
-
Get an iPad and open the Meta Horizon app (Black app with a white circle outline that’s split in half).
-
In the upper left corner, there is a circle with an image of a headset. Select this button, then select “pair headset.”
-
The app will then ask how you want to connect your headset to Wi-Fi. The headset should already be connected to the Wi-Fi (if not, connect it to SUStream), so select “Headset already connected.”
-
The app will then ask you to provide the headset code. Type the code into the iPad.
-
To find the code, put on the headset and go into quick settings, then select settings.
-
After opening settings, on the left-hand side, there will be different options. Go to General, scroll down until you see About, and select About.
-
In the About page, there should be a black box that says “Pairing code” with a number; this is the code you type into the iPad.
-
-
It will then start pairing your headset and say “pairing successful” when it’s completed. Select “Continue” at the bottom of the screen, and continue to select “Continue” until “Close” pops up instead. Select “Close”.
-
You’ll be taken back to the home screen of the app. Select the Meta Quest pairing button again.
-
It will show you your headset. Select “Headset Settings” under the “Info” section, then select “Developer Mode” from the list that pops up.
-
Turn the sliding bar for Developer Mode “on” to enable Dev Mode in Sidequest.
-
If this doesn’t fix the problem with Sidequest, consult one of the more tech-savvy experts (Michael R, Wes, Nate, Lee, etc) because the problem has expanded
-
Downloading Playable Builds:
-
Go to Google Drive and find the “_PLAYABLE BUILDS” folder.
-
Select the “.apk” or “.zip” for the experience you want to download and select “download.”
-
If it says “can’t scan file for viruses,” select “Download anyway.”
-
-
If it’s a .zip file, after it’s done downloading, right-click the .zip file in your “Downloads” and select “unzip files” (or “Extract All” if there’s no “unzip” option). Make sure that after unzipping the folder, you have a file that’s listed as “.apk.”
-
Go to Sidequest and, in the upper right side of the screen, select the box with the arrow pointing down.
-
It will open up your computer files. Go to downloads and select the .apk file for the experience you want to download, then click “Open”.
-
A red box will pop up in the upper right corner with the number “1” in the middle.Clicking on it will take you to your current downloads and show you when the file is done downloading.
-
The file should be located in “Unknown Sources” on the headset when it’s completed.
Downloading 360 Videos:
-
Go to Google Drive and find the “360 Videos” folder.
-
Select the 360 video you want to download and hit the “download” button (when hovering on the file, there should be an arrow pointing down with a flat [ underneath it).
-
If it says “can’t scan file for viruses,” select “Download anyway.”
-
-
Go to Sidequest and, in the upper right side of the screen, select the folder icon (next to the box with the downward arrow).
-
There will be a list of folders with names. Select the “Movies” folder.
-
There will be a reddish-pink button with a + in the middle on the bottom left side of the screen. Hover over it, then move your cursor up to the purple circle with an upward arrow above a straight line. Click this button.
-
Your computer files will be pulled up, select the 360 video you downloaded from “Downloads,” and select “Open”.
-
Sidequest will, at the bottom, tell you that the 360 video is downloading, and have it pop up on the screen when it’s done downloading. It will be located in DeoVR (How to find inside of DeoVR is on the Quest Navigation page) when complete.
Downloading Videos For Playable Builds
Some builds, like Classroom VR, require the videos used in the build to be uploaded separately. The directions here will explain how to do so. Setting up is the same as it is at the top
-
Go to Google Drive and find the “_PLAYABLE BUILDS” folder.
-
There will likely be a folder for the application that has videos. Open this folder and locate the videos inside it.
-
Select the video to download by selecting the “download” button (when hovering on the file, there should be an arrow pointing down with a flat [ underneath it).
-
If Google Drive says something about there being potential “unscanned viruses”, select to “download anyway.”
-
-
Before moving further, open the APK file that you should have already downloaded to the headset and close it out before continuing on the computer.
-
Go to Sidequest and, in the upper right side of the screen, select the folder icon (next to the box with the downward arrow).
-
You will then select (and enter) “Android”, then “data”, then “com.scil.CMVR” (or whatever else the application may be labeled), and lastly “files.”
-
You should see a folder called “Unreal Games” when done. Do NOT open this folder; stay where you are.
-
If you could not locate “com.scil.CMVR” (or whatever else the application may be labeled), you did not open the APK file in the headset. Please do so, then go back to the previous folder (Android) and go back in (data) to try to locate it again.
-
-
There will be a reddish-pink button with a + in the middle on the bottom left side of the screen. Hover over it, then move your cursor up to the purple circle with an upward arrow above a straight line. Click this button.
-
Your computer files will be pulled up, select the video you downloaded from “Downloads,” and select “Open”.
-
Sidequest will, at the bottom, tell you that the videos are downloading, and have it pop up on the screen when it’s done downloading. Videos should be viewable within the playable application now.
Setting up Quest Link
Connecting the Quest 3 to workstation computers
-
Plug the headset into the white cable that’s connected to the computer
-
Log in to the workstation computer
-
Open the Meta Quest application. If it’s your first time using the computer, select “Log In.”
-
A pop-up browser will pop up asking how you’d like to log in, select to use email, and type in the email (scil@su.edu). Then, when it asks for a code, select “use password instead” (scil1234) and select to “skip” when it asks you to update the password
-
Select “confirm” when it wants to be sure it’s you, and then “Open in Meta Quest” and “open” again when the rectangle asking if you want to open the app outside of the browser at the top pops up
|
If you receive an Error ⨷
|
-
The Meta Quest application will then have the Quest 3 pop up, and ask if this is your device. If it does, click yes. If it doesn’t, put on the Quest 3, go to quick settings, and select the “questlink” option.
-
It may also ask you to select what headset you’re using, in which case you should select “Quest 3.”
-
-
The Meta Quest application will then show if the cable link has been made. Hit continue twice
-
It will then tell you that the application is ready, at which point you can click “continue” again and put on the headset to use Meta Quest
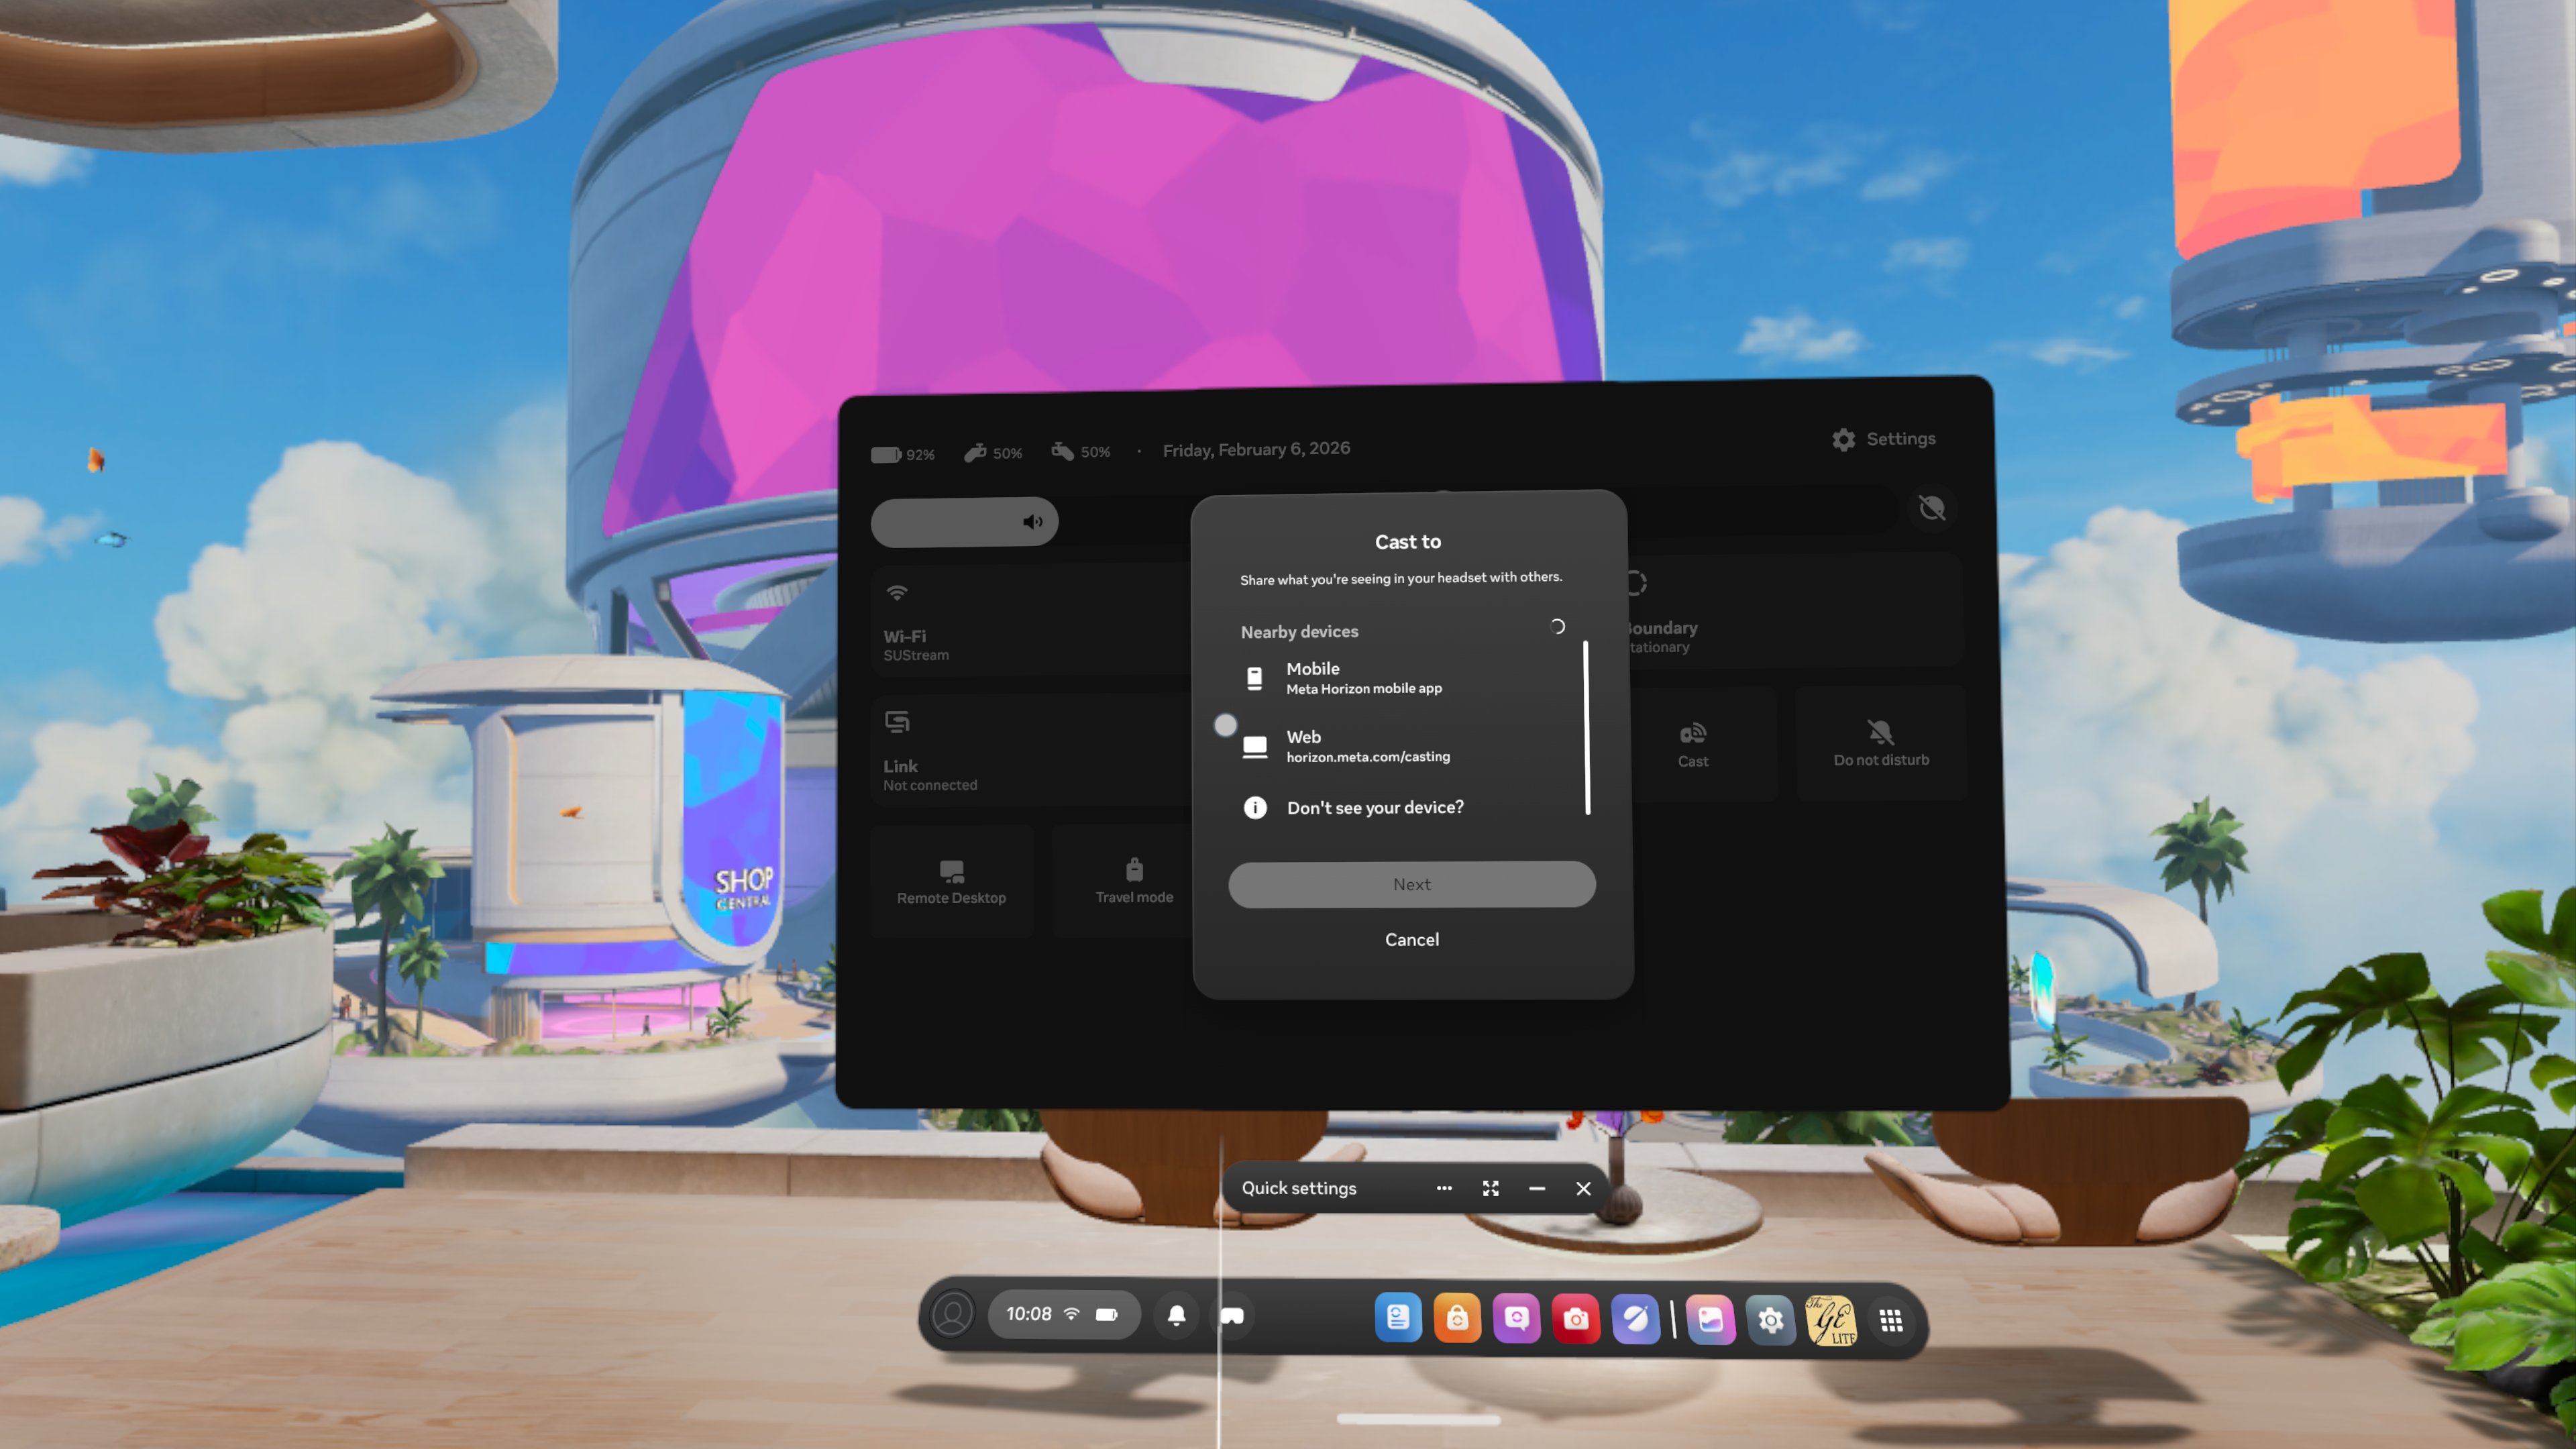
Headset Casting
Getting Set-Up:
-
Have a headset, USB-C cable, and a Windows or Apple computer with Meta Quest Developer or Sidequest downloaded (all workstations should have one of these two apps)
-
Connect the USB-C cable to the computer if not already connected
-
Connect the headset to the USB-C cable
Streaming From Computer:
-
If you’re streaming an app that’s on the computer, open the Meta Quest Developer app
-
On the left-hand side, there’s a bar. Select “Device Manager”
-
Make sure it says “Connected” at the top of the page in green
-
If it’s not connected and orange, go into the headset and select “Always allow on this computer”
-
-
Scroll down to the bottom, where there’s a list of headset commands
-
First button says “cast,” select it
- Another option for casting is from Sidequest, so open the Sidequest app
Streaming From Headset:
-
If you’re streaming an app that’s on the headset, open a web browser on a computer
-
Search oculus.com/casting
-
If first time, you’ll need to log in. Use the meta quest email and password
-
-
Then, follow the instructions provided on the screen to cast to the headset
- Another option is to go to settings in the headset
- Select Cast
- Select "Web" then "Next"
Streaming From iPad:
-
Open the Meta Horizon app on iPad
-
This is a black app with a white circle split in half
-
-
Then, in the headset, go to settings
-
Find the cast button and click it
-
Select “mobile” then “Next”
-
Screen Capture
Getting Set-Up:
-
Have a headset, USB-C cable, and a Windows or Apple computer with Sidequest downloaded (all workstations should have Sidequest, it’s a big black circle with a white logo in the middle).
-
Connect the USB-C cable to the computer if not already connected
-
Connect the headset to the USB-C cable
-
Open Sidequest. In the upper left corner, it should show a green dot and say “Device Connected”. If it isn’t green, follow the actions necessary to finish connecting the headset
-
If you’re using a new headset and it says “Enable Dev Mode”, you’ll need an iPad to connect. Directions for enabling Dev Mode are listed in “Downloading Experiences.”
-
If it says “unauthorized: Allow in headset”, put on the headset. There should be a box that says “Allow debugging” (or something along those lines). Either select “allow” or “always allow on this computer.”
-
Taking a Screenshot on PC:
-
Open the project or application you want to capture.
-
Press ‘Windows key + Shift + S’ to select a snippet of the screen.
-
Drag your mouse to one of the “corners” of the photo you want to take, left-click and hold, then drag to the “end corner” of the photo you want to take before letting go.
-
Save file to PC by clicking on the notification for the screenshot in the lower right corner of the screen and then selecting the save option at the top right side of the editing window (should be right under the minimize button and to the left of the two squares)
-
If you aren’t able to save the picture in a specific location (such as downloads) before the notification appears, it should be in the computer files anyway
-
Open “Pictures,” then there should be a folder labelled “Screenshots”. This is where the picture will automatically go.
-
-
Taking a Screenshot on a VR Headset:
-
Open the project or application you want to capture.
-
Press the Meta button on the right-hand controller
-
Select the camera icon with a plus sign on it that says “Take Photo” when you hover on it on the pop-up menu above “Quit” and “Resume.”
-
Select “Resume” to get rid of the pop-up menu for the screenshot
-
A red dot slightly above your head will count down to the moment of screen capture
-
-
Another picture option: hold the meta button, then quickly press the right trigger button
-
-
This option is for screenshots needed to be taken outside of an app/application
-
-
-
Download the screenshot through SideQuest
-
Open SideQuest
-
Select the Folder icon in the upper right side of the screen, then scroll down to Oculus, select it, then select Screenshots
-
Save the files you want to download by selecting the button next to the orange X on the file you want to download
-
A pop-up browser will show up telling you where the photo will be saved on your PC. If you want to change the location, select “Select Location” and then, after picking the location, select “Select Folder” before hitting “Save to PC” in the bottom right corner of the pop-up
-
-
PC Video Capture:
-
Open the project or application you want to capture.
-
Open OBS from the desktop
-
If not not the desktop search for OBS using the Windows search bar
-
If OBS has not been installed on the computer, you can find OBS here: https://obsproject.com/. You will need to ask a SCIL staff member for permission to install
-
-
Create the scene and source image
-
Hit the plus button at the bottom of the scene display list
-
With the new scene selected, hit the plus button at the bottom of the source list
-
Select a window capture source from the dropdown menu
-
Double-click your source and set the capture window to the project you wish to capture
-
-
Adjust OBS output for correct resolution and file format
-
Under the far right-hand menu, hit “Settings.”
-
Once inside the settings menu, select the output tab on the left side
-
Under recording, change the recording path to a desired destination
-
Under recording, change the file format to the desired output (This is usually mp4)
-
-
Make sure the canvas resolution is set to a reasonable size
-
Under the far right-hand menu, hit “Settings.”
-
Once inside the settings menu, select the video tab on the left side.
-
Change the canvas resolution to the desired size. ( Usually 1920x1080)
-
-
Record the application
-
On the main layout screen, hit the start recording button
-
This will begin to record your application
-
-
Once done, hit the same button to stop the recording
-
You will now find your recorded video at the file path you specified in step 4
-
Oculus Quest 1
Specs & Basic Capabilities
Controllers: Oculus Touch Controllers (2)
Tethered?: Optional
Lighthouses?: No
Tracking: Inside-Out, 6DOF
Display panel: Dual OLED 1600x1440
Resolution (per eye): 1440 × 1600
Refresh rate: 72 Hz
Audio: Integrated positional audio
Storage: 64GB
Processor: Qualcomm Snapdragon 835 system-on-chip
Usage modes: Seated, standing, and room scale
https://developer.oculus.com/resources/oculus-device-specs/
Oculus Quest 2
Specs & Basic Capabilities
Controllers: Oculus Touch Controllers (2)
Tethered?: Optional
Lighthouses?: No
Tracking: Inside-Out, 6DOF
Display panel: Fast-switch LCD
Resolution (per eye): 1832 x 1920
Refresh rate: 60, 72, 90 Hz supported
Audio: Integrated positional audio
Storage: 128GB
Processor: Qualcomm® Snapdragon™ XR2 Platform
Usage modes: Seated, standing, and room scale
https://developer.oculus.com/resources/oculus-device-specs/
Oculus Rift S
Specs & Basic Capabilities
Controllers: 2 x Oculus Touch (second generation)
Tethered?: Yes
Lighthouses?: No
Tracking: Inside-Out, 6 DOF
Display panel: Single LCD
Resolution (per eye): 1280x1440
Refresh rate: 80 Hz
Audio: Integrated Stereo Speakers
Storage: Dependent on computer
Processor: Dependent on computer
Usage modes: Seating, standing
Oculus Rift/Link Login Error
If you are having the following issue that looks like the following:
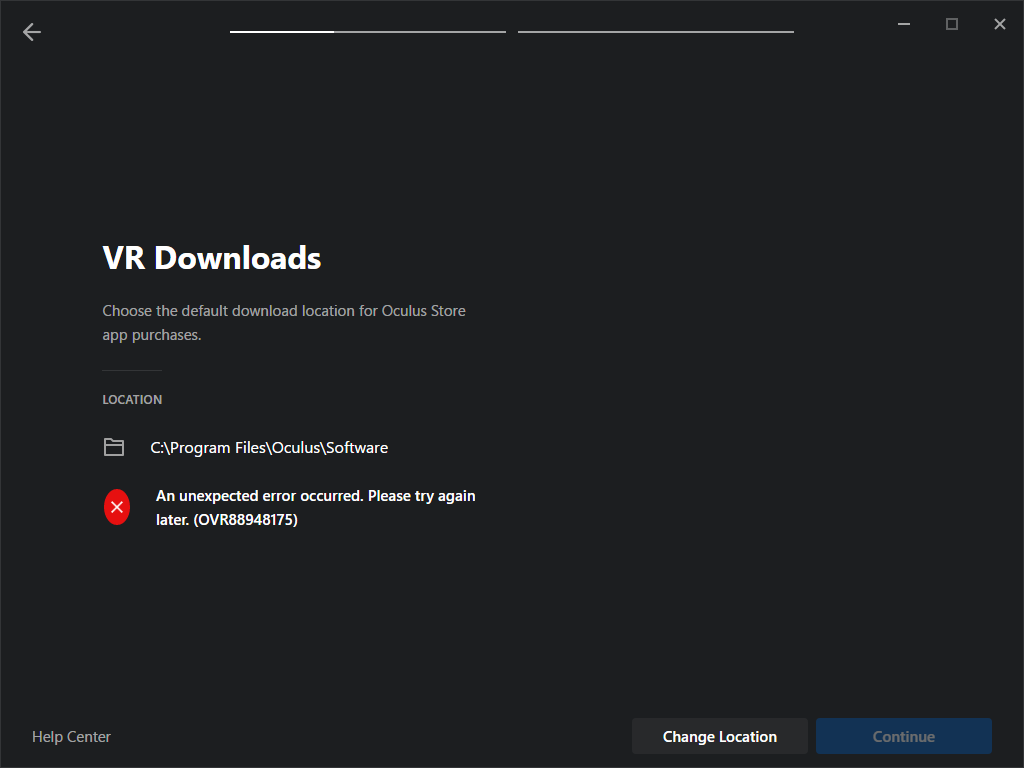
Close the software.
Open a windows command prompt from the start menu (or search). Copy the following line below and paste into the command prompt, then press enter.
REG ADD "HKCU\Software\Oculus VR, LLC\Oculus\Libraries"
Reopen Oculus software and verify you can move forward with setup.
Pico Neo 3 Eye
Specs & Basic Capabilities
Controllers: 2 x Pico Neo 3 Controller
Tethered?: Optional
Lighthouses?: No
Tracking: Inside-Out, 6 DOF
Display panel: Single LCD
Resolution (per eye): 1832x1920
Refresh rate: 90 Hz
Audio: Integrated stereo speakers
Storage: 128 GB
Processor:
Chipset Qualcomm Snapdragon XR2
CPU Octa-core Kryo 585 (1 x 2.84 GHz, 3 x 2.42 GHz, 4 x 1.8 GHz)
GPU Adreno 650
Usage modes: Sitting, standing, room scale
Magic Leap
Specs & Basic Capabilities
Controllers: 1 x Magic Leap Controller
Tethered?: Optional
Lighthouses?: No
Tracking: Inside-Out, 6 DOF
Display panel: Waveguide Display
Resolution (per eye): 1280x960
Refresh rate: 122 Hz
Audio: Integrated Stereo Speakers
Storage: 128 GB (approximately 95 GB available to applications)
Processor: NVIDIA® Parker SOC CPU: 2 Denver 2.0 64-bit cores + 4 ARM Cortex A57 64-bit cores (2 A57’s and 1 Denver accessible to applications) GPU: NVIDIA Pascal™, 256 CUDA cores Graphic APIs: OpenGL 4.5, Vulkan, OpenGL ES 3.3+
Usage modes: Seated, standing, and room scale
https://developer.magicleap.com/en-us/learn/guides/magic-leap-one-hardware-specifications
Care and Maintenance
Oculus Quest 1:
- Use a dry optical lens microfiber cloth to clean the lenses. Wipe gently in a circular motion, moving from the center outwards. Never use liquid cleaners, alcohol, or soap on the lenses.
- Never leave the headset with lenses facing direct sunlight, as this will cause permanent, irreversible screen damage.
- Use a dry microfiber cloth to wipe the exterior body and the 4 tracking sensors.
- Use non-abrasive, alcohol-free antibacterial wipes for the straps and face pas.
- The facial interface foam can be removed and hand-washed with cool water and mild soaps, then left to air dry completely.
- Wipe down controllers with a dry cloth or non-abrasive, alcohol-free antibacterial wipes.
- Store the headset in a cool, dark, and enclosed case, especially if near windows.
- If you wear glasses, use the glasses space provided to prevent lens scratching.
- Insert and remove cables carefully to avoid damaging the ports.
Oculus Quest 2:
- Look above, many of the requirements for the Oculus Quest 1 also apply to the Oculus Quest 2.
- Gently clean the 4 exterior cameras with a microfiber cloth.