Immersive Video
- GoPro 360 Camera
- Getting started with Unreal Live-Action Cinematics
- DSLR Camera Information
- ISO
- F-stop and Aperture
- Shutter Speed
- Exposure and the Exposure Triangle
- Depth of Field
- Camera Settings: the Mode Dial
- White Balance
GoPro 360 Camera
When shooting 360 videos there are several important steps along the way to making sure your footage is ready to edit in premiere.
First, You must make sure your go pro settings are correct. 360 video, 5.6k Resolution, 30 FPS.
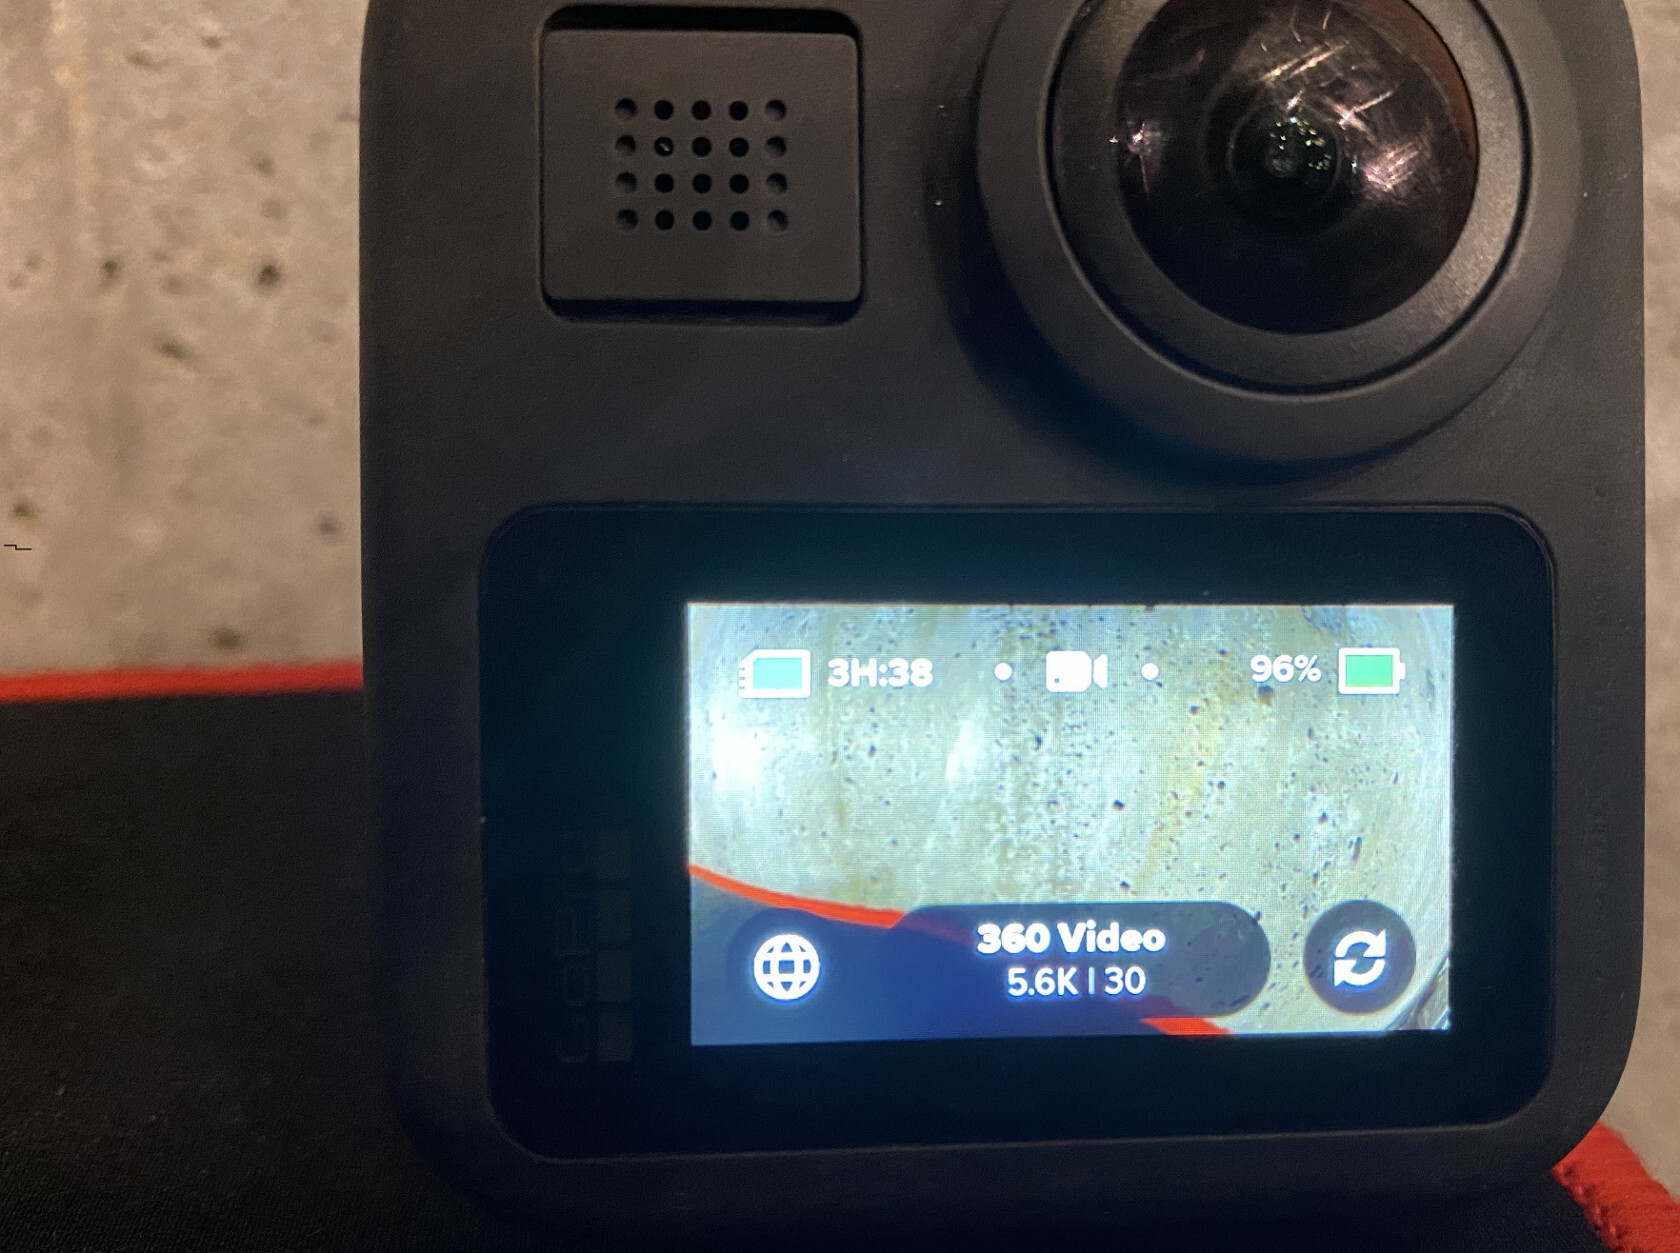
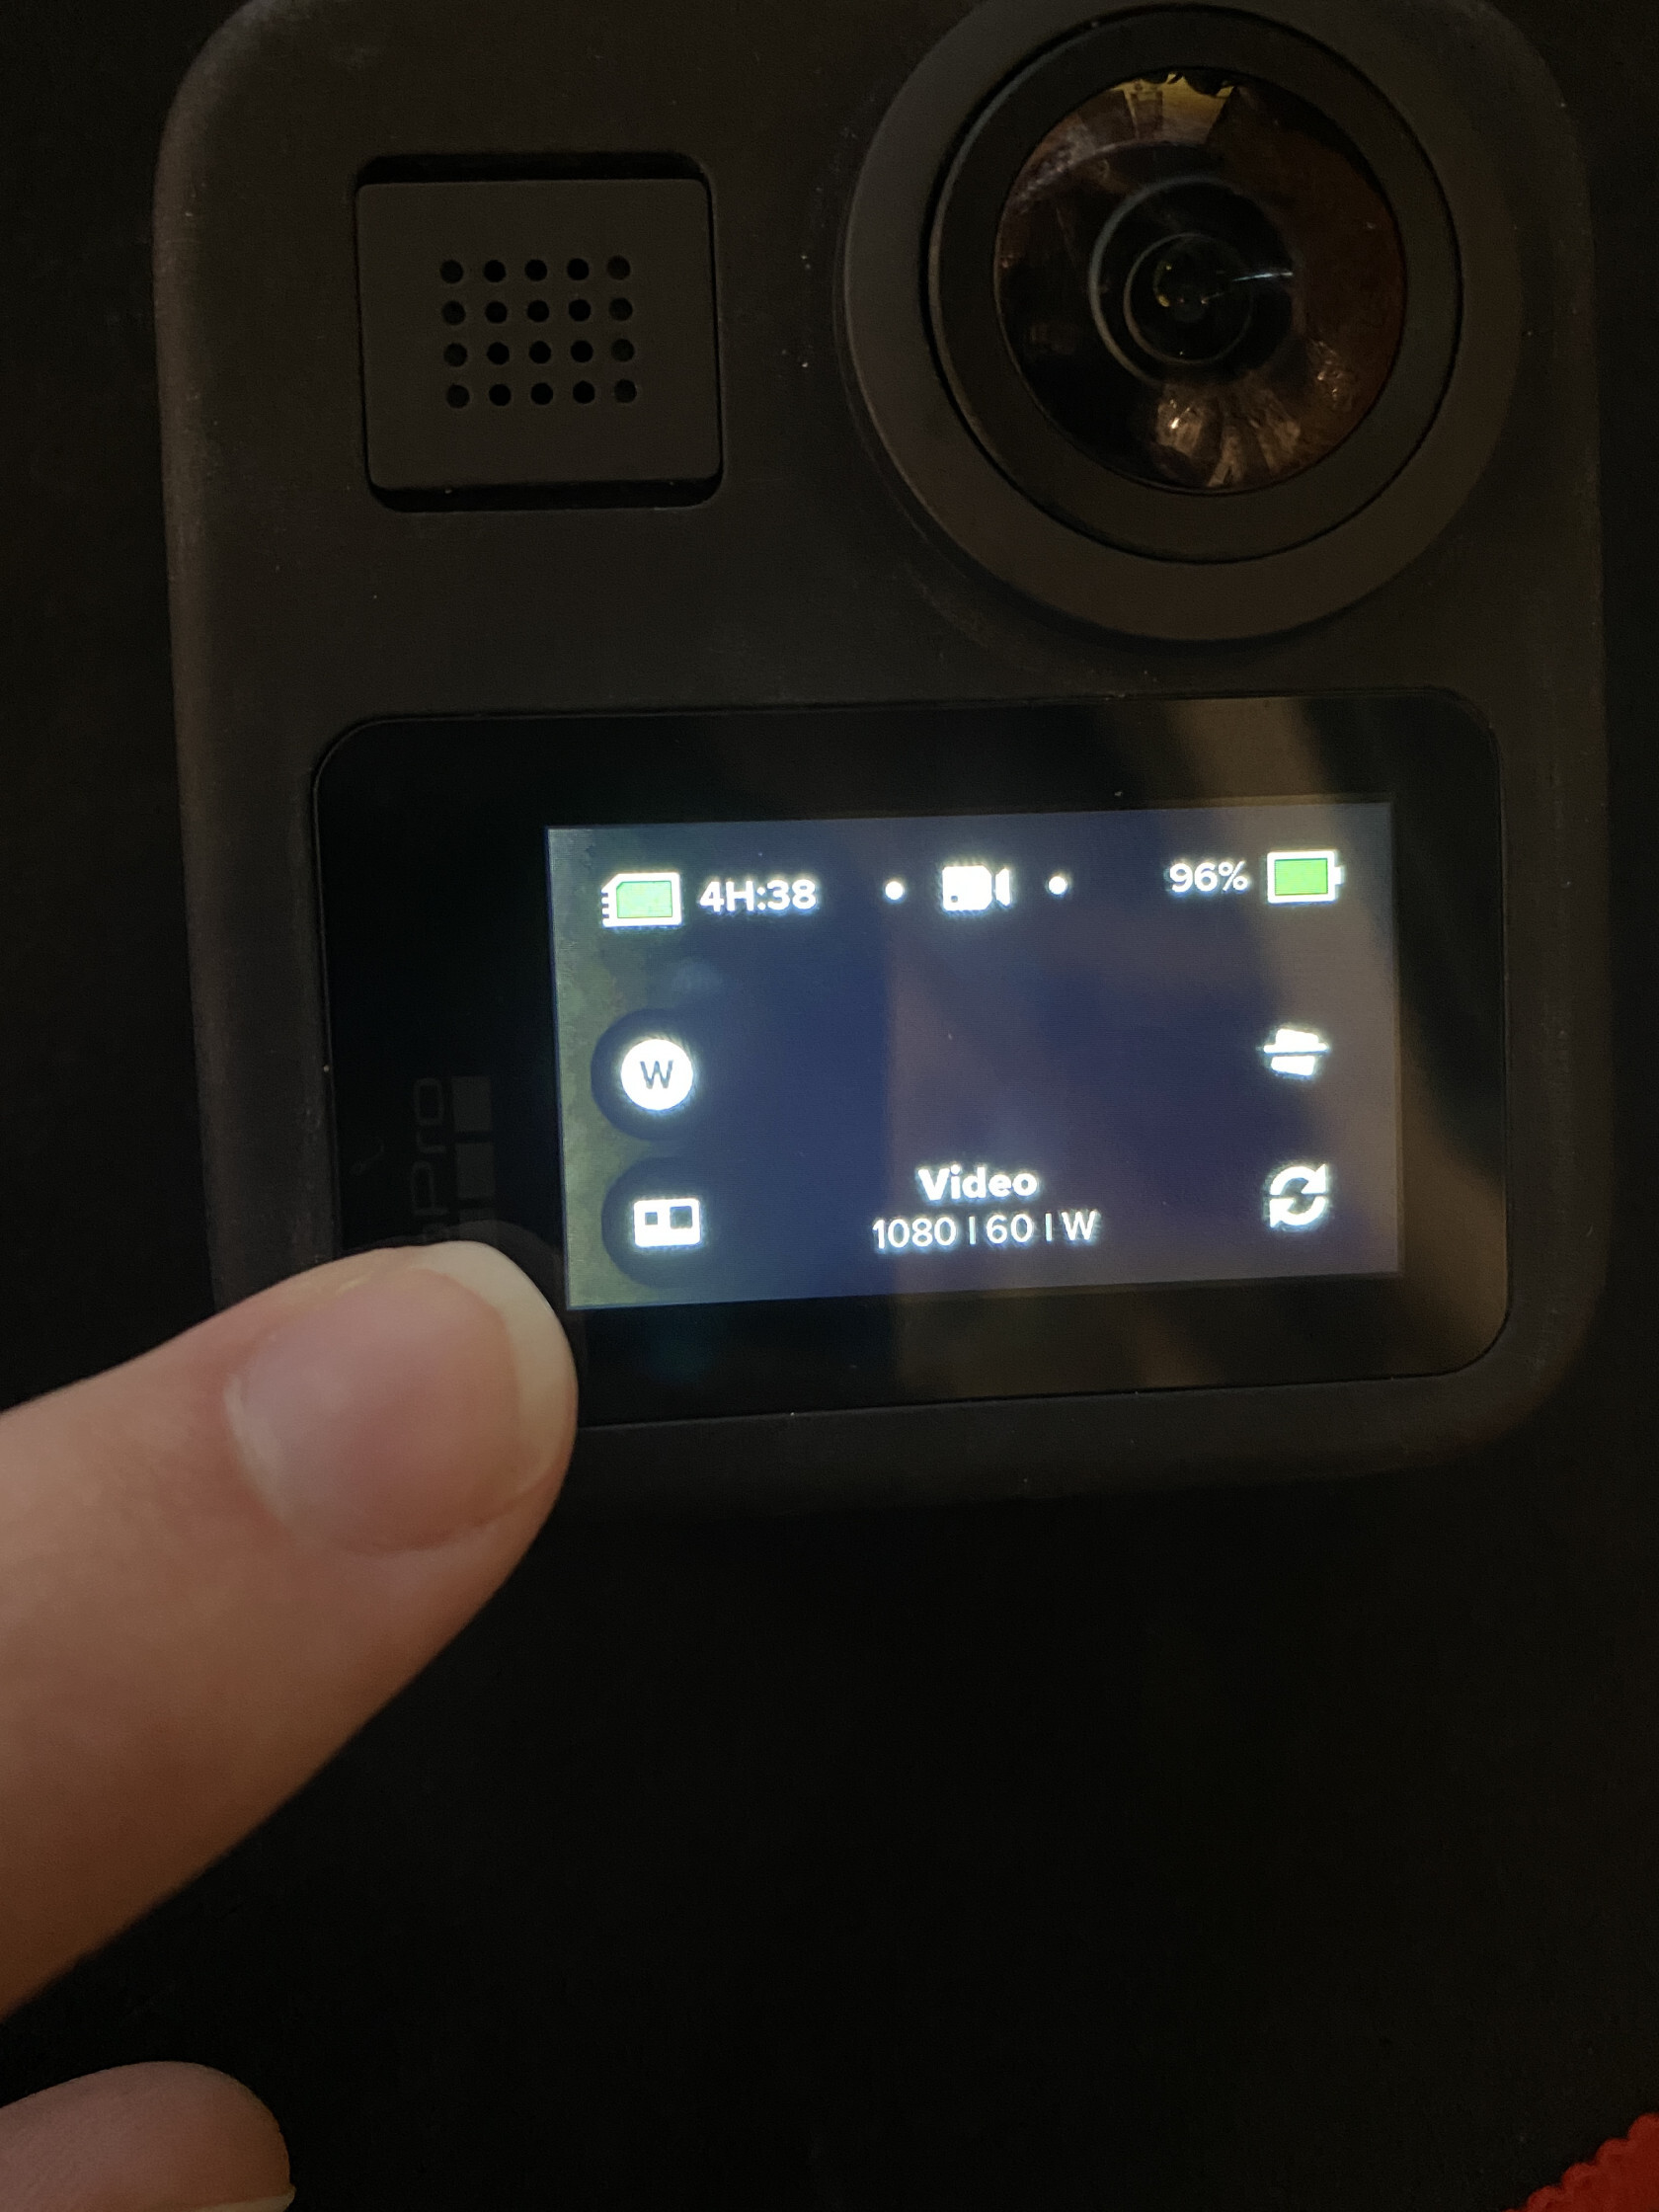
If the camera is not already on 360, press the icon in the bottom left corner of the screen. This will change to 360 modes.
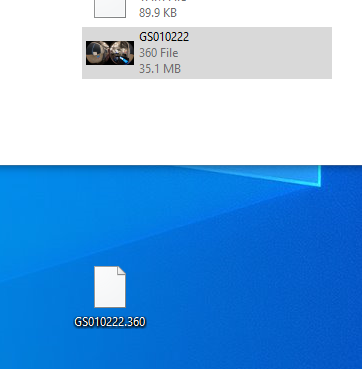
You are now set up to start recording some video, but you are not done yet. Once you have your footage, off of the go pro, it will be in a format called 360.
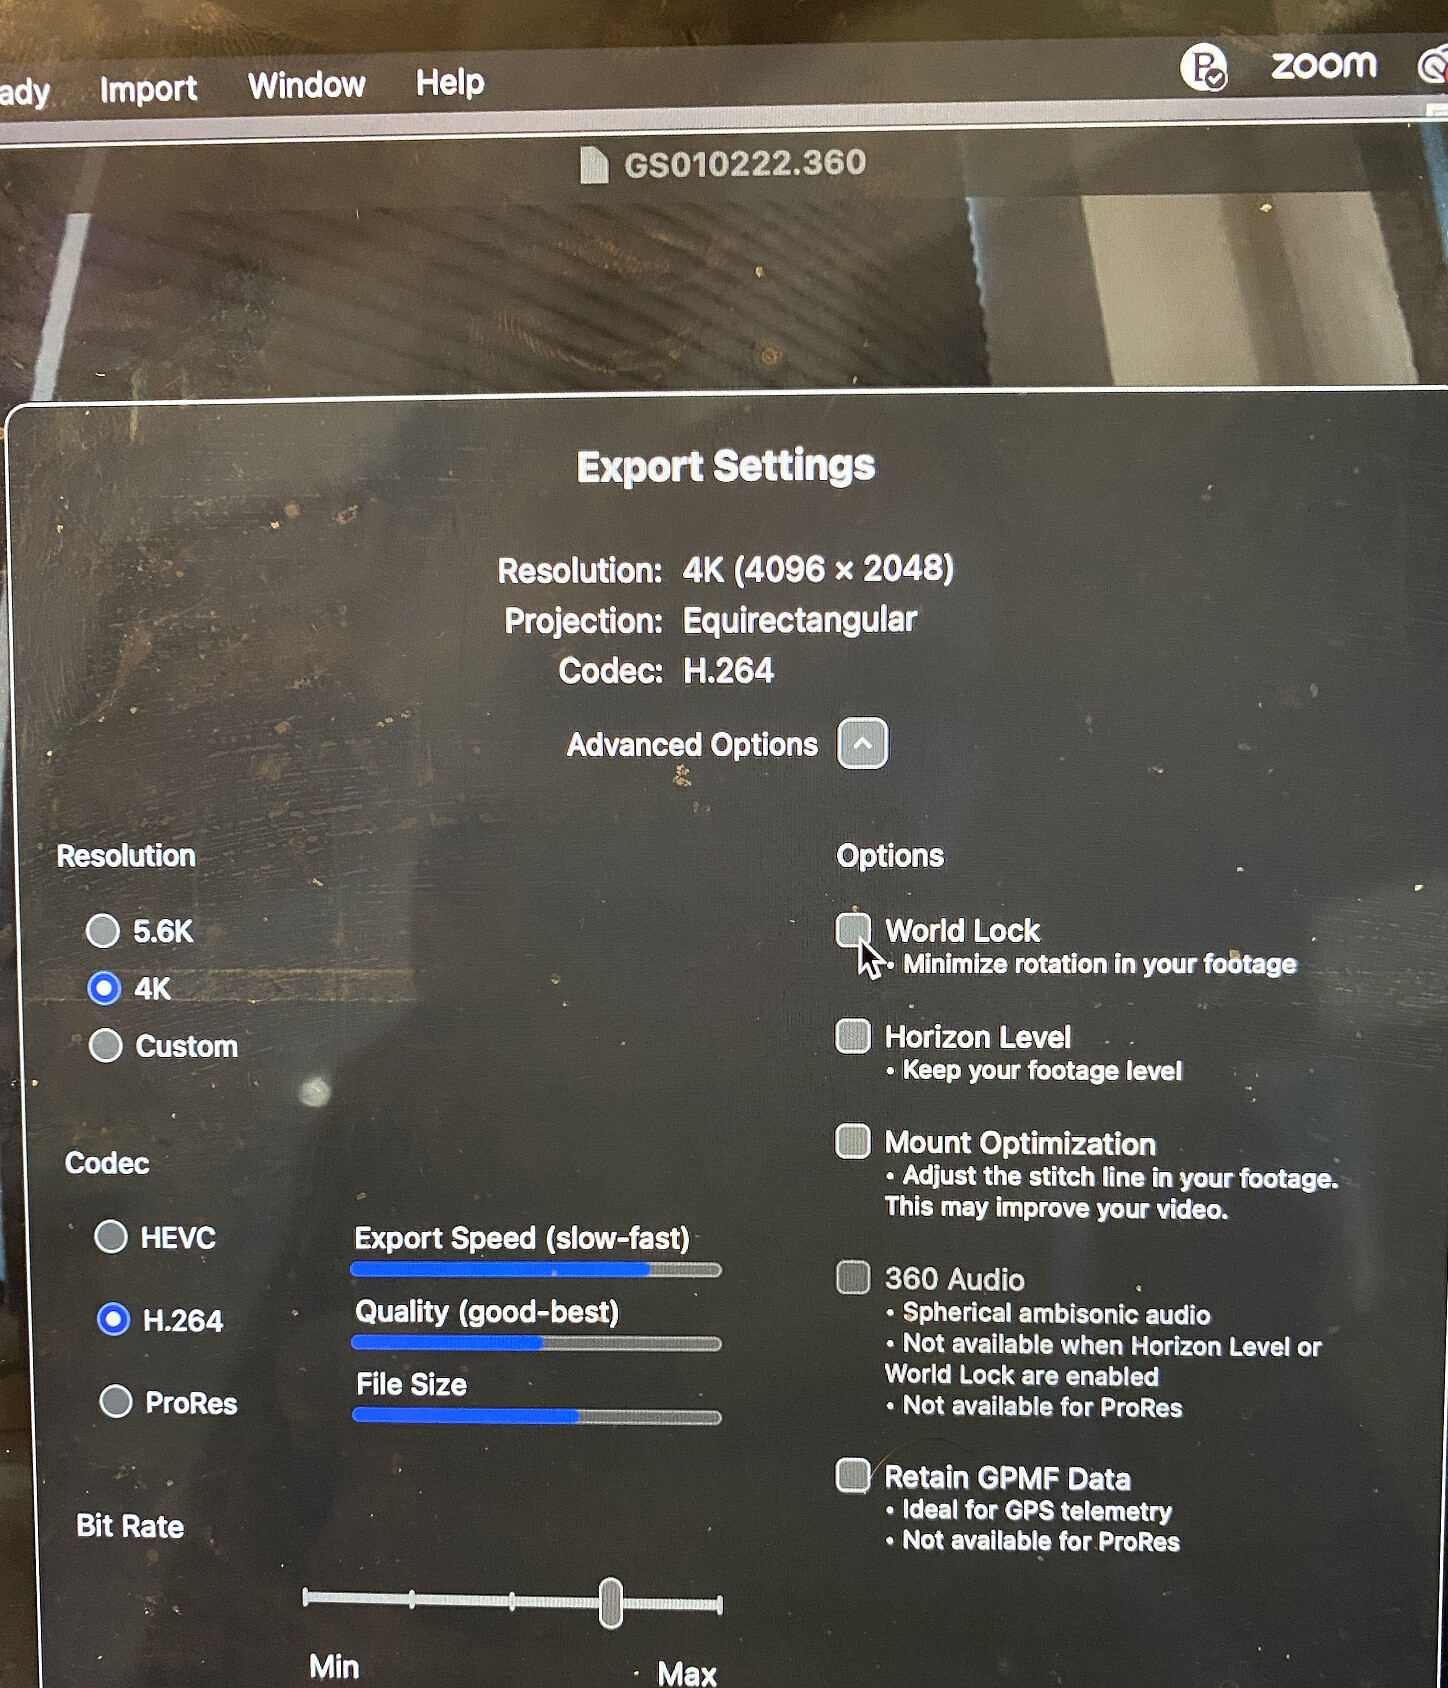
You will need to get the official GoPro Player and open your 360 files with it. Once open, Go to file Export As and select 4k.
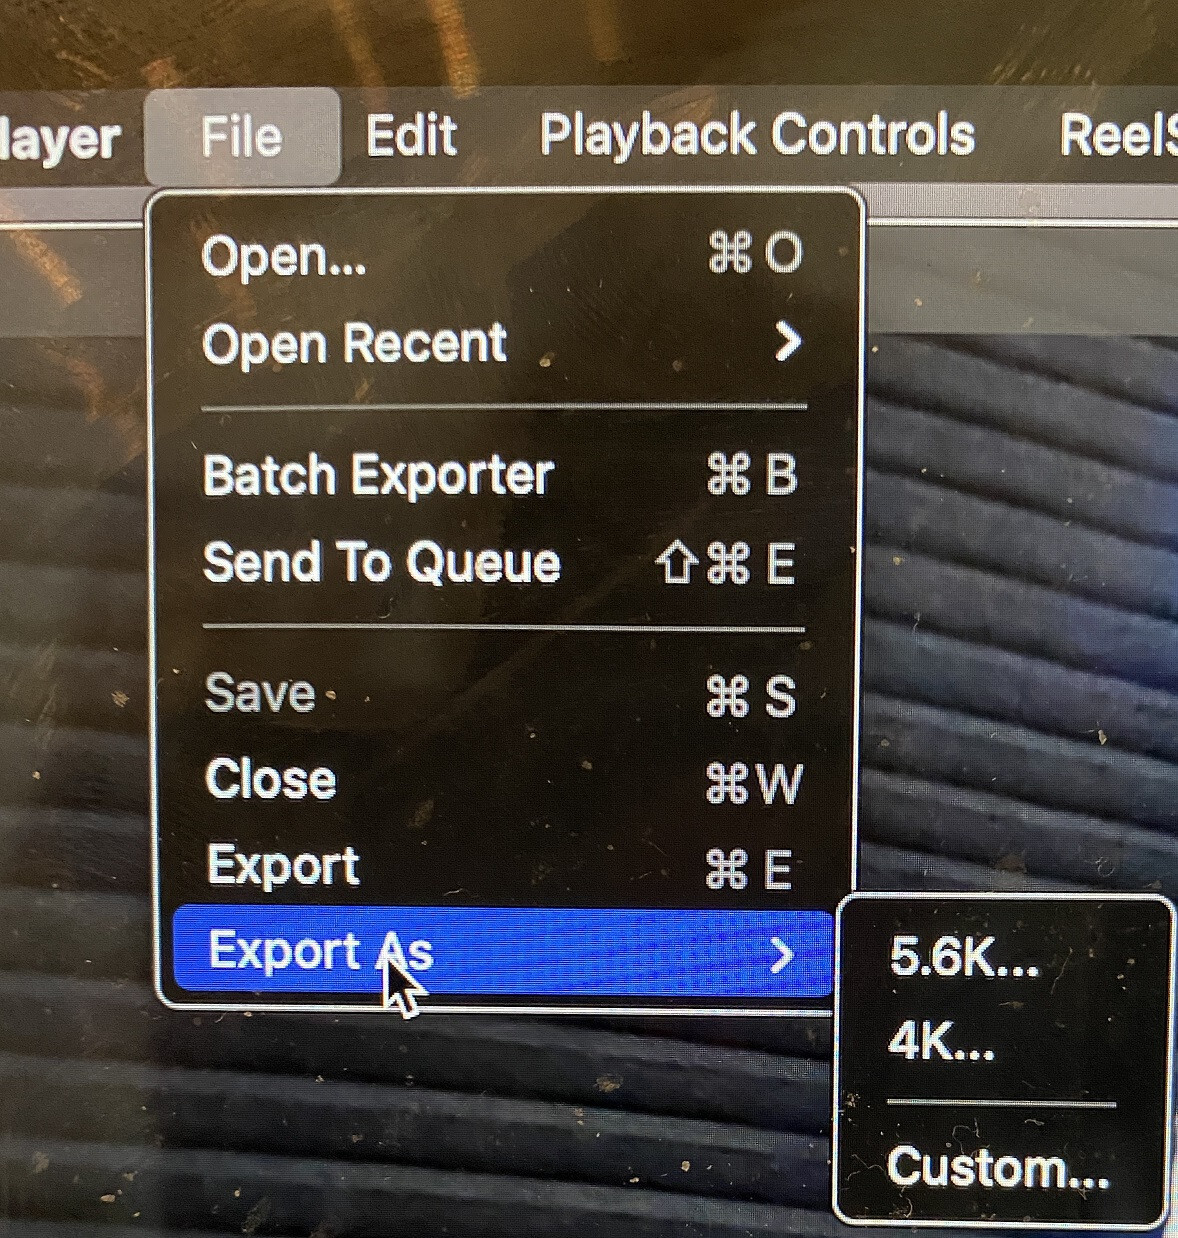
You will then get the menu below. Again, the Resolution should be 4k. The Codec should be H.264. Finally, turn off World Lock and Horizon Level. Keeping this setting on will still footage spin.
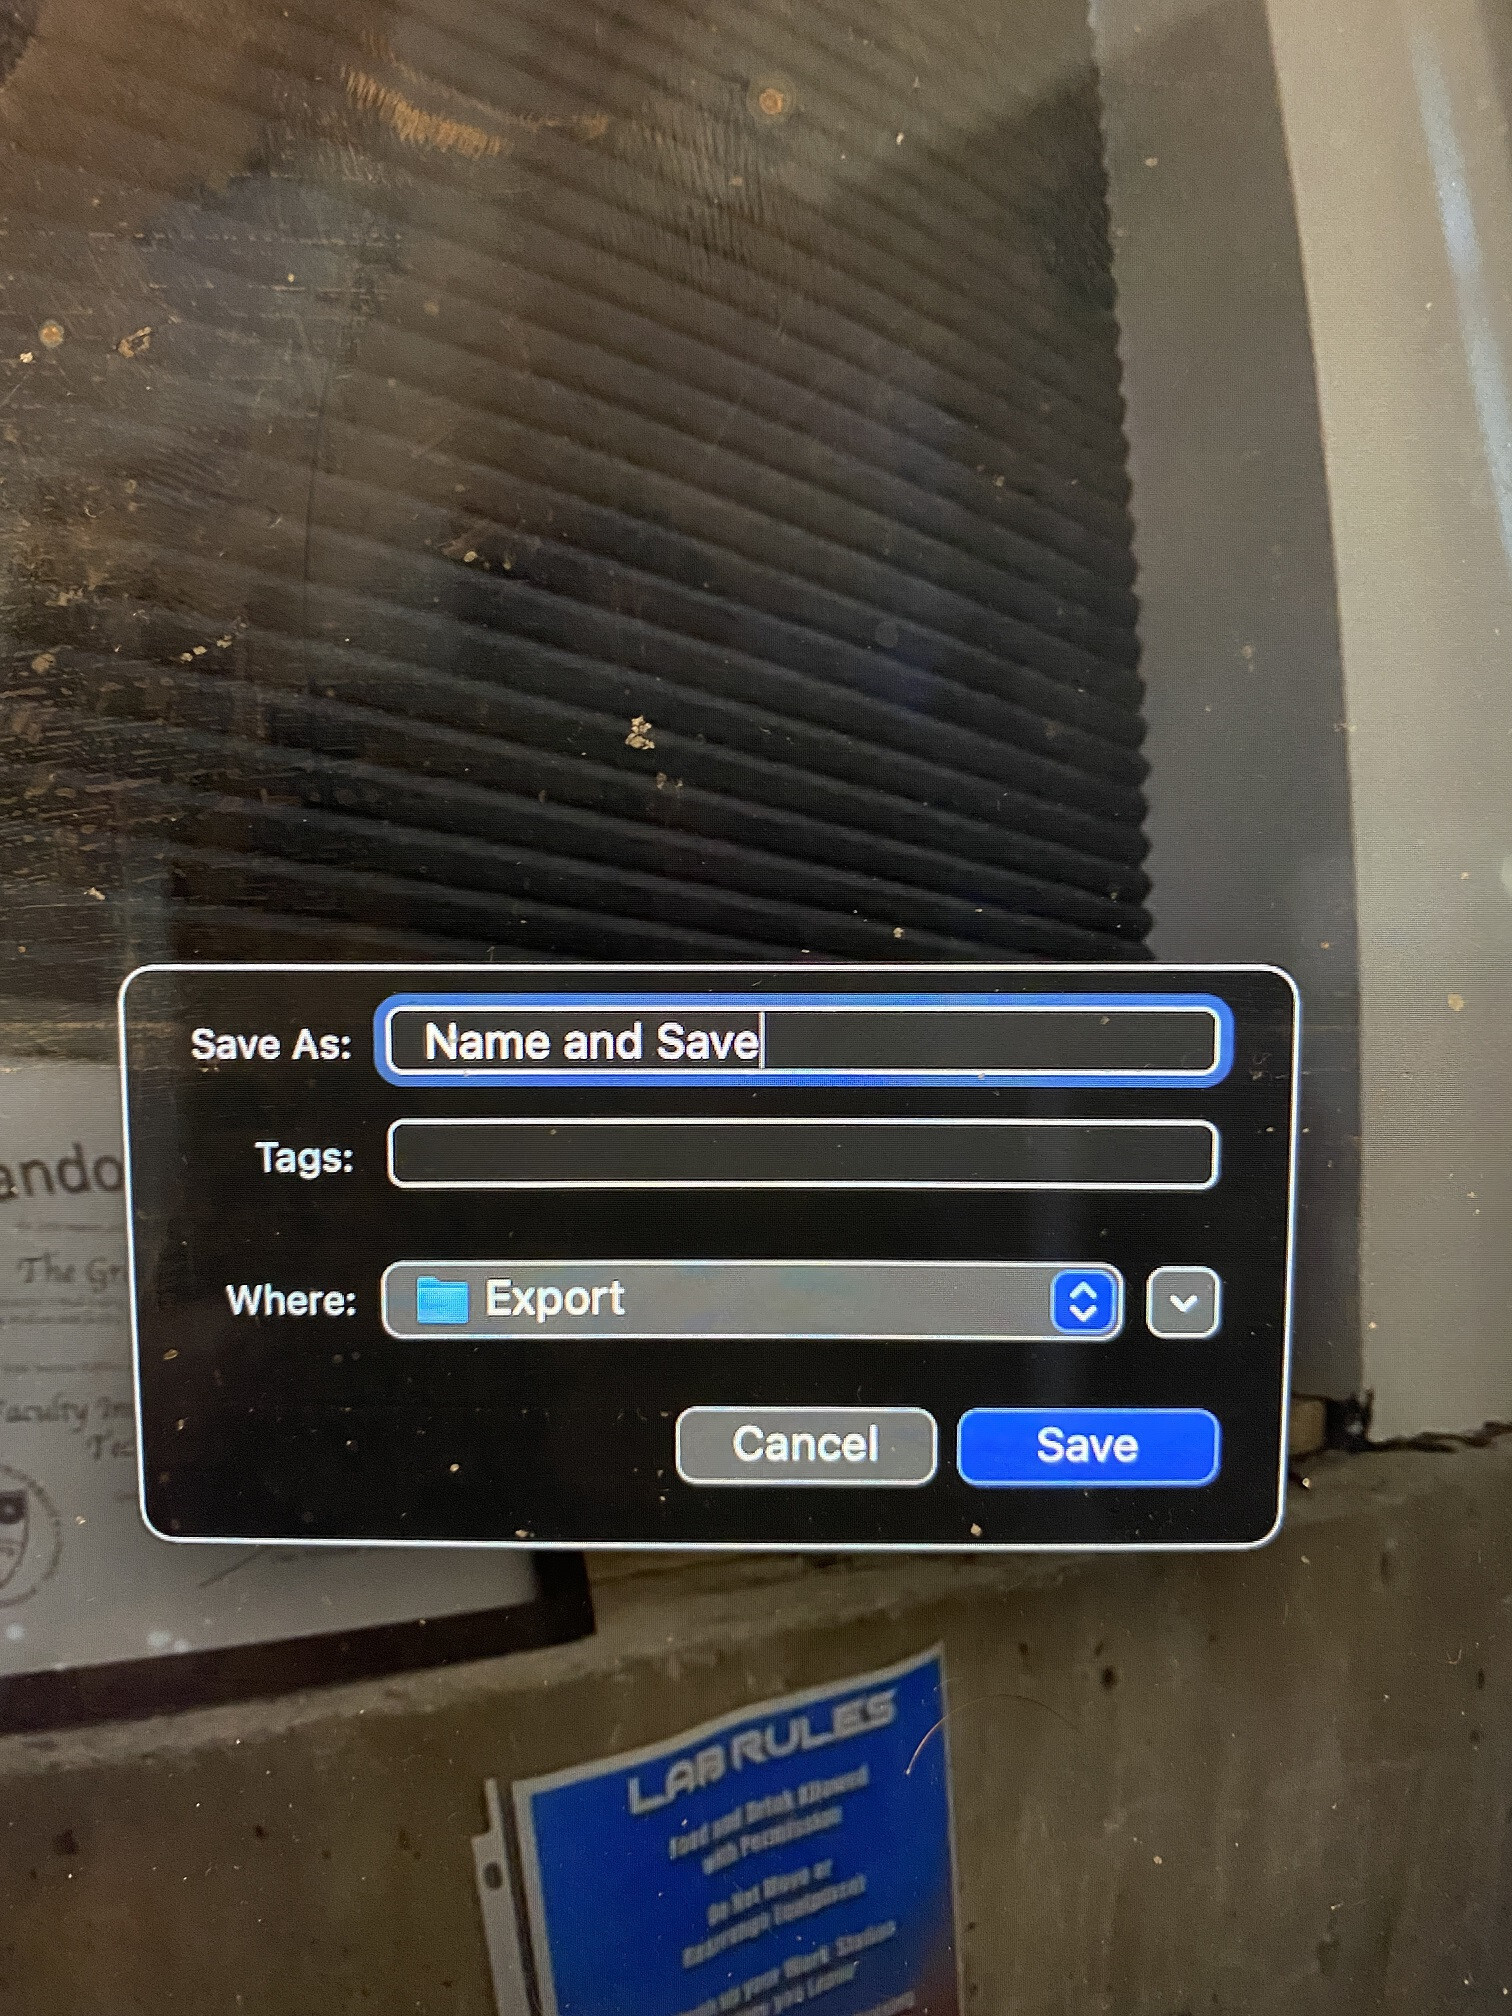
You can Name and Save your video. It is now ready to be edited in premier pro.
Happy Filming!
Getting started with Unreal Live-Action Cinematics
This guide is a work in progress.
About
This guide provides an OVERVIEW of Unreal live-action cinematic video. Covered in this guide include tutorials to get familiar with Unreal, tools and hardware required, the checklist of operations, and an overview of the template project. To avoid confusion, this guide does not cover the capturing and exporting video from Unreal. Another guide will be posted.
This guide makes use of OpenXR systems but no one will be wearing the headset in a traditional sense.
Prerequisites
New to Unreal?
Checklist of items:
- Meta VR headset with Meta Link. Other headsets in theory could be used, but I found Meta Link behaves better when the headset goes to sleep. We will use an HMD because SteamVR requires one. Note: SteamVR will use the OpenXR runtime.
- SteamVR. This will be the default OpenXR runtime and will be what we used to capture the Canon DSLR movement.
- Vive Ultimate Trackers with the Vive HUB. A vive tracker will be mounted to the Canon DSLR to track its movement to Unreal.
- Canon DSLR Camera with a connection from mini HDMI to USB. For recording the live-action elements in front of a green screen.
- Unreal and the target set on the desktop shortcut (see below)
- Microphone for Unreal PC. To to help with scene slating
- Any additional equipment. Such as lighting, props, mics, etc.
Order to activate equipment
OpenXR equipment is still early technology and can sometimes lose tracking, freeze, and other challenges. Keep in mind you may need to restart devices, re calibrate, and more. The good news is every year bugs, software, and hardware improves.
At the time of this writing, the following should be turned on and checked for calibration in this order, please read the FAQ below:
- Start Meta Link. Use a Quest 2 and set up a boundary FACING THE GREEN SCREEN. A stationary boundary is fine.
- Start Vive HUB. Verify tracker is working. A solid green light may say it is working, but verify in SteamVR (below) that it is tracking.
- Start SteamVR. Verify the app sees the headset, 2 controllers, and a Vive tracker. SteamVR should be the default OpenXR runtime. If the tracker loses tracking, close SteamVR and Vive HUB and reopen until it works.
- Set the Vive tracker in SteamVR to anything BUT a controller, hand, etc. I usually use Left Foot.
- Put on VR headset. Make sure you are in the SteamVR home environment. Use the menu button on the left controller to bring up the SteamVR menu. Select the button to calibrate the Vive tracker. Follow the in headset instructions.
- Verify the Unreal Desktop icon has the target flag set to -XRtrackingonly. Right click on the desktop icon, select Properties, select Shortcut, and verify the the Target says -XRtrackingonly.
- Open your project by launching from the Unreal Desktop icon. DO NOT USE the Epic Games Launcher, the app icon for your project, or some other way as the flag above won't get called and Live Link may not cooperate.
FAQ
- If at any point your floor is not calibrated, close SteamVR and exit Meta Link and reset the floor.
- If the tracker loses tracking, you may have to repeatedly close SteamVR and Vive Hub until it recognizes tracking. Do not cover the cameras and make sure the light faces out.
Verify plugins are enabled in your project
- OpenXR
- OpenXRViveTracker
- Vive OpenXR - This is a local plugin enabled in the Plugins directory of your project. It can be downloaded here if it is not included in the template project.
- LiveLink
- LiveLinkXR
Overview of template project
Open up the CinematicMap map. Take a moment and review all the actors in the Outliner. Before getting started, let's open a couple of tabs that may not have imported.
Quick fixes
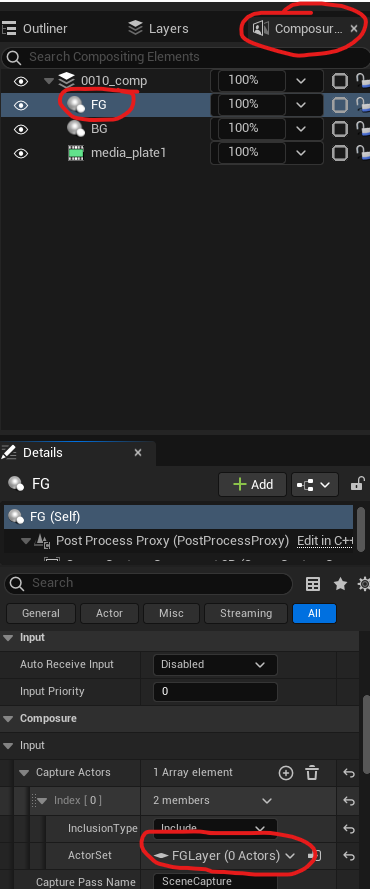
Go to Window/Virtual Production/Composure Compositing and dock this window as a tab next to Outliner. You'll find there is an item called 0010_comp with three items as children. All of these are actors in our map.
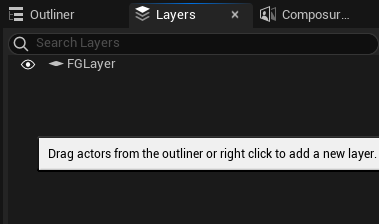
Go to Window/Layers and dock this window as a tab next to Outliner and Composure.. Our Foreground layer was not saved when the project was zipped so let's recreate it. Right click in the Layer tab, create an empty layer called FGLayer. This layer will be for all the foreground objects that sit over top the green screen and background objects. You do NOT need to create a background layer.
Now click on the Composure... tab, click on FG, and within the Details panel, go to Composure/Input/Capture Actors/Index [0]/ and verify the ActorSet has FGLayer assigned. If not, assign the layer.
Actors overview
A demo of the following will be presented during your class.
The following are the actors in the outliner along with their purpose.
- Lighting folder - This contains a DirectionalLight and SkyLight. It is strongly recommend you used either Baked lighting or Mixed
- Sky_Sphere - This actor can hold your skybox or 360 photo
- SM_Template_Map_Floor - A simple floor object to get started and to understand spatially where the floor starts in relation to the cameras.
- BG, FG - These actors are part of the composition. You shouldn't need to mess with these actors.
- media_plate1 - This special actor is the live feed for your DSLR camera. The only setting you should need to change occasionally is your green screen chroma key. This is under Composure/Transform/Compositing Passes/Transform Passes/Chroma Keying/Key Colors/Index[0]
- 0010_comp - You will use this actor most of the time to serve as the PREVIEW COMPOSITE SHOT of the unreal and DSLR cameras. When this object is selected, there is a preview window that appears and a button in the top right corner to maximize. Be careful to not open too many windows!
- CineCameraActor - This is the primary camera that will film your virtual shot. As a child is another camera, CompCamera, which you will not use but serves as the output from our 0010_comp actor.
Setup
If everything is running properly, go to Window/Virtual Production/Live Link. Click the button + Add Source and choose LiveLinkXR Source and check all the boxes. You should see your HMD, two controllers, and most importantly, the Vive Tracker. If not, close the editor and ensure everything is working. If you see the tracker, close this window.
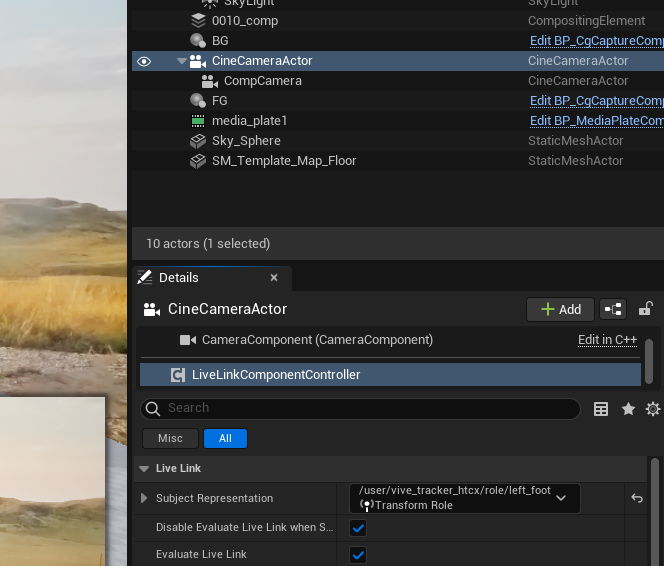
Click on CineCameraActor. In the Details panel, scroll down in the components window (it's tiny) and choose LiveLinkComponentController (screenshot below). Under Live Link in the Details panel, make sure to assign the tracker under Subject Representation.
Now we need to get the DSLR feed. Ensure the DSLR is turned on.
Open the Content Drawer, go to Movies/NewMediaPlayer and open it up. In the top left of the video preview is a tiny folder icon, just below the Save icon. Select it, choose Video, and choose the DSLR camera. If you can see the video feed, you can MINIMIZE this window.
DO NOT CLOSE the NewMediaPlayer window after you open the video feed or you will "close" the video feed!

From here, select the actor 0010_comp and verify everything is working, including tracker, camera feed, etc.
Where to go from here?
The next steps would be to prepare both the studio and the Unreal world for cinematic capture. This takes time and planning, particularly with lighting, perspective, and positioning of both real-life and CGI objects. Consider recording a few tests and making a composite before officially recording your takes. Another guide will be posted on an overview on capturing within the Unreal environment and exporting the footage.
DSLR Camera Information
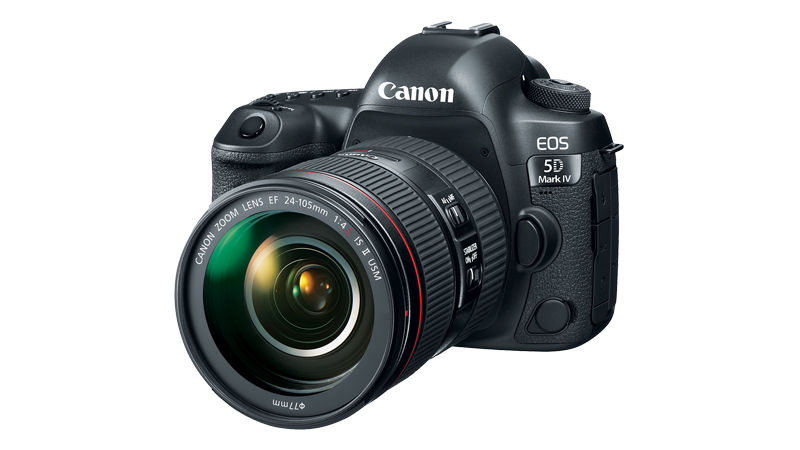
The cameras owned by SCiL are “digital single-lens reflex” (DSLR) types, specifically the Canon EOS 5D Mk IV.
Helpful manuals and guides for this camera are available online.
Important! This equipment is expensive, so you must treat it with care.
DSLR cameras tend to look a lot like older film cameras of the SLR type. Let's break this acronym down:
Digital - the camera produces images digitally instead of on film
Single-Lens - there is one path for light to enter the camera
Reflex - the light entering is split via mirror to both imaging chip and viewfinder
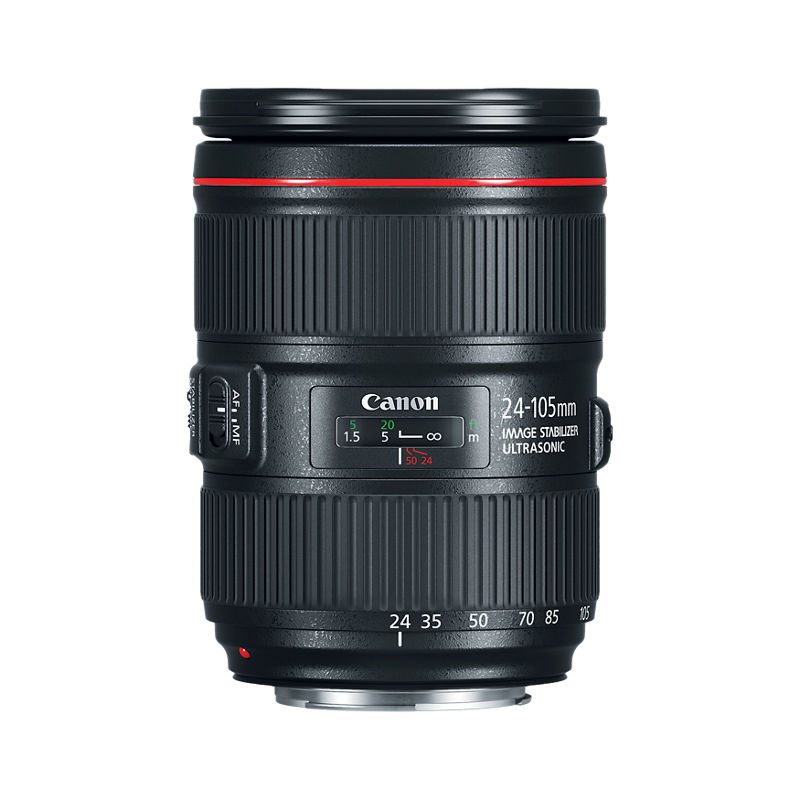
SLR cameras, whether digital or film, are notable for allowing simple switching of different lenses to accomplish various photographic techniques. Both SCiL camera kits come with a Canon 24-105mm lens. A selection of other lenses is available as needed.
Helpful manuals and information about this lens are available online.
CCD vs. CMOS
Digital cameras usually use one of two types of image sensor, either a charge-coupled device (CCD) or a complementary metal-oxide semiconductor (CMOS).
CCDs used to be the more common technology, but newer cameras outside of specialized applications tend to use CMOS because they operate more quickly, allowing DSLR cameras to shoot video in addition to stills.
The E0S 5D Mk IV uses a CMOS sensor.
ISO
ISO stands for the International Organization for Standardization (it is technically not an acronym). This organization established a numerical scale to rate how sensitive different kinds of film were to light (called a film's speed). The current standard dates to 1974.
The ISO film speed standard was retained for digital cameras, even though light sensitivity is now determined by the camera's computer software and light sensor hardware, rather than the chemical composition of film.
When you change the ISO value on a DSLR, you may think of it as swapping out a physical roll of film and replacing it with a new roll that is more sensitive or less sensitive to light.
One big advantage of a digital camera is that you can change the ISO with the press of a button and from shot to shot, instead of only when you change the roll of film.
This short video shows how to set ISO on the Canon EOS 5D Mk IV.
Here are some important things to know about camera ISO:
Higher ISO numbers are more suitable for dark environments but make the image grainier.
Lower ISO numbers are more suitable for bright environments and the image will usually be less grainy.
ISO 100: Suitable for a bright, sunny day
ISO 800: Suitable for indoor spaces when not using a flash
ISO 1600+: Suitable for dim or dark environments (but the picture will be increasingly grainy looking)
In the diagram below, note how the higher ISO number produces a much lighter, but also much grainier image.

F-stop and Aperture
The F-Stop setting determines how much light is allowed to enter a camera through the lens to reach the imaging sensor. F-stop is normally a setting of the lens that is attached to the camera, and is controlled mechanically, by opening or closing the lens aperture.
Different lenses have different apertures and so can handle different f-stop ranges.
The Canon EF 24-105mm f/4L IS II USM lens that is normally kept on the SCiL DSLR cameras has an adjustable f-stop range from f/4 (wide open) to f/22 (nearly closed). It will retain the f-stop you set through its entire zoom range from 24mm to 105mm.
When the camera is set to video mode, you can set the f-stop on the Canon EOS 5D Mk IV using the large dial around the "set" button located at the lower right of the camera body.

Lower f-stop numbers (like f/4) indicate that the aperture is more open, allowing in more light.
Higher f-stop numbers (like f/22) indicate that the aperture is more closed, allowing in less light.
F-stop settings influence the depth of field.
f/1.2 - f/2.8 - lets in a lot of light, with a correspondingly shallow depth of field.
f/4 - f/8 - useful in many scenarios, with a somewhat wider depth of field.
f/11 - f/32 - best for bright settings, with a wide depth of field.
In the chart below, see how different f-stop settings change the amount of light reaching the sensor and the depth of field:

Shutter Speed
Shutter Speed
The shutter speed, aka exposure time, is the time that the image sensor is exposed to light when capturing an image. The shutter is a mechanical window inside the camera that opens and closes to allow light into the sensor for a selected amount of time.
This video explains more about different types of camera shutter.
Shutter speed is not necessarily the same as frame rate, which determines how many exposures will be taken per second. For example, it is possible to have a frame rate of 24 frames per second (fps) but have a shutter speed (exposure time) of 1/1000 of a second instead of 1/24 of a second.
A fast shutter speed, such as 1/1000 of a second, will allow light into the sensor extremely briefly. This will work in bright lighting conditions but may not allow enough light to impact the sensor in dimmer light.
A slower shutter speed, such as 1/250 of a second, will allow more light into the sensor, and may work better in lower light conditions. However, a lot can happen over longer periods of time, so faster moving subjects or camera movement may result in a blurry look. This could be an intentional, artistic effect, or could simply ruin your shot or take.
Extremely slow shutter speeds (for example ½ second, 1 second, or more) will allow a LOT of light into the sensor and will almost certainly result in blur effects. However, these shutter speed settings could also be used to capture long exposure photos with their own unique aesthetic appeal.
The Canon EOS 5D Mk IV shutter speed is set using the small dial located on the top right side of the camera. You will notice that this setting has different limits when shooting in video mode vs. still image mode.
When shooting in video mode, you will usually want to leave the shutter speed setting around 30-60. Faster exposure times are possible if you set your ISO and aperture accordingly but will tend to introduce "flicker" into your video.

In the image below, note how a 1/30 second shutter speed produces an image with less blur, while a 15 second exposure time adds considerable blur to the waterfall, resulting in an appealing, soft look.

Exposure and the Exposure Triangle
Exposure
Overexposure: the recorded image or video appears too bright, and details may be "blown out" in a wash of white light.
Overexposed images may look too bright because they were captured with settings that allow too much light into the sensor:
- ISO may be set too high
- f-stop may be set too low
- Shutter speed may be set too low
Underexposure: the recorded image or video appears too dark, and details may be hidden or lost in artificially deep shadows.
Underexposed images may look too dark because they were captured with settings that allow less than expected light into the sensor:
- ISO may be set too low
- f-stop may be set too high
- Shutter speed may be set too high
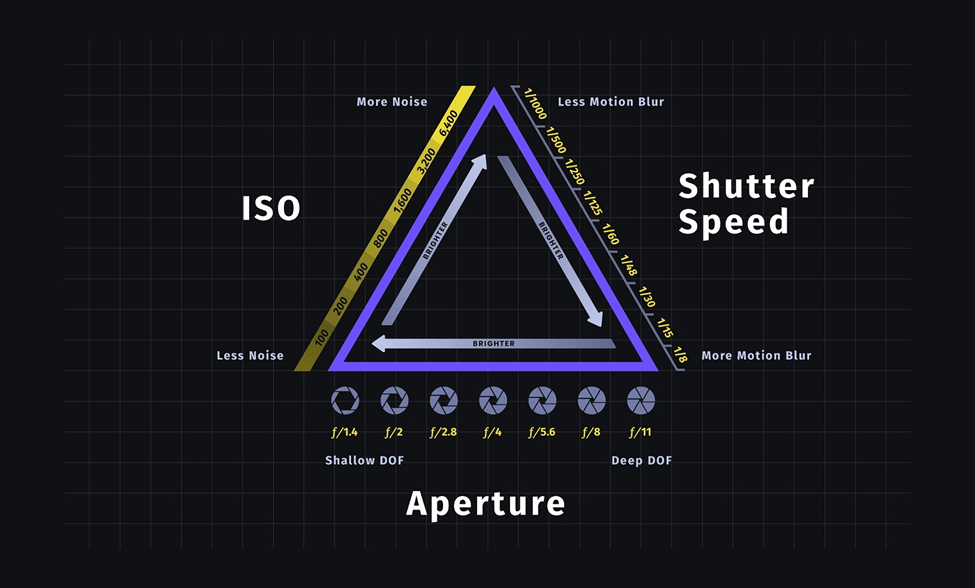
The Exposure Triangle
As you can see, there is a three-way relationship between these three important settings:
- ISO - how sensitive the light sensor will be to light
- f-stop/aperture - how much light is allowed to pass through the lens iris
- Shutter speed - how long the shutter is left open before it closes to cut off incoming light
An adjustment to any one of these settings will impact the final exposure of the image. It is up to the photographer/videographer to set all three in balance, to achieve the desired depth of field, motion blur, exposure, and aesthetic look.
Depth of Field
The depth of field is the distance between the nearest and furthest in-focus objects in an image. A narrow depth of field will have a very narrow area in which objects will be in focus. A wide (or large) depth of field will put most elements of the image in focus.
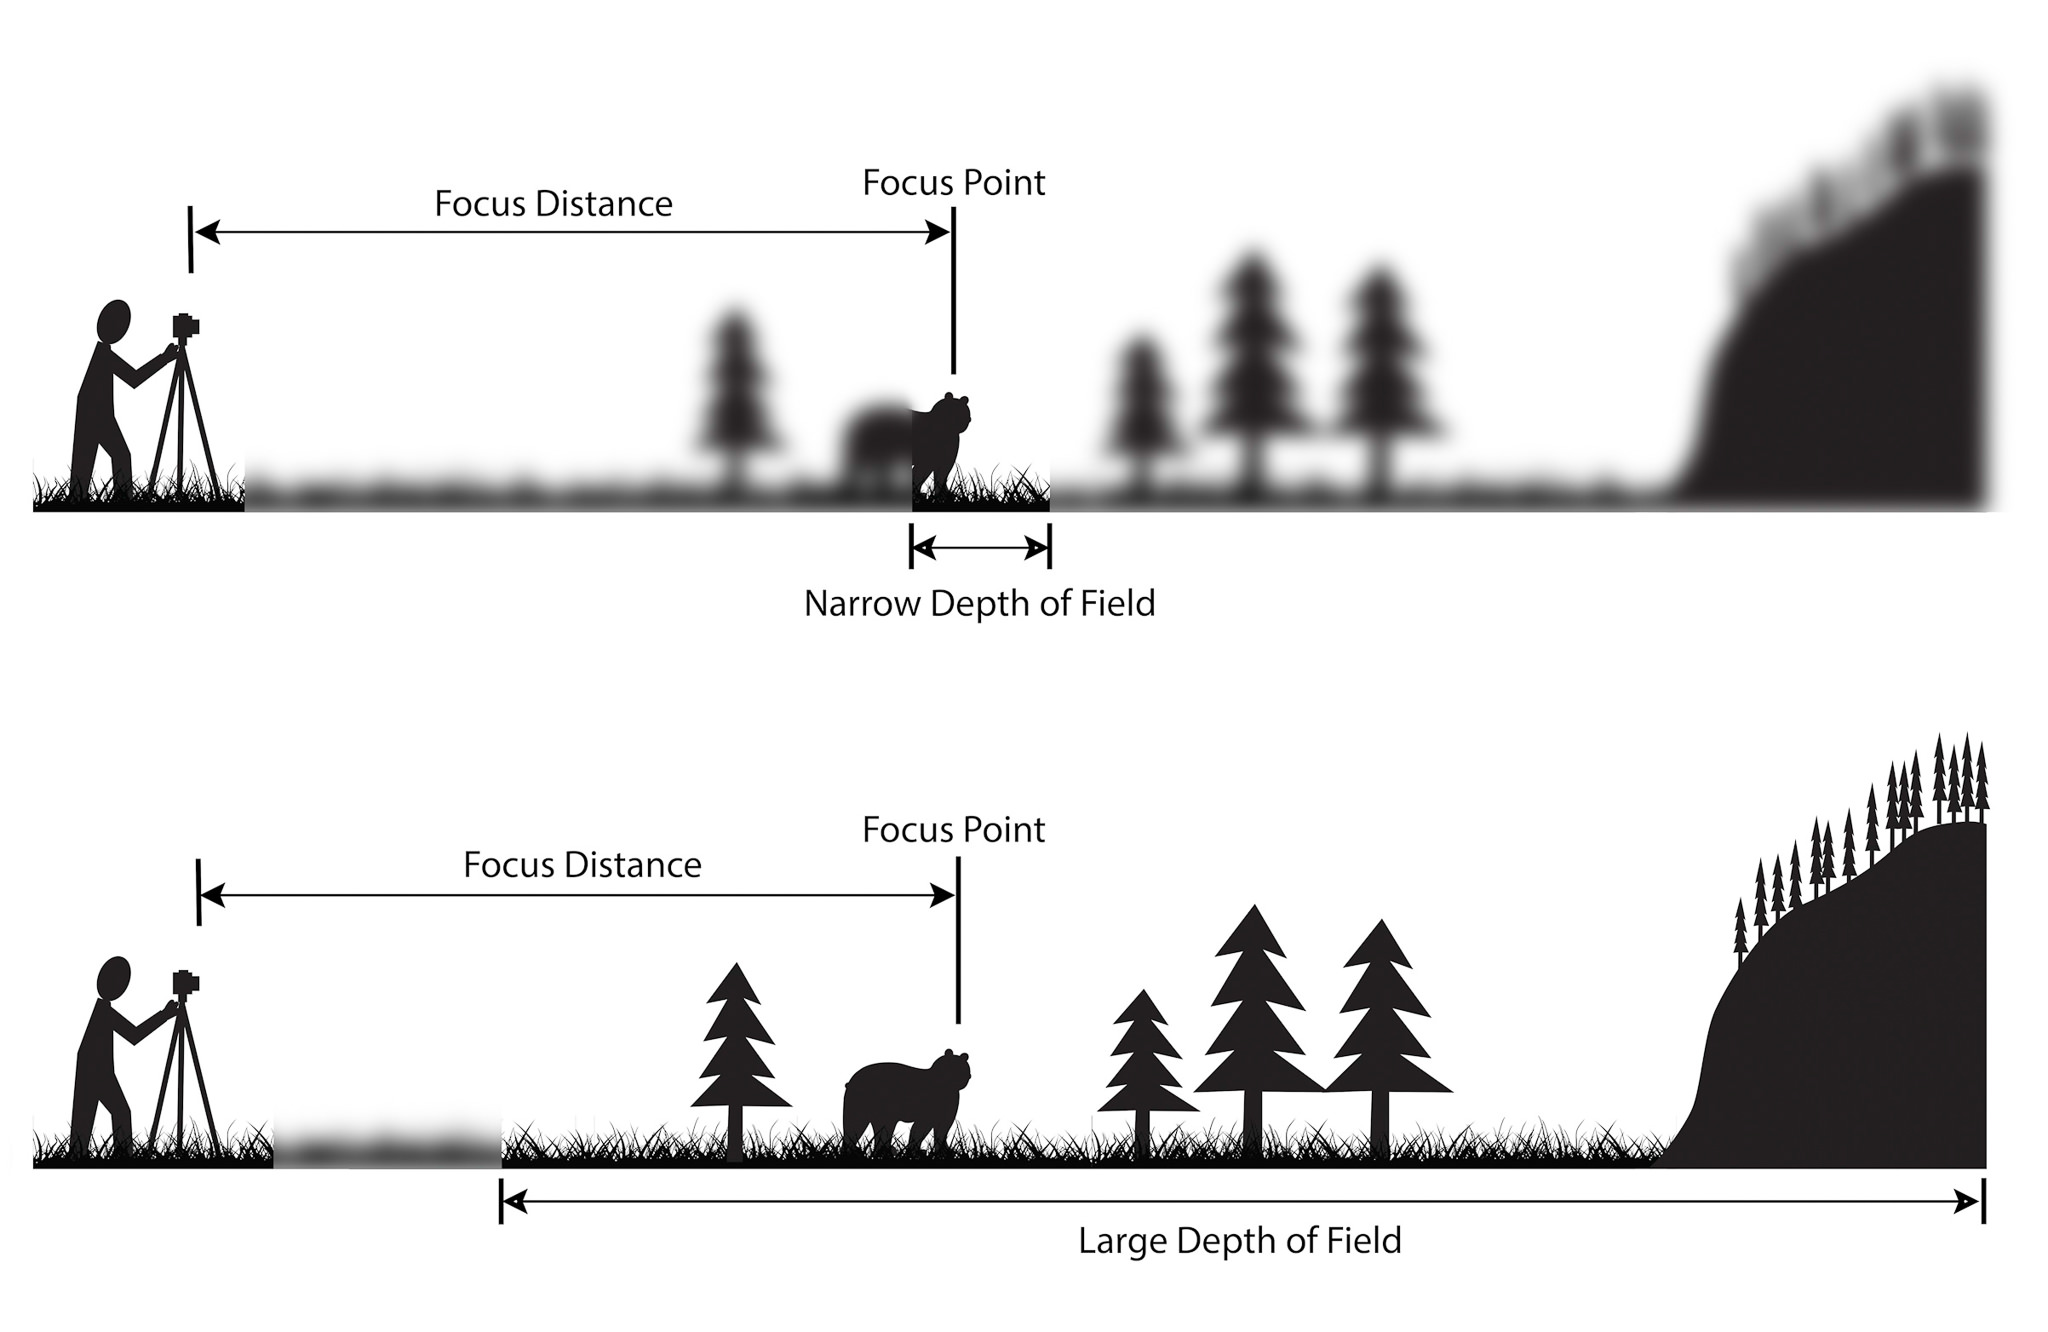
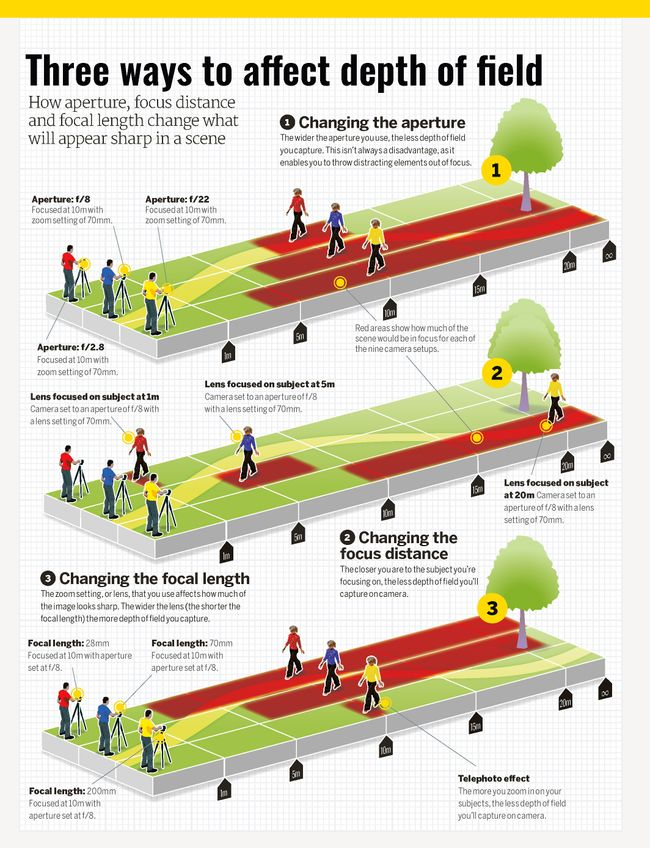
Depth of field is influenced by several camera settings including aperture (f-stop) and the lens focal length.
Lower f-stop settings (f/1.2 - f/2.8) have shallow depths of field.
Higher f-stop settings (f/11 - f/32) have wider depths of field.
Longer focal lengths (like the 105mm setting on the Canon EF 24-105mm lens) will have a shallow depth of field.
Shorter focal lengths (like the 24mm setting on the Canon EF 24-105mm lens) will have a wider depth of field.
Turning the focus ring on the lens will adjust the position of the in-focus area, or focal point.
|
|
|
|
| Shallow Depth of Field Aperture = f/1.4. DOF = 0.8 cm |
Medium Depth of Field Aperture = f/4.0. DOF = 2.2 cm |
Wide Depth of Field Aperture = f/22. DOF = 12.4 cm |


The camera's distance to the subject can also influence depth of field.
The depth of field will be wider when the camera is focused on more distant subjects.
The depth of field will be shallower when the camera is focused on closer subjects.
Camera Settings: the Mode Dial
Mode Dial
SCiL's Canon EOS 5D Mark IV DSLR has a mode dial, located on the upper left of the camera chassis. The mode dial allows you to choose which mode the camera will operate in. The available modes are:
- C1, C2, and C3: user defined presets
- B: Bulb mode (the shutter remains open as long as the shutter button is held down)
- M: Manual mode (photographer controls all settings)
- Av: Aperture Priority mode (set the aperture/f-stop; other settings are set automatically)
- Tv: Shutter Priority mode (set the shutter speed; other settings are set automatically)
- P: Program AE mode (aperture and shutter are set automatically based on brightness)
- [A+]: Scene Intelligent Auto mode (fully automatic mode)
Which mode should you use? That will depend on what you are trying to accomplish. However, some modes are more commonly used than others. The modes you are most likely to use are:
- M (manual mode). Usually, professional photographers and filmmakers will usually prefer to have complete control over the camera and all of its settings. This is the recommended mode for a serious photographer or filmmaker.
As a matter of convenience, it can sometimes speed up your workflow to use partially automated settings:
- Av (aperture priority). Sometimes it may be convenient to set the aperture/f-stop and allow the camera to automatically handle other settings. This may be useful when, for example, you want to control depth of field using aperture but do not have special requirements for ISO or shutter speed.
- Tv (shutter priority). Sometimes it may be convenient to set the shutter speed and allow the camera to handle other settings. This may be useful when, for example, you would like to achieve specialized shutter effects (like a long exposure) and would like the camera to automatically assign other settings to achieve a good exposure.
- P (automated shutter and aperture). Sometimes, especially when shooting casually, you may find fully automatic settings help you to capture images and video quickly when the camera handles most settings for itself. This is not the recommended mode for capturing imagery or videos for immersive media productions.
White Balance
Digital cameras require a certain amount of calibration to capture color information (RGB) properly. This calibration is called white balance, because the camera is being given the information it needs to identify white areas of the image and reproduce them correctly.
The image below shows the same scene white balanced to different color temperatures:

You can (and should) confirm or set the white balance on the Canon EOS 5D MkIV camera before capturing images or video. You can do this by pressing the WB button on the top right of the camera chassis. A menu will appear (it looks slightly different depending on whether you are shooting in image or video mode), and you can use the large dial on the right side of the camera chassis to select the white balance mode. The available white balance options are:
- AWB (auto white balance): the camera will seek an appropriate white balance for the current lighting conditions
- Daylight: the camera will set an appropriate white balance for sunny daylight conditions
- Shade: the camera will set an appropriate white balance for shady daylight conditions
- Cloudy: the camera will set an appropriate white balance for cloudy/overcast conditions
- Tungsten Light: the camera will set an appropriate white balance for tungsten light (~3200K, a warm, orange light)
- Fluorescent Light: the camera will set an appropriate white balance for fluorescent light, such as in an office building
- Flash: the camera will set an appropriate white balance for the color temperature of the camera's built-in flash
- Custom: you can take a photo of a white surface under desired light conditions and then use it to set the white balance
- Color Temperature: you can manually set the white balance to be appropriate for different color temperatures
Which setting should you use? It will depend on what you are trying to accomplish, but the most usual settings would be:
- AWB if you do not want to control the white balance for yourself
- Daylight, shade, or cloudy if you are shooting outdoors under natural light
- Color temperature if you are shooting in the studio and know the color temperature of your lighting conditions
You should check and confirm your white balance setting before you begin a photo or video shoot. Typically, you will want to leave the white balance setting alone once you set it to your preferred selection.
In video mode, the display screen on the camera will show you a preview of the color result from different white balance settings. In still image mode, you can take a test picture to see the effects of your white balance setting (the test picture will briefly appear on the display screen after you take the picture).