MANUS Core
MANUS Core Setup
1. Launch the MANUS Core and SteamVR applications. These can be accessed either by searching for them or by finding the shortcuts on the desktop.

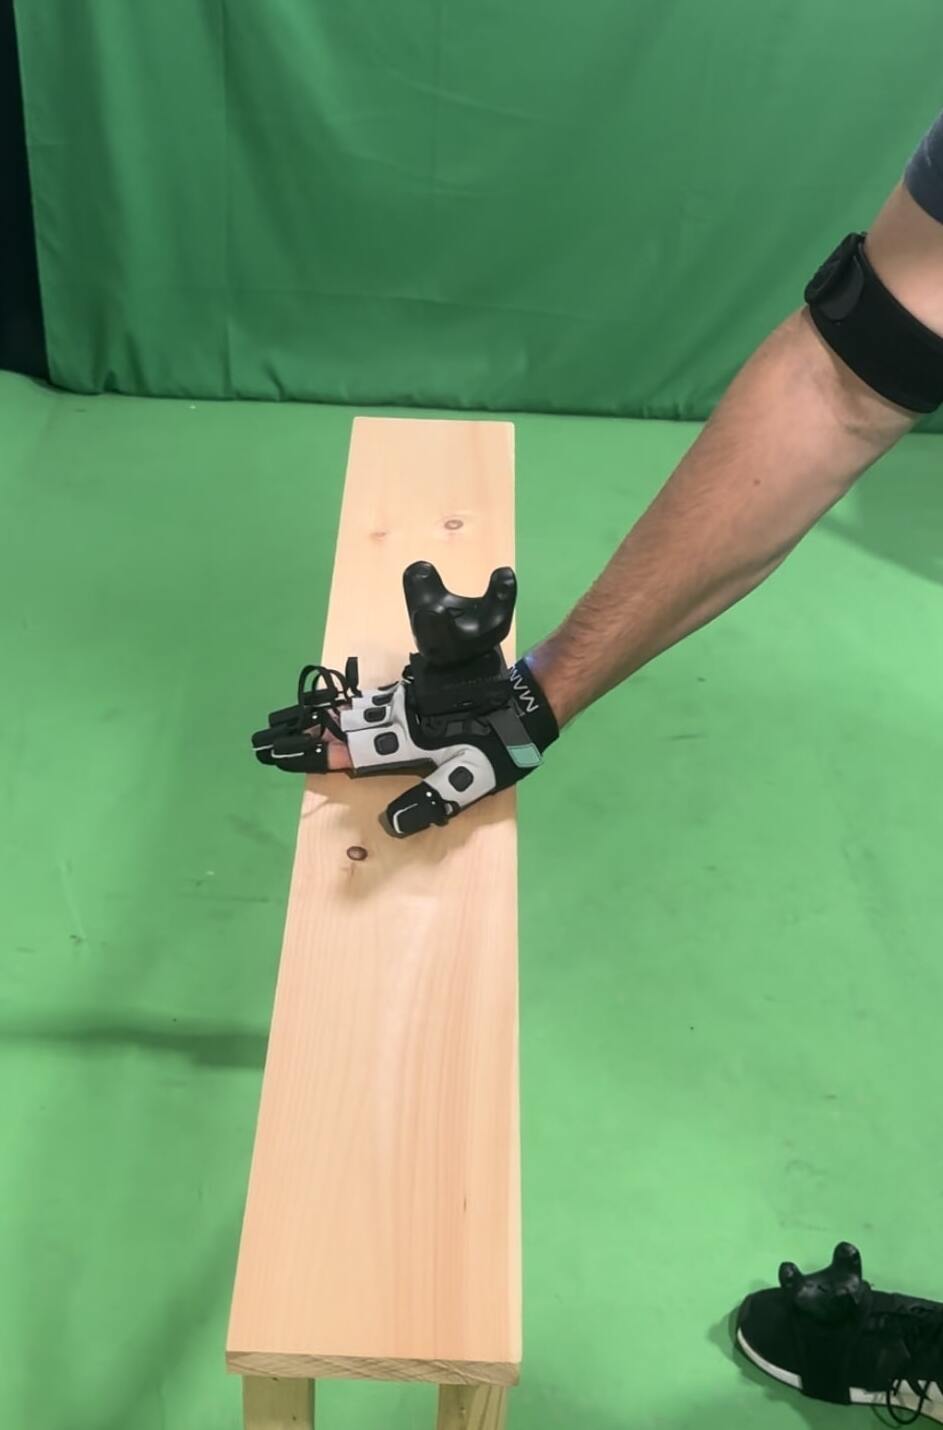
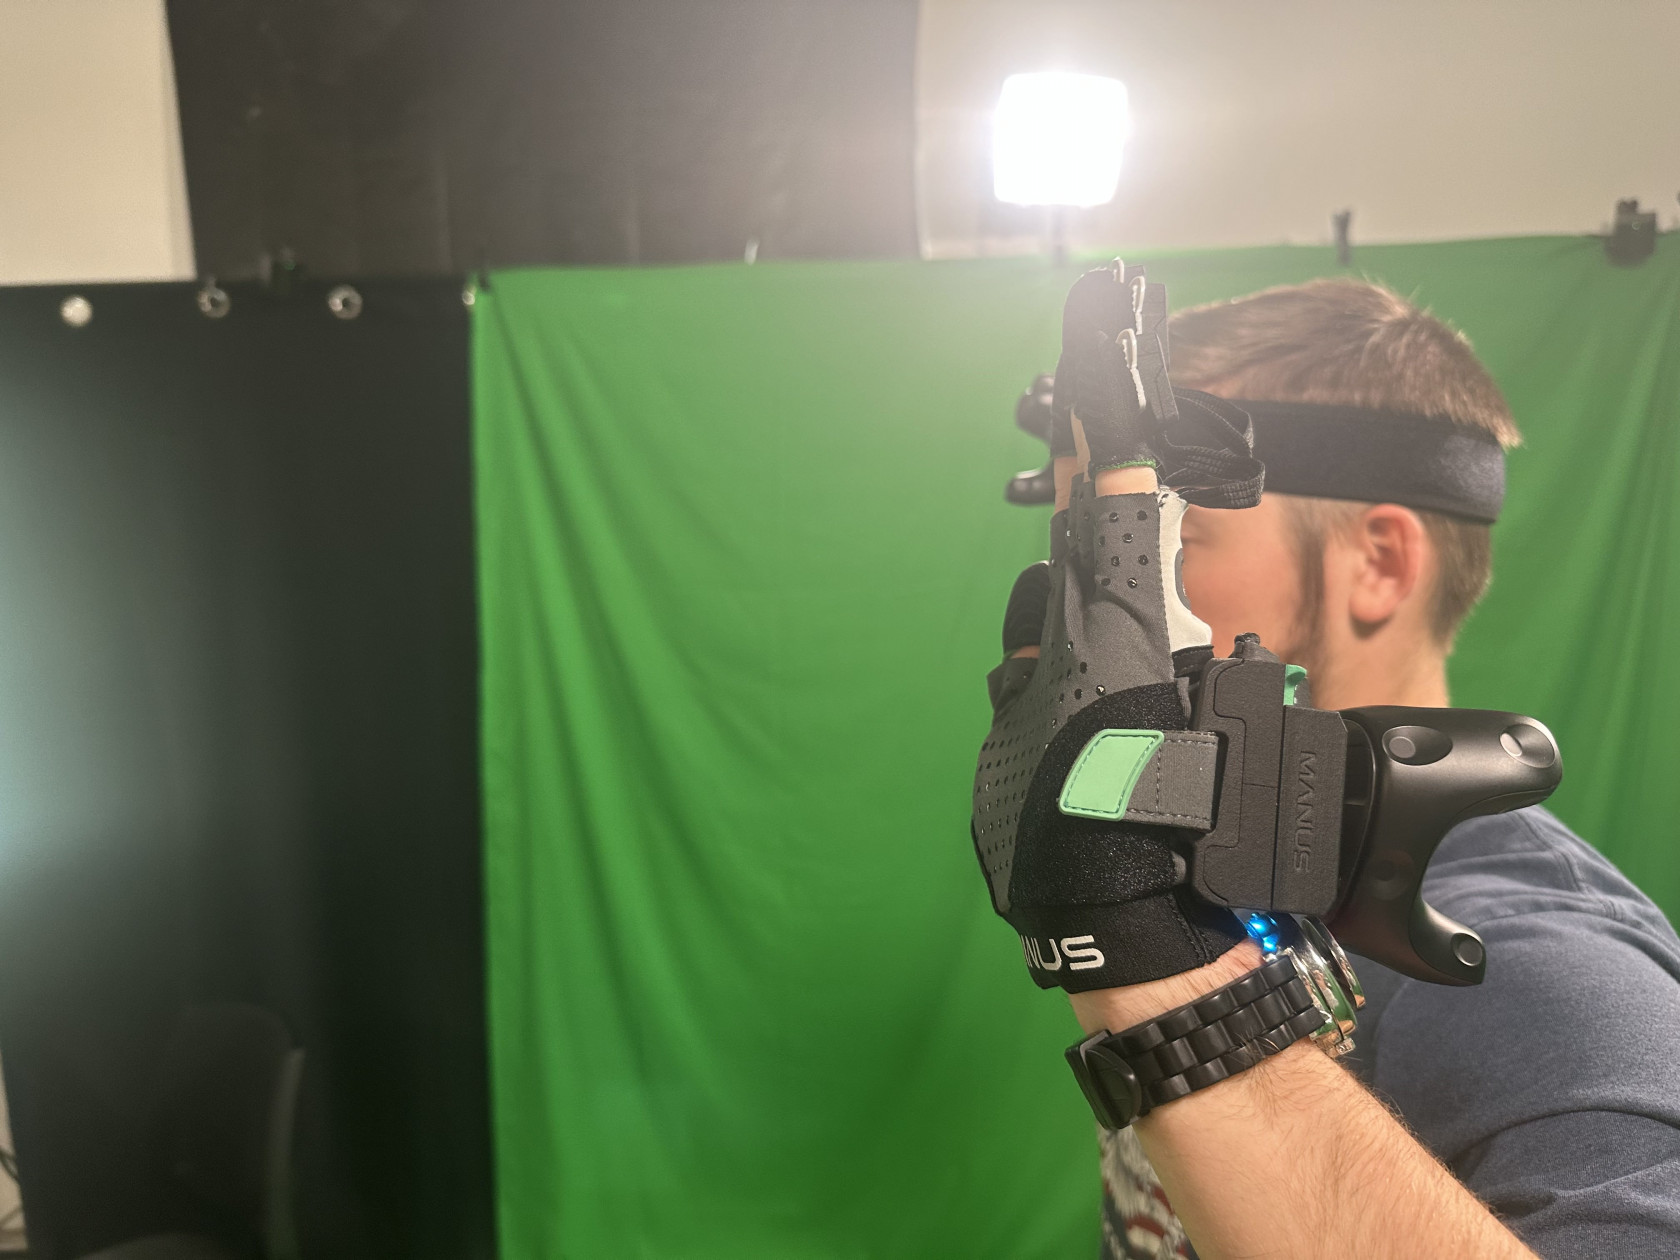
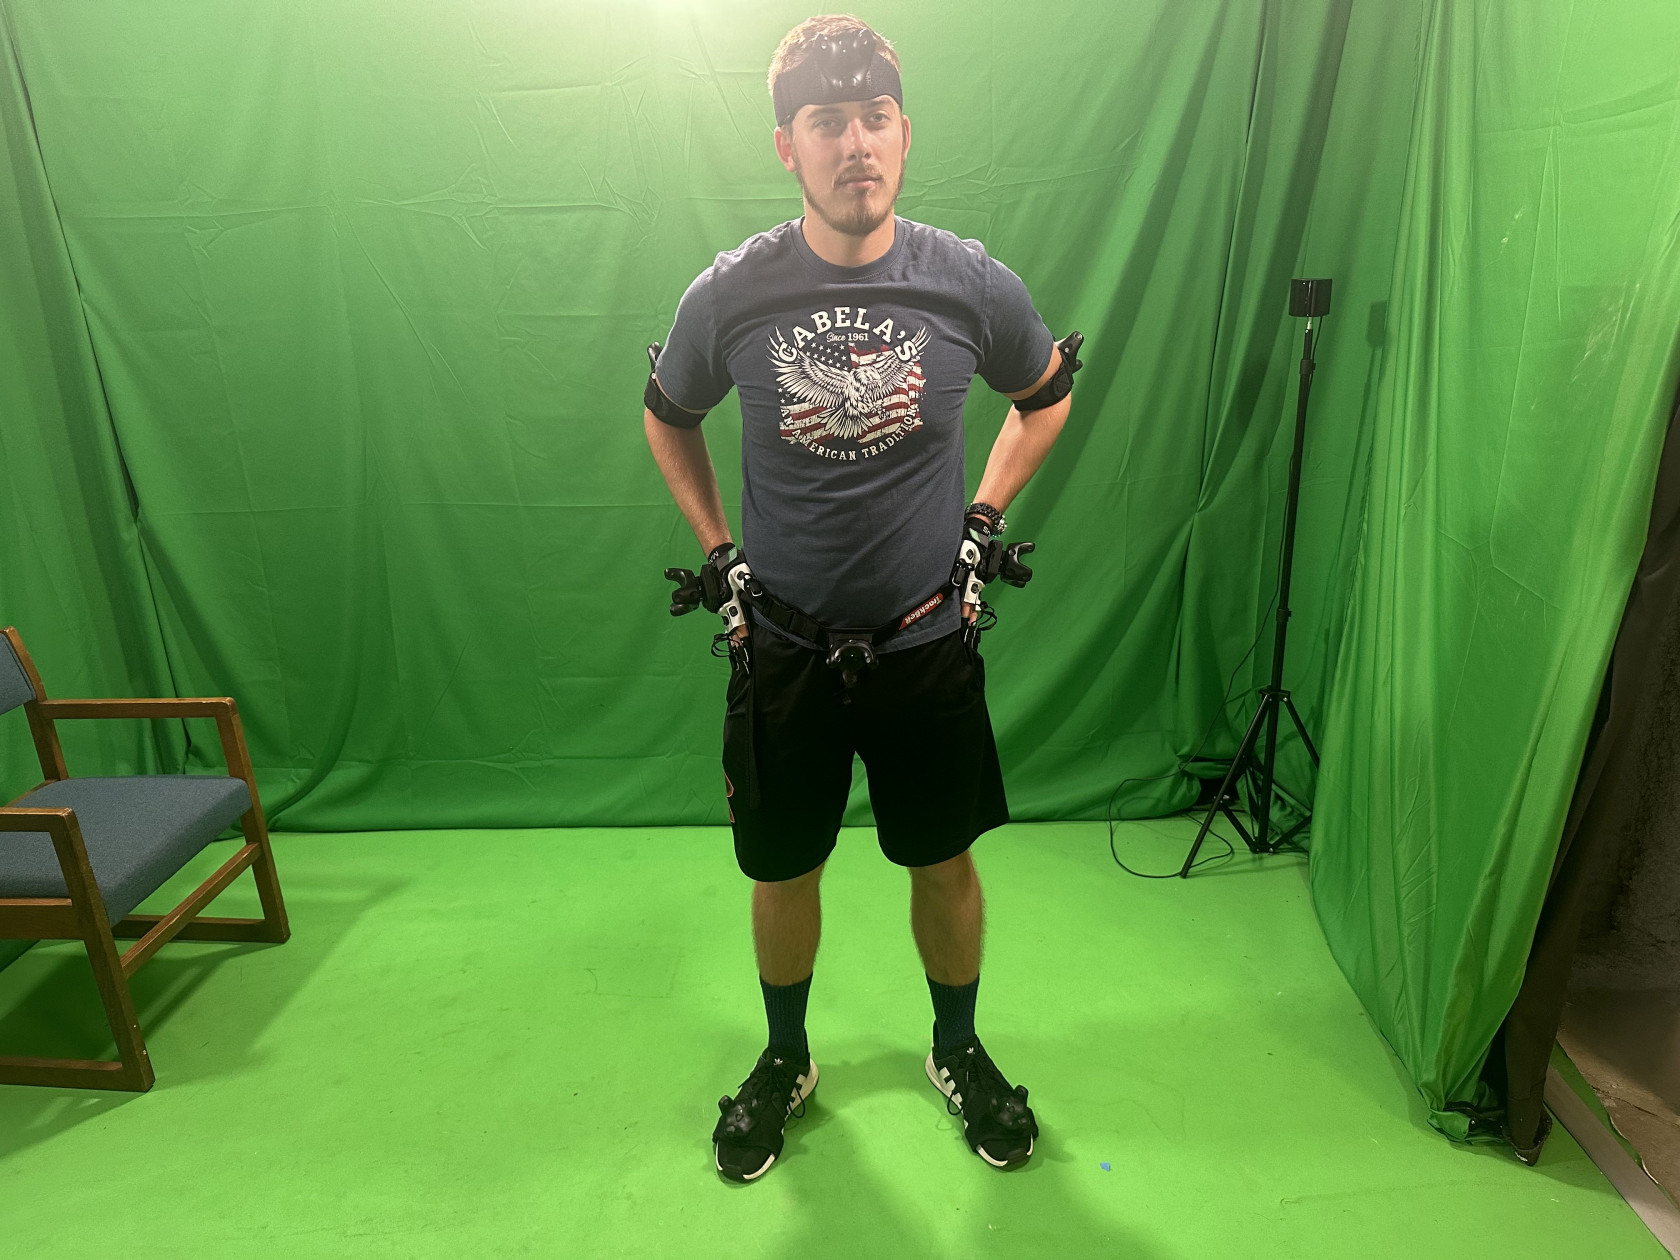
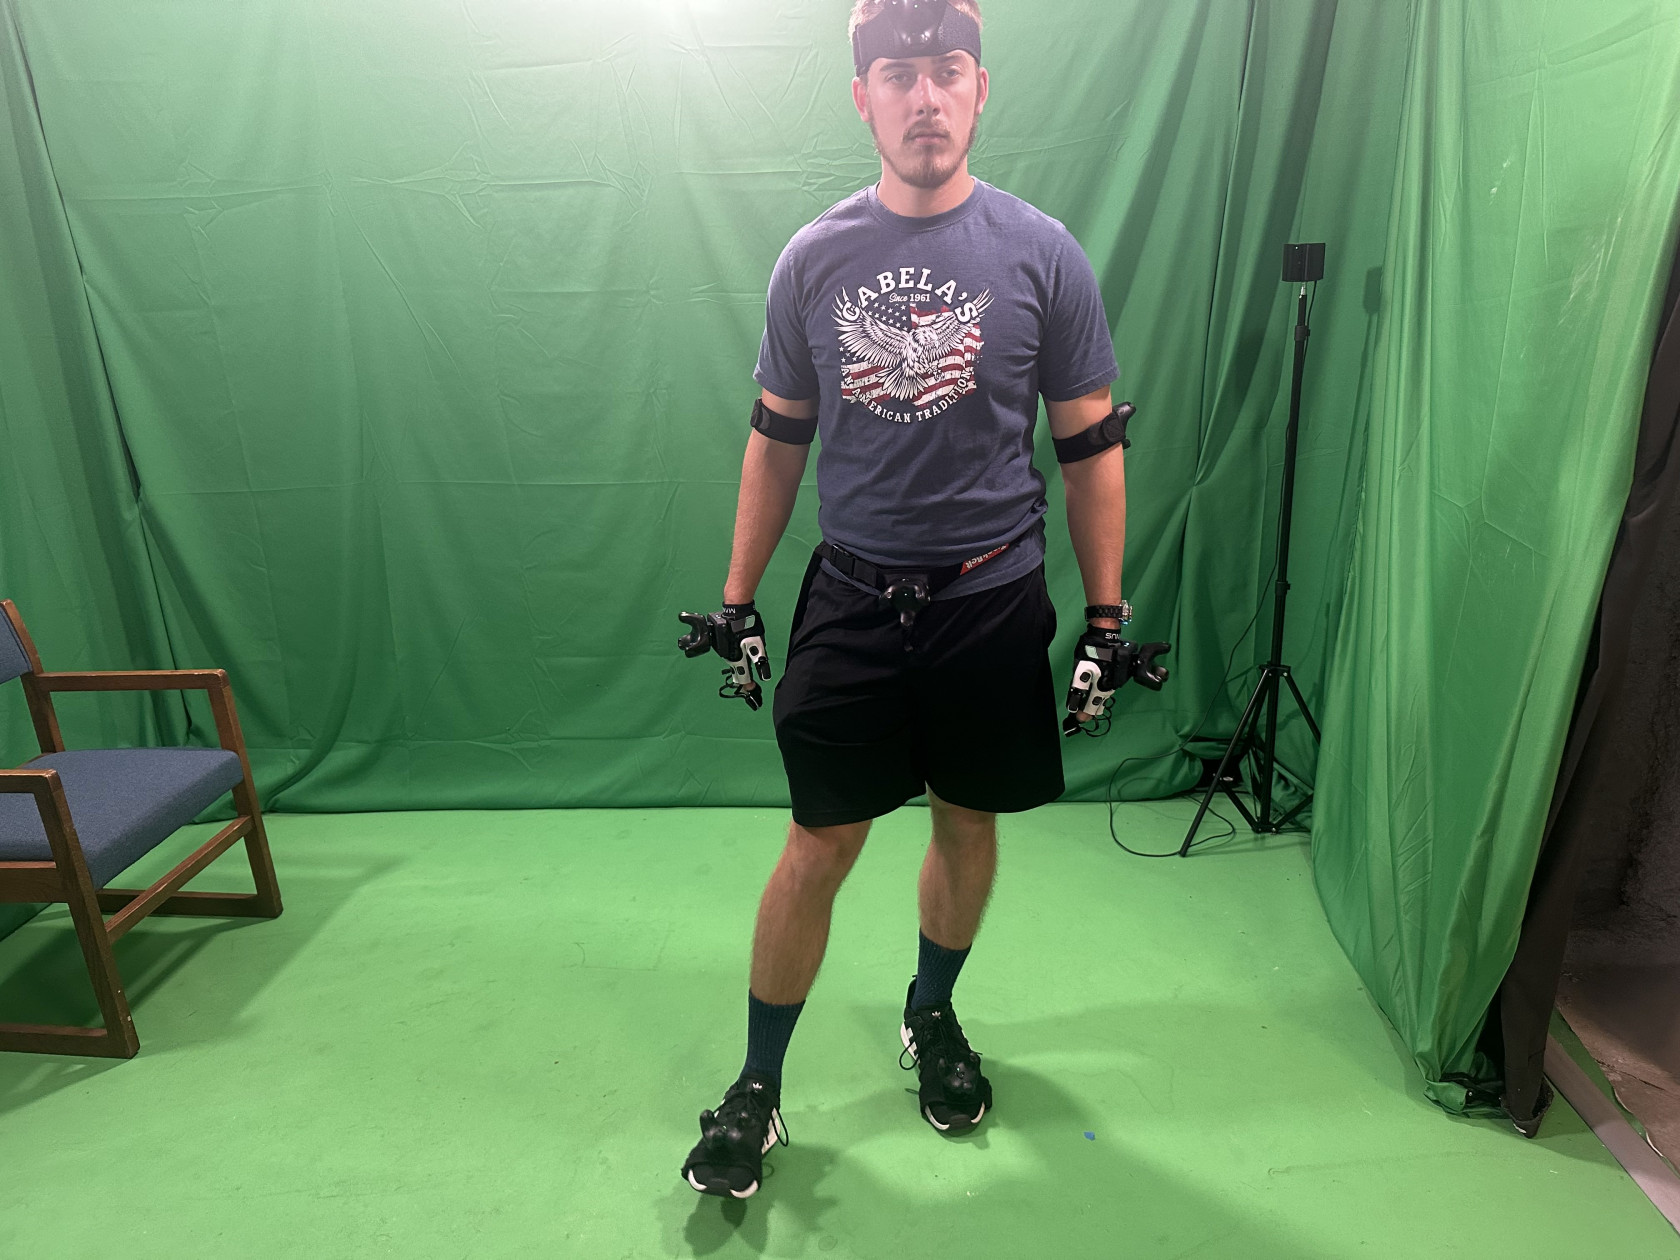
2. Approach the actor and activate all eight VIVE trackers along with both gloves. The VIVE trackers are equipped with a triangular button on their face; press this for one second and then release. A white light should blink, followed by a steady green light, signaling a successful pairing. Confirmation of this can also be observed in the SteamVR mini window, where the outline of the added tracker will be displayed. Regarding the gloves, an on-off switch is situated near the wrist. Slide this button to the on position, and a white and blue light should flash from the glove's LED. Once the flashing ceases and a solid blue light appears, the glove is successfully connected.
Note: In the event of any connection issues, please refer to the troubleshooting page for assistance.
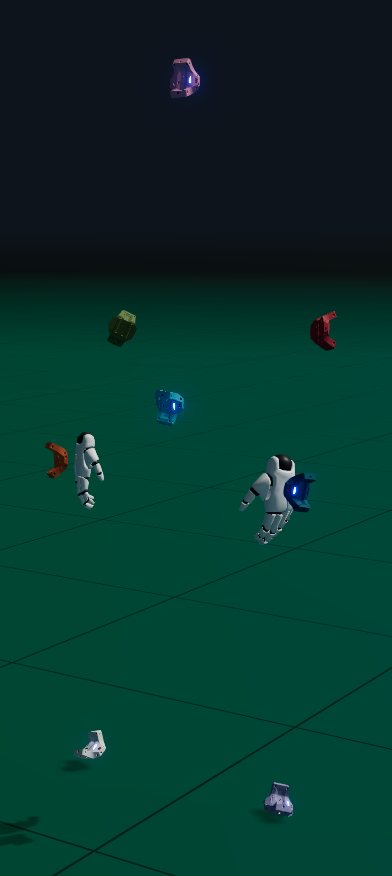
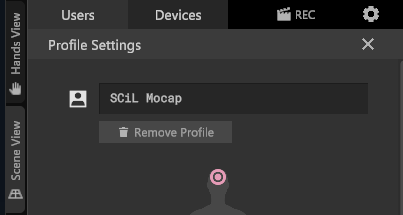
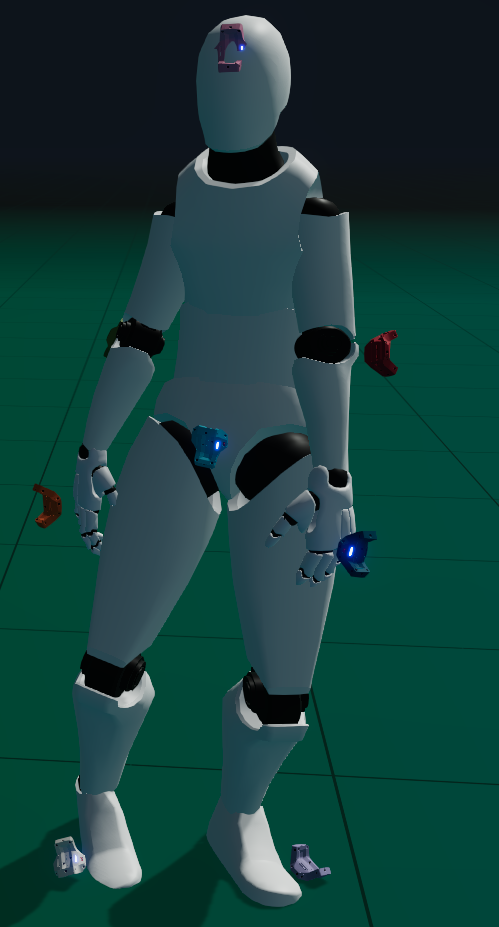
3. Once all devices are connected, navigate to the profile settings tab next to the user's tab in the MANUS Core software, where you will assign the trackers to the corresponding body parts. Each tracker possesses a unique color and is represented in the scene view. Communicate with the actor, asking them to raise or move specific body parts to facilitate tracker assignment. Upon correct assignment of all trackers, a 3D mesh should materialize on the actor within the scene view.
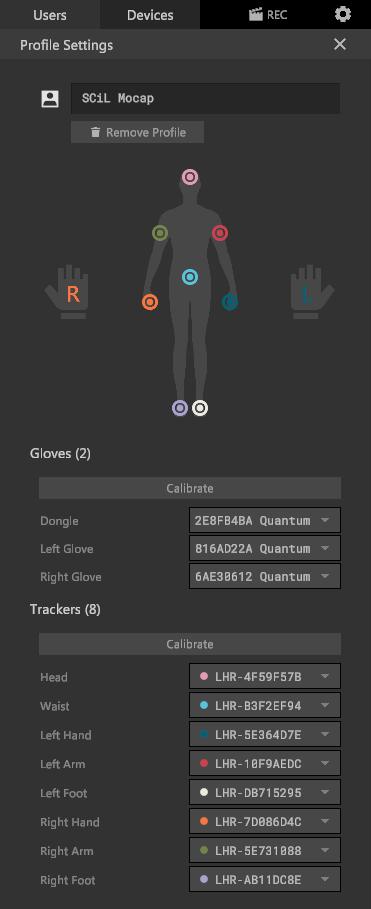
Different views: The MANUS Core software features two different views - hands view and scene view. These options are situated on the right-hand side of the page, adjacent to the Users tab.
Note: While the mesh skeleton may not appear perfect, it is important that the arms and legs are not crossed. If they are, this suggests that the trackers have been assigned incorrectly to the opposite body part.
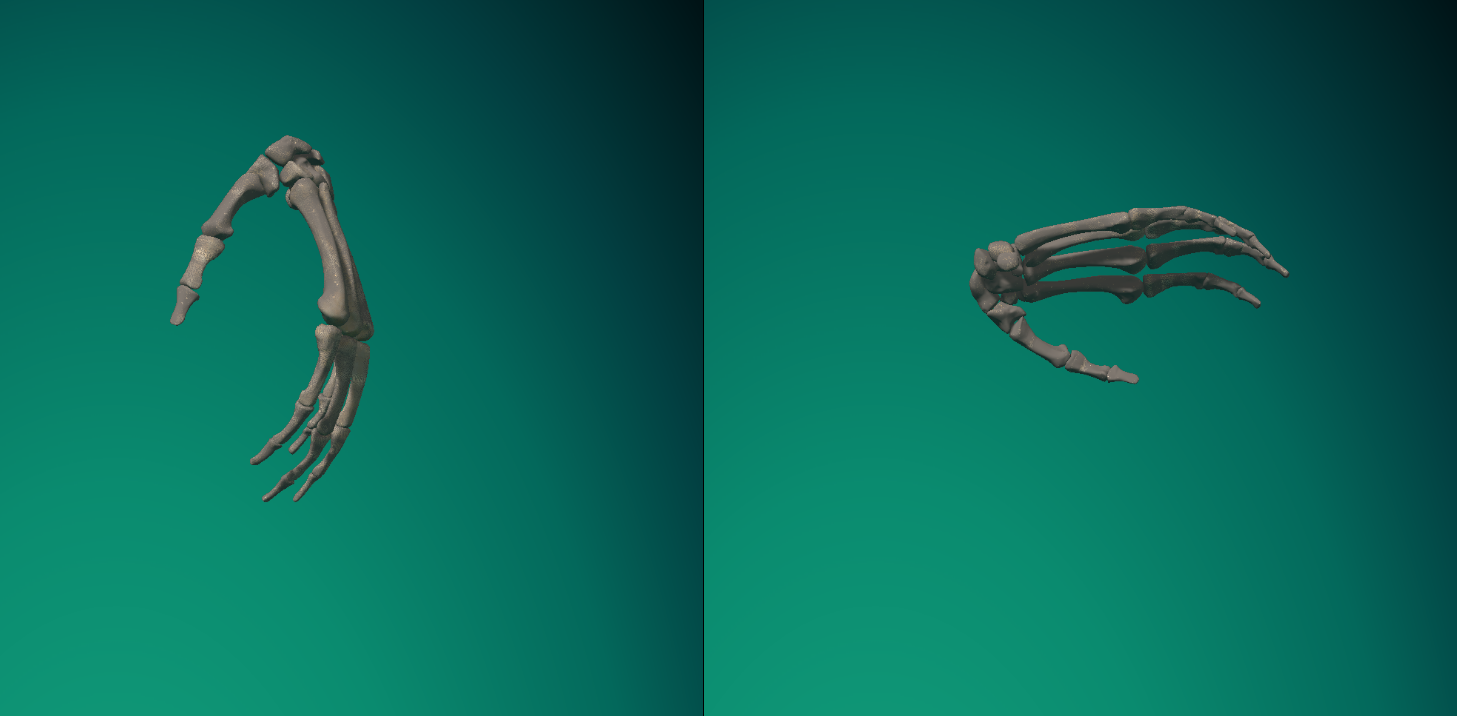
4. Transition to the hands view and verify that both hands are visible as a 3D skeletal hand. If both are not present, consult the troubleshooting page for assistance.
Note: The skeletal hands/fingers should mimic the actor's movements. However, if certain fingers appear bent incorrectly and are unresponsive, do not be alarmed. The hands have yet to be calibrated.
5. Once everything is connected and assigned correctly, you may proceed to calibrate the hands and body trackers. Refer to the MANUS Core Calibration page for step-by-step instructions.
MANUS Core Recording
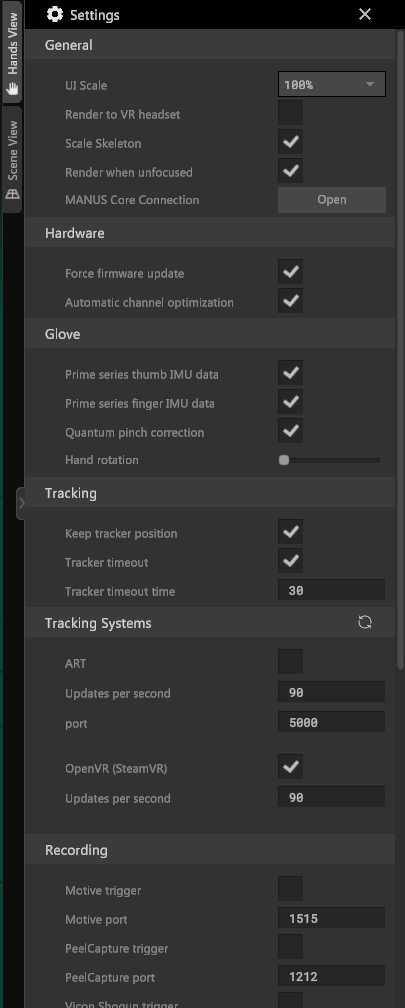
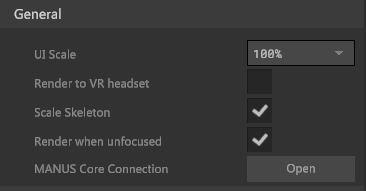
1. At this time, please ensure your settings correspond to the images provided below unless instructed otherwise. These default settings are typically the ones to use.
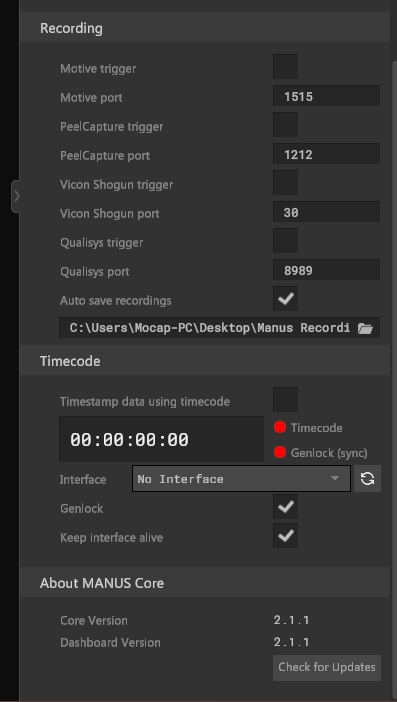
2. Having confirmed that your settings are accurate, navigate to the upper right of the tabs and click on 'REC'. Following this action, a recording menu set should emerge at the bottom of your scene view.

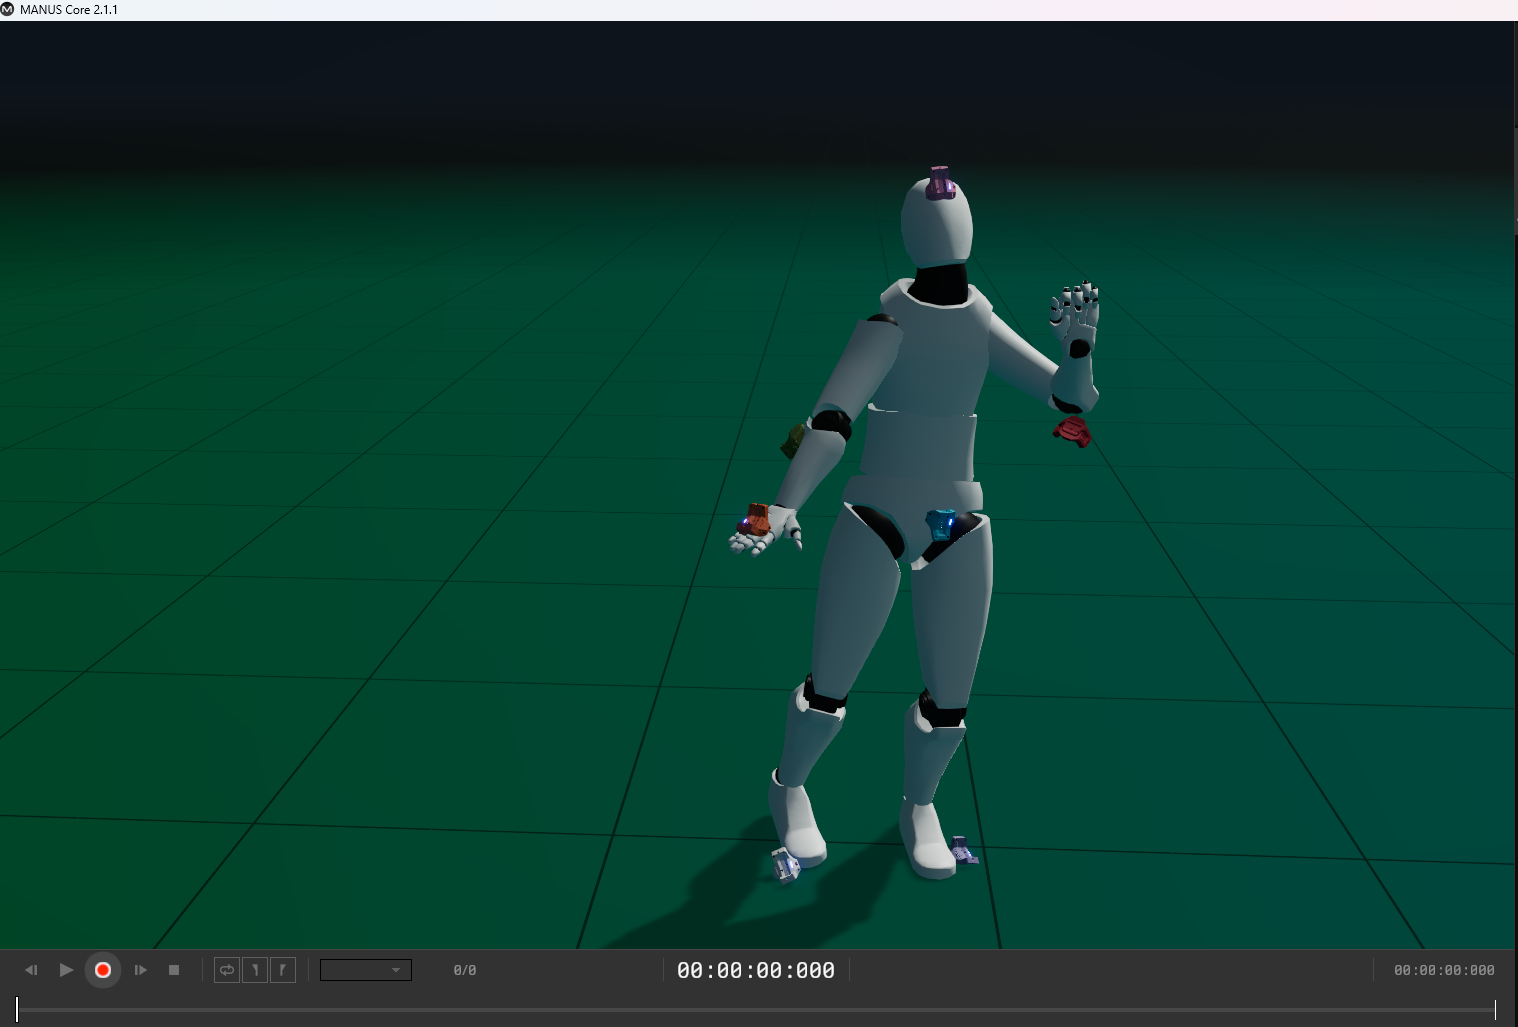
3. To commence the recording of the actor's performance, click on the red 'Record' button
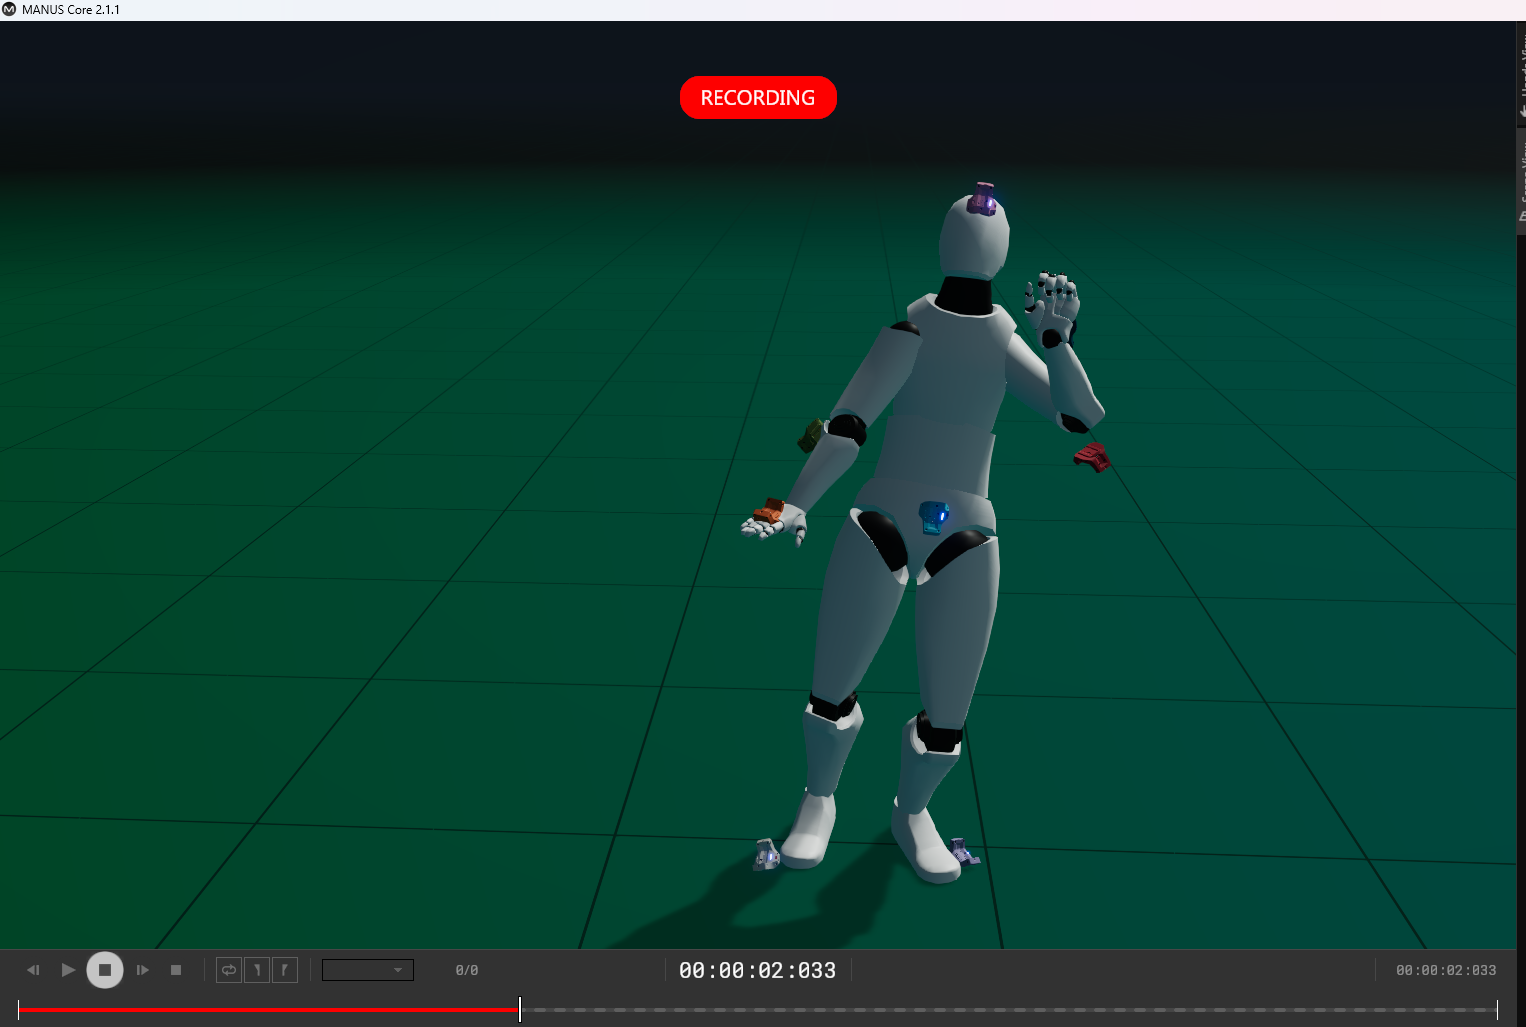
5. Once the recording concludes, click the 'Record' button again to halt the process. Post-recording, you have the option to review the clip and adjust the beginning or end as necessary by moving the two yellow indicators on the timeline.
Note: The software will only display the animation clip and not the live actions of the actor until the clip is cleared for another recording.
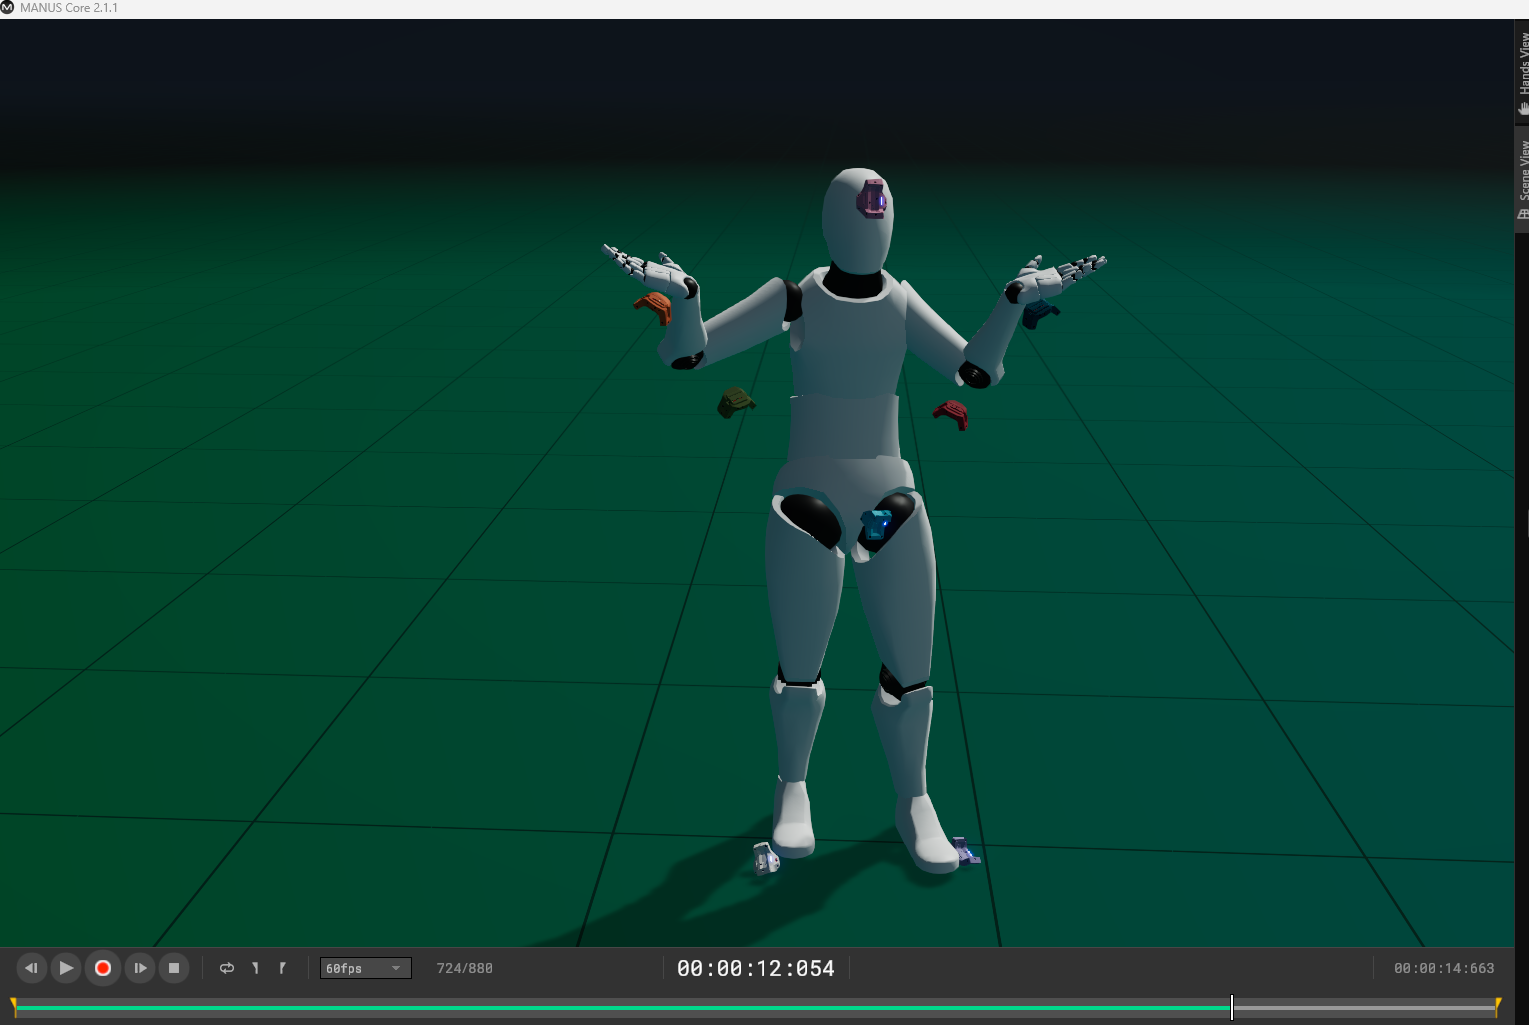
You can also adjust the framerate at which the performance is viewed

6. To save the animation clip, navigate to the lower right-hand side of the software and select 'Save'.
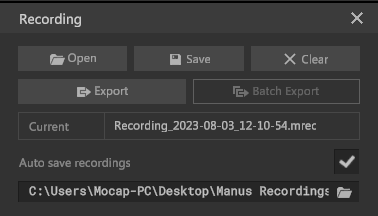
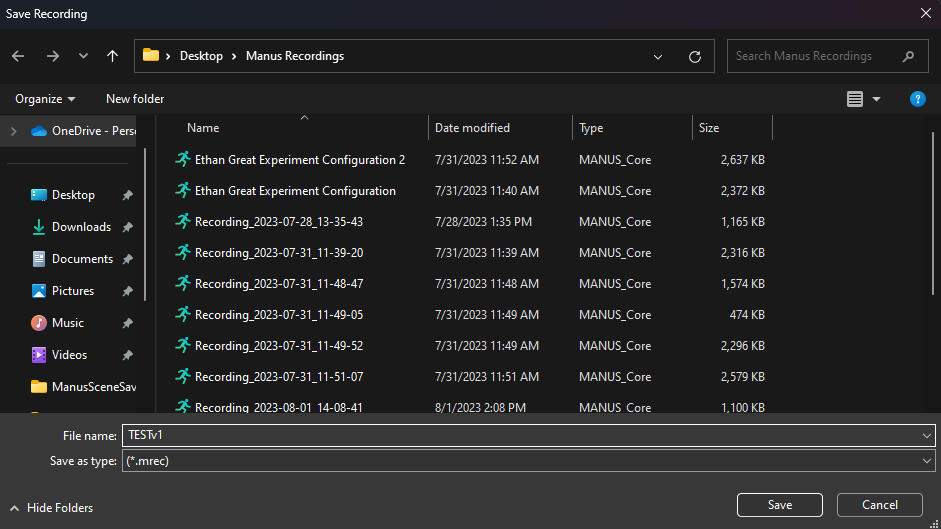
7. At this point, you're preserving the MANUS Core scene, and it is generally advised to consistently save your scenes. You will be prompted to designate a name and location for the scene. Once satisfied with the details, click 'Save'.
8. After you saved the scene select the export button. Here you will rename and assign a location too. Then for the skeleton select Mixamo and then X Bot.
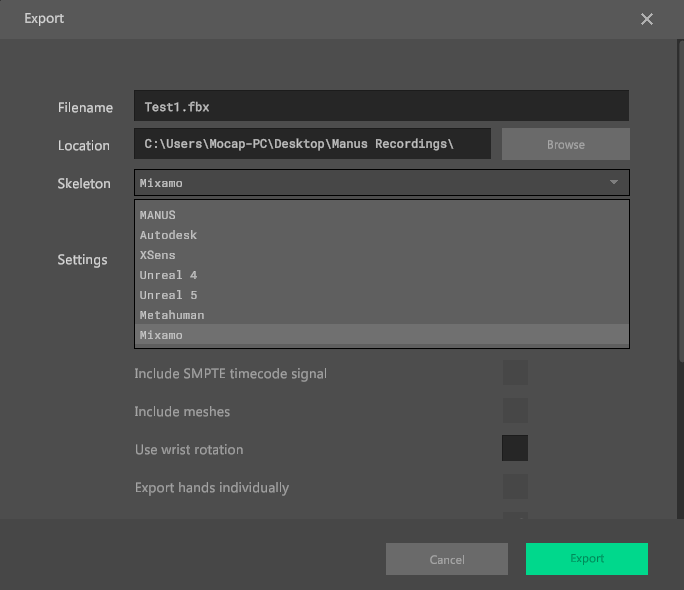
The following are the additional settings that I've found to yield the best results.
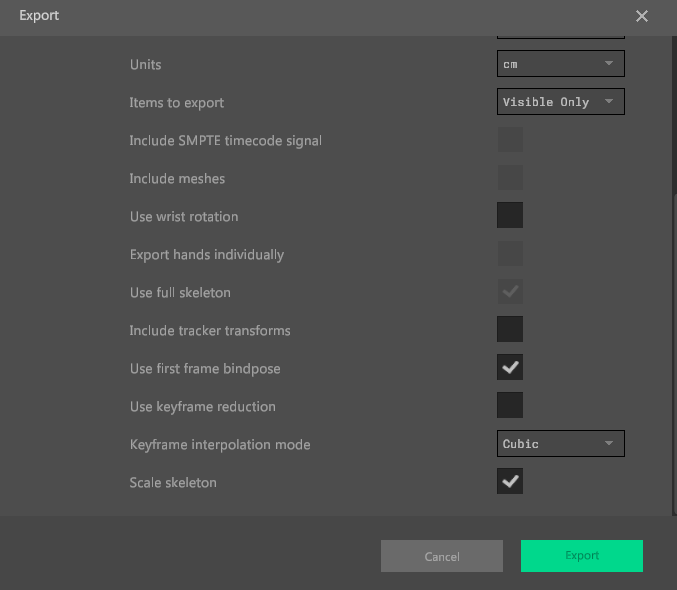
9. Now, a file of type FBX should be present in the location you specified.
MANUS Core Calibration
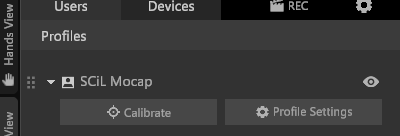
1. To initiate calibration, click on the 'Calibrate' button located in the 'Users' tab on the right-hand side of the page.
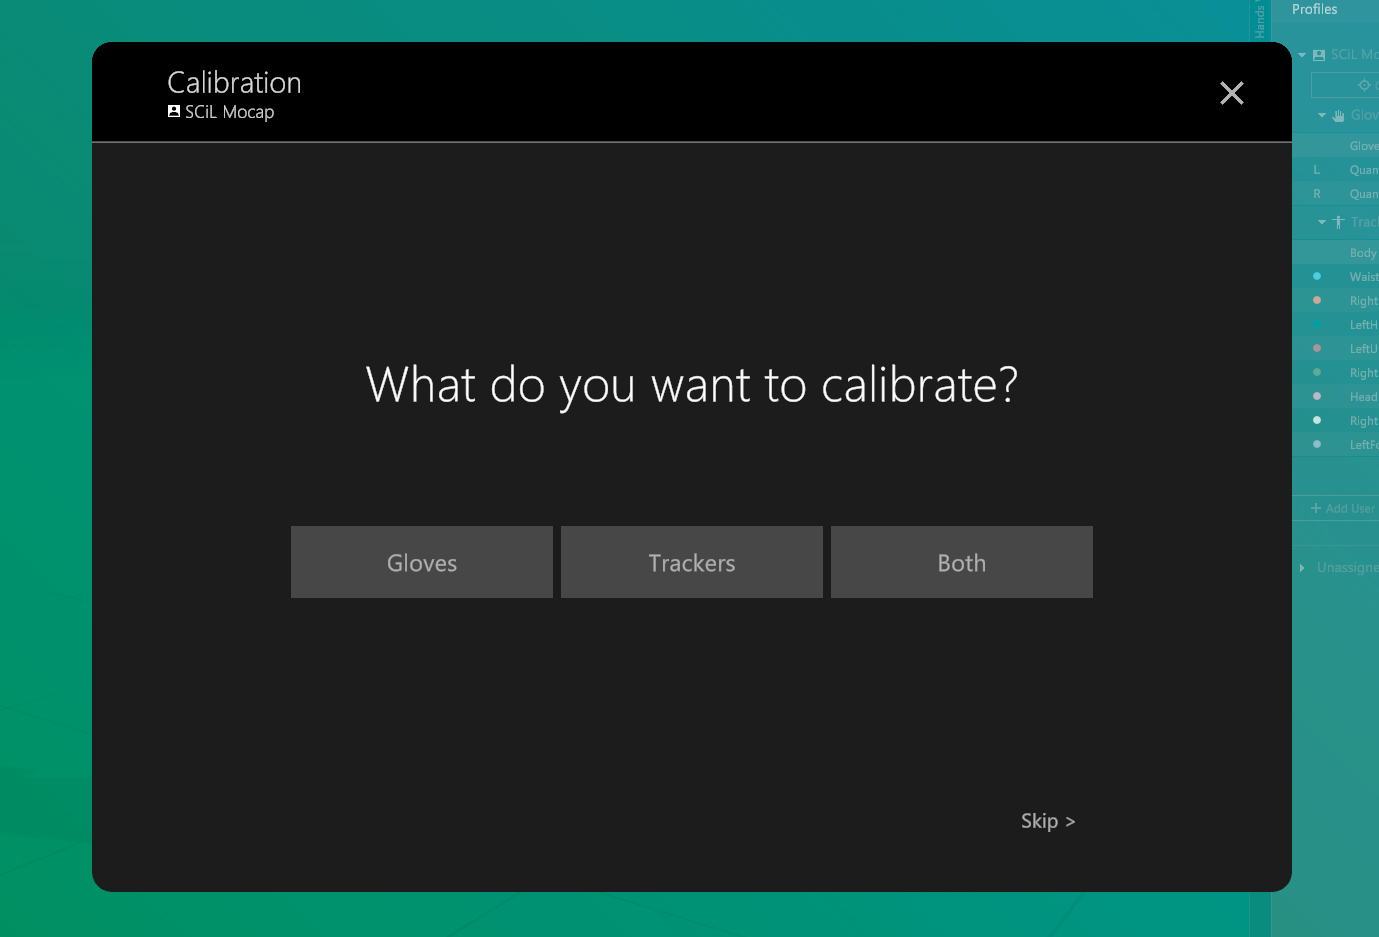
2. Upon selection, you will encounter three options, the first of which is 'Gloves'. Choose this option to proceed.
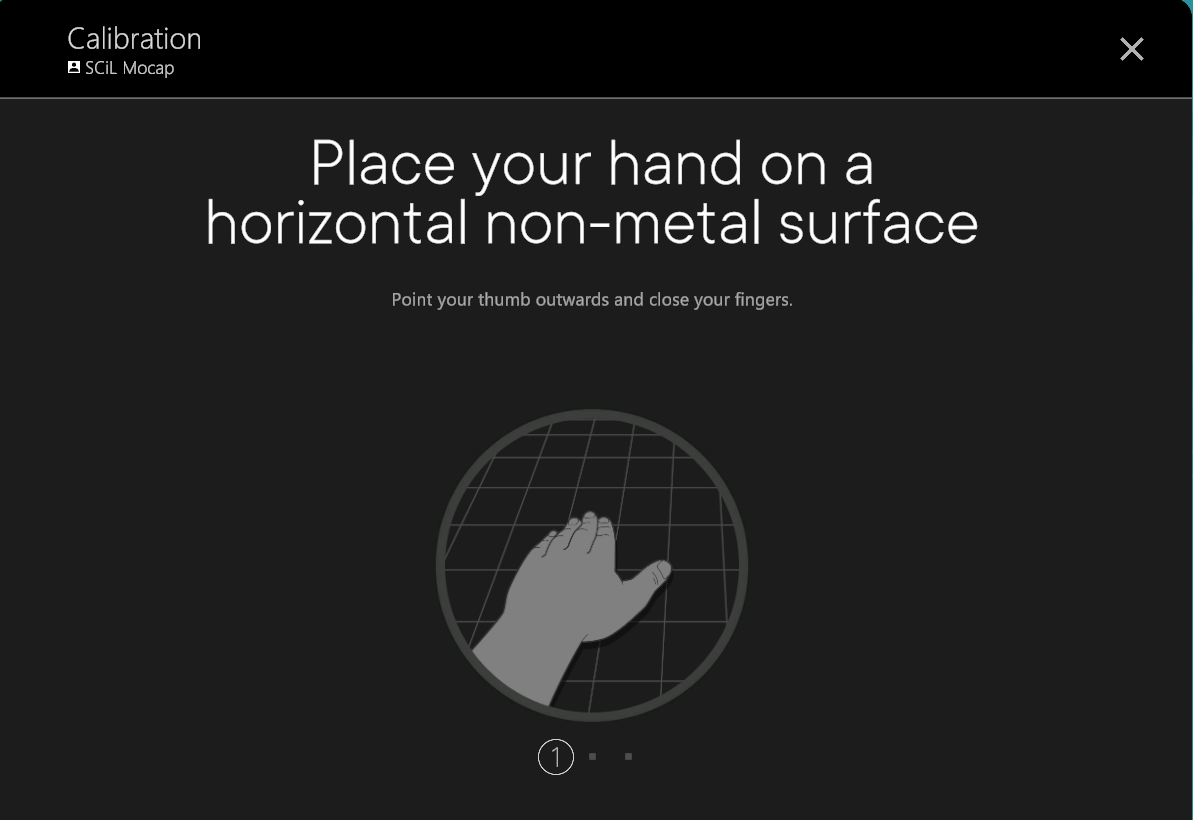
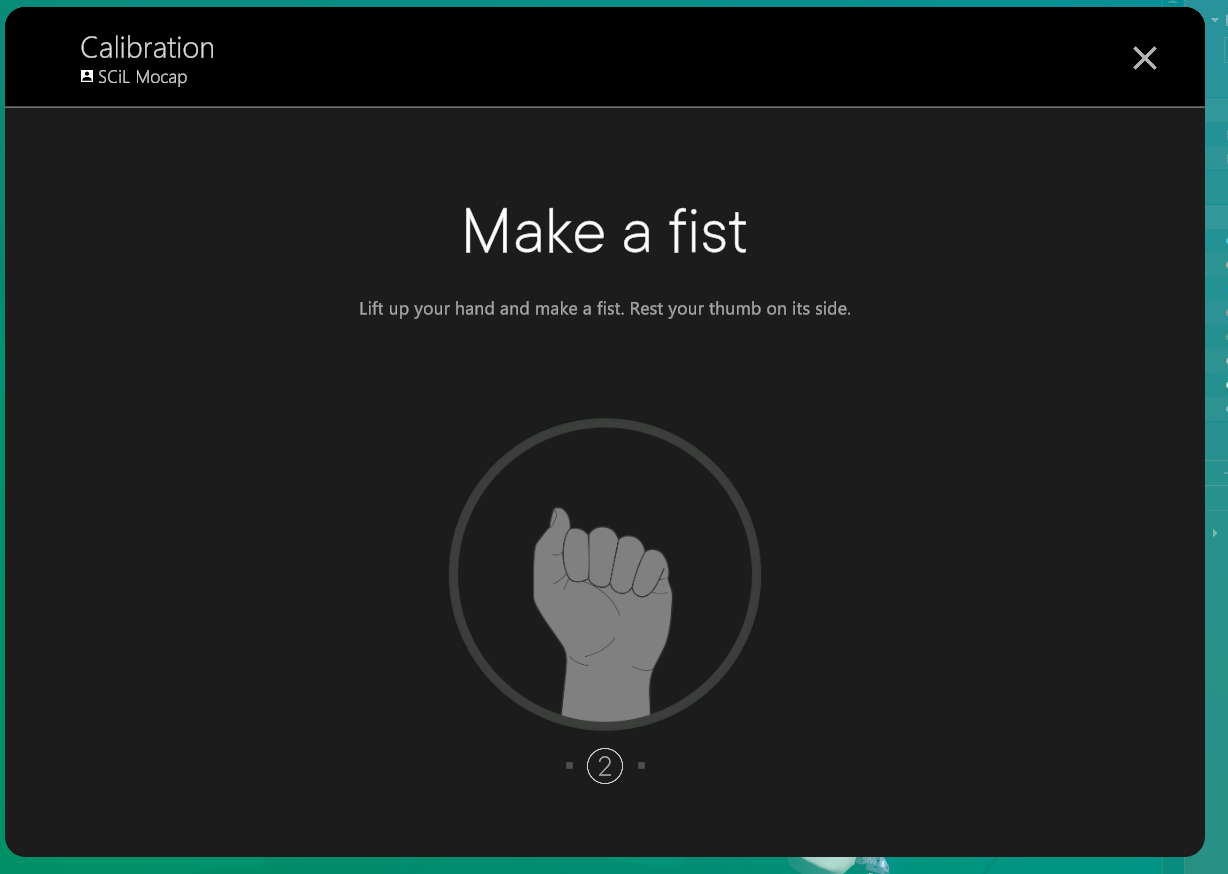
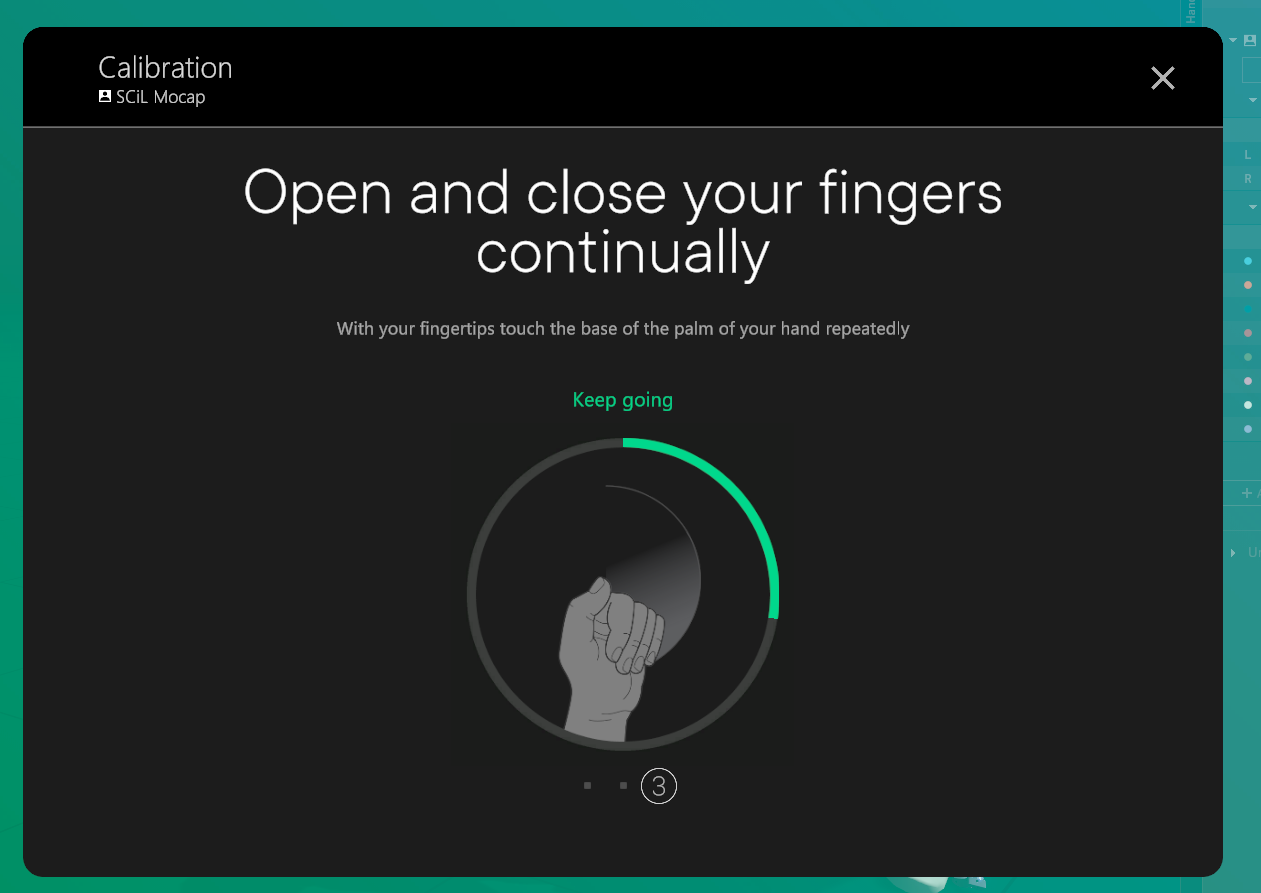
3. A prompt requesting confirmation to begin the process will appear. Instruct the actor to prepare their hands and follow the on-screen directions.
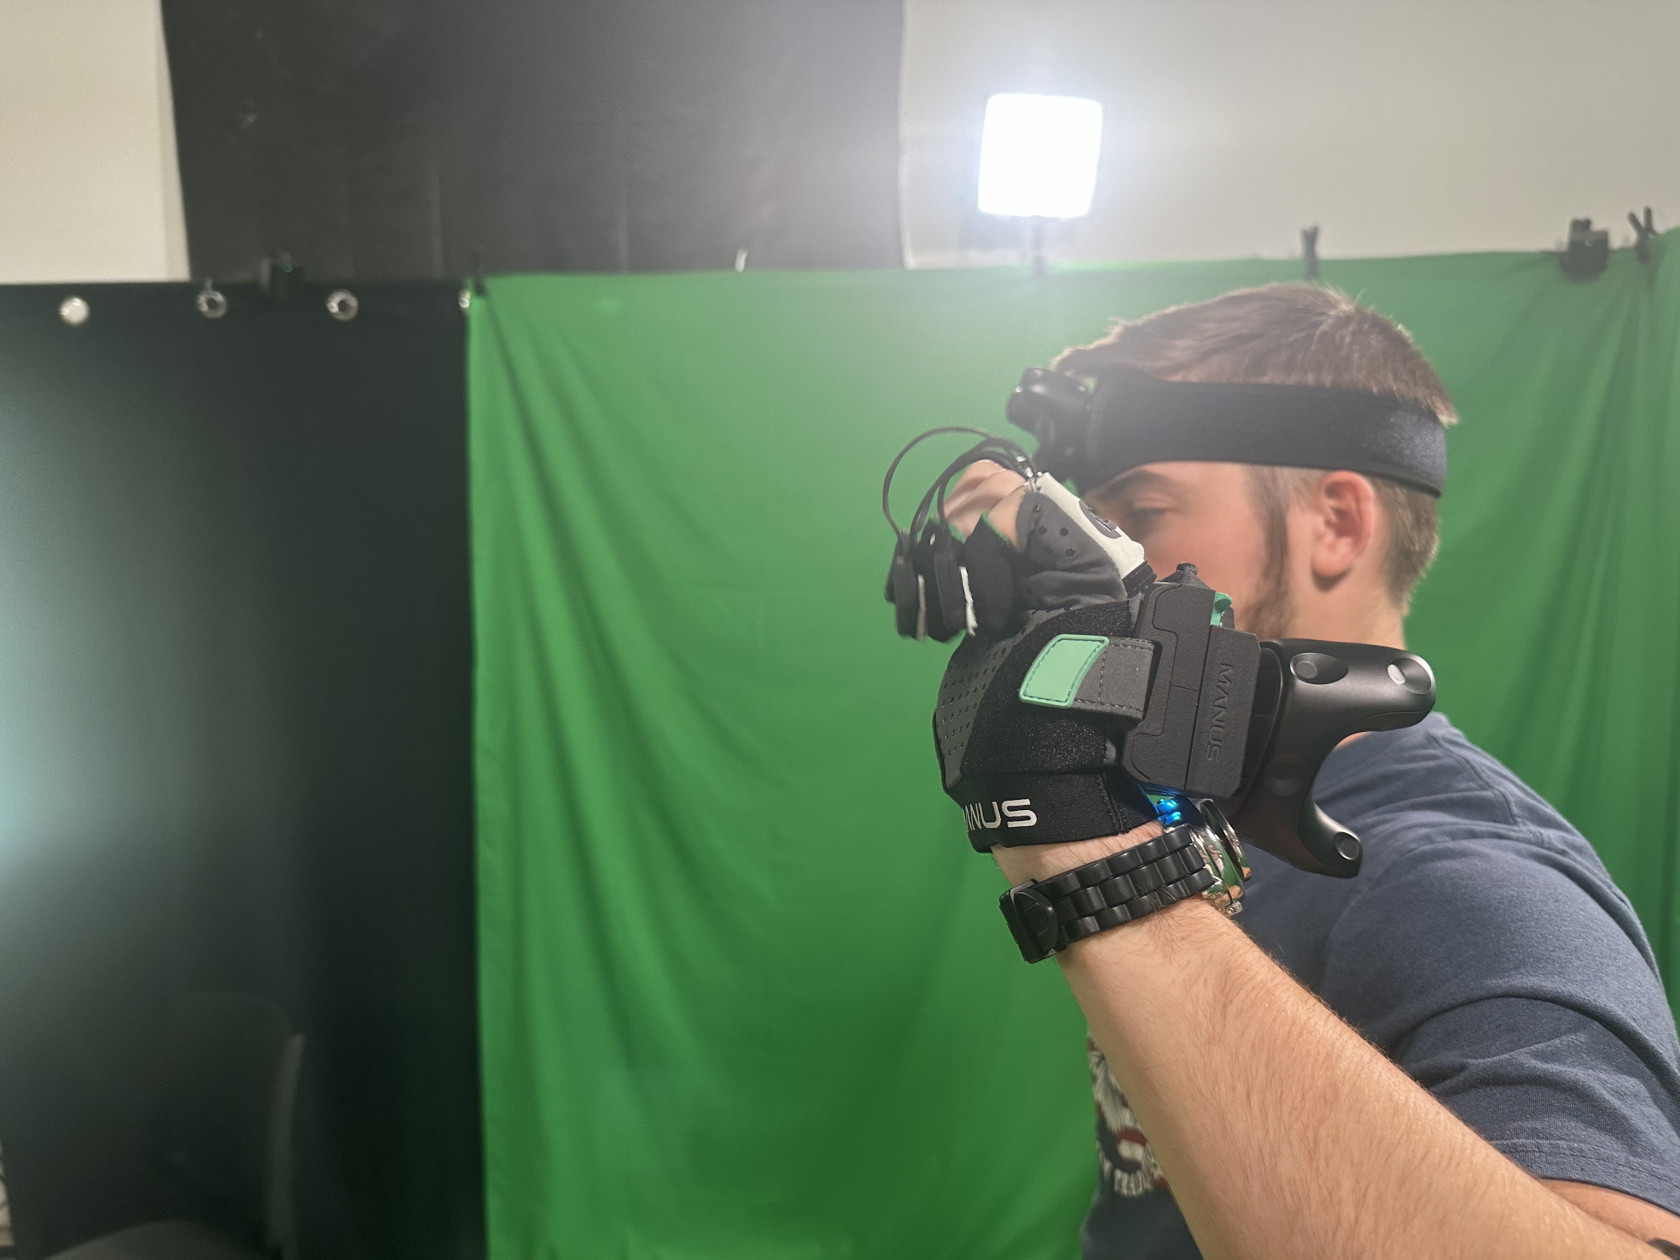
Note: At the time of writing this guide, a third monitor, capable of being angled towards the actor in the studio, is located on the right-hand side of the desk. This monitor mirrors the second monitor, so displaying the Manus software on this screen is crucial for the actor to follow along.
Upon completion of the calibration for each pose, a green checkmark should appear. If a red 'X' mark materializes with a message stating 'Calibration Failed', simply repeat the step. Should calibration for a specific pose persistently fail, consult the troubleshooting page for assistance.
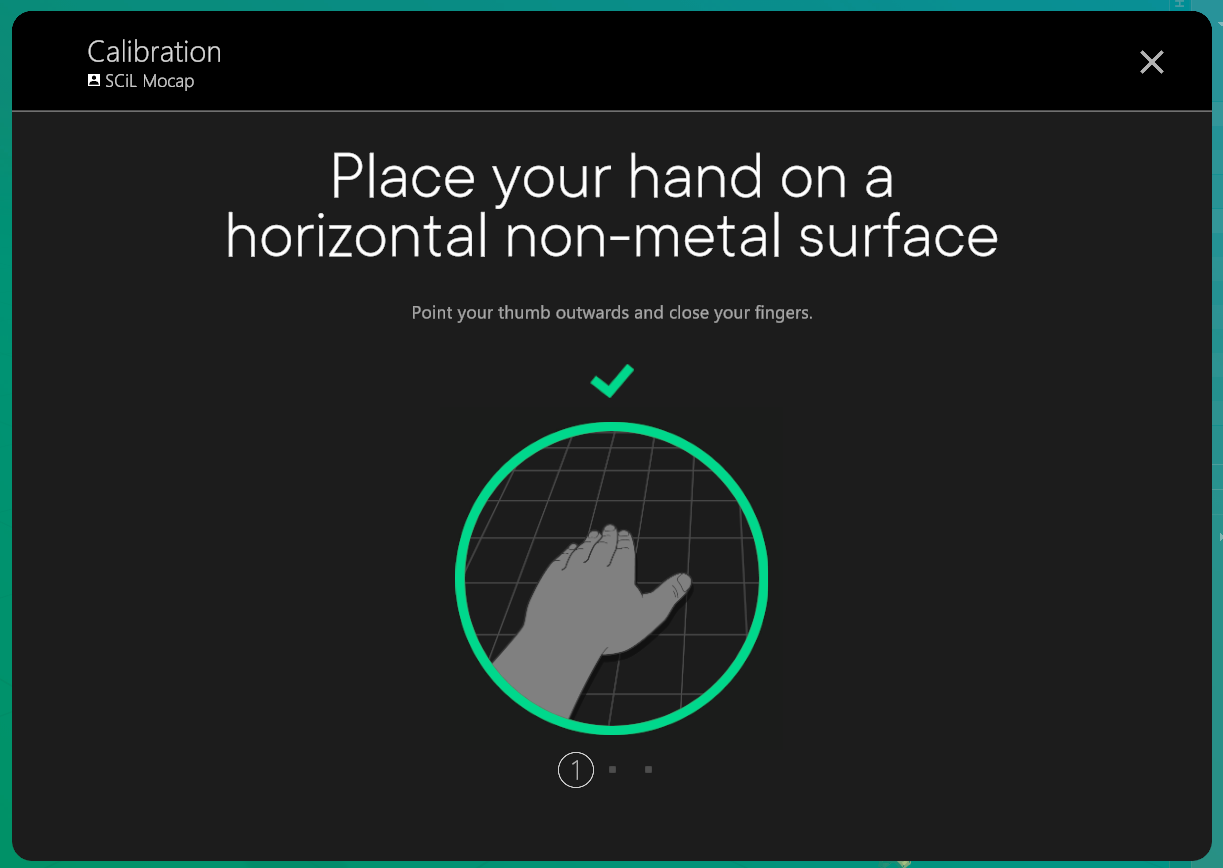
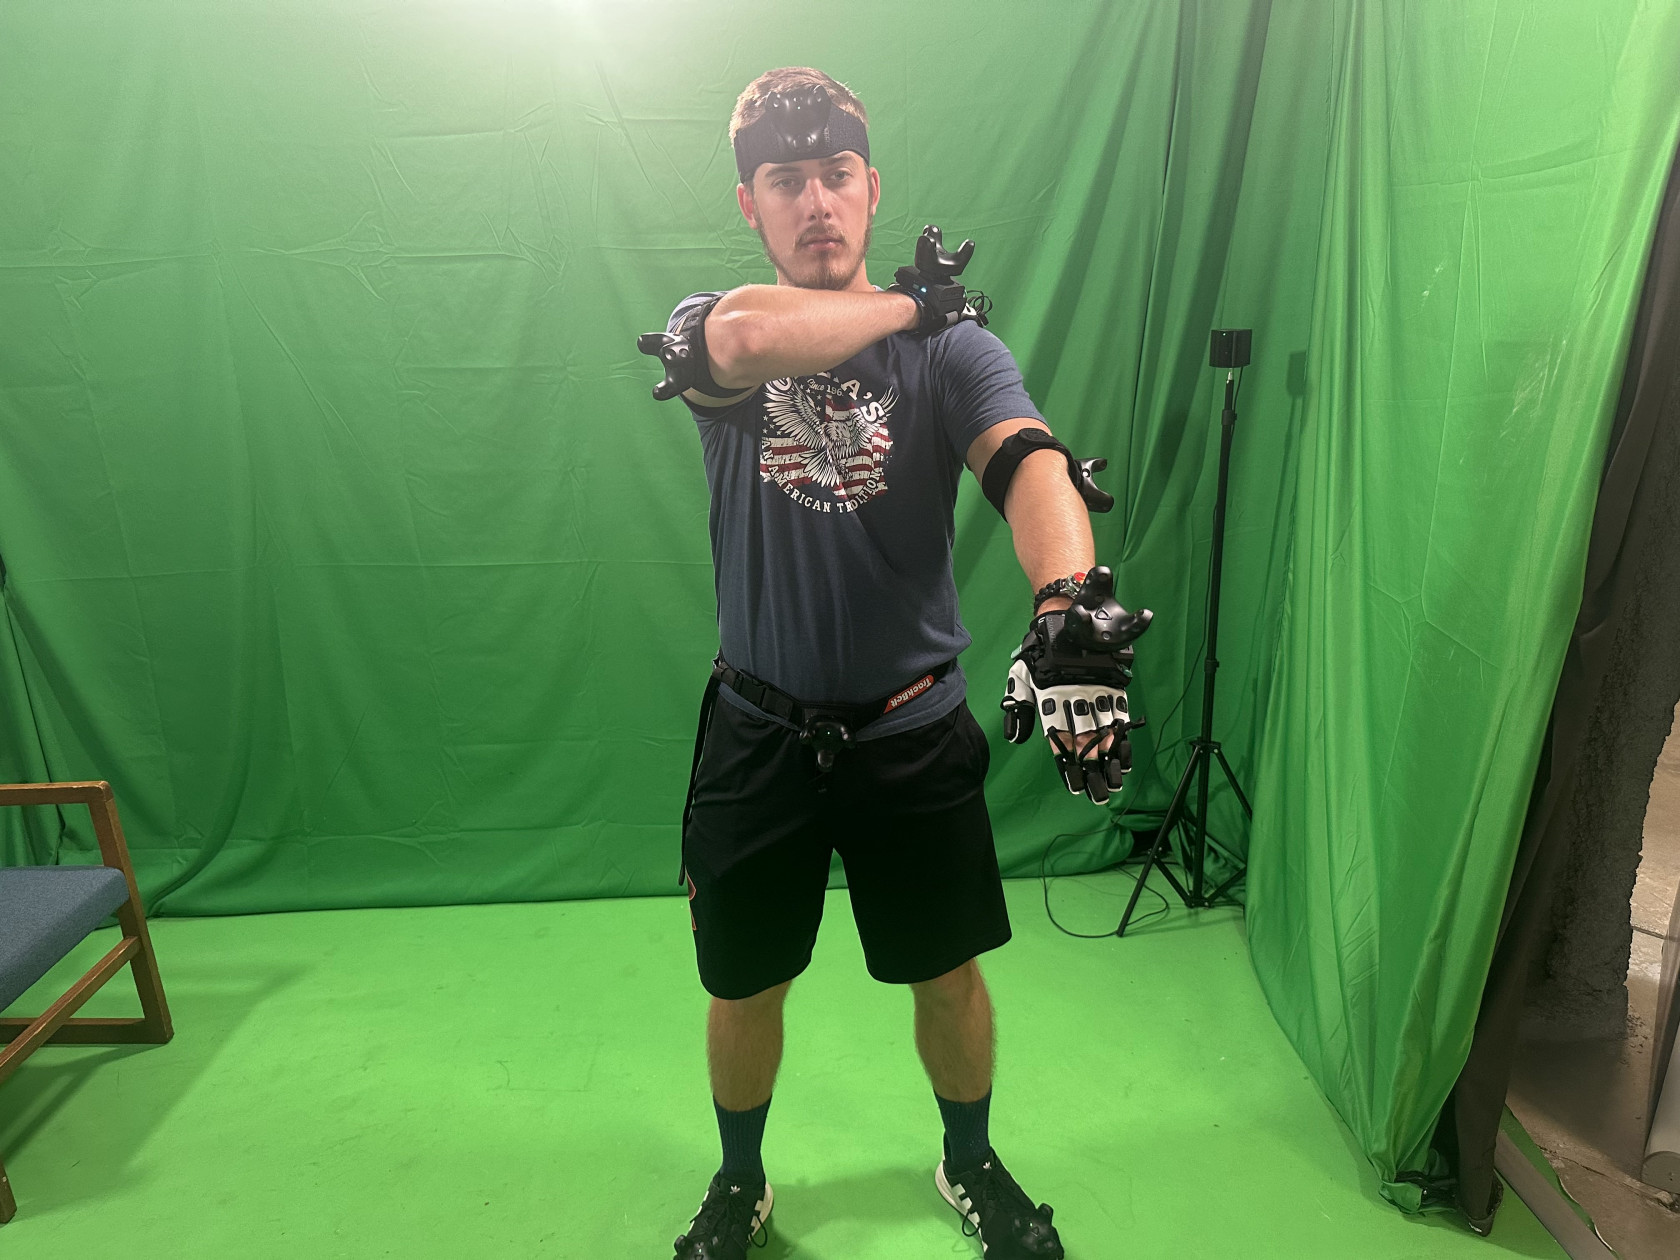
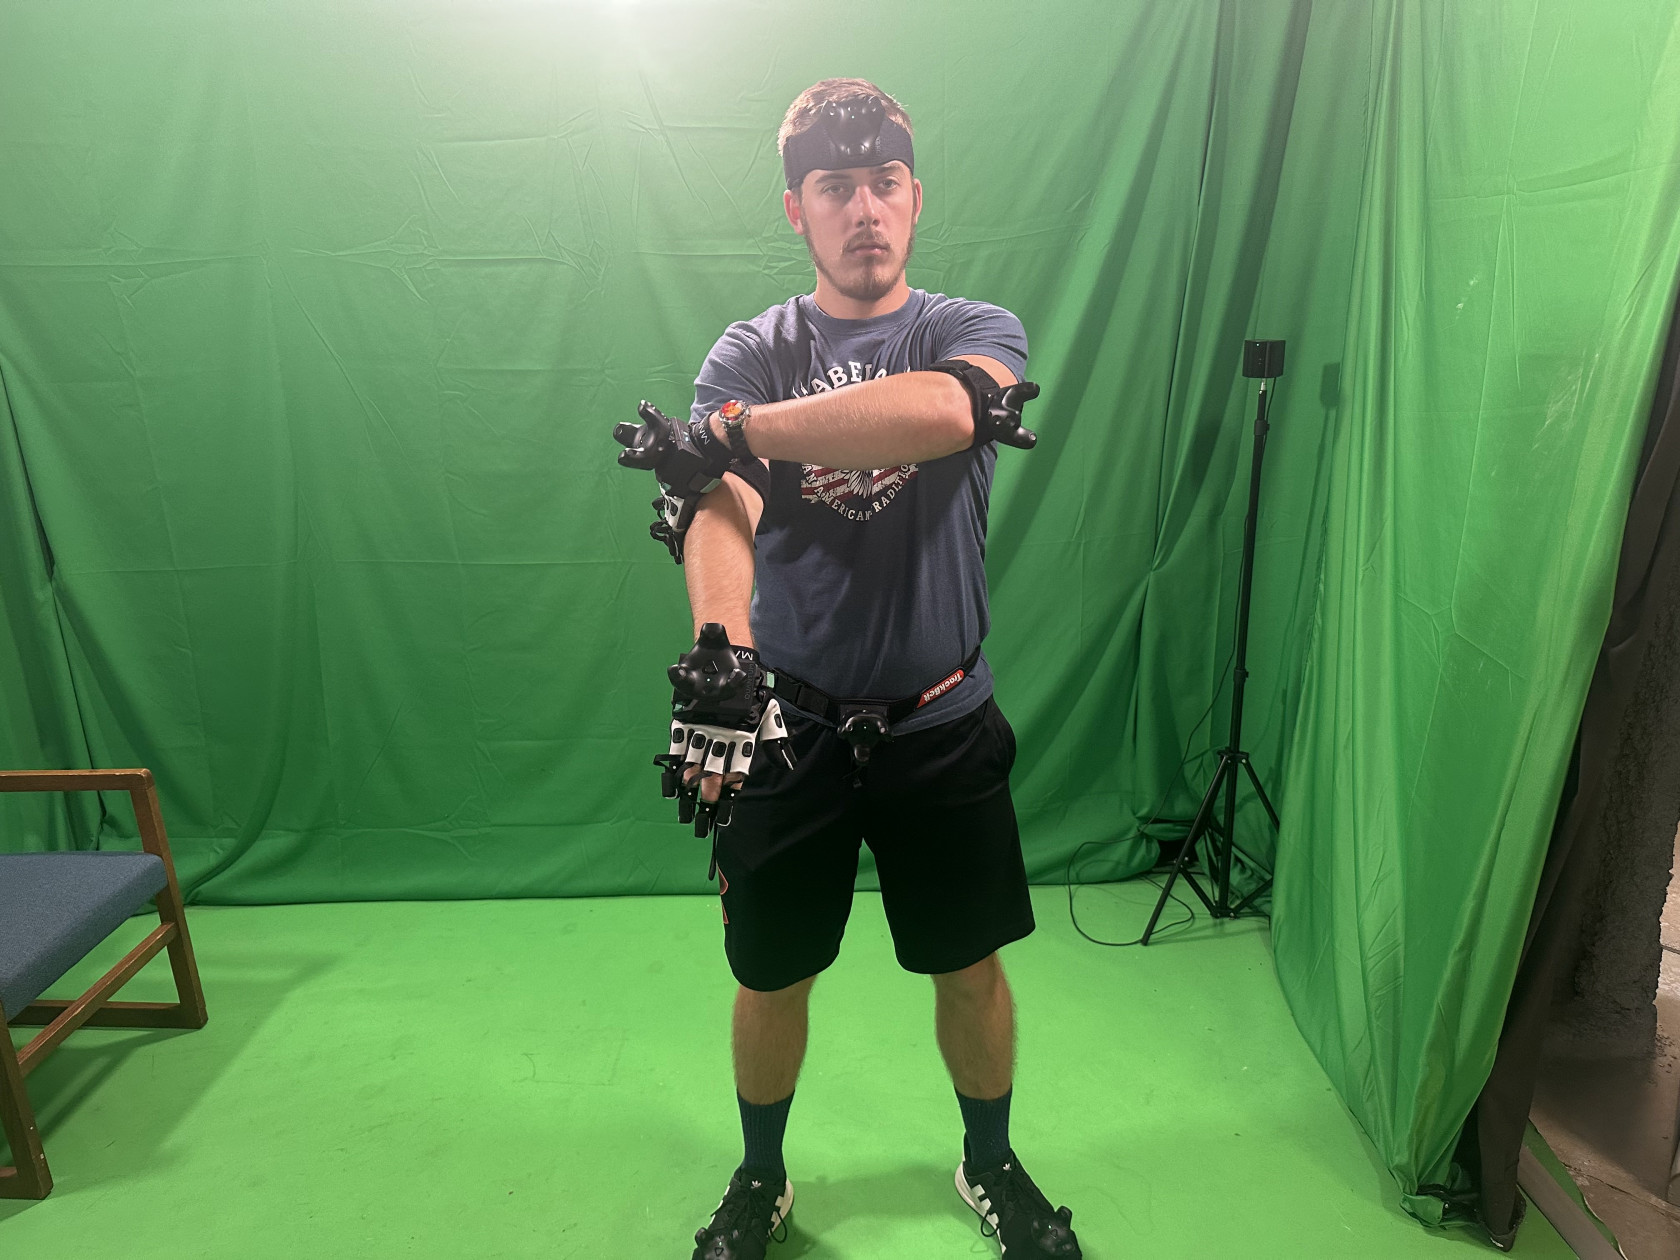
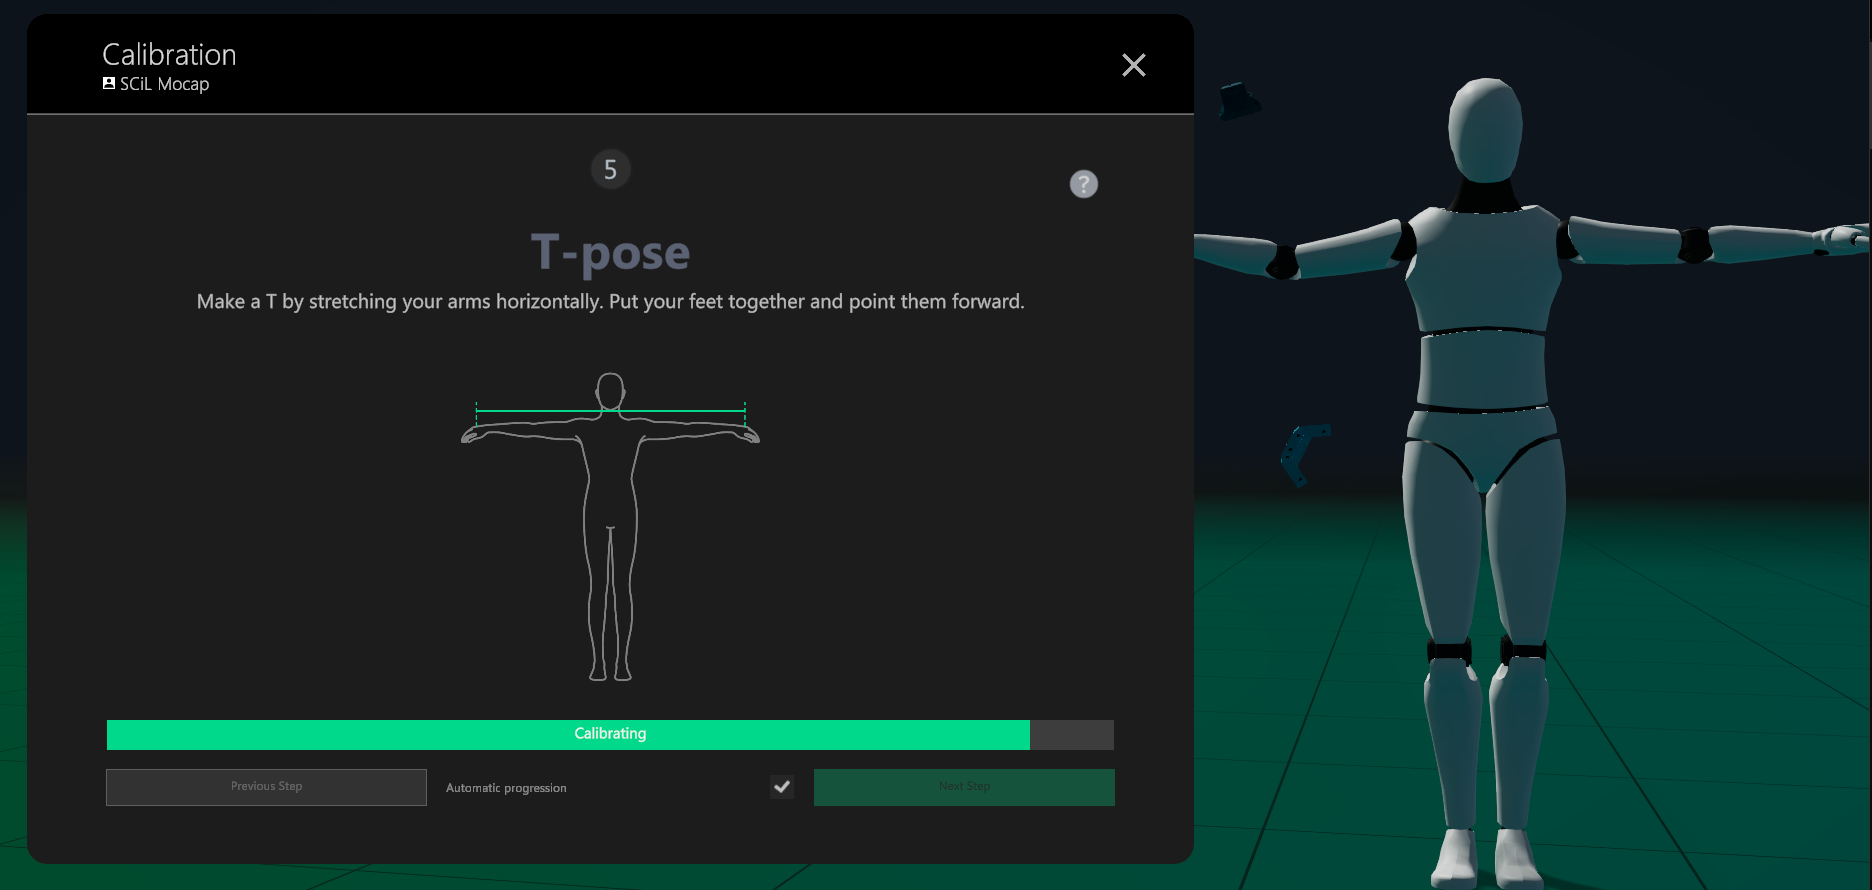
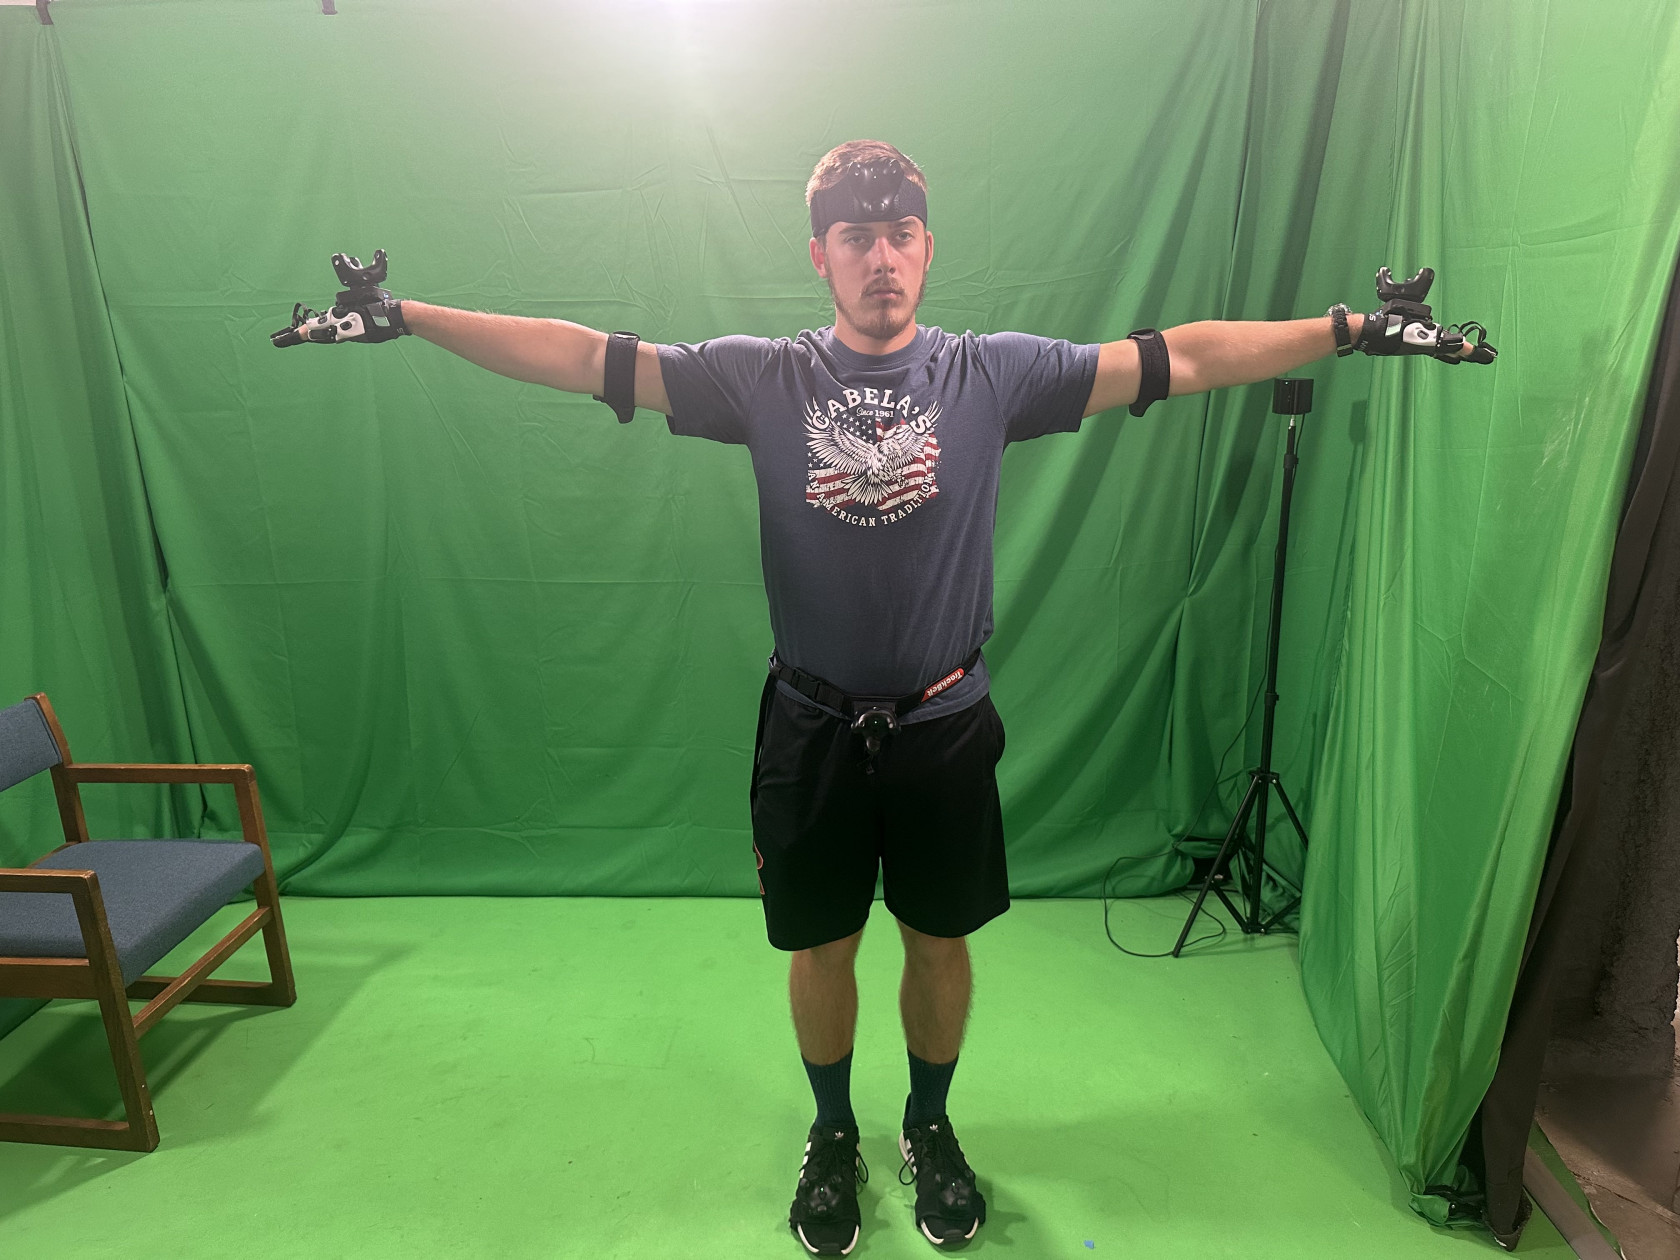
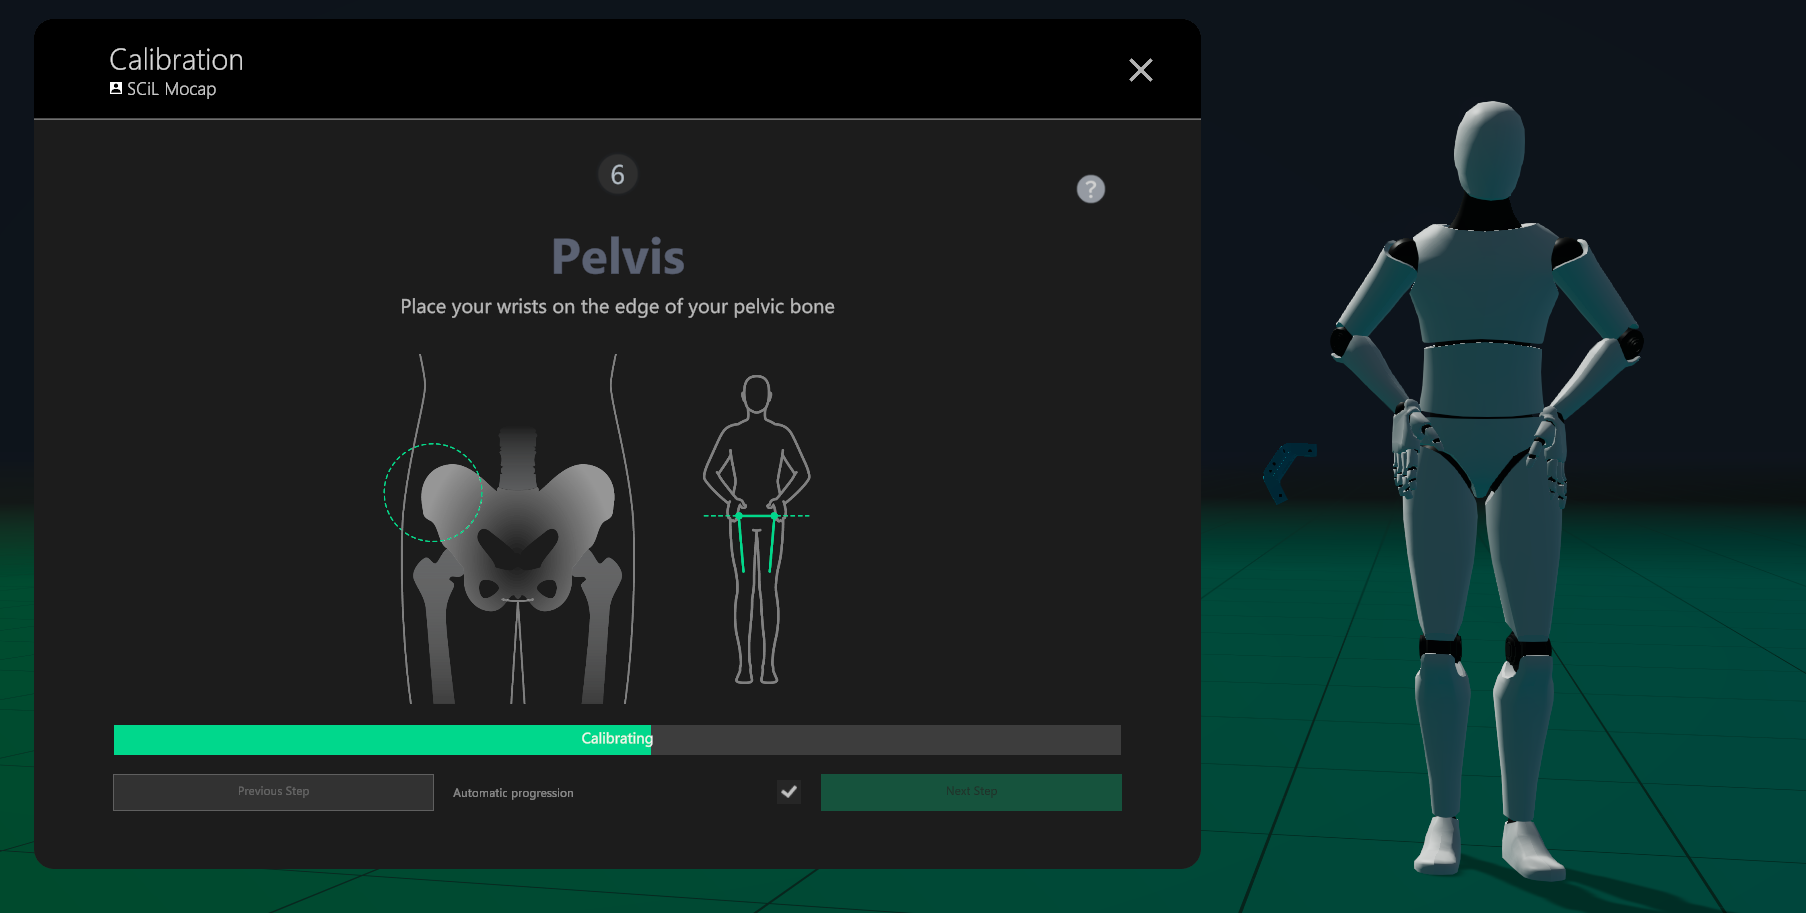
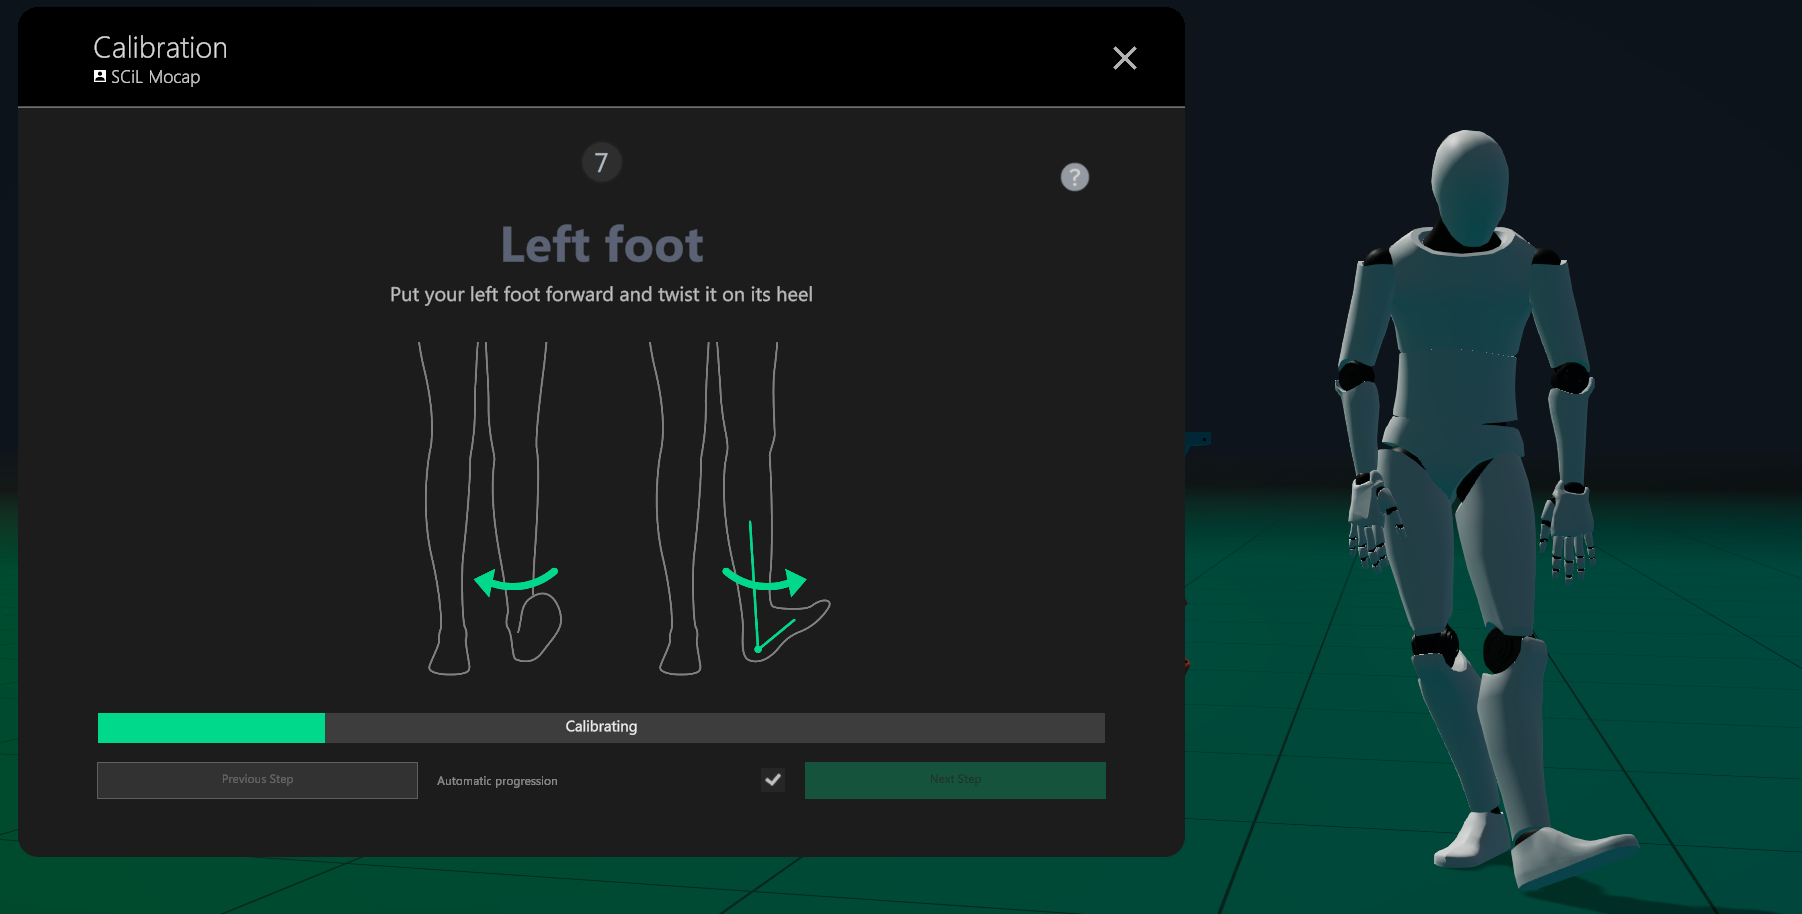
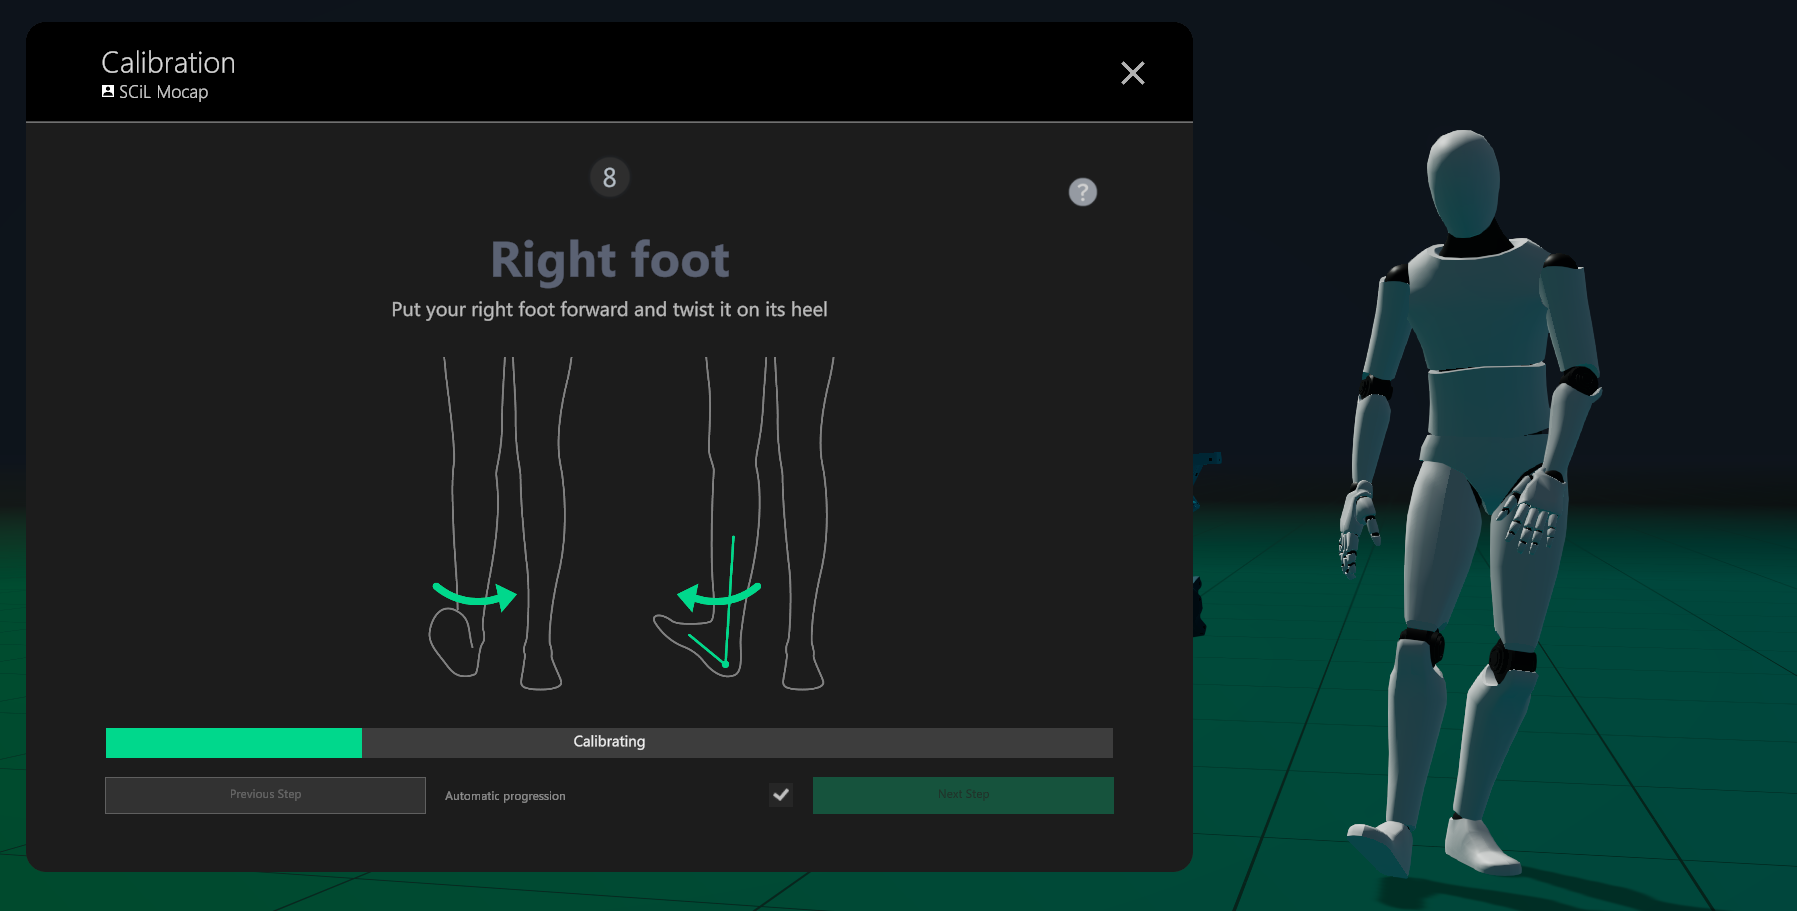
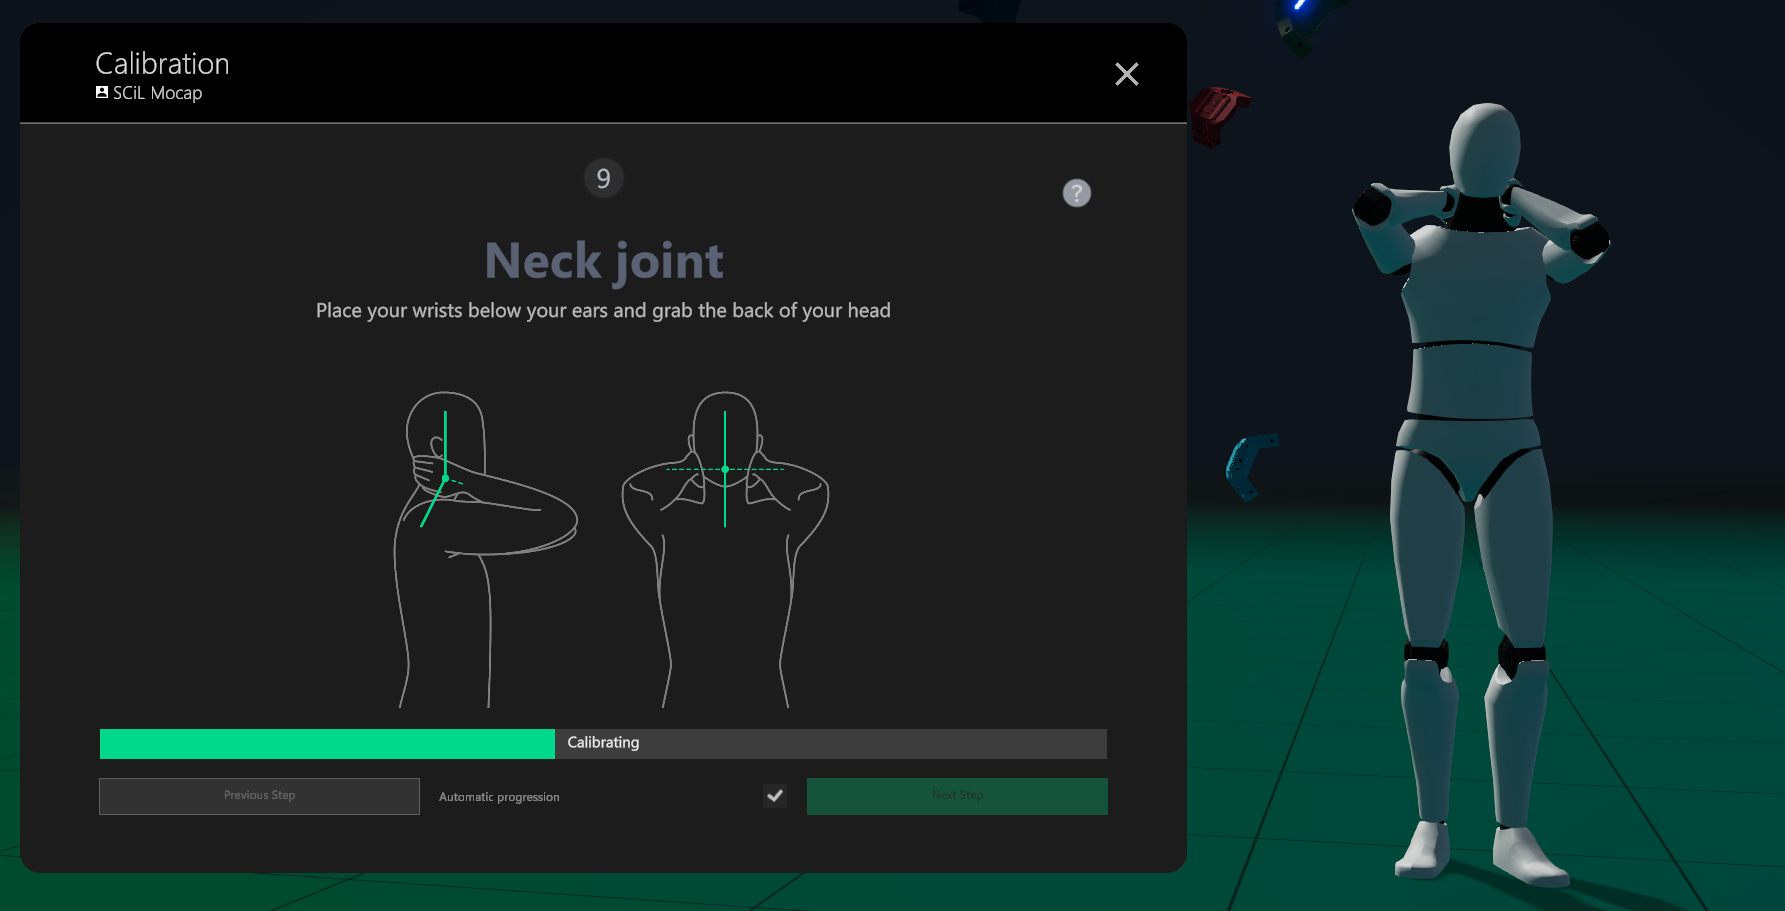
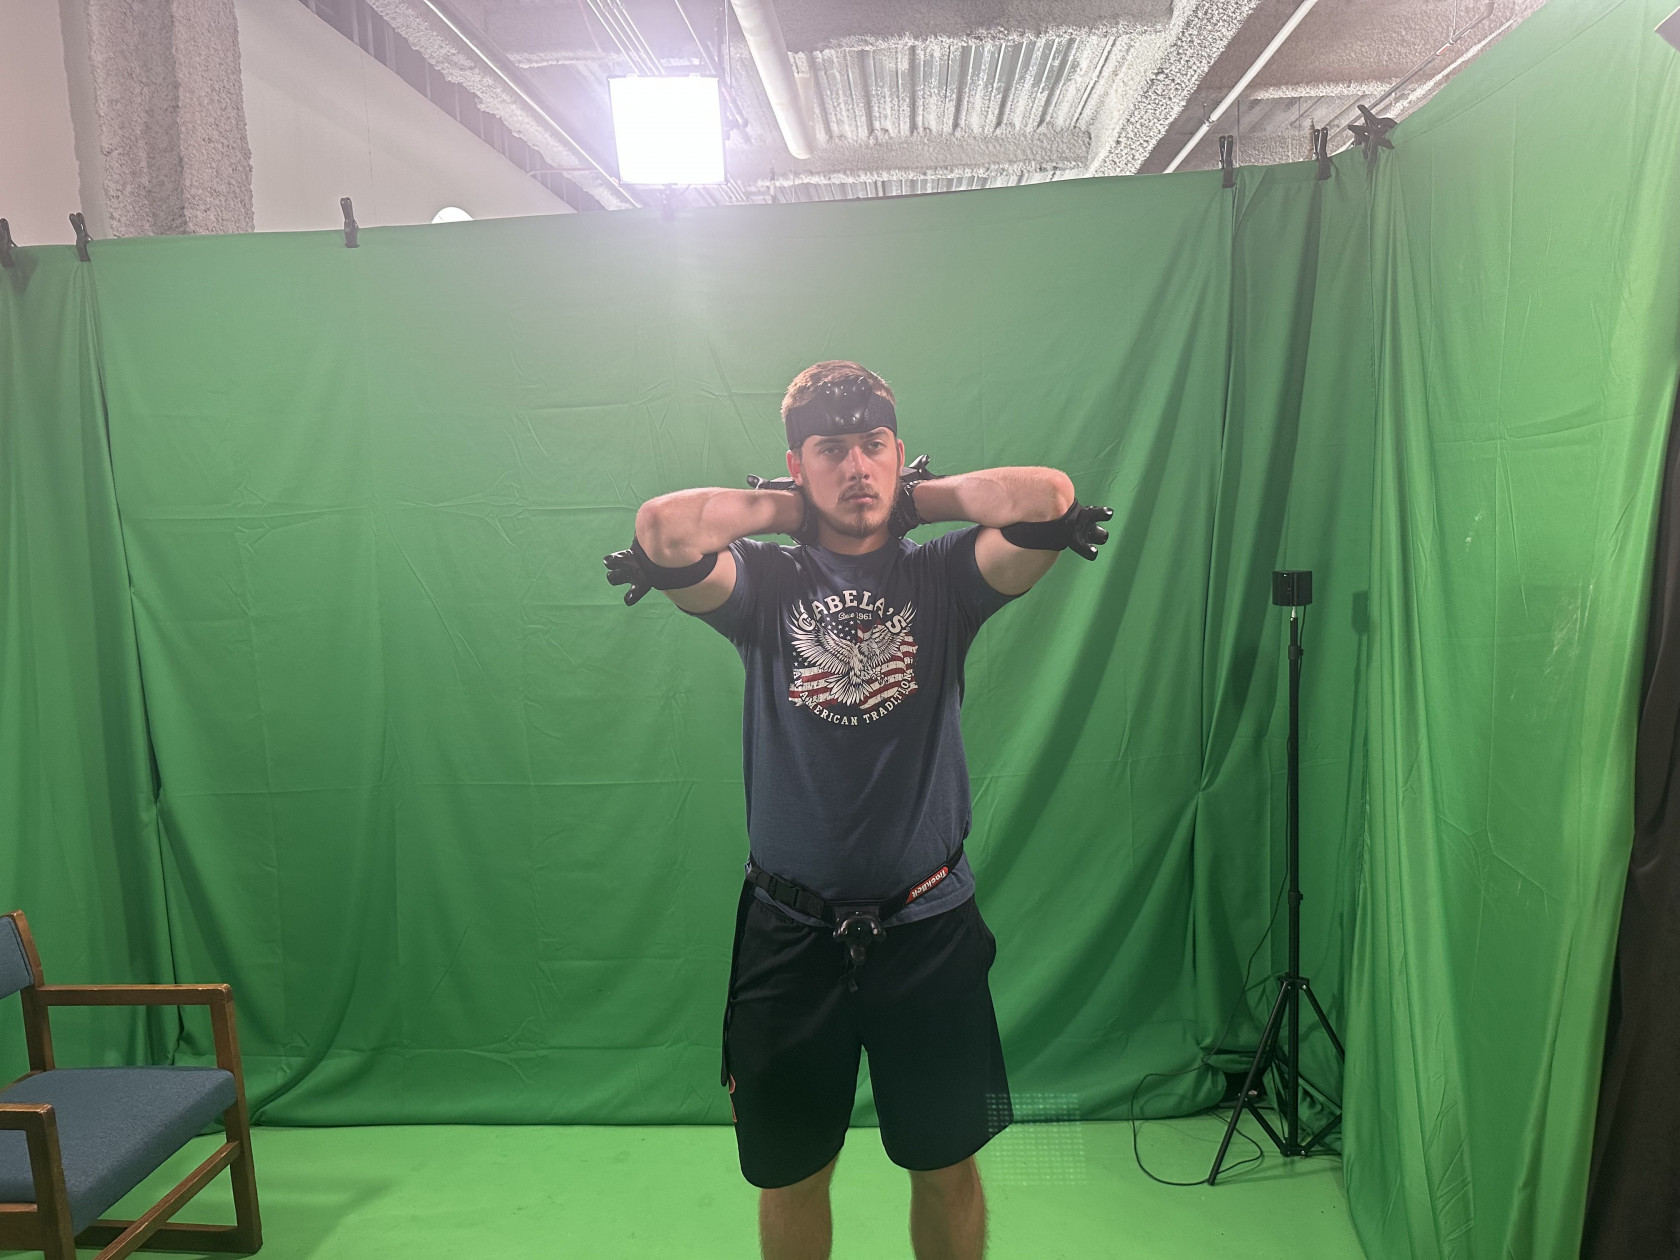
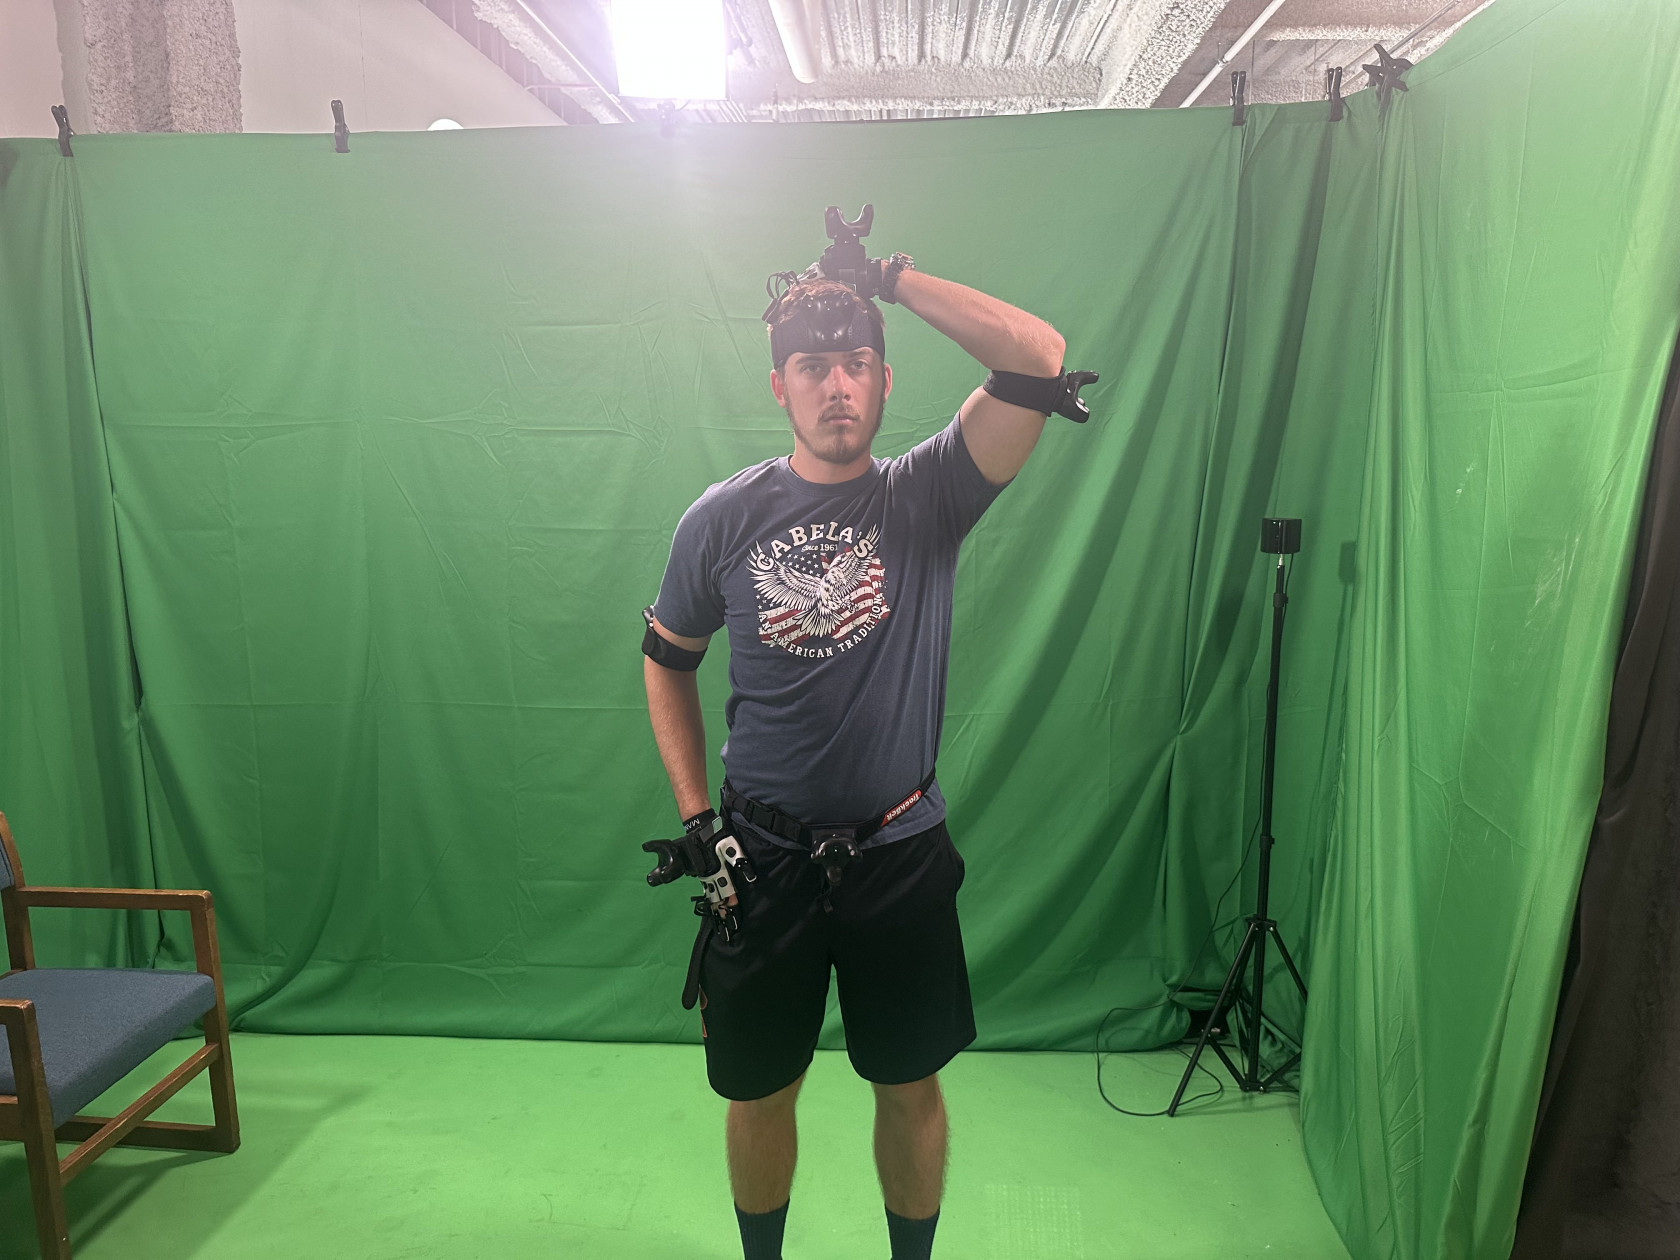
Continue with the calibration sequence, referring to the images on this page for guidance in assisting the actor. After calibrating the left hand, the process will transition to the right hand (the steps remain the same).


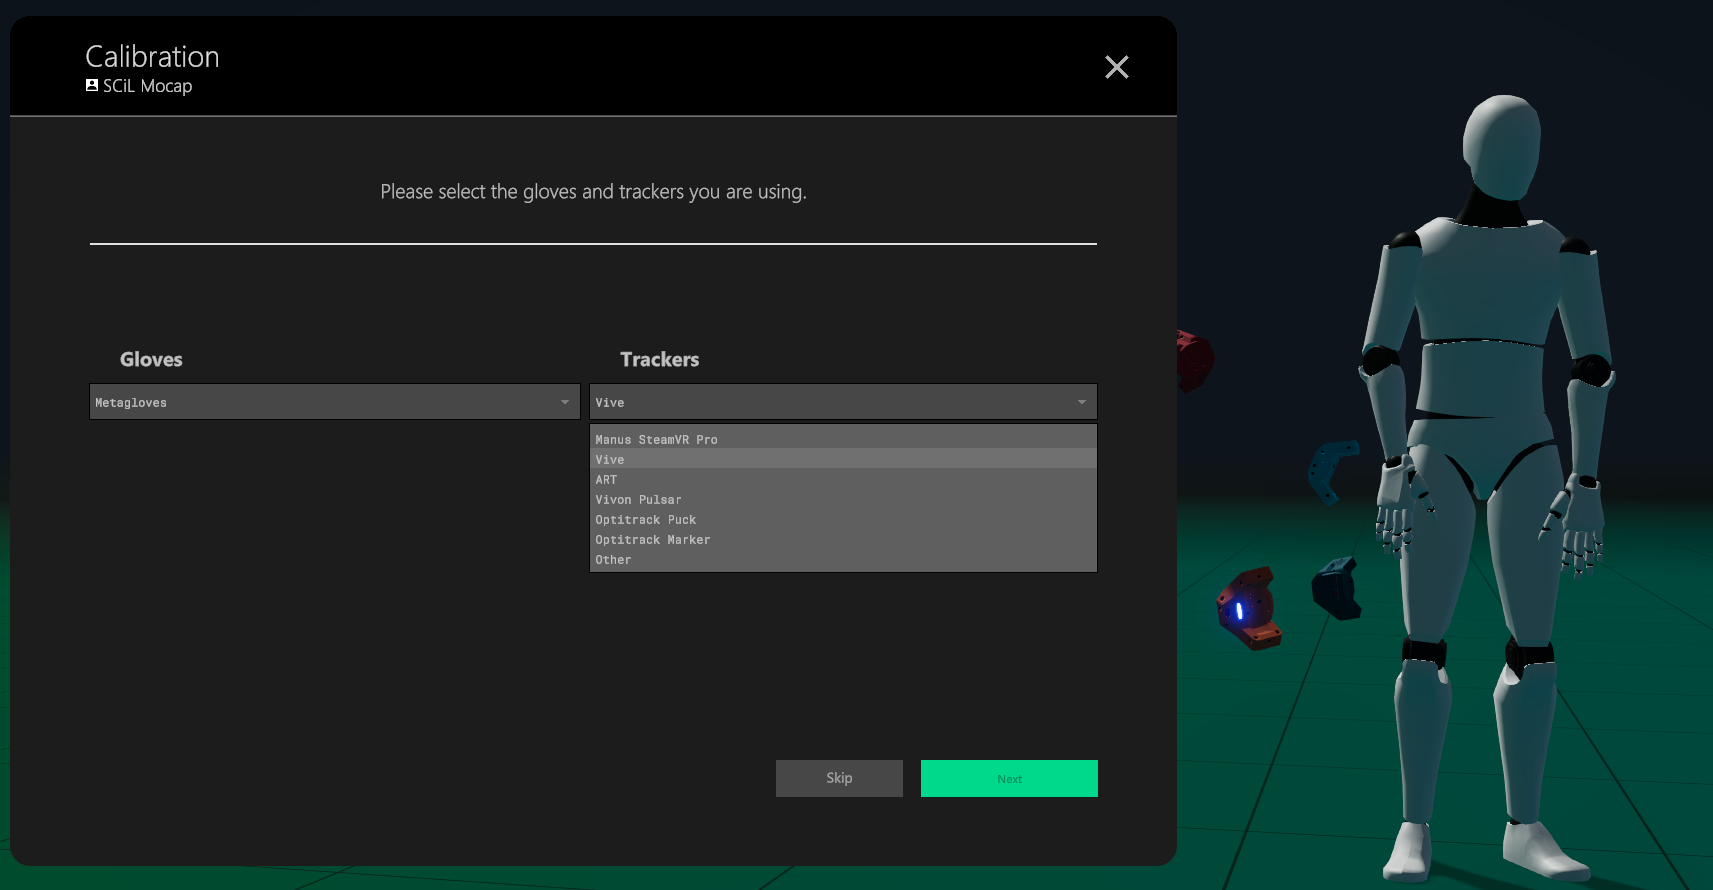
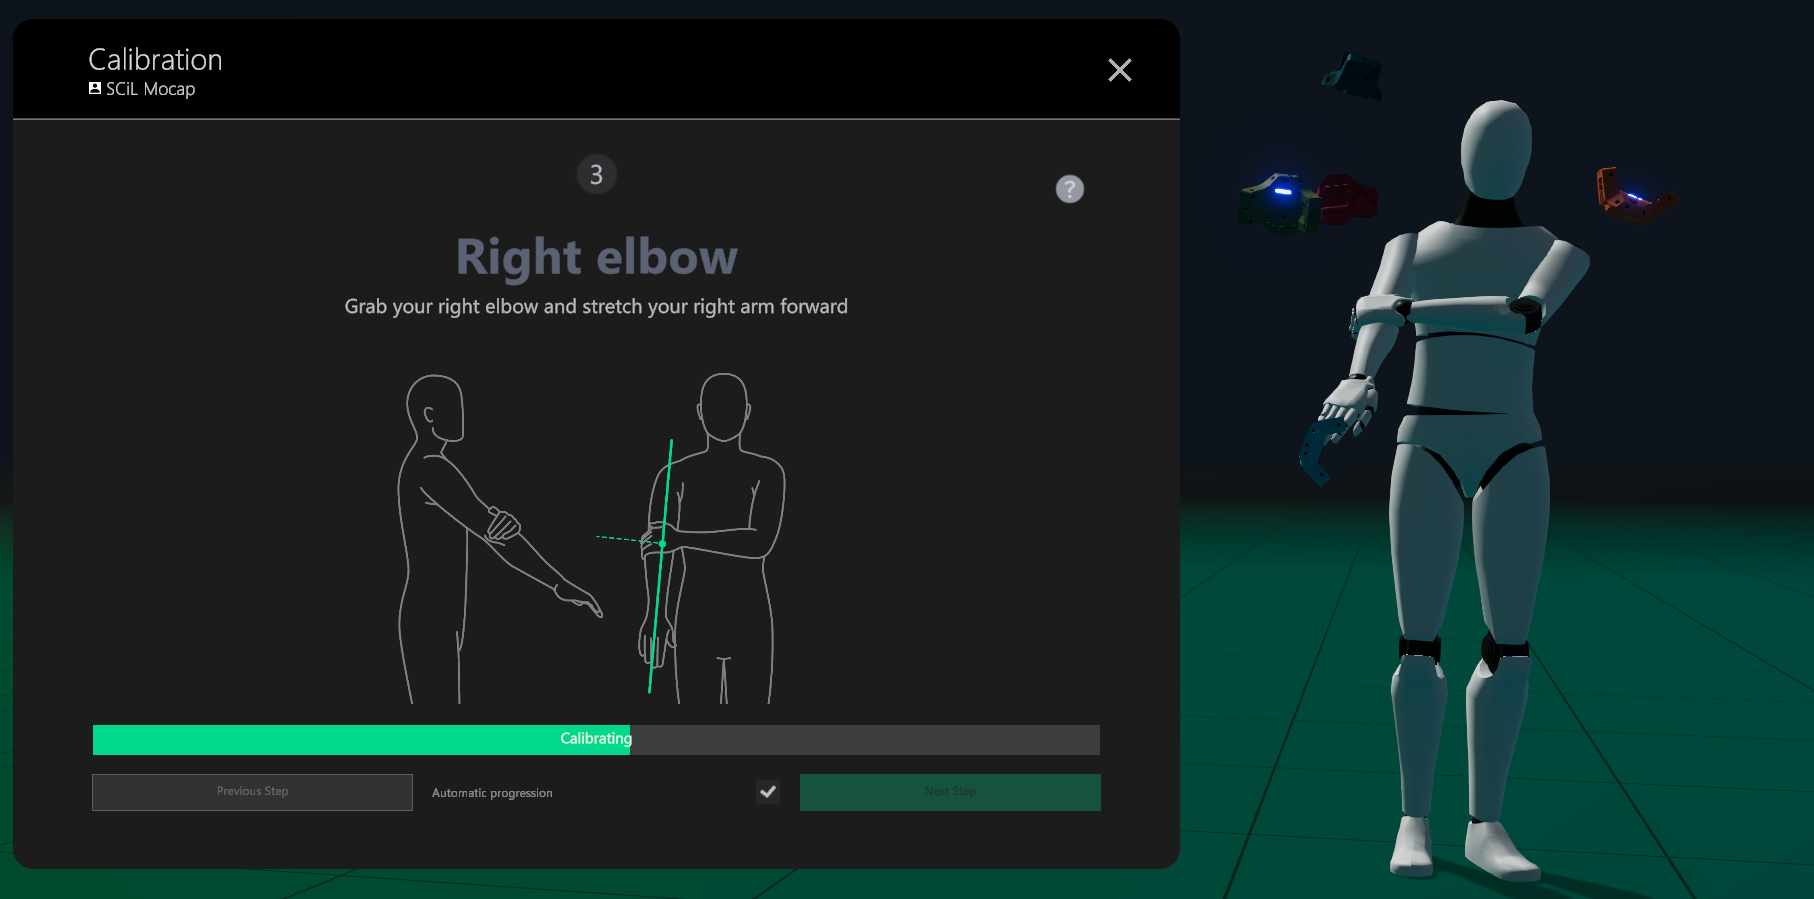
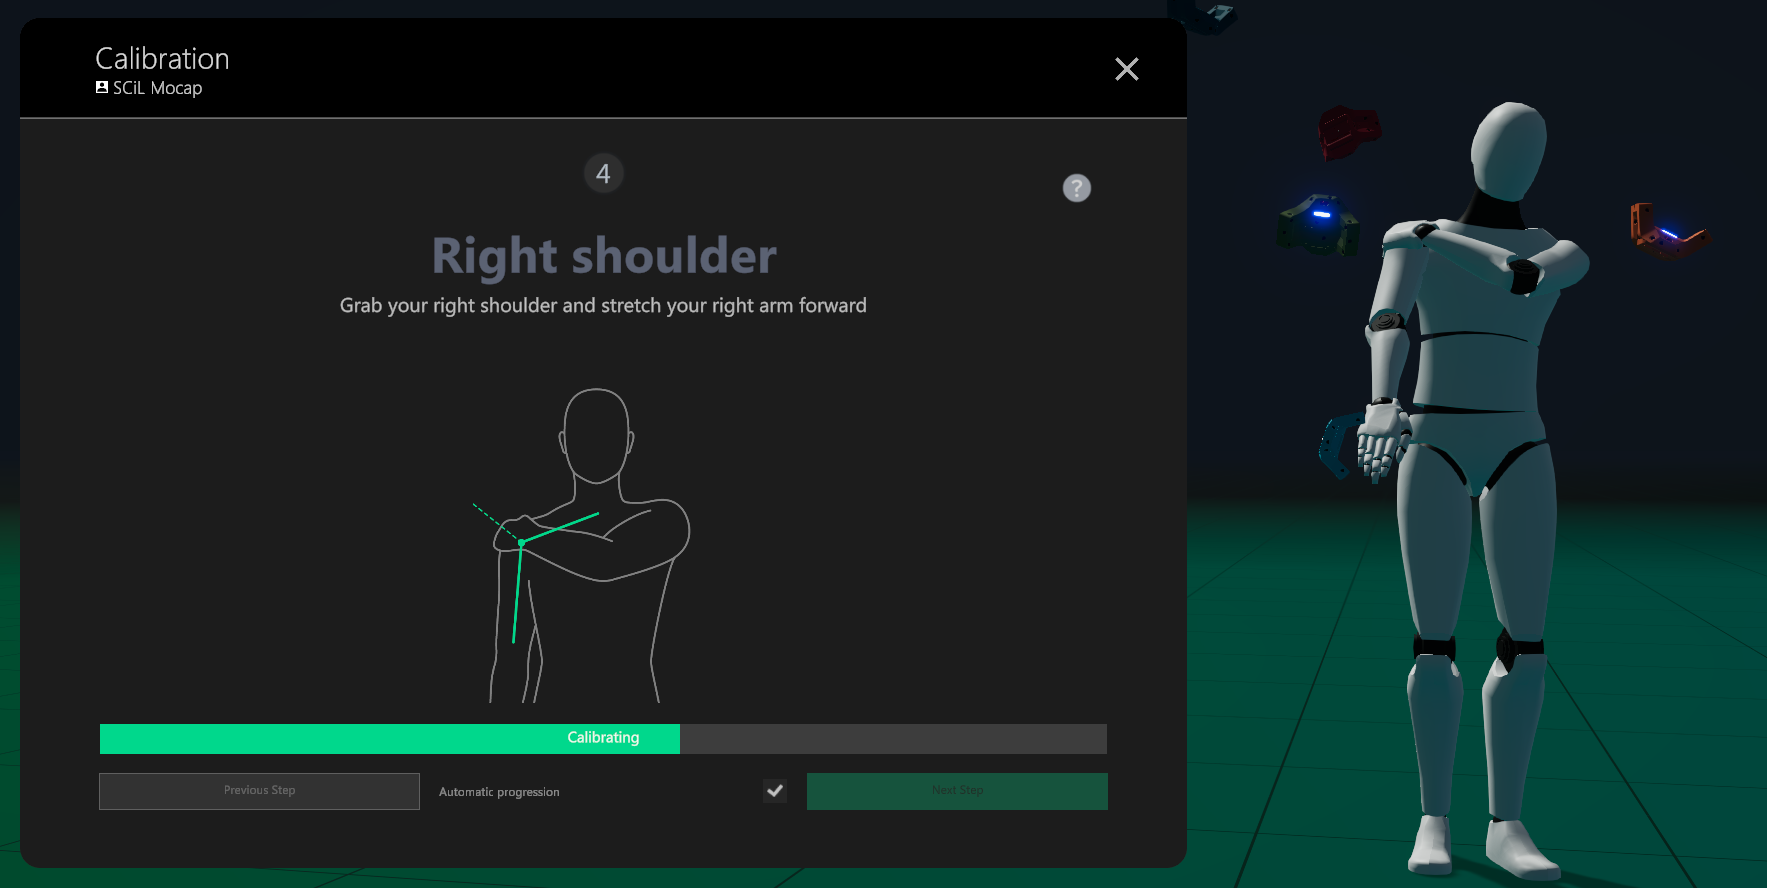
4. Once calibration for both hands is complete, the subsequent step involves calibrating the trackers. Select 'Trackers' from the calibration menu. Proceed by clicking 'Next' until you're asked to choose the gloves and trackers you're using.
For Gloves, select 'Metagloves', and for Trackers, choose 'Vive'. After making your selections, click 'Next' to continue.
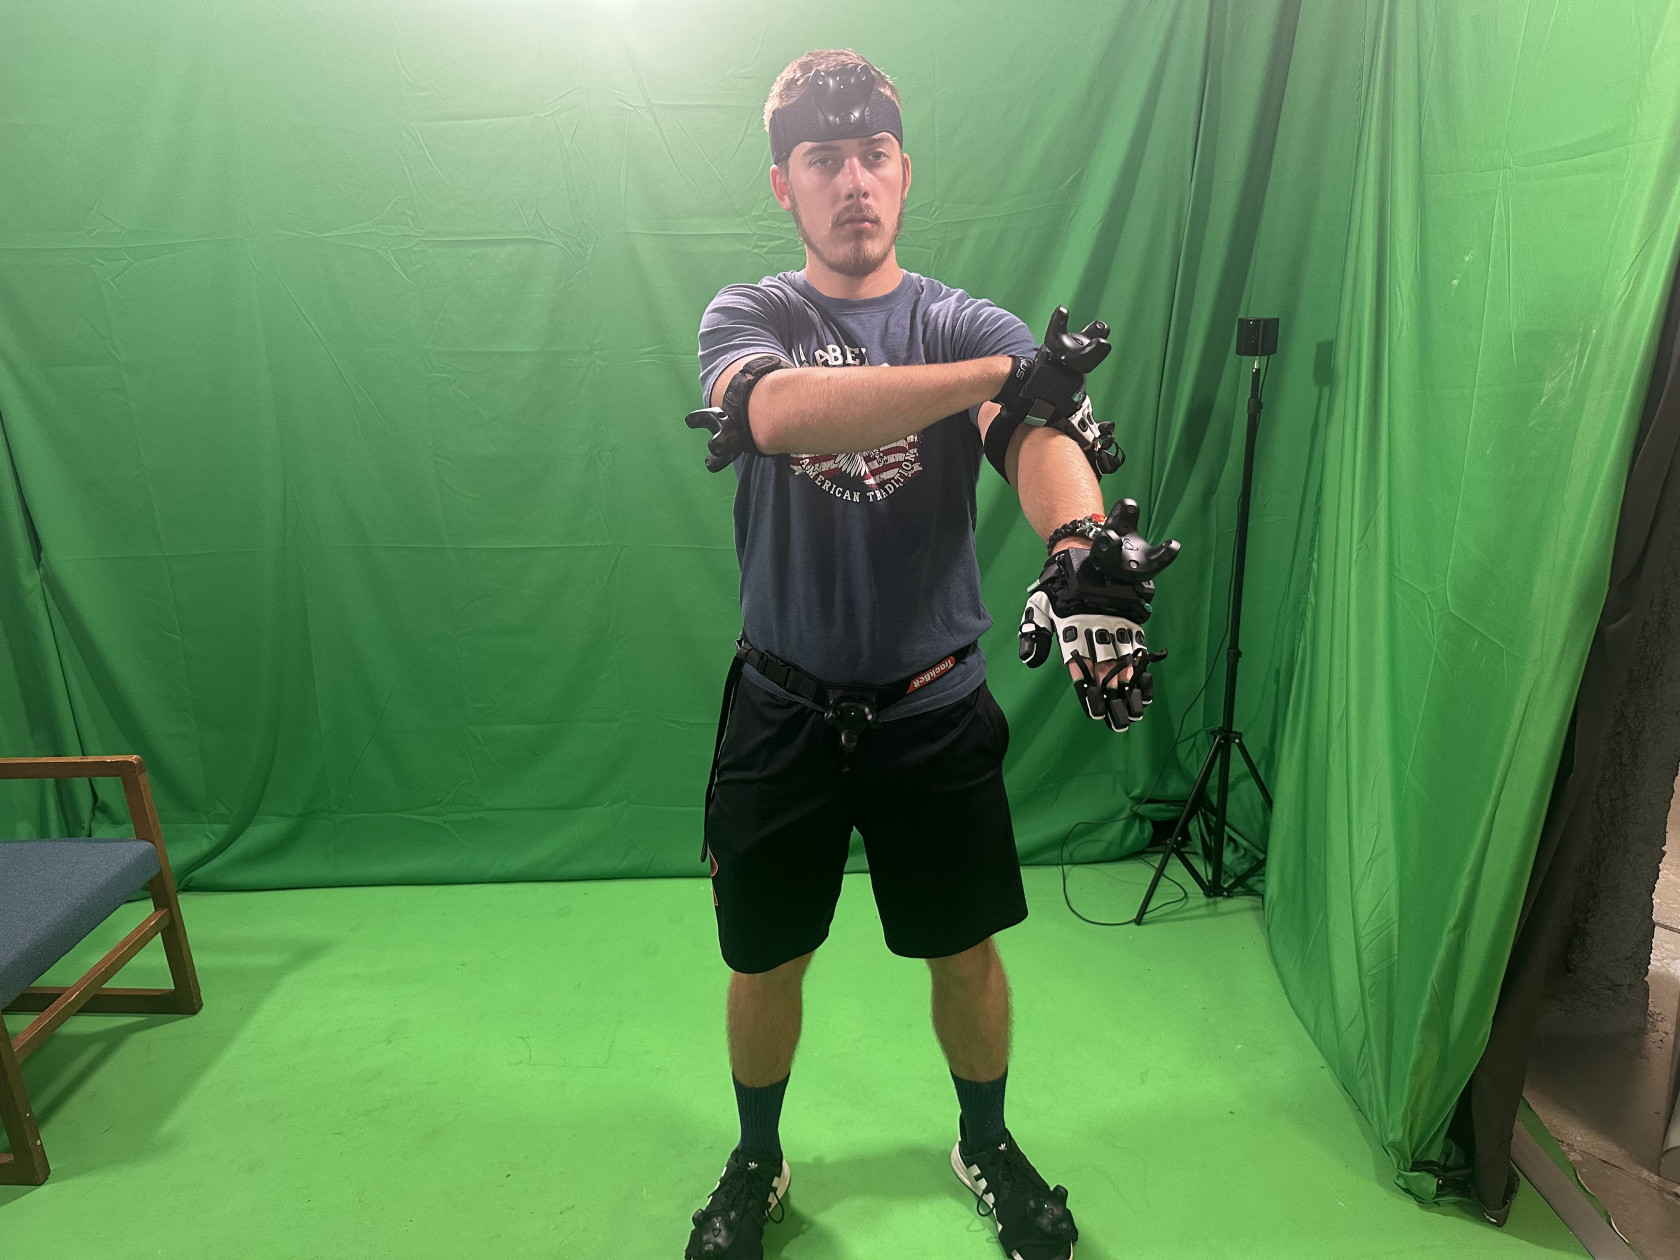
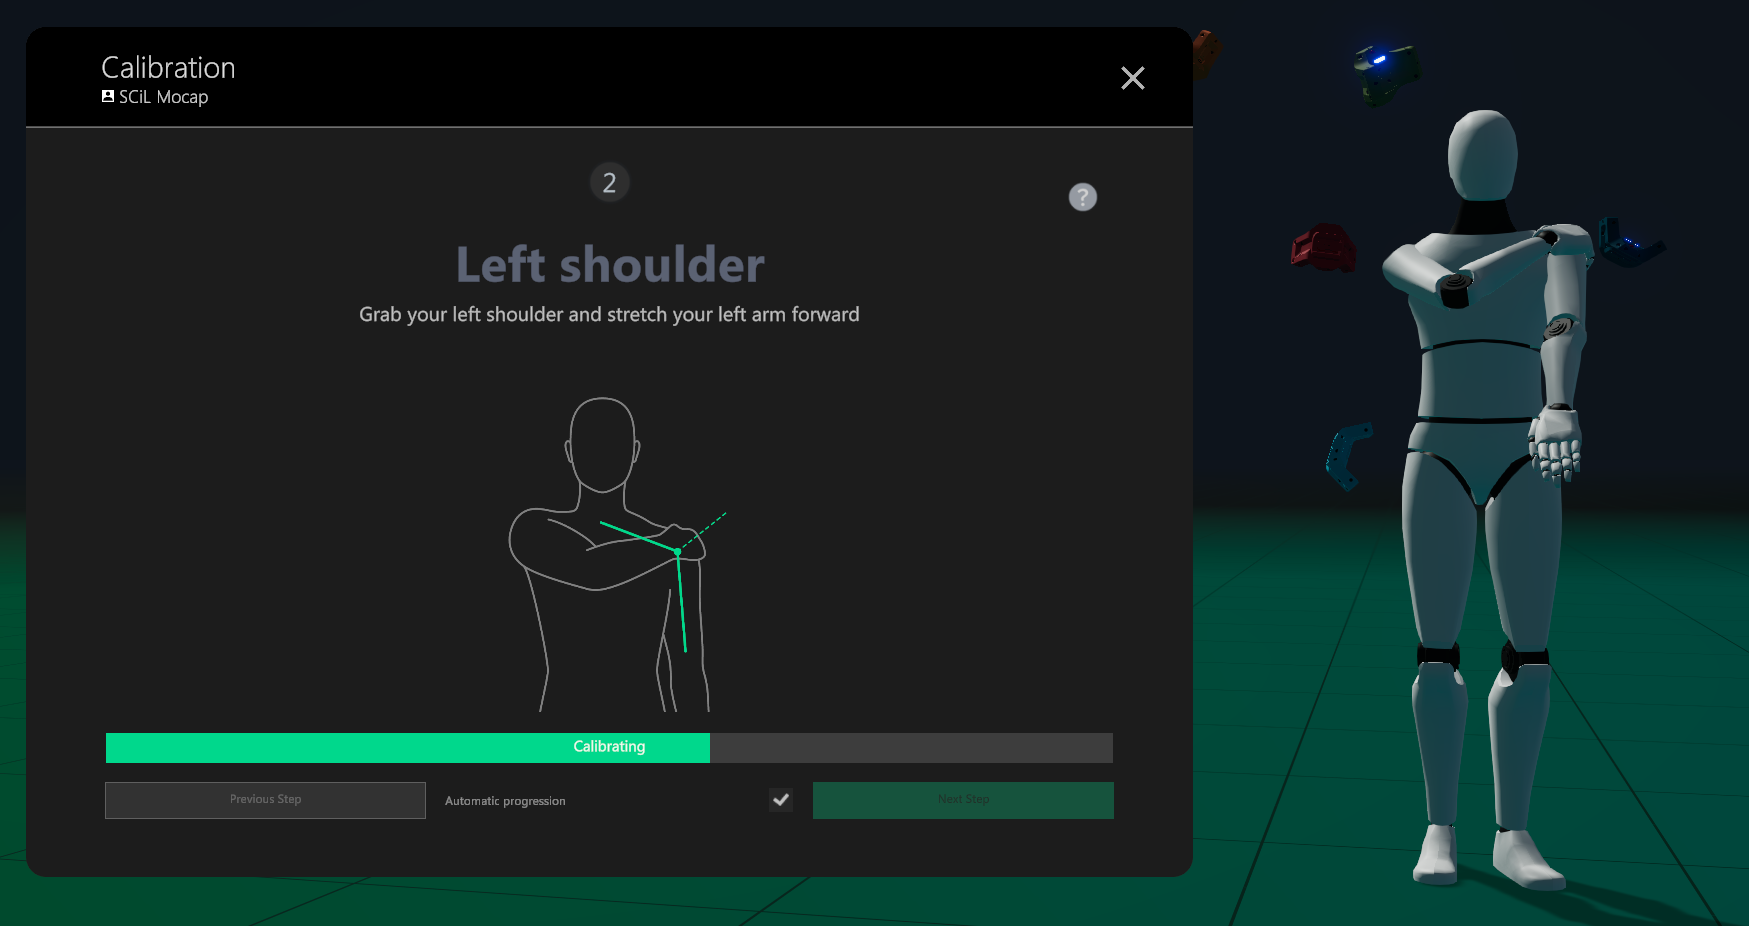
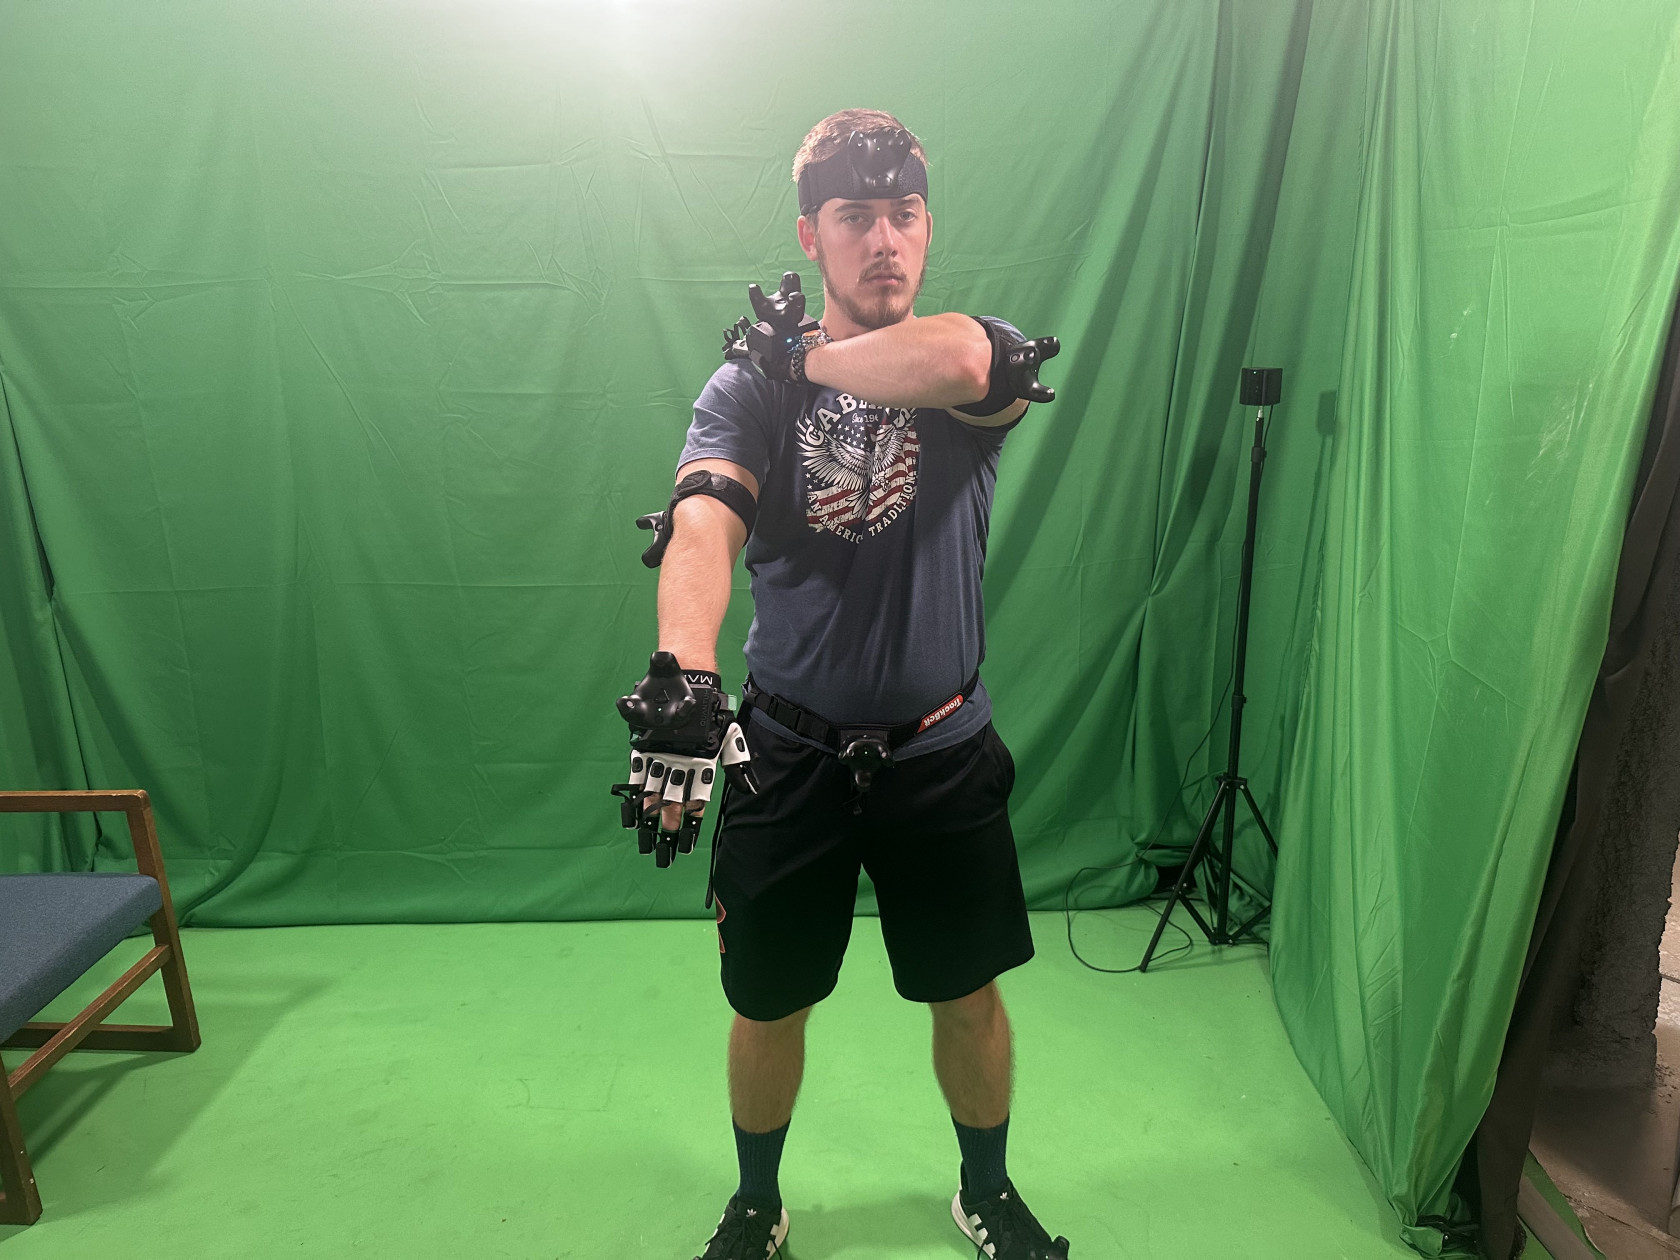
5. Again, the actor should be able to view the MANUS software via the third monitor and emulate the instructions provided by the 3D mesh character. You may enable automatic progression if it's comfortable, but first-time calibrators are advised to manually continue through the calibration to ensure the actor correctly follows the steps. The calibration process includes three review sections to verify proper tracking.
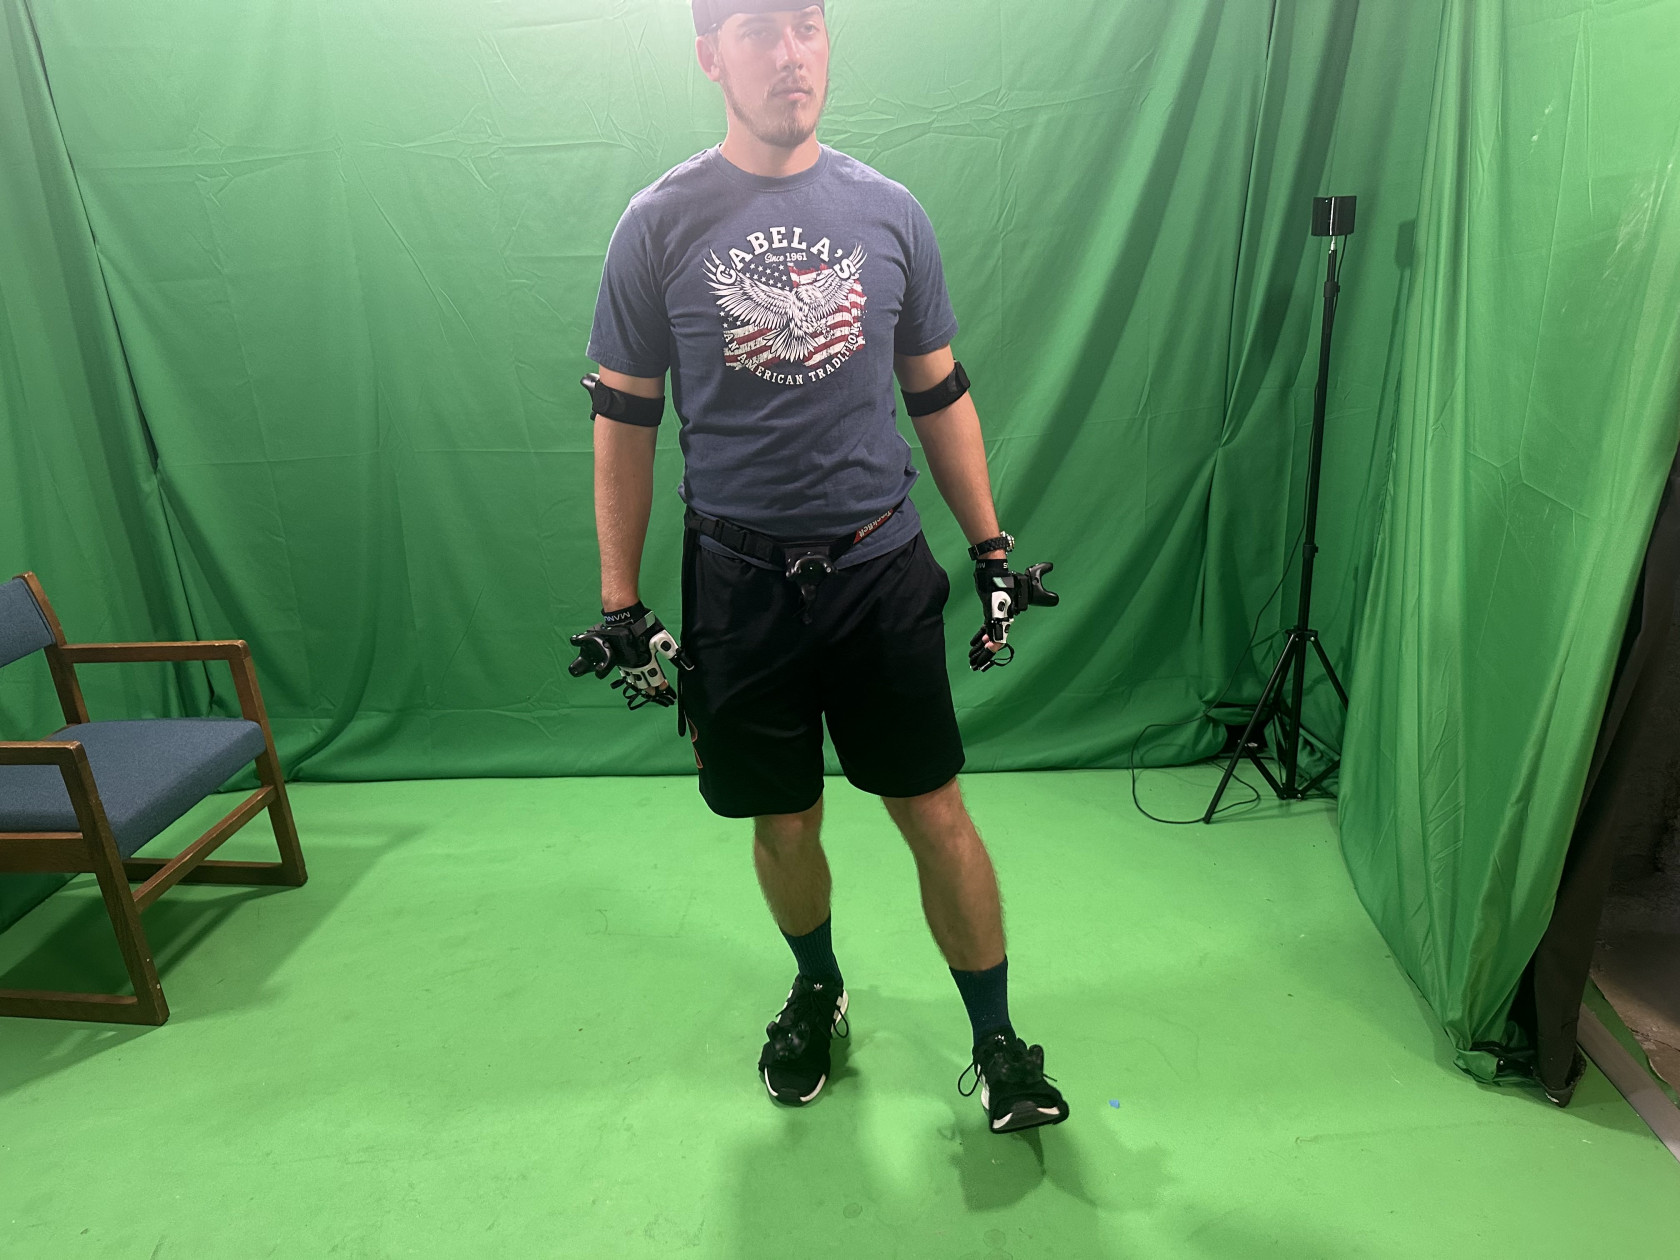
During the arm review section, you may notice a hand depicted upside down - disregard this as it will correct itself upon conclusion.
Note: If a calibration step fails, retry the step until successful. If continuous issues arise, consult the troubleshooting page for support.
Progress through the calibration sequence, using the images provided on this page to aid in guiding the actor.


6. Upon completion, the fully calibrated mesh character will be responsive to the actor's movements. It's common that the actor requires fine-tuning, so navigate to the profile setting in the user tab to facilitate this.

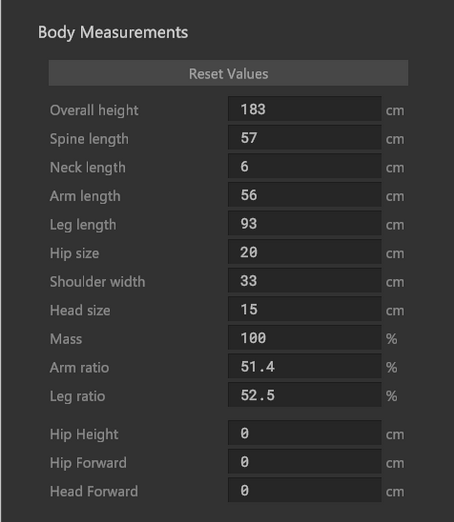
7. Select the user's tab and then the profile settings. Scroll down until you see the 'Body Measurements' section. This area allows for the adjustment of measurements, with real-time visualization of the impact each change has on the actor's body mesh. While making adjustments, it's strongly recommended to have 'Scale to Skeleton' checked in the settings tab. If unchecked, the model may display visual glitches when the arms are in close proximity.
Tip: When adjusting the measurements, start from the hips and work your way up and down the actor's body, as the hips serve as the foundational point for the rest of the measurements.
8. Once satisfied with the measurements click on Apply& Close under the Body Measurements section. Then refer to the MANUS Core Recording page for guidance on recording performances.
Troubleshooting
Helpful Links:
MANUS Knowledge Center: https://www.manus-meta.com/resources/knowledge-center-quantum-metagloves
How to pair/troubleshoot VIVE trackers: https://www.vive.com/us/support/tracker3/category_howto/pairing-vive-tracker.html
Troubleshooting MANUS Gloves Pairing Issues:
Should you encounter difficulties with the pairing of the MANUS Quantum Metagloves, please follow the steps outlined below:
- Locate the MANUS glove Bluetooth emitter plugged into the computer's back.
- Detach the USB device, wait for a duration of five seconds, and then reinsert it into the computer.
- Reactivate the gloves by moving the on/off switch completely to the right, past the 'On' indication, to the Wi-Fi symbol. This action will prompt the gloves to reenter the pairing mode
This should ideally resolve the issue and allow for the successful connection of the gloves with the software.
Body Tracker Calibration issues:
If you are encountering calibration issues, particularly concerning the shoulders or arms, it is recommended to attempt the following troubleshooting steps:
- Recalibration: Start with recalibrating the system once again.
- Software Restart: If the issues persist, restarting the MANUS Core software can often resolve them. To do this, navigate to the bottom right of the Windows taskbar and click on 'Show Hidden Icons' (represented by an upward-pointing caret '^' next to the Wi-Fi/internet icon). From there, find the MANUS Core application and click 'Restart'. This action will completely reboot the software.