UE Facial Capture (Setup)
About
For this guide, we will be using Unreal Engine and capturing our facial data using the app Live Link. This app uses FaceID, which is available on most iPhones as well as our lab iPads.
Characters should follow standardized rigged bone-structure and this also applies to the face. We won't be covering how to rig a character but instead will use a character creation tool that is free and characters are ready to go.
Create Character
Create a character (ReadyPlayer.Me)
Let's visit ReadyPlayer.Me and customize your character. At the end of the process, a window will appear with a link and a button to your character. Click the Copy button and paste into a new browser window/tab. This should download your character (.glb)
glb and gltf files are a great file extension, but in the case for ReadyPlayer.Me, I found that Morphs/Blendshapes are imported incorrectly in Unreal at the time of this writing. For this step I am going to use Blender.
Open Blender and delete the Cube, Camera, and Light from the scene. Now go to File/Import gLTF 2.0 and import your downloaded model.
OPTIONAL: I recommend exporting the textures out in case they have problem packing with the new export
Now go to File/Export/FBX. Leave the default settings and give your character a name. Finally, click the button Export FBX.
Unreal Engine Setup
This project will ONLY be used for your animations!
- Launch Unreal Engine. Create a new project under Games and select Blank. Set the Target Platform for Mobile and Quality Preset to Scalable. Leave Starter Content and Raytracing unchecked. Give the project a name and select create.
- Go to File/New Level. Select Basic and click Create. Now go to File/Save Current Level As... and choose a name for the map. I recommend creating a folder called Maps and saving this map inside there.
- Go to Edit/Project Settings/Maps and Modes and change your Editor Startup Map to the map you just created.
- Go to Edit/Plugins and enable the following: Live Link. If you are recording a live performance, enable Apple ARKit and Apple ARKit Face Support. If you are not, enable LiveLinkFaceImporter Restart the editor.
After the editor restarts, you should be back in your basic starting map! (If you see the terrain map, you did something wrong)
Character Setup
Now let's import your character.
- Create a folder called Characters inside Content. Inside, create a folder for the CURRENT character you will be working with. Open this folder directory inside the Content Drawer.
- Drag and drop your character FBX into this location. A menu will appear and you MUST select under Mesh/Advanced Import Morph Targets and Use T0 as Ref Pose. Then select Import All
- Assign any textures to the materials if you need.
- Click Save All and verify everything is correct before proceeding.
Now, drag your character (Skeletal Mesh, pink) on to the level.
Inside the folder for your character, right-click and selection Animation/Animation Blueprint. Select your character's skeleton in the popup window and select Create. Give this file a decent name.
Select your character inside the level. In the Details Panel, under Animation/Anim Class, assign this animation blueprint into the class.
Character Setup for Live Link
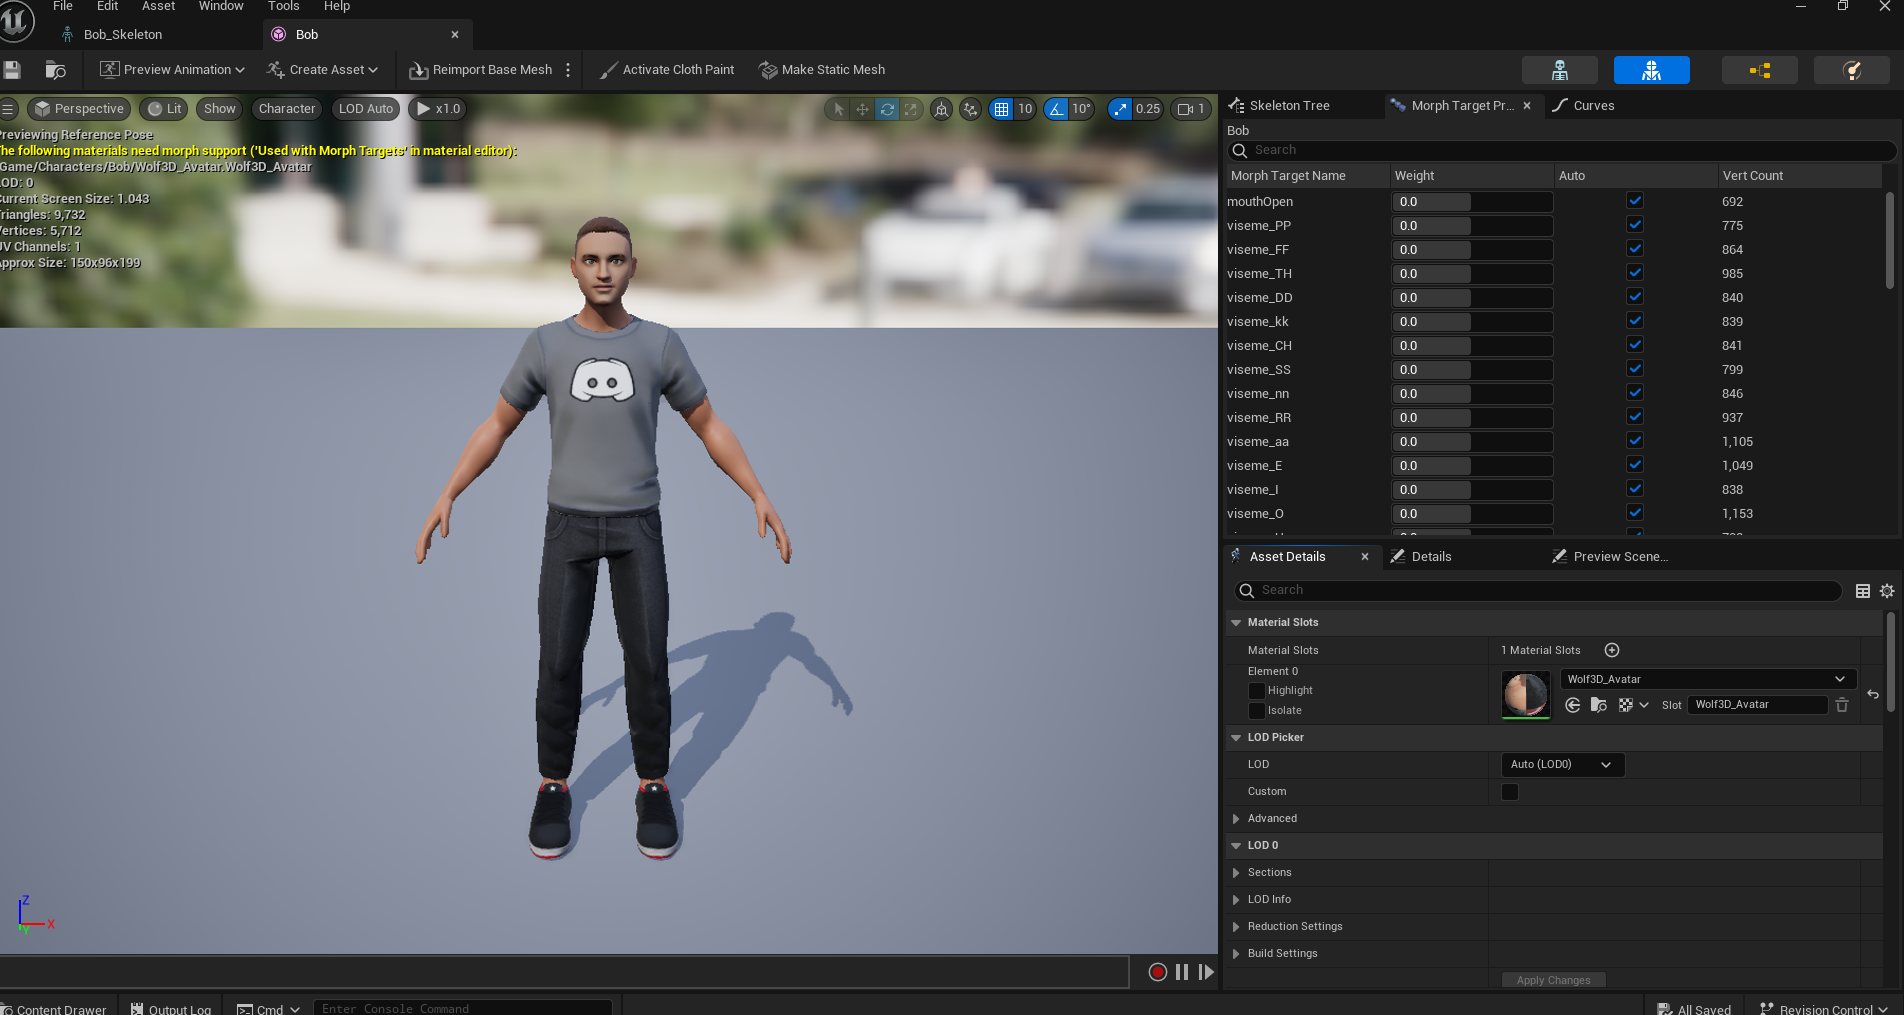
Our character will need to receive the data from the iPad and translate this data into your character's face. Here is an example of the Morph Targets that my character's skeleton has:
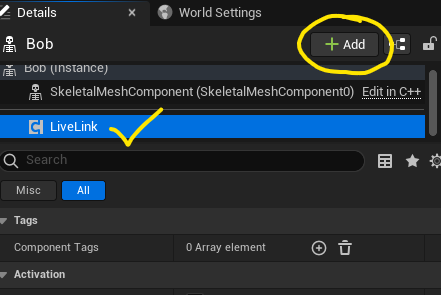
First click on your character in the level. In the Details Panel, click the [+ Add] button and add a Live Link Skeletal Animation component.
Now, open the Animation Blueprint you created earlier.
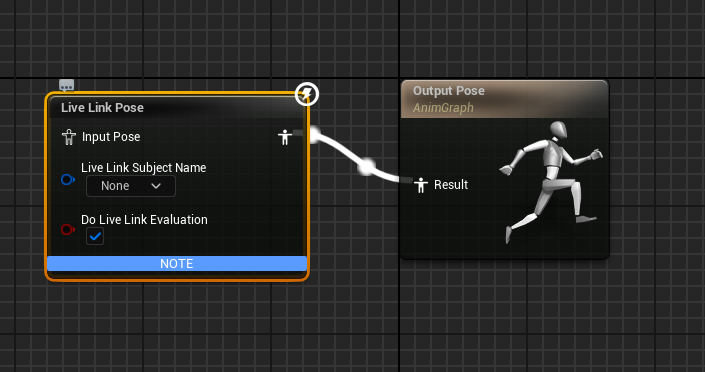
In the Anim Graph tab, you will see a node called Output Pose. Right click and choose Live Link Pose. Connect the two nodes together with the person-looking execution pins.
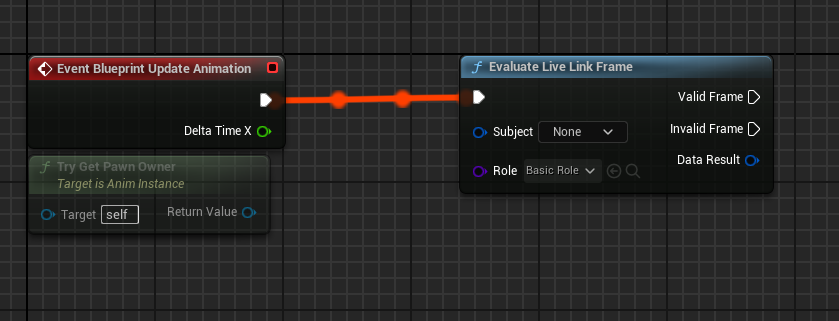
Now switch to the Event Graph tab. Create a node called Evaluate Live Link Frame. In this node there is a purple class dropdown. Choose LiveLinkBasicRole.
Note the Subject drop down in both nodes you created. YOU WILL HAVE TO RETURN TO THESE LATER AND VERIFY THE iPAD APPEARS HERE.
Click Compile and Save.
Create the Remapping Asset (For Live Recordings)
This is probably the most involved item on the list. In your character folder, right-click and create a new Blueprint Class. Under All Classes, search LiveLinkRemapAsset. Choose this and create the asset. Name it something like YourCharacterNameRemap. Now open the file.
Inside the file, on the left under Functions, if you hover over the word/header, a dropdown that says Override appears. Click the drop down and choose Get Remapped Curve Name.
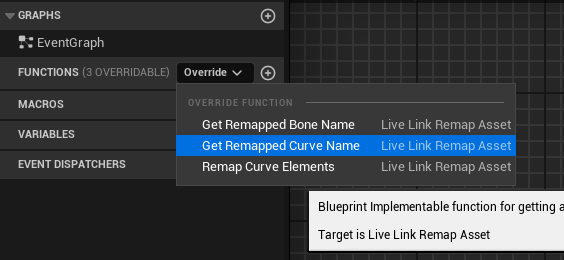
What do we need to do here? In the above image I show those Morph Targets that need to be used in my character's skeleton. This function receives as a parameter the name of the curve from your face in the iPad and we need to match it to our character's Morph Target curve.
Create a new variable called SkeletalMesh. Under its type, search for Skeletal Mesh and choose Object Reference. Press Compile in the top left and under Default Value you should be able to select your mesh.
From here create the nodes like following:
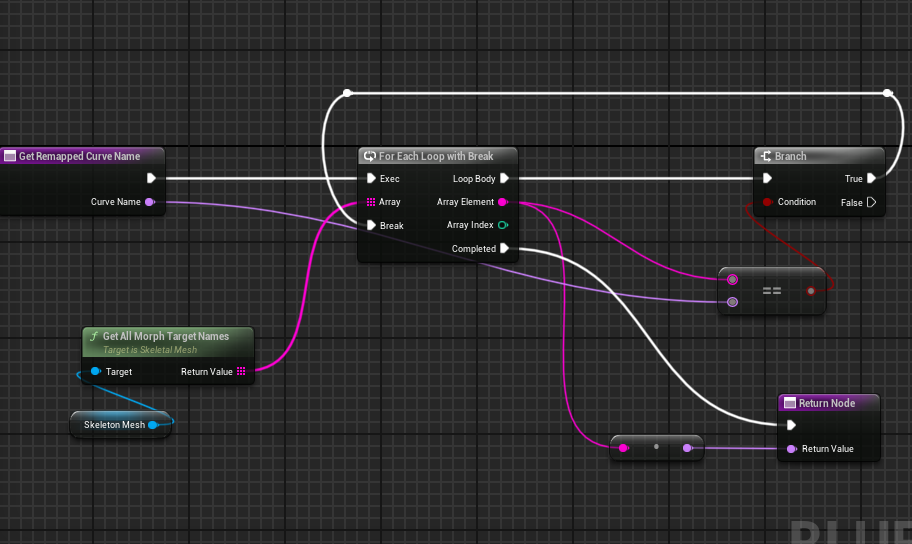
The pins that move from the Branch True back to Break are called Reroute Nodes. The can be created by double clicking on the node path and can be readjusted
It looks scary but it's simple. Here is the algorithm:
- Take our skeleton mesh and get all of the Morph Target Names
- Let's cycle through each name and see if it matches the Curve Name that is coming in from the iPad.
- If it matches, stop searching and exit with the name that was found.
Now, all we have to do is assign this file. Open up your Animation Blueprint, select the Live Link Pose node. On the right, under Retarget Asset, select this file.
YOU HAVE FINISHED THE SETUP
From here, you can proceed to the Recording Section of this guide.