**DISCLAIMER:** This site hosting is for SCiL/Class purposes only and users who fall under this criteria are given access. Hosting is not accessible outside of campus. Finally, always backup your work, keep local copies, and understand SCiL resources are routinely wiped. For questions or special needs, please reach out to Wes
If you are a Windows user and are having trouble with the Console app, I HIGHLY recommend downloading Git-For-Windows which comes with a Unix-like program app called bash. Download the 64-bit Installer [here](https://git-scm.com/downloads/win).
If this is your first time using SSH, you may be greeted with an **SSH request to enter yes/no**. Enter **yes**. You should now be logged into the server. To change your password, type in the following below and follow the instructions: - **passwd** You may now type **exit** and close the terminal #### Remote edit your site with Visual Studio Code (VS Code)You should always keep a backup of your files (and possibly versions with Git if you are familiar). My web development workflow is to work offline/in a safe directory, use version control, and push the changes to the live server after I test and verify my work.
Download Visual Studio Code: [https://code.visualstudio.com/download](https://code.visualstudio.com/download) If you have not used VS Code before, from here you would open a folder directory as a "workspace" and begin working. Here is a tutorial for an overview: [https://www.youtube.com/watch?v=B-s71n0dHUk](https://www.youtube.com/watch?v=B-s71n0dHUk) ##### Setup First, click the **blue lightning-bolt icon** in the very bottom left corner of the editor to **Open a Remote Window**. [](https://scil-wiki.su.edu/uploads/images/gallery/2025-01/screenshot-2025-01-13-130438.png) A drop down will appear. Yours may vary, but within the drop down that appears, choose **Connect to Host... Remote SSH**. [](https://scil-wiki.su.edu/uploads/images/gallery/2025-01/screenshot-2025-01-13-130612.png) Next, click **+ Add New SSH Host...** Then type in the ssh command, like the one you used to change your password (above). Mine is as follows: [](https://scil-wiki.su.edu/uploads/images/gallery/2025-01/Ahlscreenshot-2025-01-13-130818.png) **FOR WINDOWS USERS:** Choose a configuration file. I chose the one with my name in (the first one). With macOS there may be something similar. [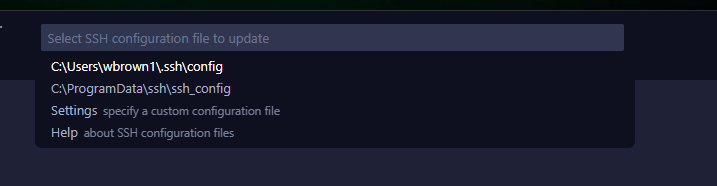](https://scil-wiki.su.edu/uploads/images/gallery/2025-01/screenshot-2025-01-13-130852.png)*The host information should now be added!* ##### Open Remote Folder If the **Host Added!** window is still open you can press the **Connect** button. Otherwise, move to the next step. Click the **blue lightning-bolt icon** again in the bottom left corner to open the **Remote Connection**. Choose **Connect to Host... Remote SSH** (same as before) Choose the server address: **10.72.1.125** For the platform of the remote host, choose **Linux** Enter your password. VS Code creates the remote connection and connects you to your Home directory within the linux web server. Your website directory is located here in a folder called **public\_html**. To open this folder as your working directory, Go to **File/Open Folder...** and choose **public\_html** and then click **OK**. You may have to enter your password one more time to set up the workspace as well as **Trust the workspace**. [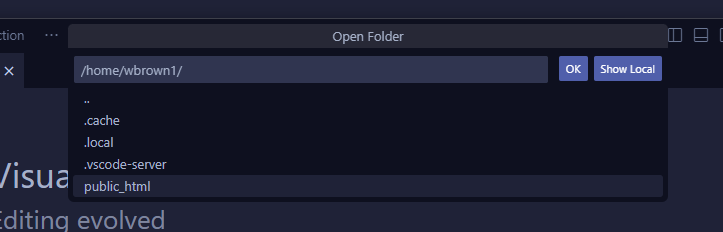](https://scil-wiki.su.edu/uploads/images/gallery/2025-01/screenshot-2025-01-13-131837.png) From here you are finished. When you close VS Code when you are done working using a Remote Connection, go to either **File/Close Remote Connection...** #### Access your site with an FTP client (FileZilla) Download the client: - For macOS with Apple Silicon (default for most SU users): [https://filezilla-project.org/download.php?platform=macos-arm64](https://filezilla-project.org/download.php?platform=macos-arm64) - For macOS with Intel: [https://filezilla-project.org/download.php?platform=osx](https://filezilla-project.org/download.php?platform=osx) - For Windows users: [https://filezilla-project.org/download.php?platform=win64](https://filezilla-project.org/download.php?platform=win64) Open the **FileZilla** app. We need to change a configuration first, since this is a basic hosting server. Open **FileZilla/Settings** in the task bar at the top. Select **FTP** for the page on the left. On the right, switch from **Passive** mode to **Active** mode. Then click **OK**. [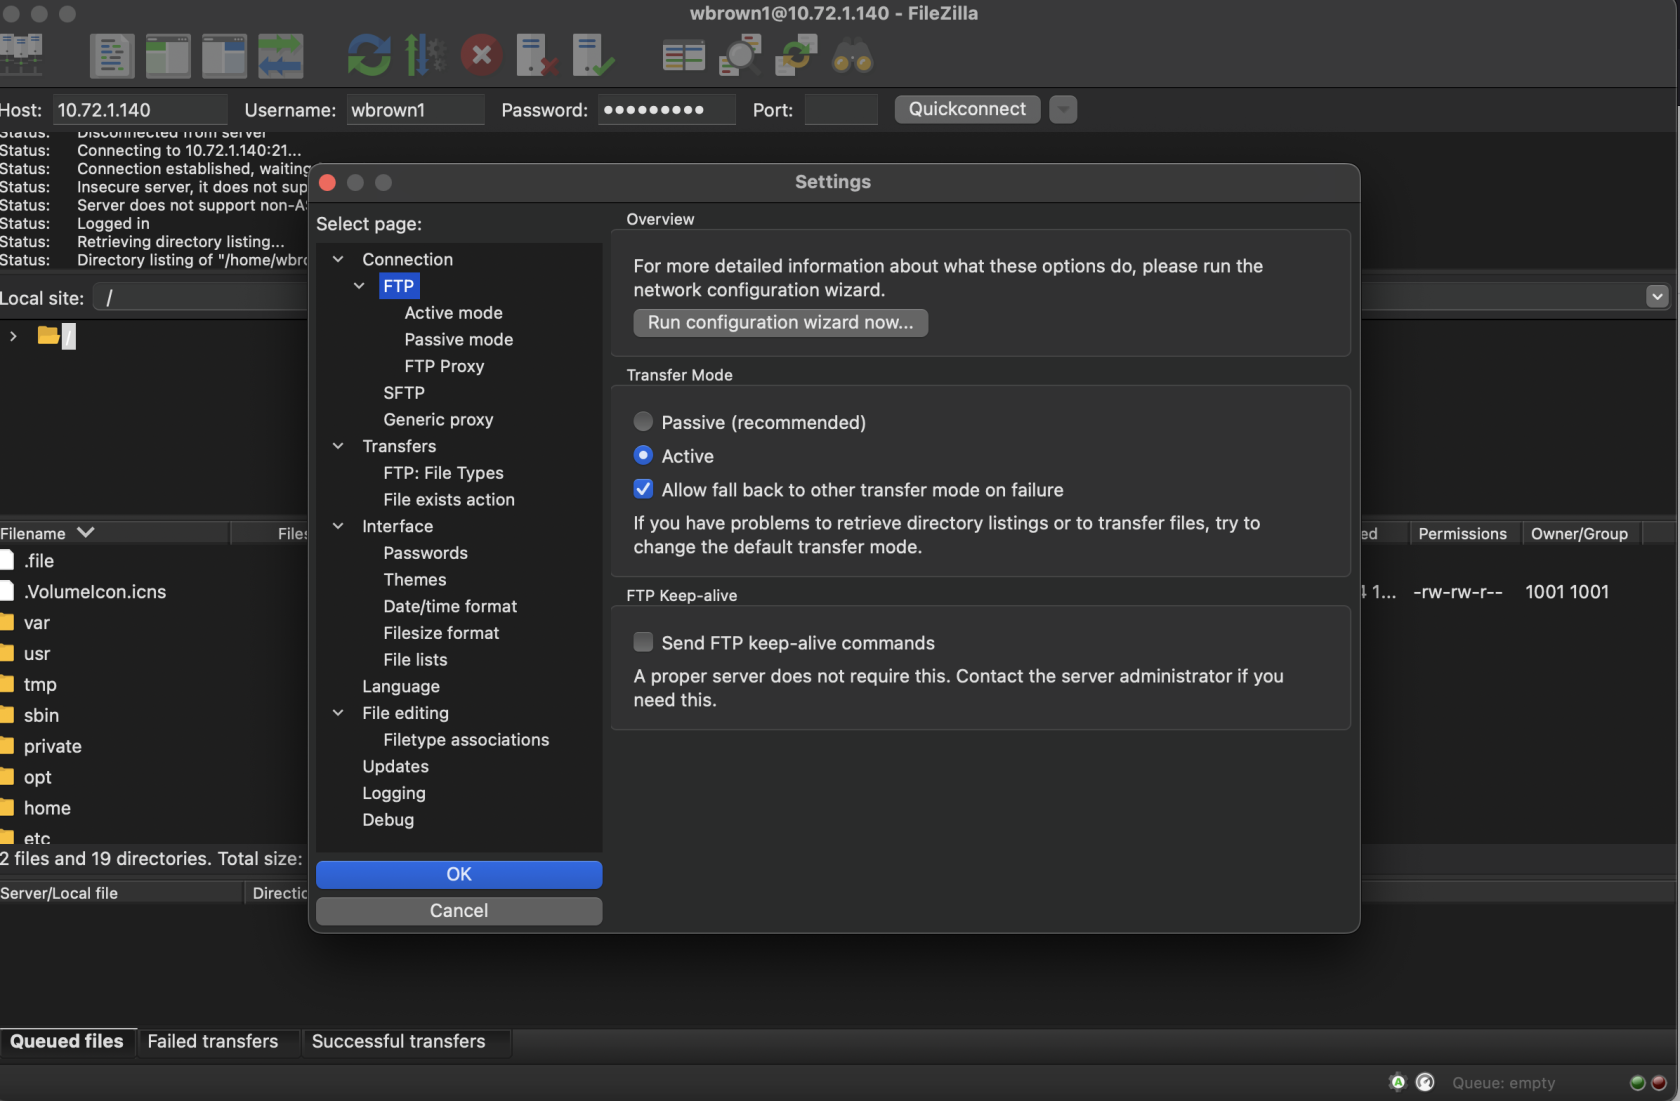](https://scil-wiki.su.edu/uploads/images/gallery/2024-12/screenshot-2024-12-16-at-5-19-39-pm.png) To login, enter the following at the top bar of the app: - Hostname: **10.72.1.125** - Username: **Your SU login** - Password: **Your password (listed above)** - Port: **21** After a successful connection, you should see your directory in the remote site section (right side of app). Your website directory is under **public\_html**. ##### Questions If you have any questions, email Wes at