Prerequisites: Some familiarity with Photoshop will be helpful.
Begin with gathering a high quality photo of your soon to be texture. There are many, many guides on how to take the photo, but if you do not have a DSLR camera, an iPhone camera will still do great. Look out for things such as good lighting, no shadows being cast, and keeping your photo shot straight and perpendicular. Take many photos if possible for backups and references (e.g. find other tufts of grass, or turn over the wood plank, etc.) #### Photoshop These YouTube videos that will explain the process. Feel free to search more as well, or find one specific to the texture you are creating. **Base color textures:** - [https://www.youtube.com/watch?v=owm0R2uDMtY](https://www.youtube.com/watch?v=owm0R2uDMtY) - [https://www.youtube.com/watch?v=vE0dR-TWVg4](https://www.youtube.com/watch?v=vE0dR-TWVg4) **Normal Maps:** - [https://www.youtube.com/watch?v=YJqWHsllczY](https://www.youtube.com/watch?v=YJqWHsllczY) **Normal Map (generator)** - [https://cpetry.github.io/NormalMap-Online/](https://cpetry.github.io/NormalMap-Online/)Be careful of using generators. They are approximations based off the image received as input and the algorithms can't determine that your wood photo is actually wood.
#### #### Where to go from here? This guide covers taking photos, editing photos into seamless textures, and creating normal maps. Consider researching other photoshop tutorials that cover maps such as roughness and metallic. Other maps, such as shadows, ambient occlusion, cavity, can be generated in modelling tools like Blender or Maya. I recommend assigning these base color and normal maps to your modelling software's materials and producing these additional maps. When completed, always test your maps and models in their final rendering destination. For SCiL, it is mostly Unreal Engine or Unity. # Preparing ID Maps in Maya This is a quick tutorial by *3D Texture Geek* showing how to prepare ID maps for materials in Maya (and also a technique for Substance Painter): # Baking maps in Blender #### About If you wish to bake material IDs, or any other type of baking (similar to what Substance Painter does) I recommend my favorite Blender plugin: **BakeMaster**. If you wish to bake just material IDs without a plugin, that guide is below as well. *Textools was my previous favorite but for now it only works up through Blender 3.2 although some contributors have forked the project to make it work with newer versions.* #### Requirements For SU students, **BakeMaster** can be downloaded [here](https://drive.google.com/file/d/1g5GYDaz5Us7AL4nRNk9tMiLAE2sU--sh/view?usp=drive_link). Most of these baking tools make use of Blender's **Cycles** engine (not EEVEE). #### Tutorials Bakemaster introduction Baking just the ID map (no plugin) # Substance Painter Tutorials ##### **Substance Painter for Beginners Tutorial** This is about an hour long video going over the basics for Substance Painter. The video starts with an overview of the UI and general layout of the application and slowly dives into more intricate features. For most people, this is a great intro. ##### **EVERYTHING you need to know about SUBSTANCE PAINTER!** [](https://www.youtube.com/watch?v=uBgdLmvK_U8) About 30 minutes long, this video along with its YouTube channel, is the BEST on the internet. However, it is fast-paced and I recommend a familiarity with Adobe Photoshop (or layer/mask based image editor) or have seen the hour-long video listed above. You can also download the 3D model he uses within the video, just follow along with the instructions while watching. # Resources for Substance Painter Lists of additional resources and supplements to Substance Painter. Feel free to add more. [Substance 3D Community Assets](https://substance3d.adobe.com/community-assets) [ArtStation](https://www.artstation.com/) [fab.com](https://scil-wiki.su.edu/fab.com "Fab.com") [ambientCG](https://ambientcg.com/) - Completely free pbr textures. Be sure to download the correct size for your needs! # Using ID Maps in Substance Painter This is a useful tutorial by *Alberto Cordero* showing how to use an ID Map in substance painter: # PBR Tools Normal Map Generator: [https://cpetry.github.io/NormalMap-Online/](https://cpetry.github.io/NormalMap-Online/) ORM Texture Generator: [https://www.flowkit.app/orm-generator](https://www.flowkit.app/orm-generator) # How to use Smart Masks in Substance Painter **Open** your substance project You can find the **smart masks** in the **assets folder**. It's a **“rectangle with a hole” icon** next to smart materials.   To show how to use the smart masks I will use this **table** as an **example** This is how it looks **before** any smart mask applied  First **select** your **smart mask** drag and **drop** it in the **layers tab** I choose **moss** for the table 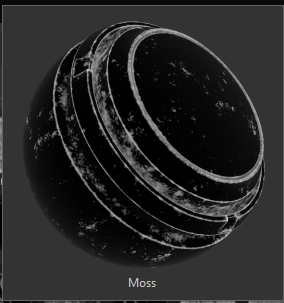 The **mask** is already **applied** once dropped in the **layers tab** 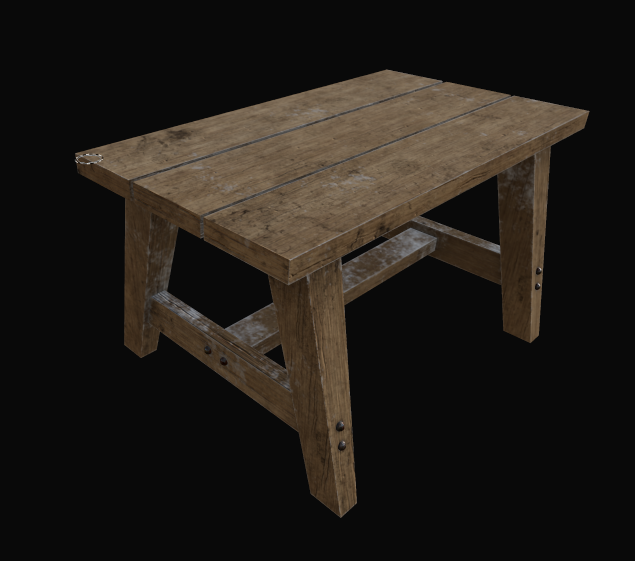 If you click on **"Mask Builder - Legacy"** in the layers tab you can adjust the **settings of the mask**   **For example**, if you change **level** it would look like **this** 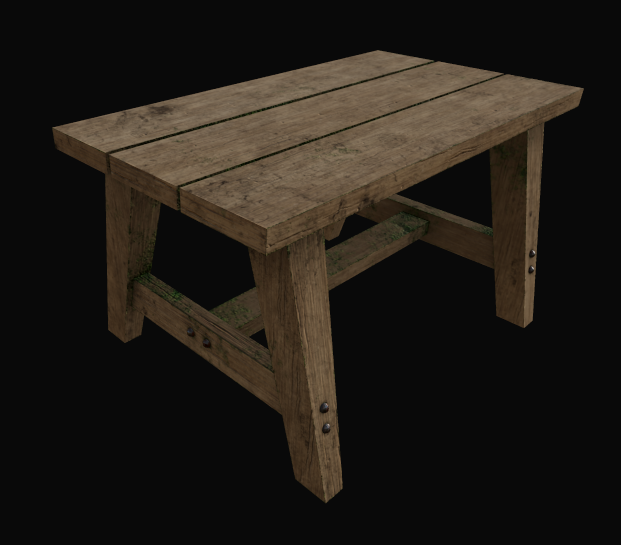 **Before After** To **add textures**, click on the **white ball** next to mask.  Scroll **down** in the **properties tab**. Now you can **add** your textures in the **material section**. Try **not** to choose materials that have **spaces** in between. **For example,** 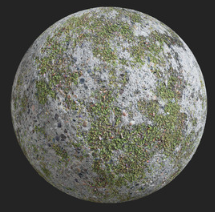 **Choose** the **first one** instead of the second one **for better visuals** Or if you're going for **metal rust**. 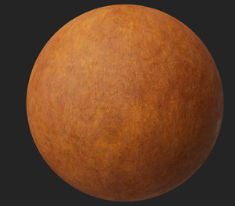 Go for the **first one** for better visuals. **Now add** your textures in the **properties** window. 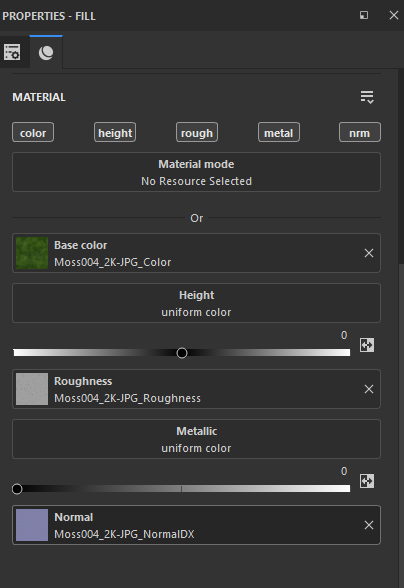 **After** adding your textures, it should look like **this**. 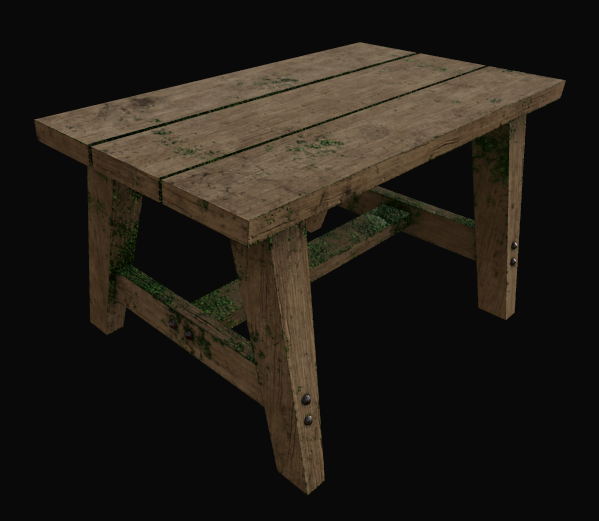 **The End.**