# Meta Hand Tracking Unreal
### Prerequisites
- **Meta XR** plugin is enabled in your project. The SCiL workstations typically has this plugin installed but if you are working from home, you can find out more about the plugin [here](https://developers.meta.com/horizon/downloads/package/unreal-engine-5-integration/). Ensure all the Meta XR recommendations are in place!
- [XR Rig (VR Pawn)](https://scil-wiki.su.edu/books/unreal-engine/page/xr-rig-setup "XR Rig Setup") is properly working with controllers.
- All interactions should be working correctly with the controllers
- Optional: [Passthrough](https://scil-wiki.su.edu/books/unreal-engine/page/passthrough-setup "Passthrough Setup") has been setup
### Setup
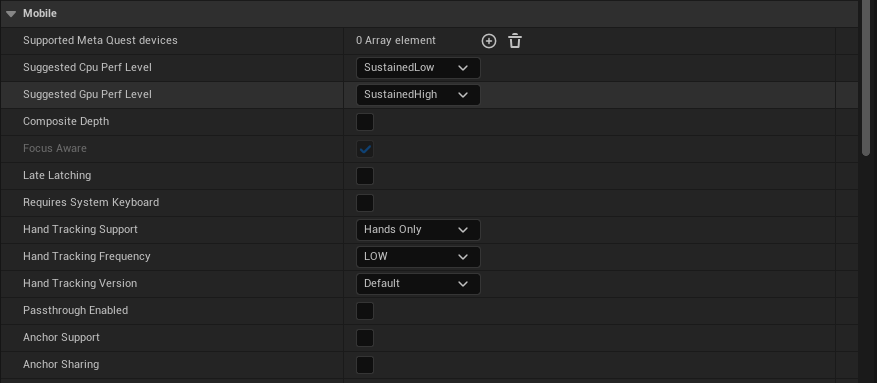
For this guide, we will be setting our controllers to **Hands Only**, Hand Tracking Frequency to **LOW**, and leave default values for the rest.
Go to **Edit -> Project Settings -> Plugins -> Meta XR**. Under the section for **Mobile**, set **Hand Tracking Support** to **Controllers Only**. The other default values are fine.
[](https://scil-wiki.su.edu/uploads/images/gallery/2025-10/screenshot-2025-10-27-094907.png)
Now open your **VR Pawn/XR Rig**. On both of your main **Motion Controller** components, i.e. the motion controller components marked to use the motion source **Left** or **Right** (NOT Right Aim etc.), Disable (set **Hidden in Game**) or delete any **XRDeviceVisualization** components that may be there.
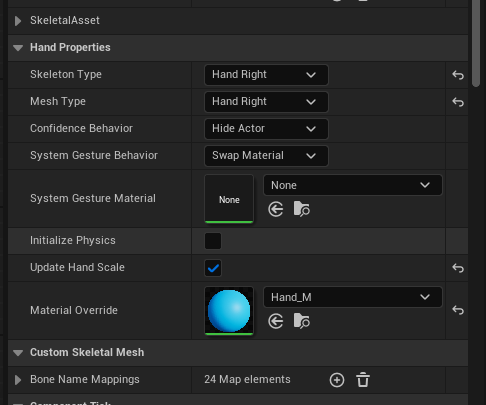
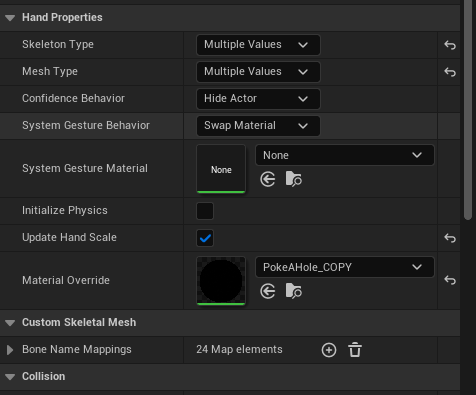
Now add an **OculusXRHand** component as a child of each main **Motion Controller** (labeled OculusXRHand\_L for the left and \_R for the right). Let's take a look at the settings for you to configure:
- **Skeleton Type**: Set for either the Left or Right hand in the component you are working with.
- **Mesh Type**: Set Left/Right, same as above
- **Confidence Behavior**: Leave this alone
- **System Gesture Material**: This is a material you can optionally assign when your hand's palm is facing close to your face, triggering Meta's system to show a home button to either pause or leave the app.
- **Initialize Physics**: Except for special use-cases, I would leave this off for performance purposes.
- **Update Hand Scale**: Set this to true to allow the hand to scale to be the same size as yours
- **Material Override**: This is your default hand material.
Here is a basic setup:
[](https://scil-wiki.su.edu/uploads/images/gallery/2025-10/screenshot-2025-10-27-101620.png)
Be sure to build your app and test in standalone VR to ensure quality
### Input and Gestures (Input already Enabled)
For input, such as pinch, you can open your input mapping context file and choose a mapping to add built-in gestures, such as **Oculus Hand (R) Index Pinch**:
[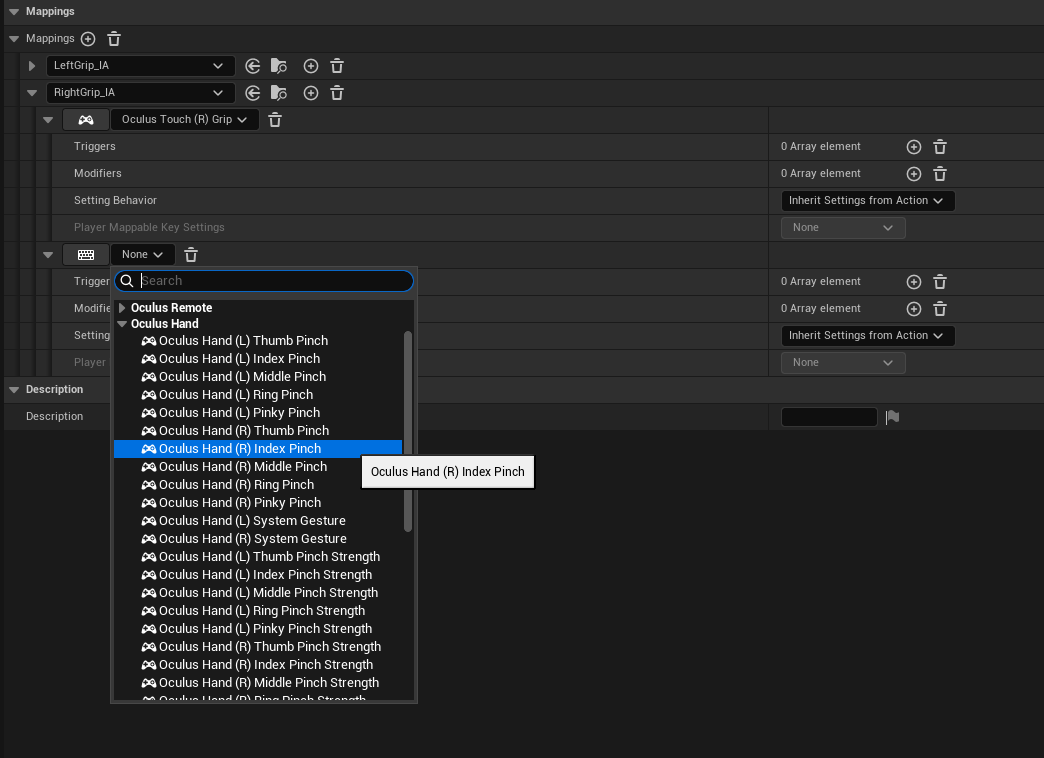](https://scil-wiki.su.edu/uploads/images/gallery/2025-10/screenshot-2025-10-27-105415.png)
**Optional:** For more advanced gestures and custom gestures, see this video: [https://www.youtube.com/watch?v=VV9PKQ\_DruA](https://www.youtube.com/watch?v=VV9PKQ_DruA)
### Optional: Passthrough Hands with Depth Occlusion
You must have passthrough setup and working as outlined in the prerequisites above.
**You MUST FOLLOW the following instructions CAREFULLY!**
- Open your **Content Drawer** and look for the button **Settings** on the top right. Enable **Show Engine Content** and **Show Plugin Content**.
- Now, browse through the folders in your **Content Drawer** and browse to **Engine -> Plugins -> Meta XR Content -> Materials**
- Look for the material **PokeAHoleMaterial**.
- Click (but don't open) on this material to select it.
- **COPY** it (CTRL+C)
- In your project's **Content** folder, **PASTE** (CTRL-V) this material in your project's materials folder. I would SUGGEST renaming it, maybe **PokeAHole\_COPY**.
- Disable **Show Plugin Content** in the **Settings** button of the **Content Drawer**, to prevent accidents in the future.
- Assign this copied material to the Material Override in your **OculusXRHand** components.
Here are some screenshots of the process:
[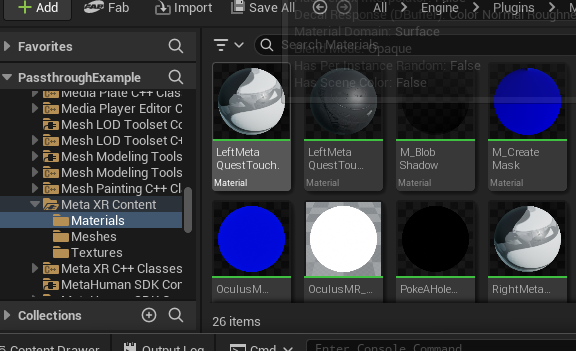](https://scil-wiki.su.edu/uploads/images/gallery/2025-10/screenshot-2025-10-27-103233.png)
[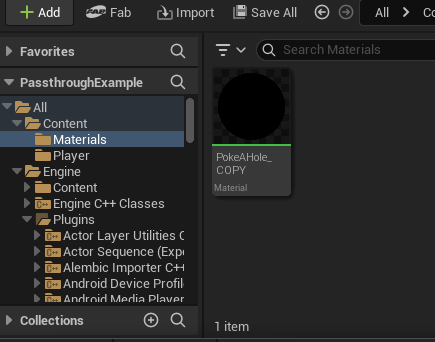](https://scil-wiki.su.edu/uploads/images/gallery/2025-10/screenshot-2025-10-27-103512.png)
[](https://scil-wiki.su.edu/uploads/images/gallery/2025-10/screenshot-2025-10-27-103820.png)
From here, build your application and test in standalone.
For occlusion depth in Meta Link, you need to set in the Project Settings **Alpha Output** to **TRUE** and in older versions **Enable alpha channel support in post processing** option set to **Allow through tonemapper**.