
Audio QuickStart Guide (DRAFT: WORK IN PROGRESS)
Studio/Mixer Settings Checklist
Initial Mixer Setup
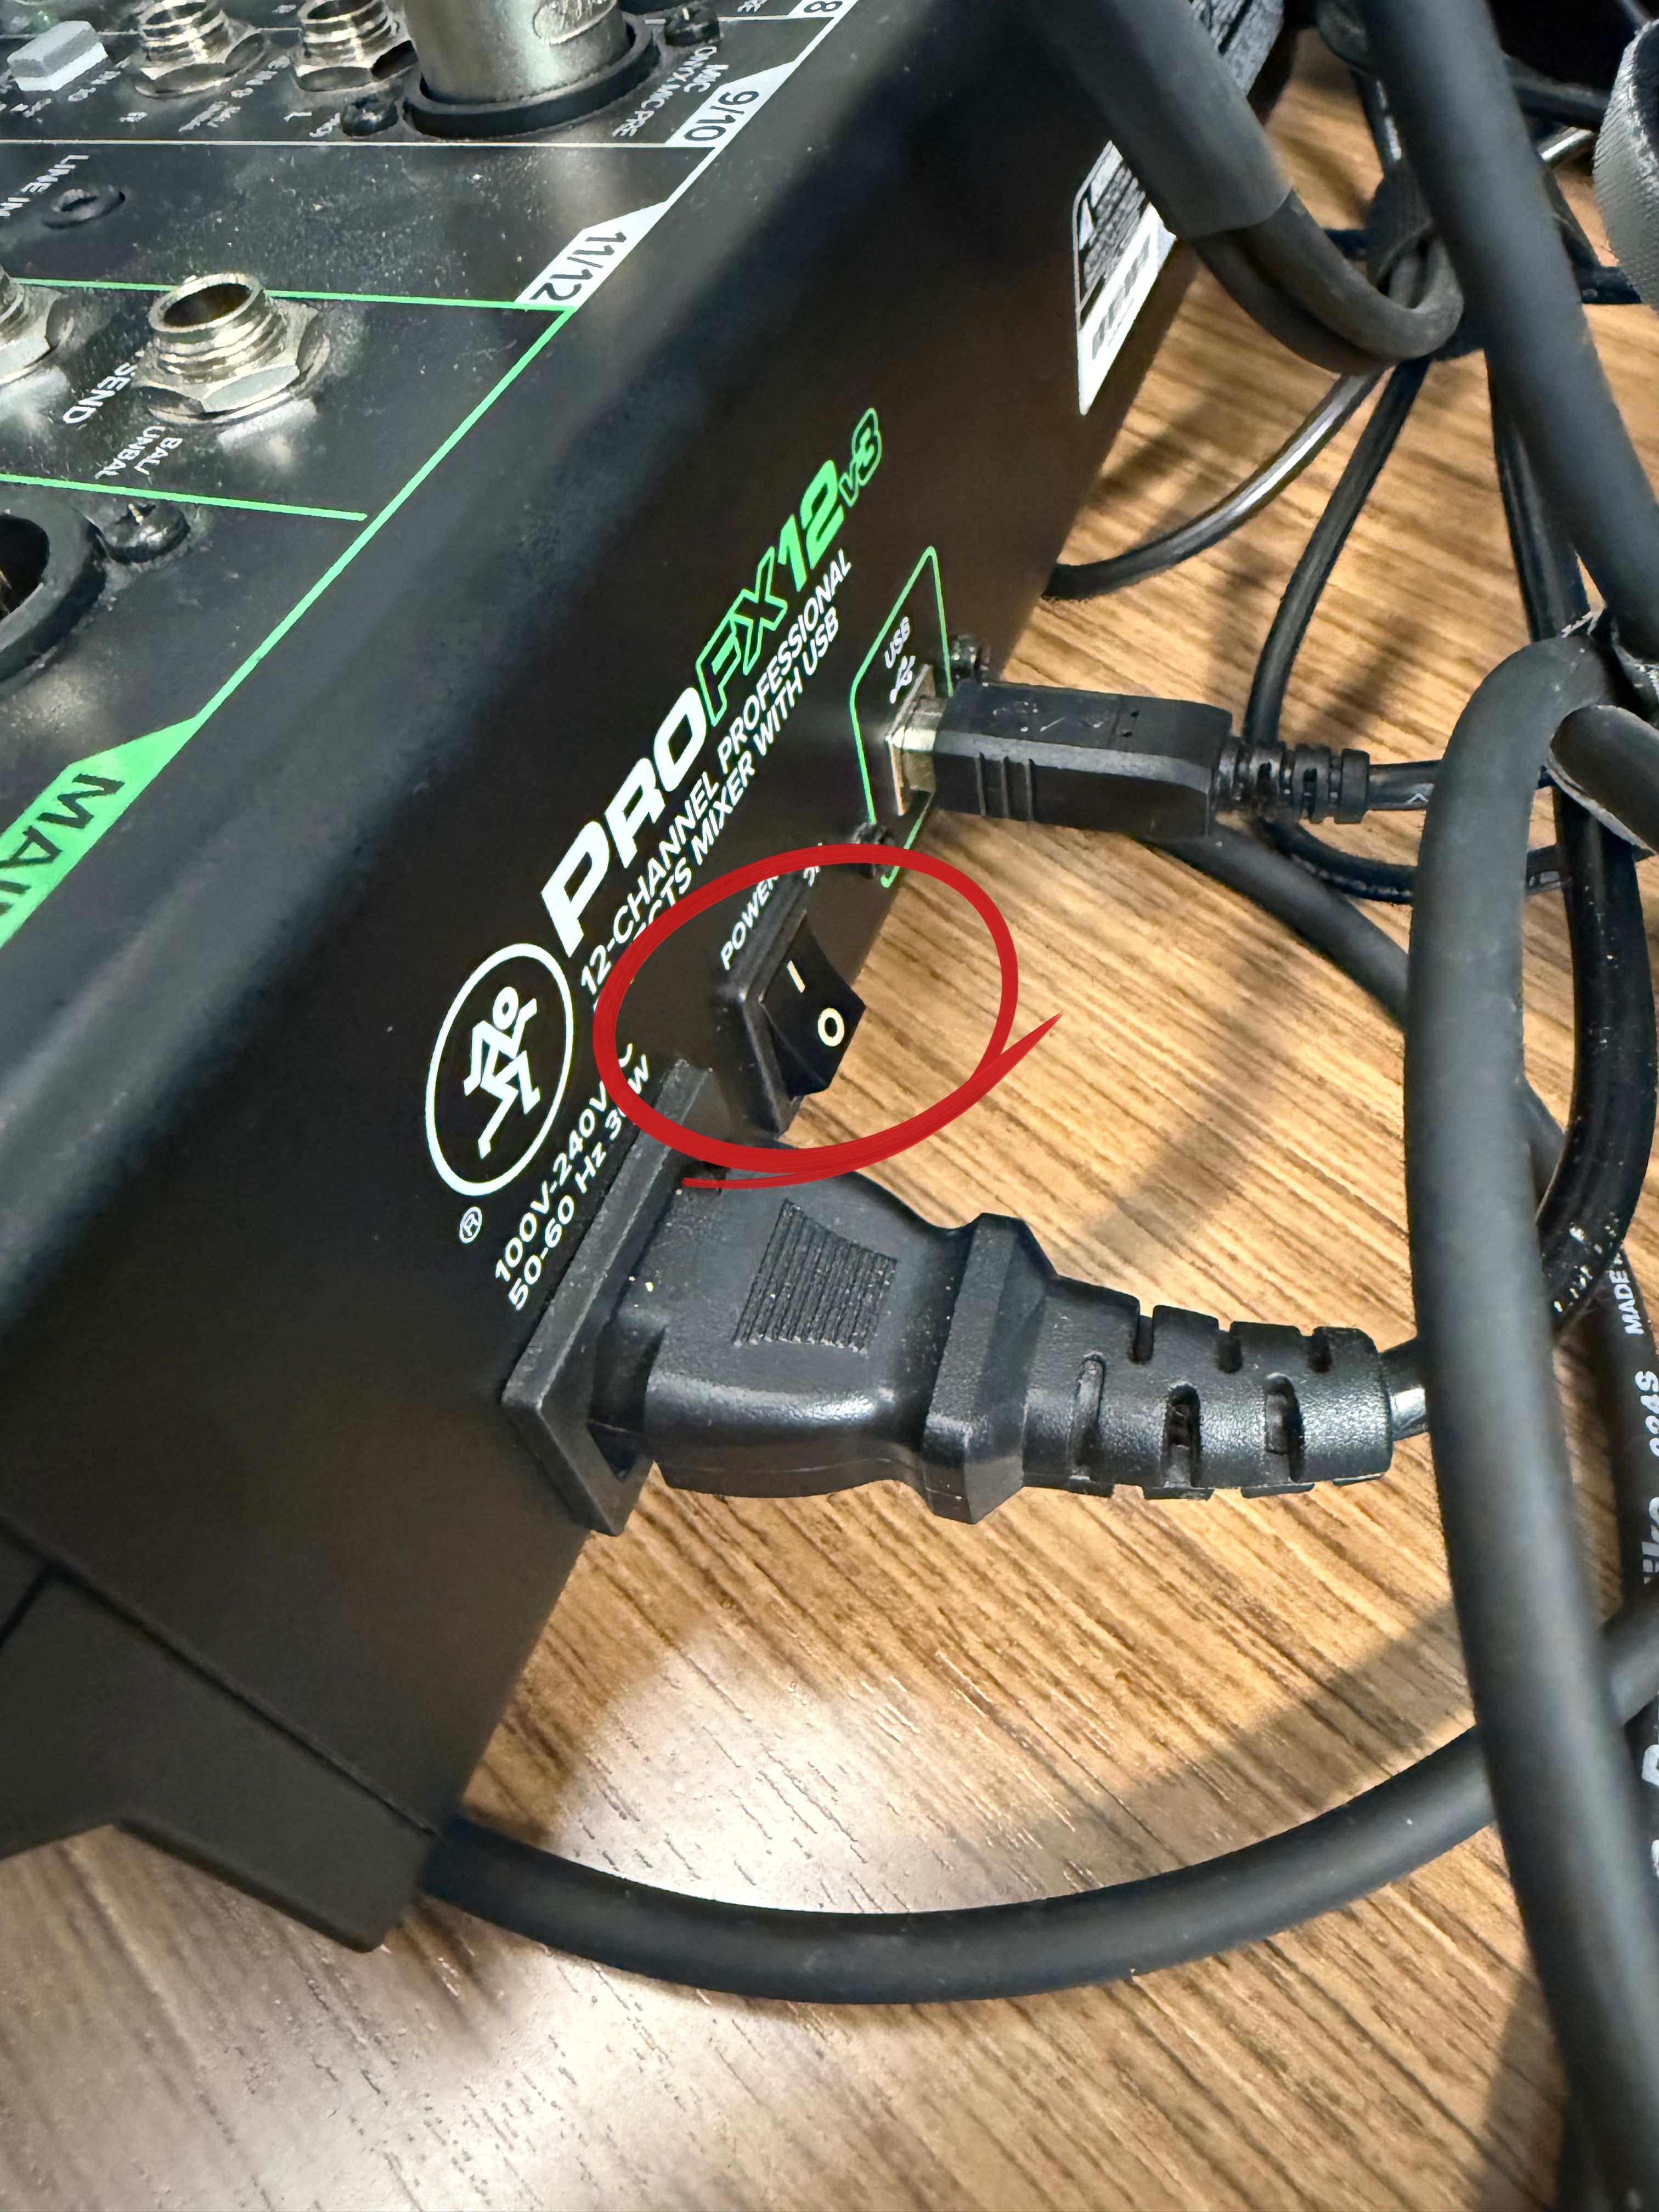
1. Turn on the Mixer with the switch on the back
2. Make sure the cable is plugged into the Microphone and the pop filter is placed in front of the mic in the booth
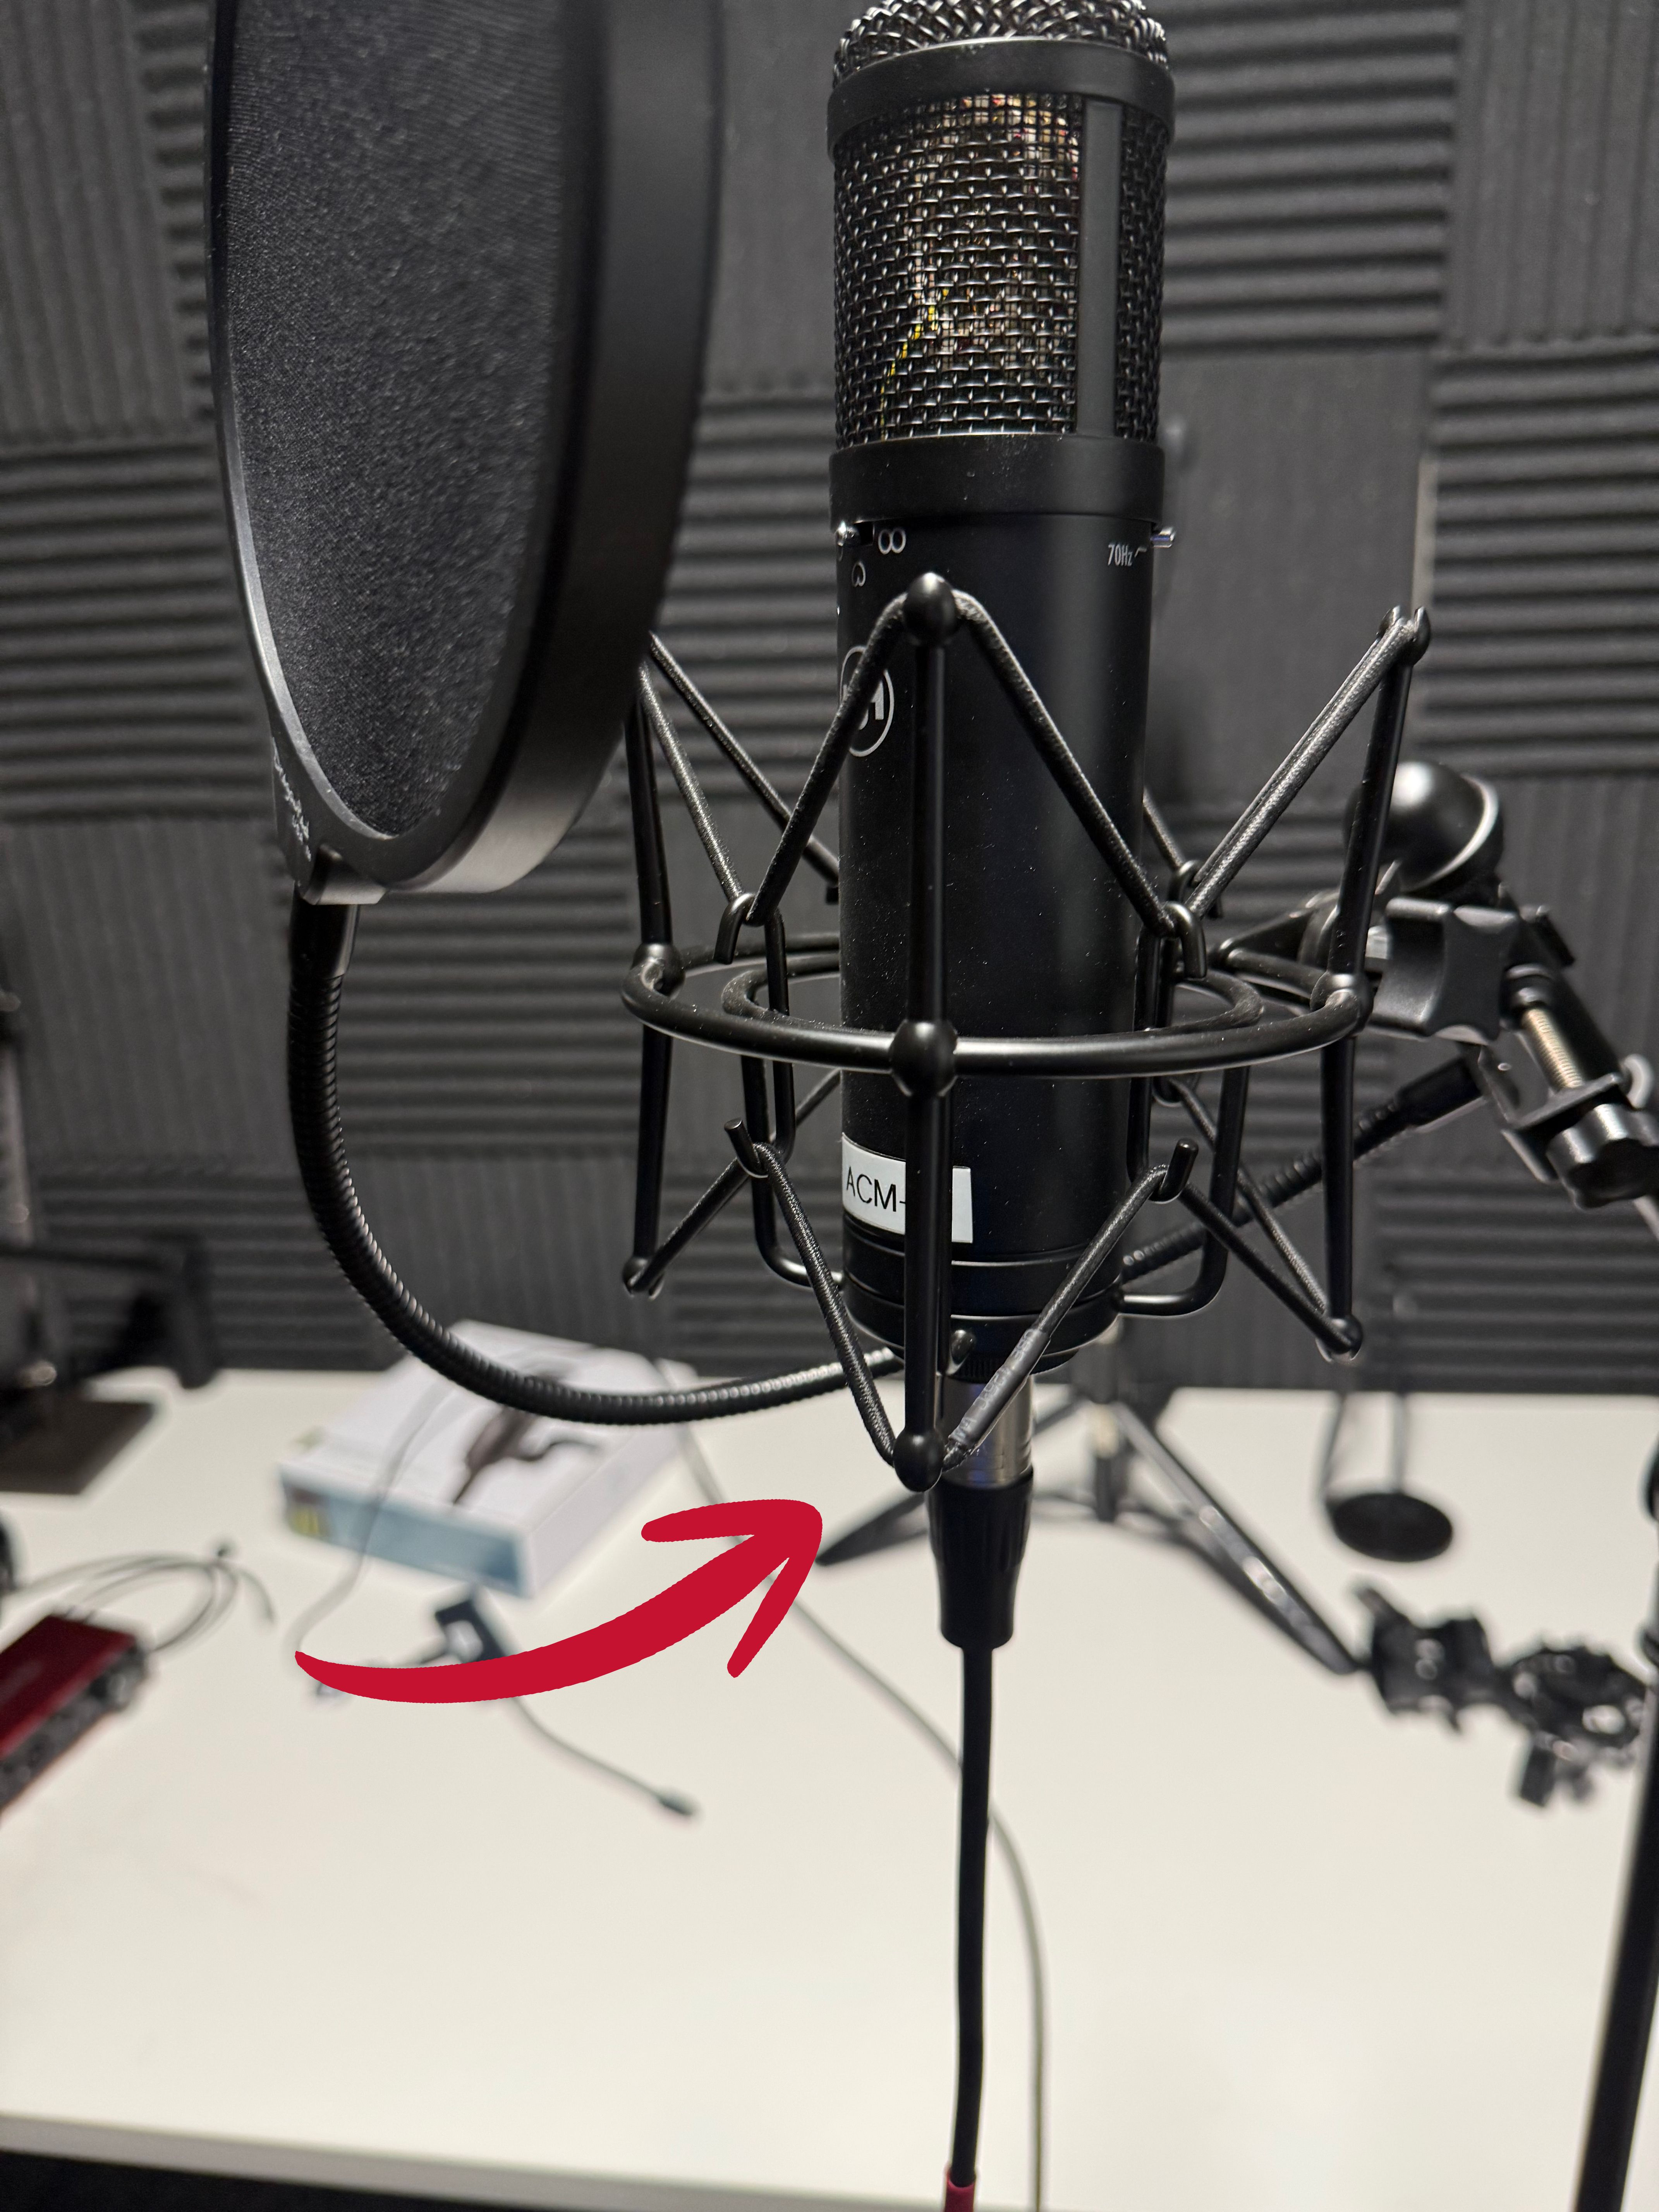
3. Make sure mic is plugged into correct wall sockets
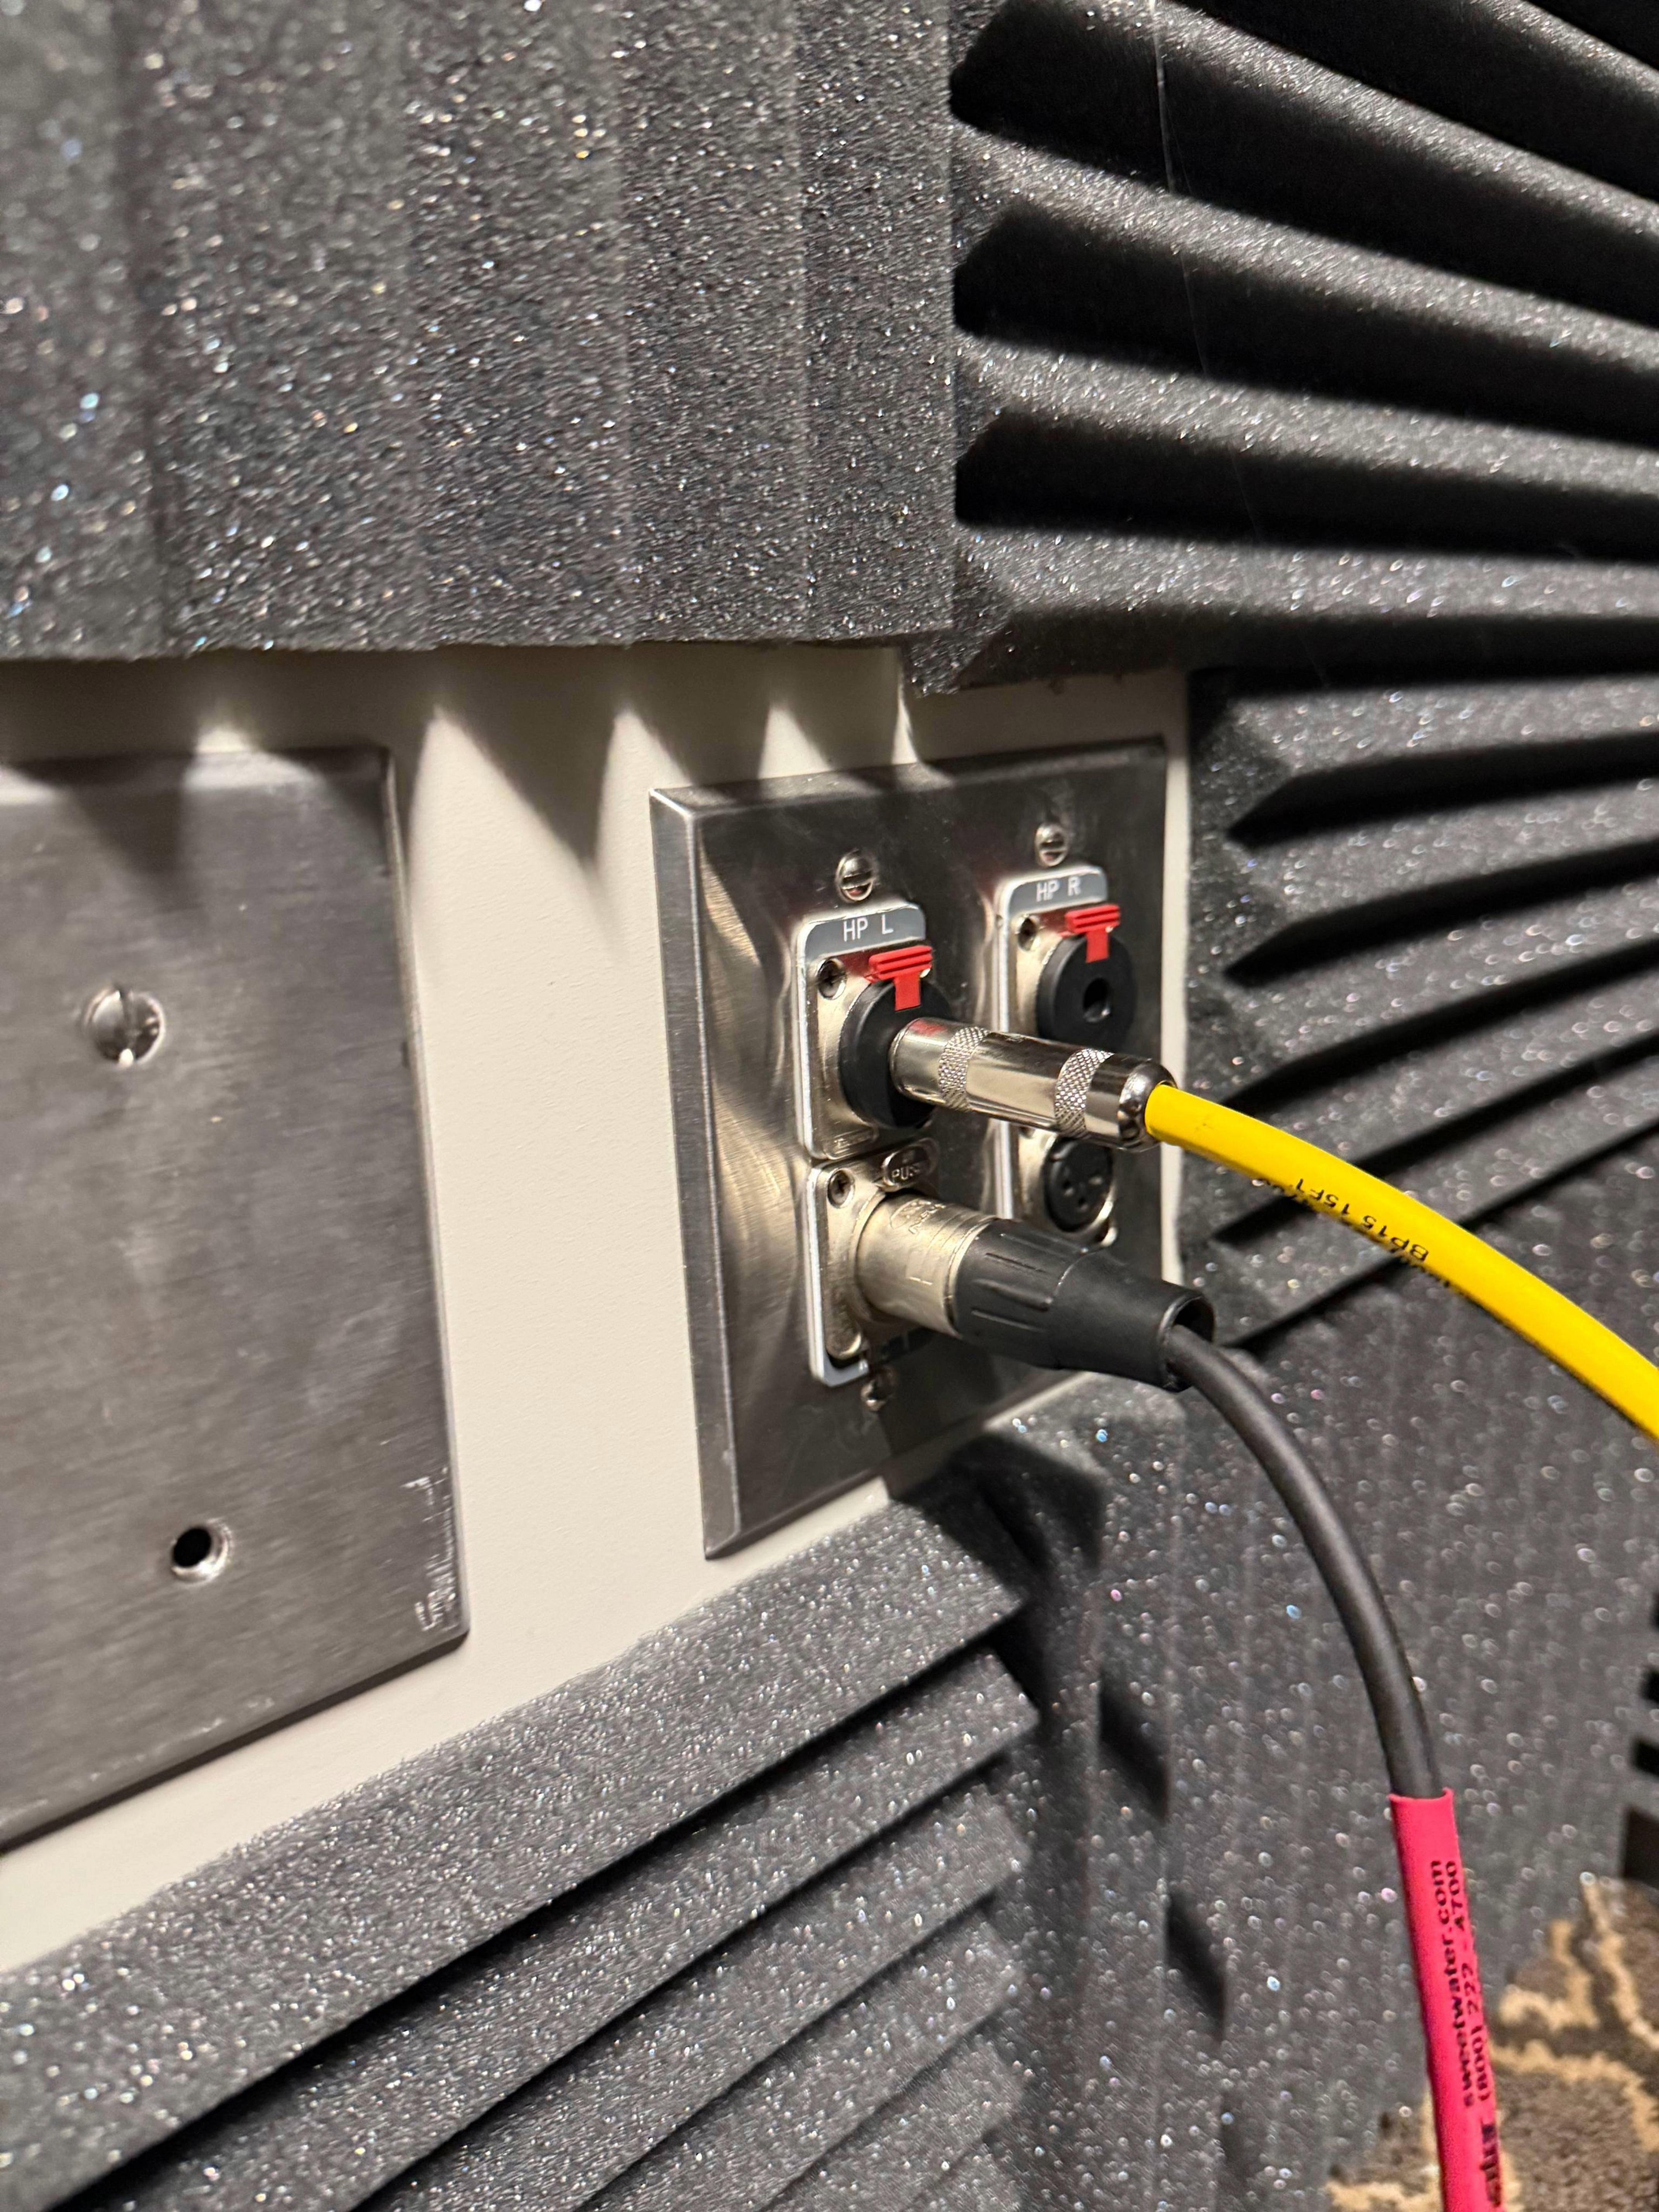
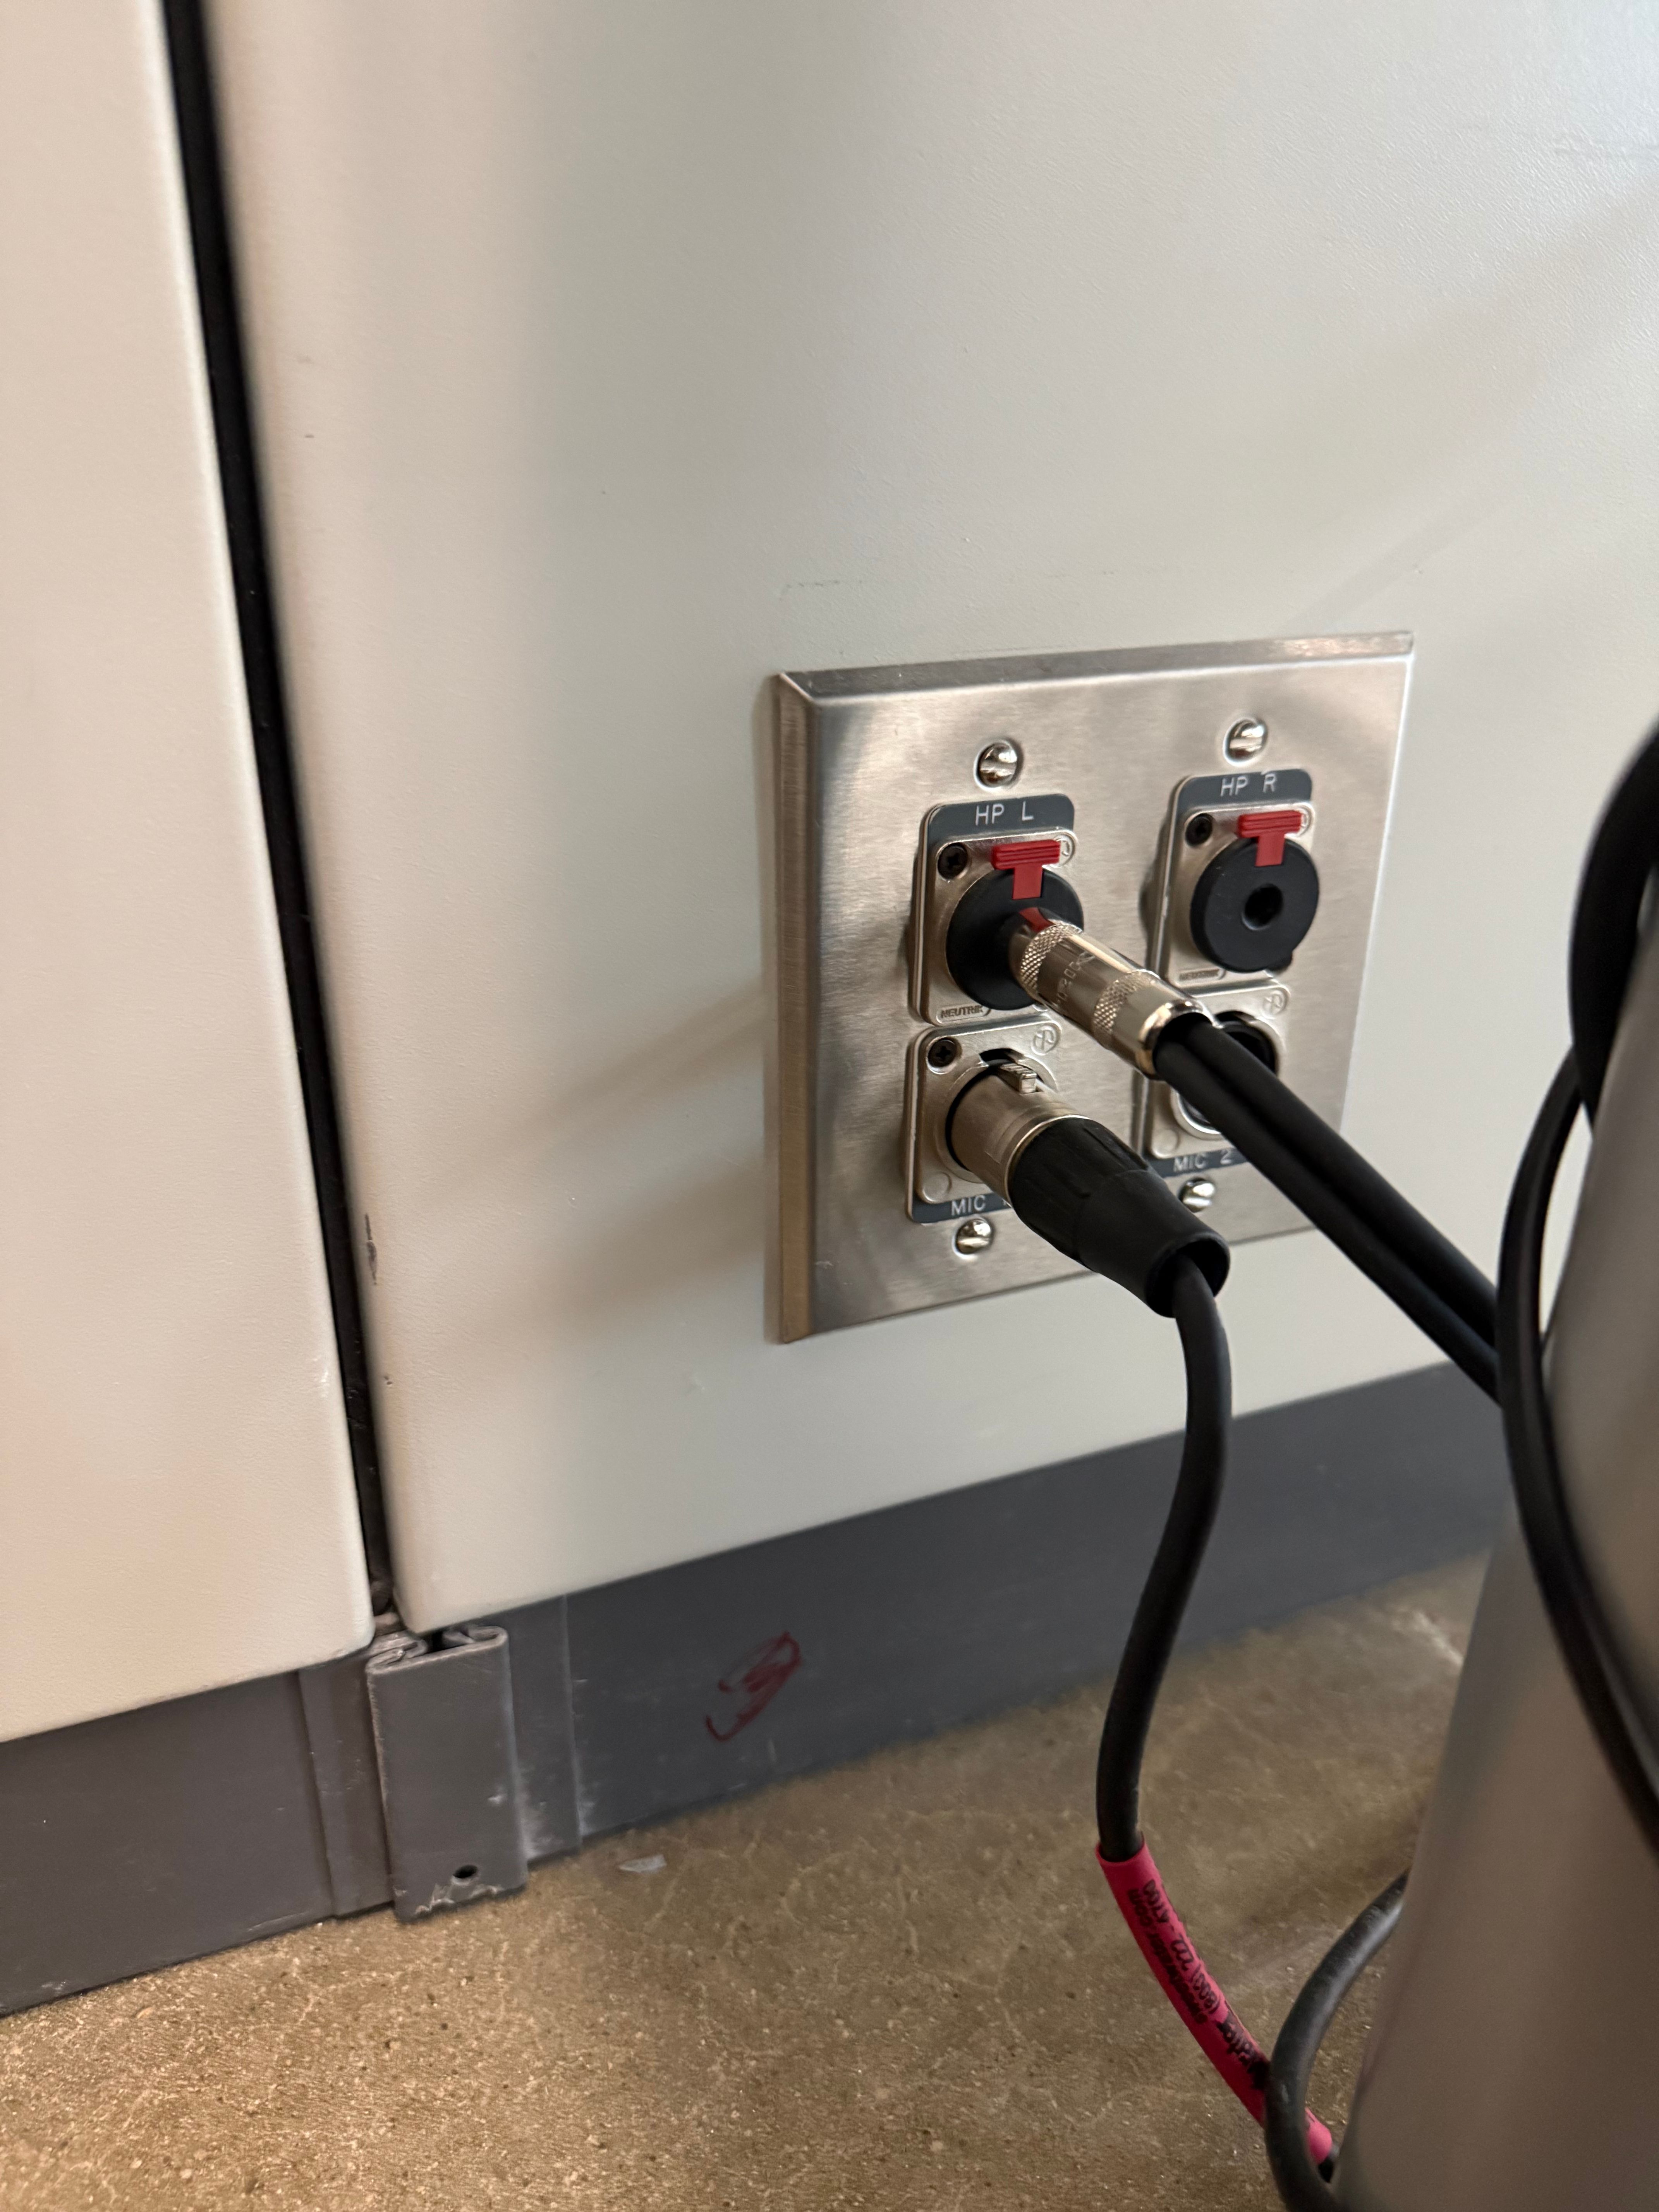
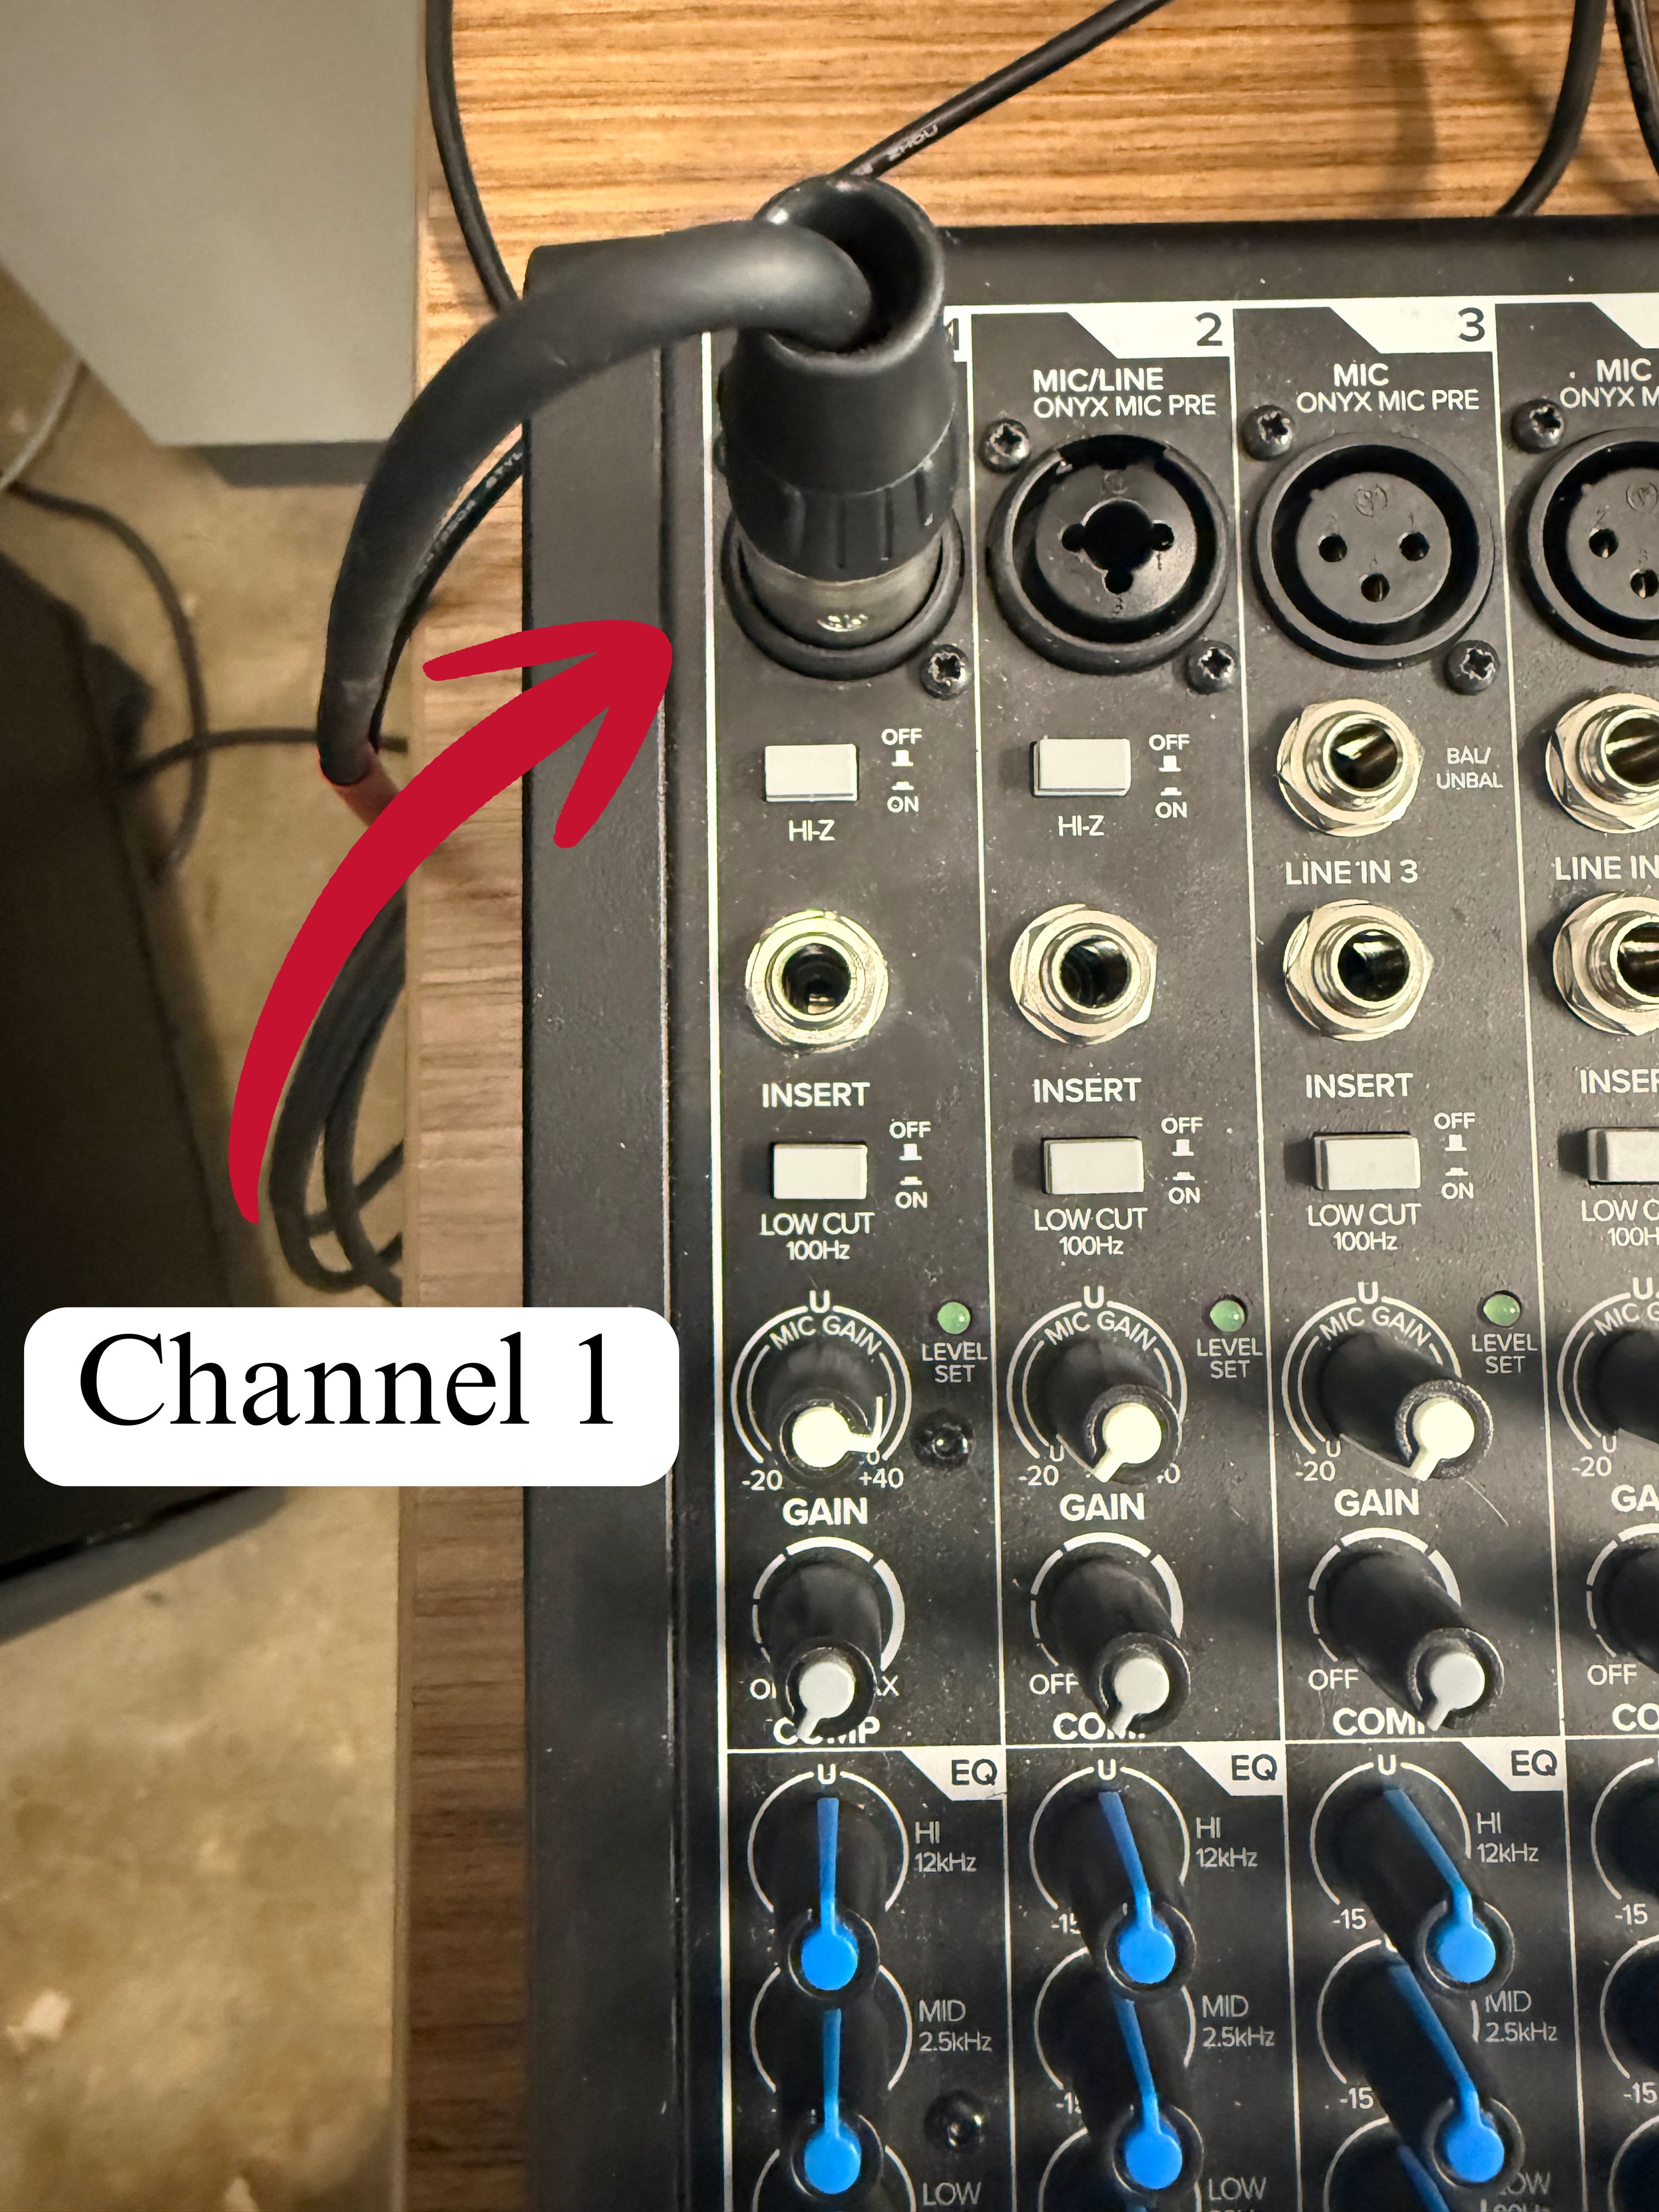
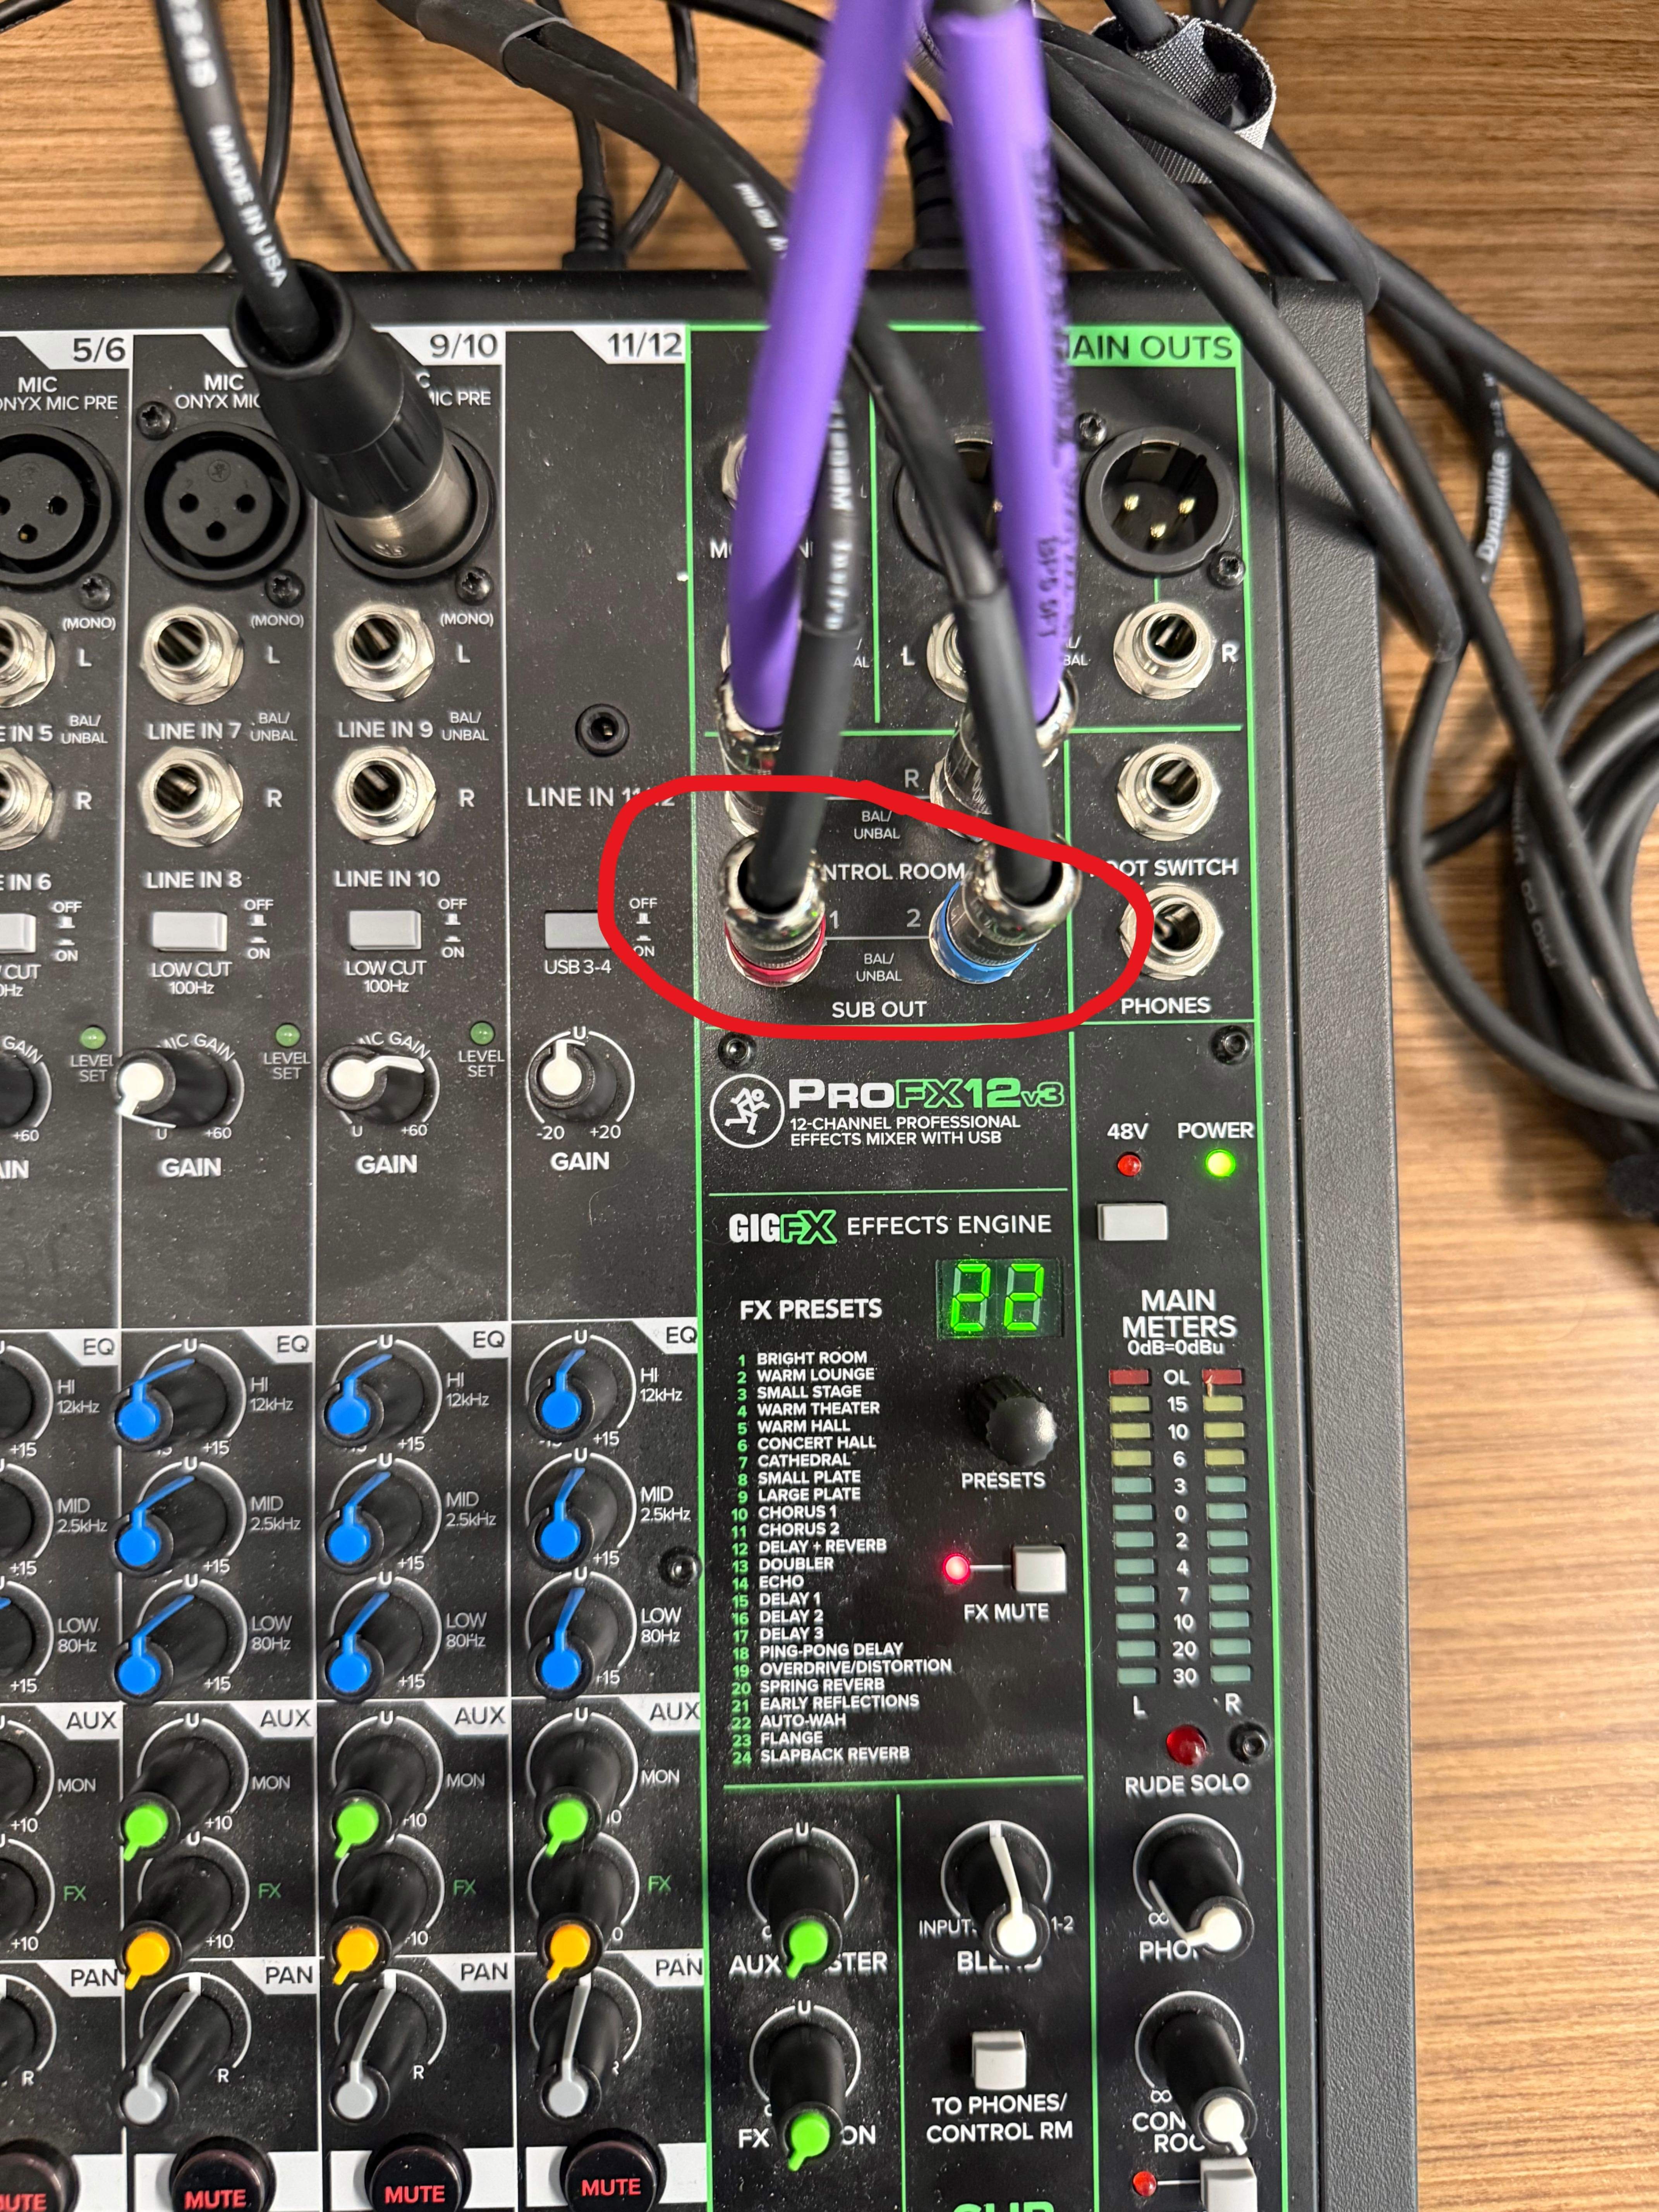
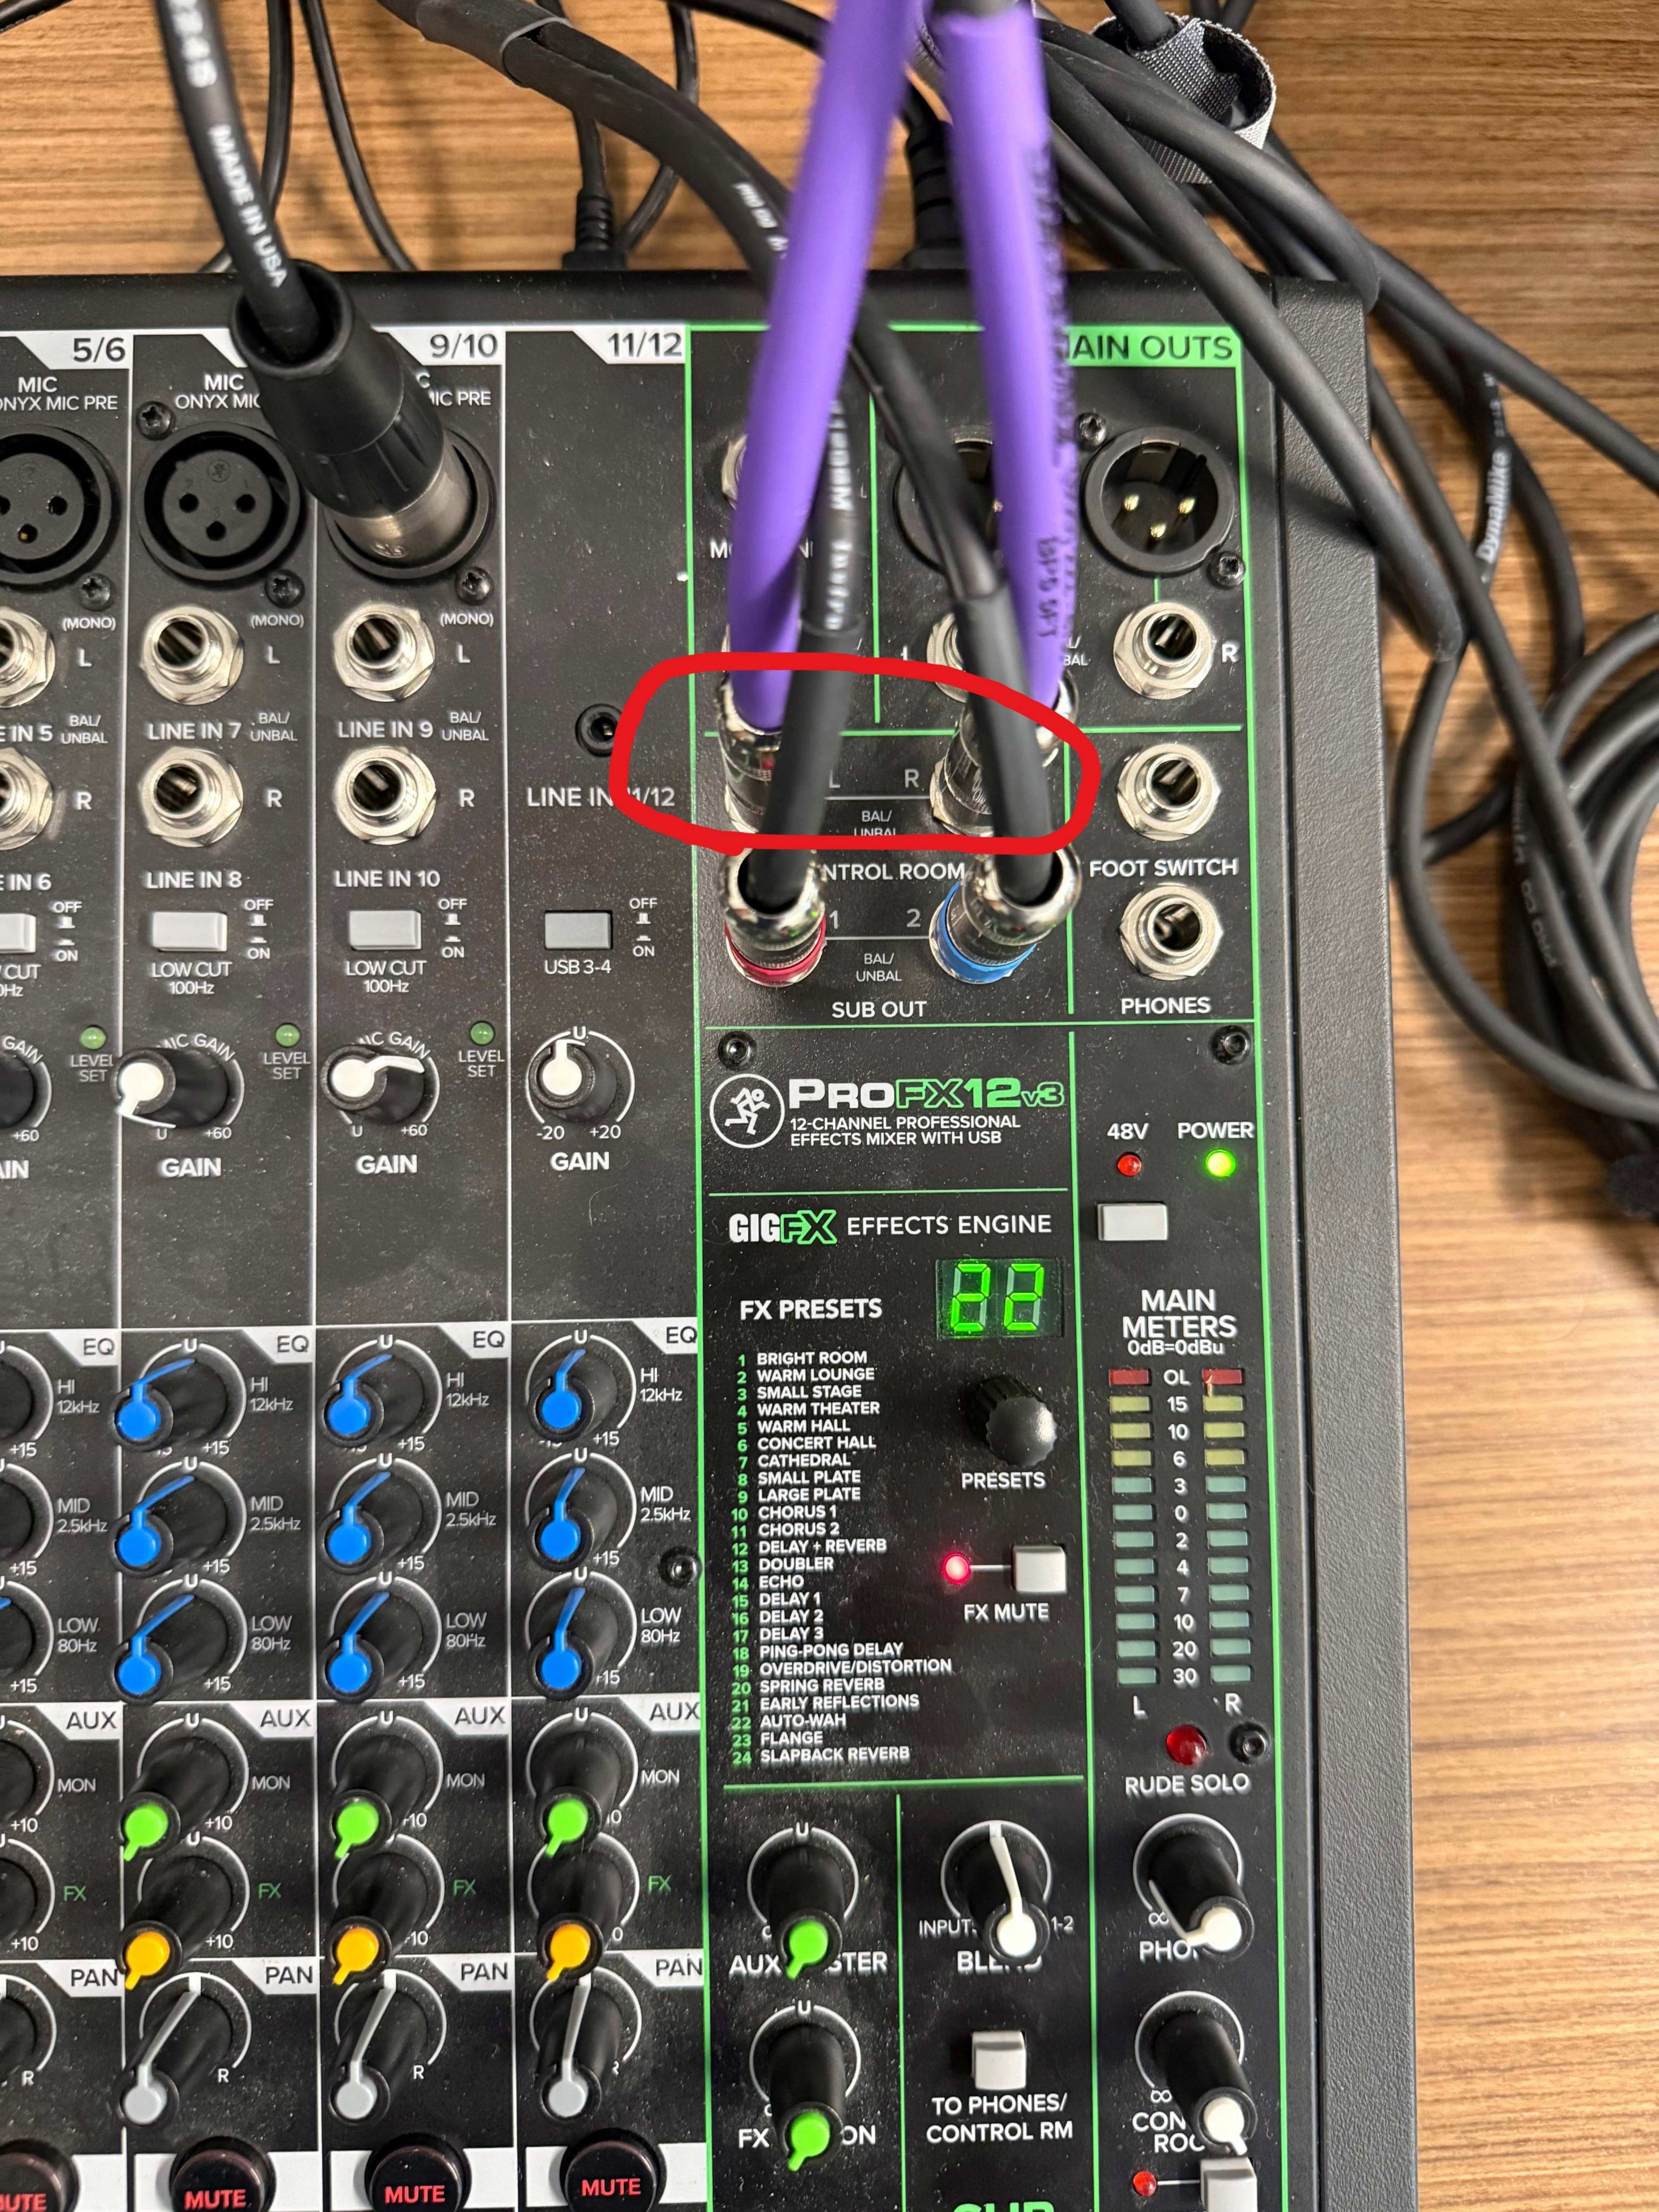
4. Make sure the XLR cable from the wall is plugged into Channel 1 and the other cable from the wall is plugged into 1-2 SUB OUT
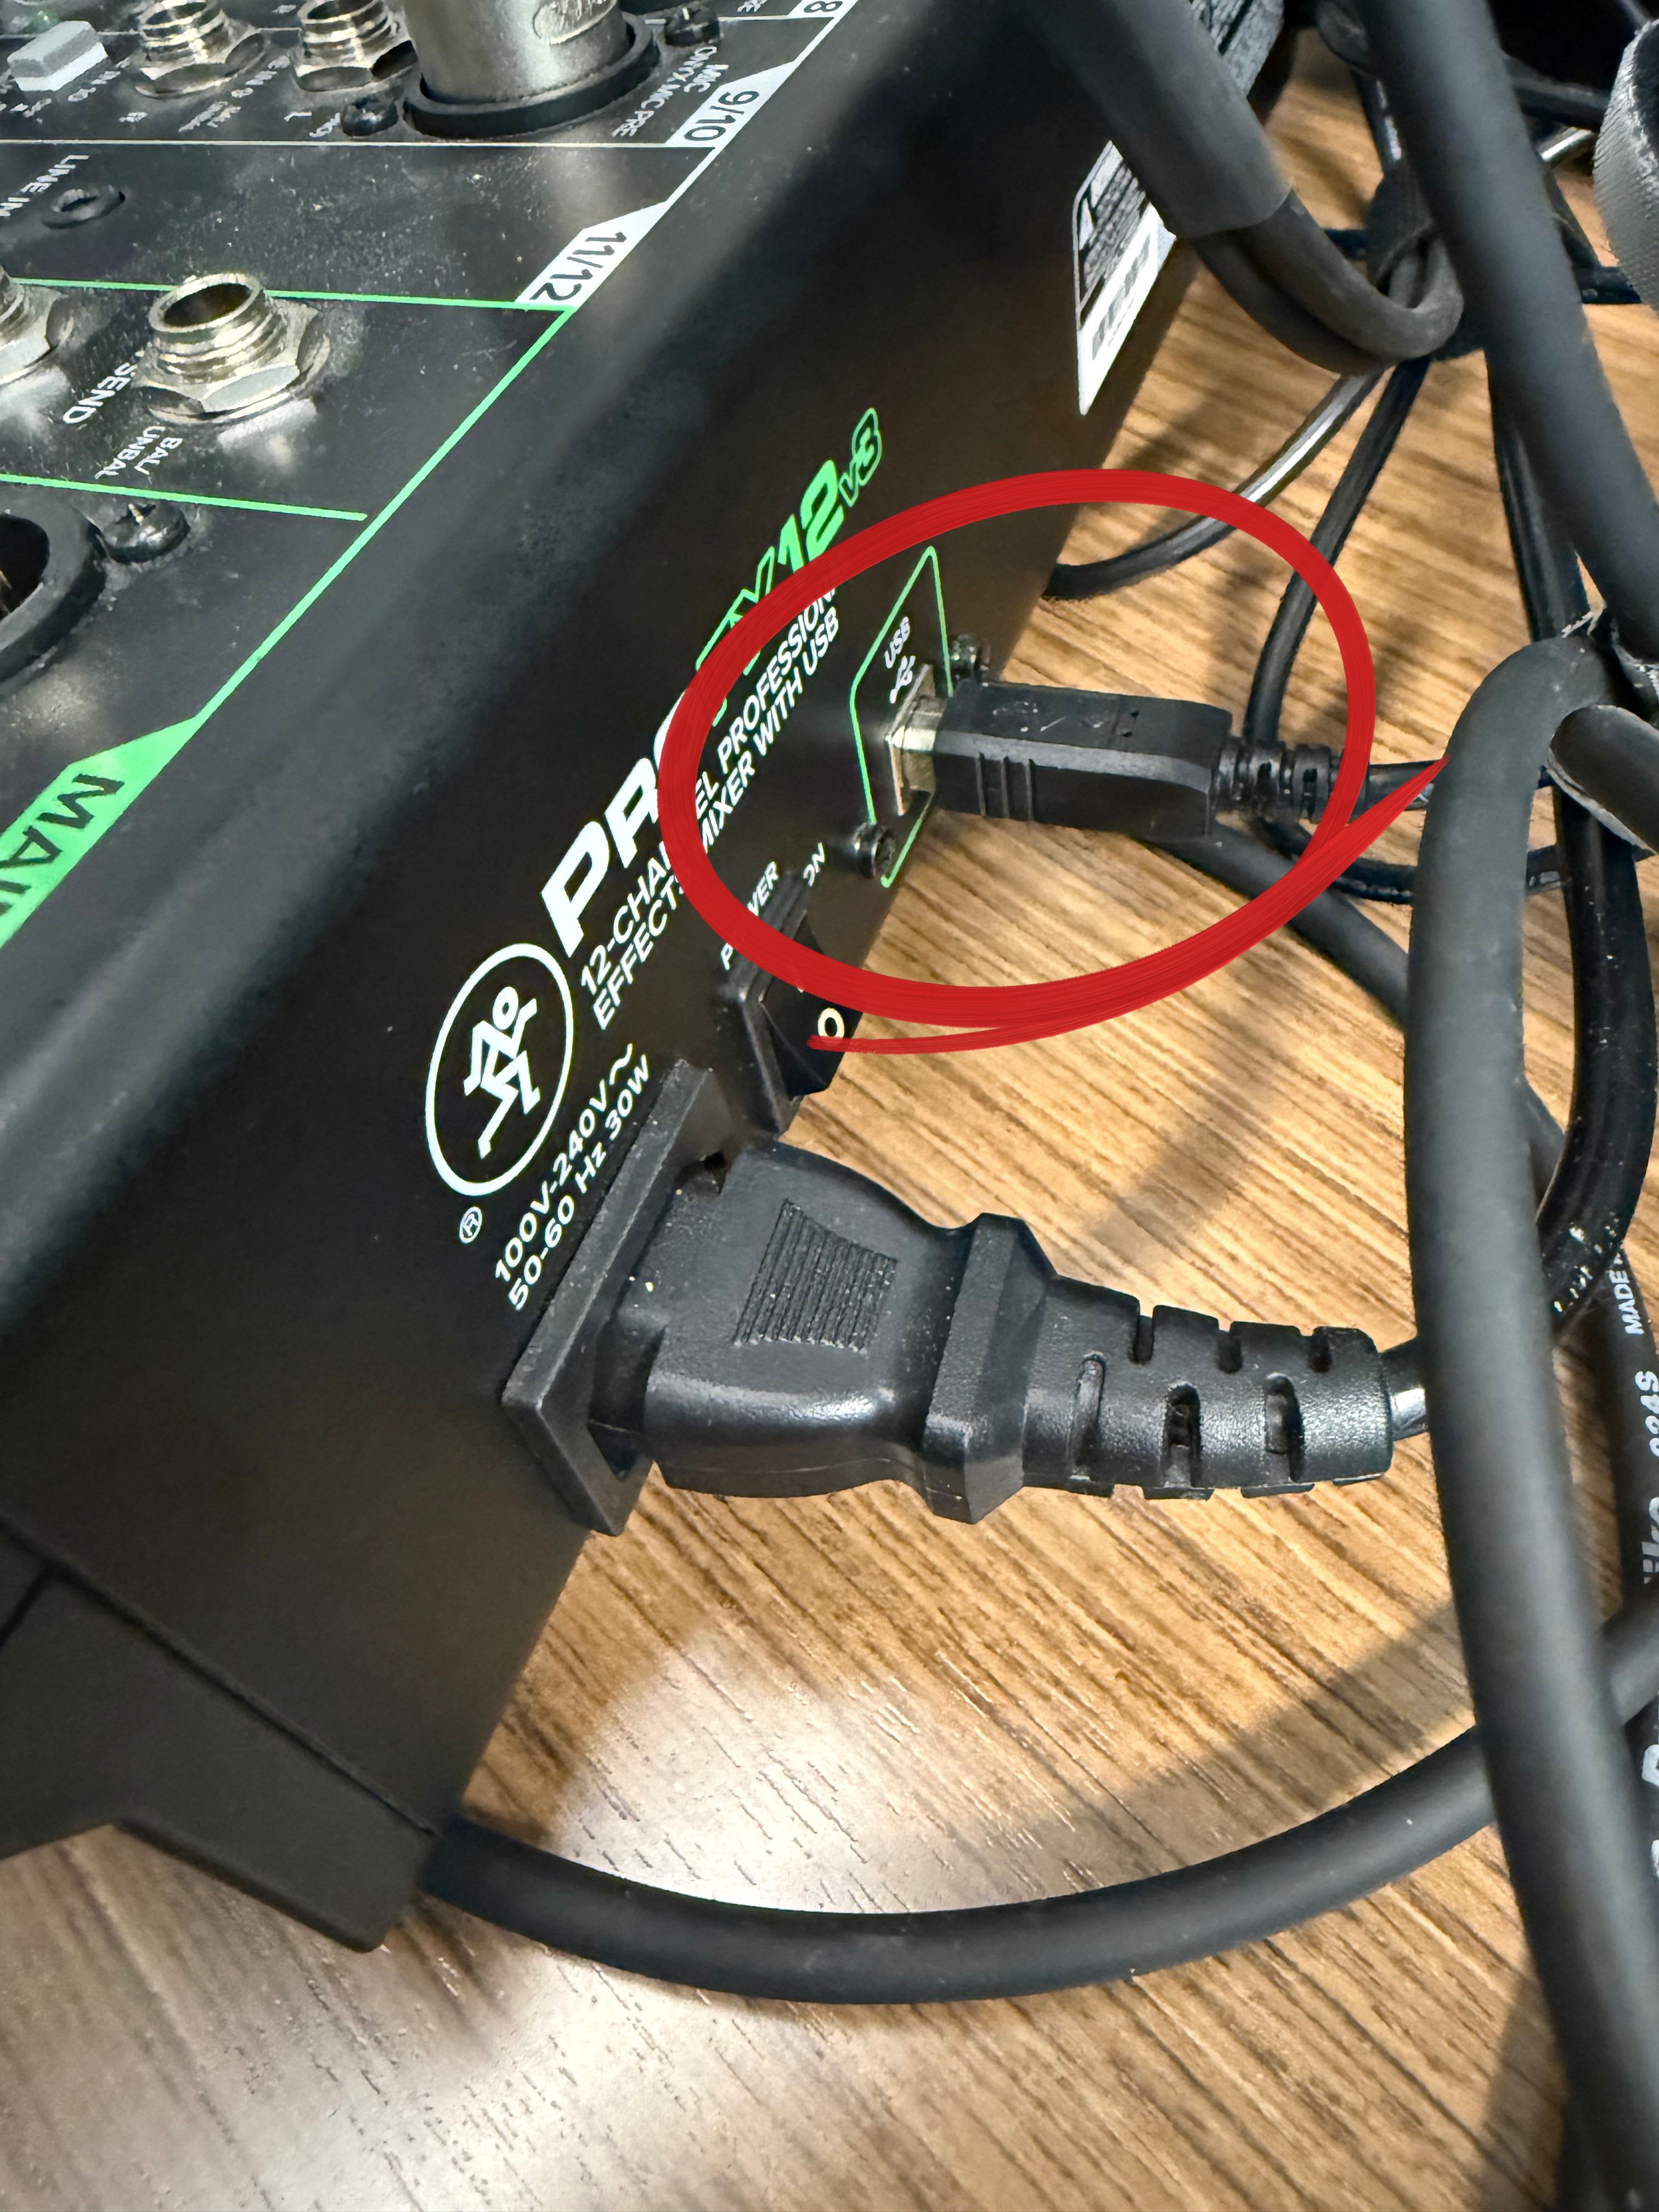
5. Make sure the USB cable on the back of the mixer is plugged into the computer
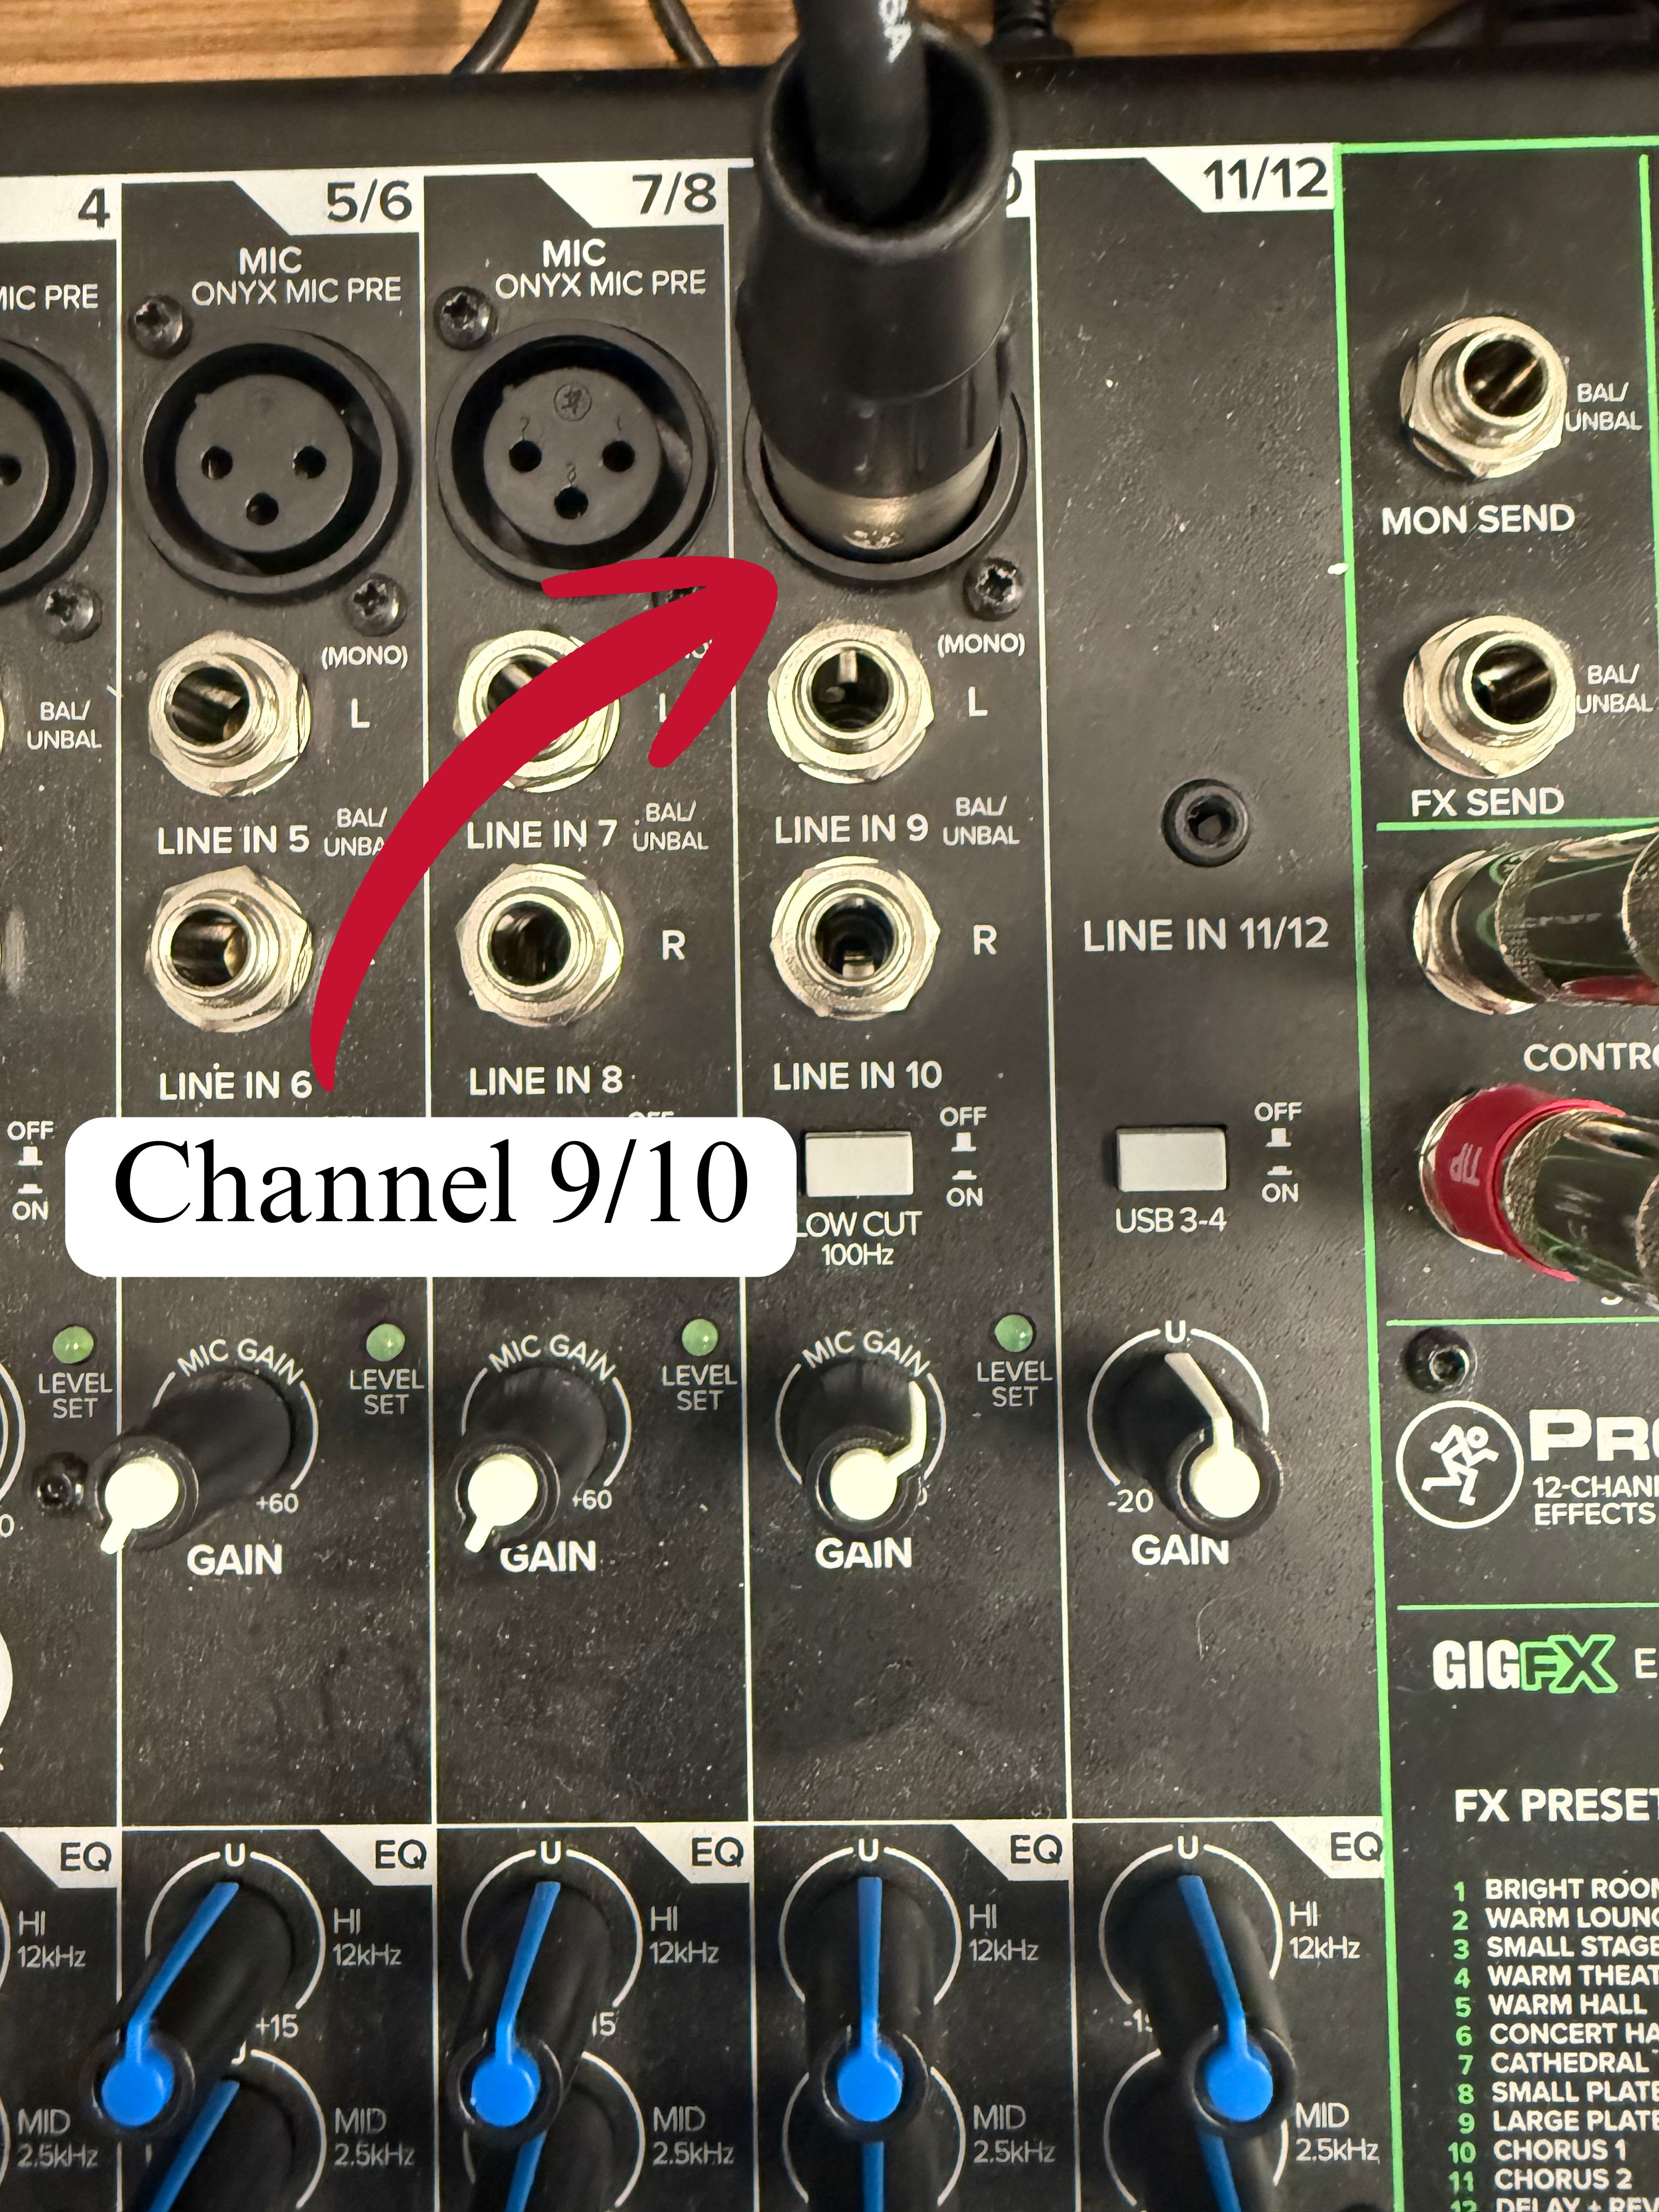
6. Make sure the Talk back mic is plugged into Channel 9/10
7. Make sure the cable connected to the speakers is plugged into control room L-R matching the corresponding speaker
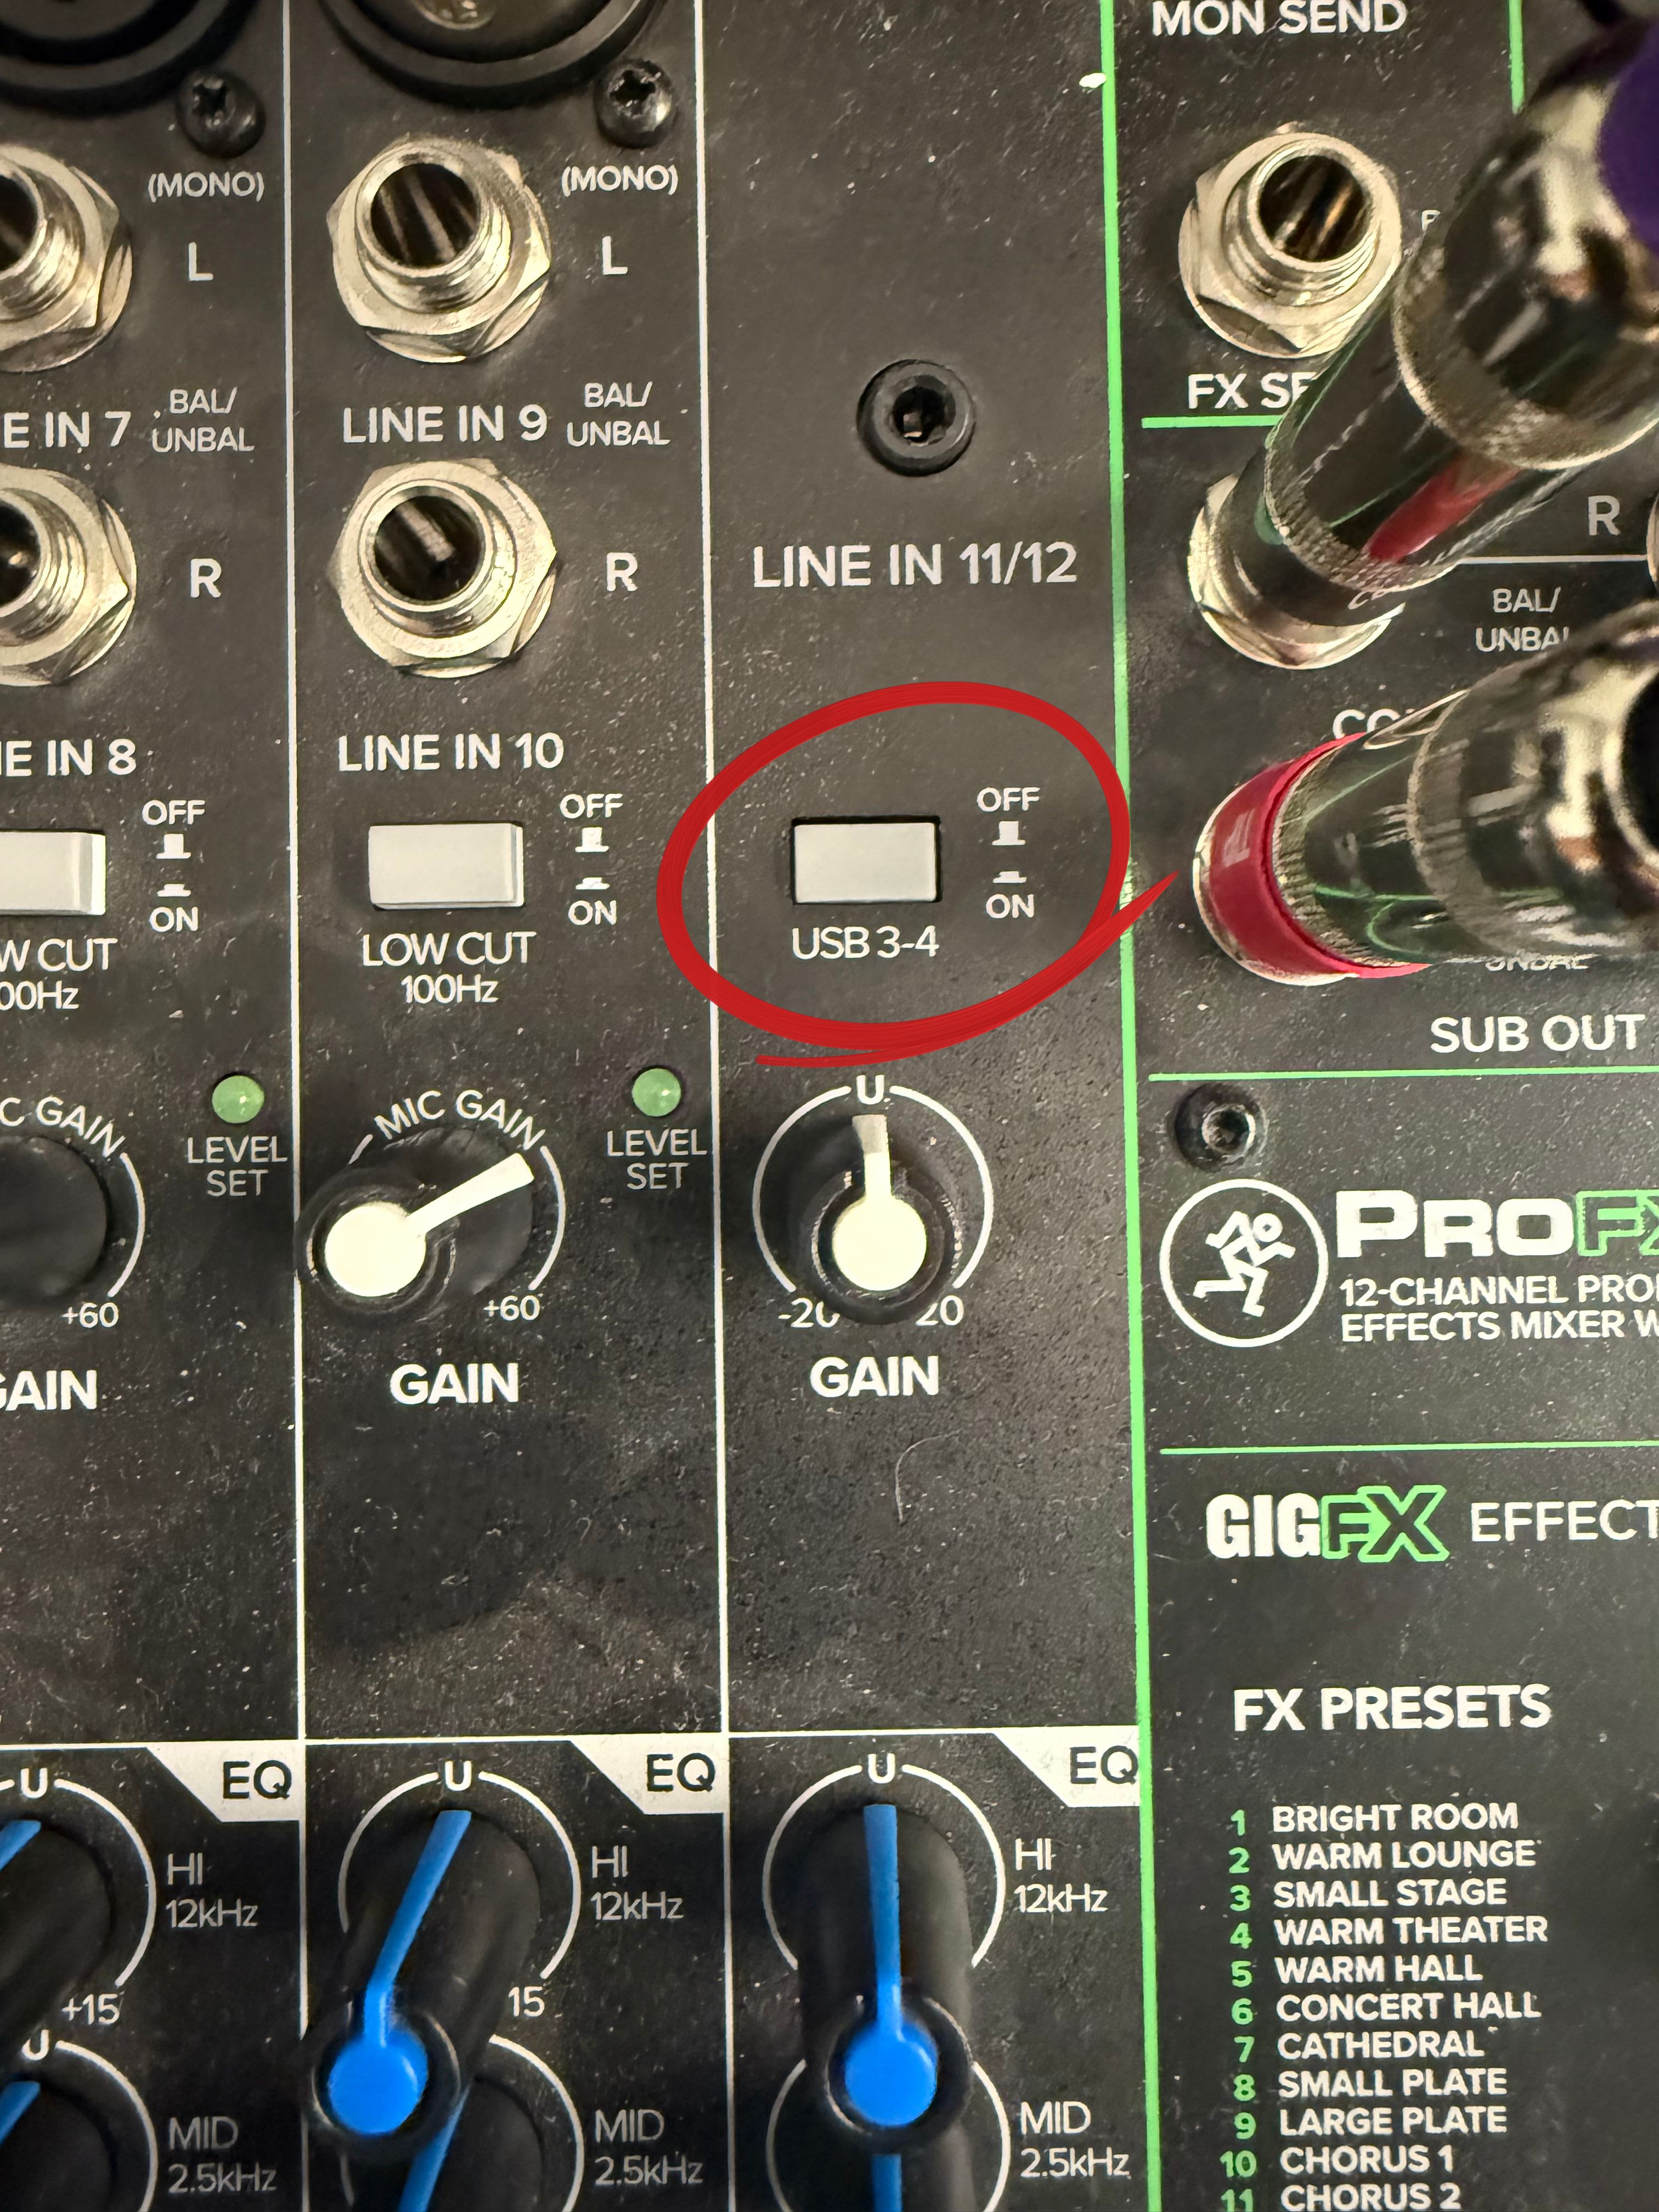
8. Press the USB 3-4 button on Channel 11/12
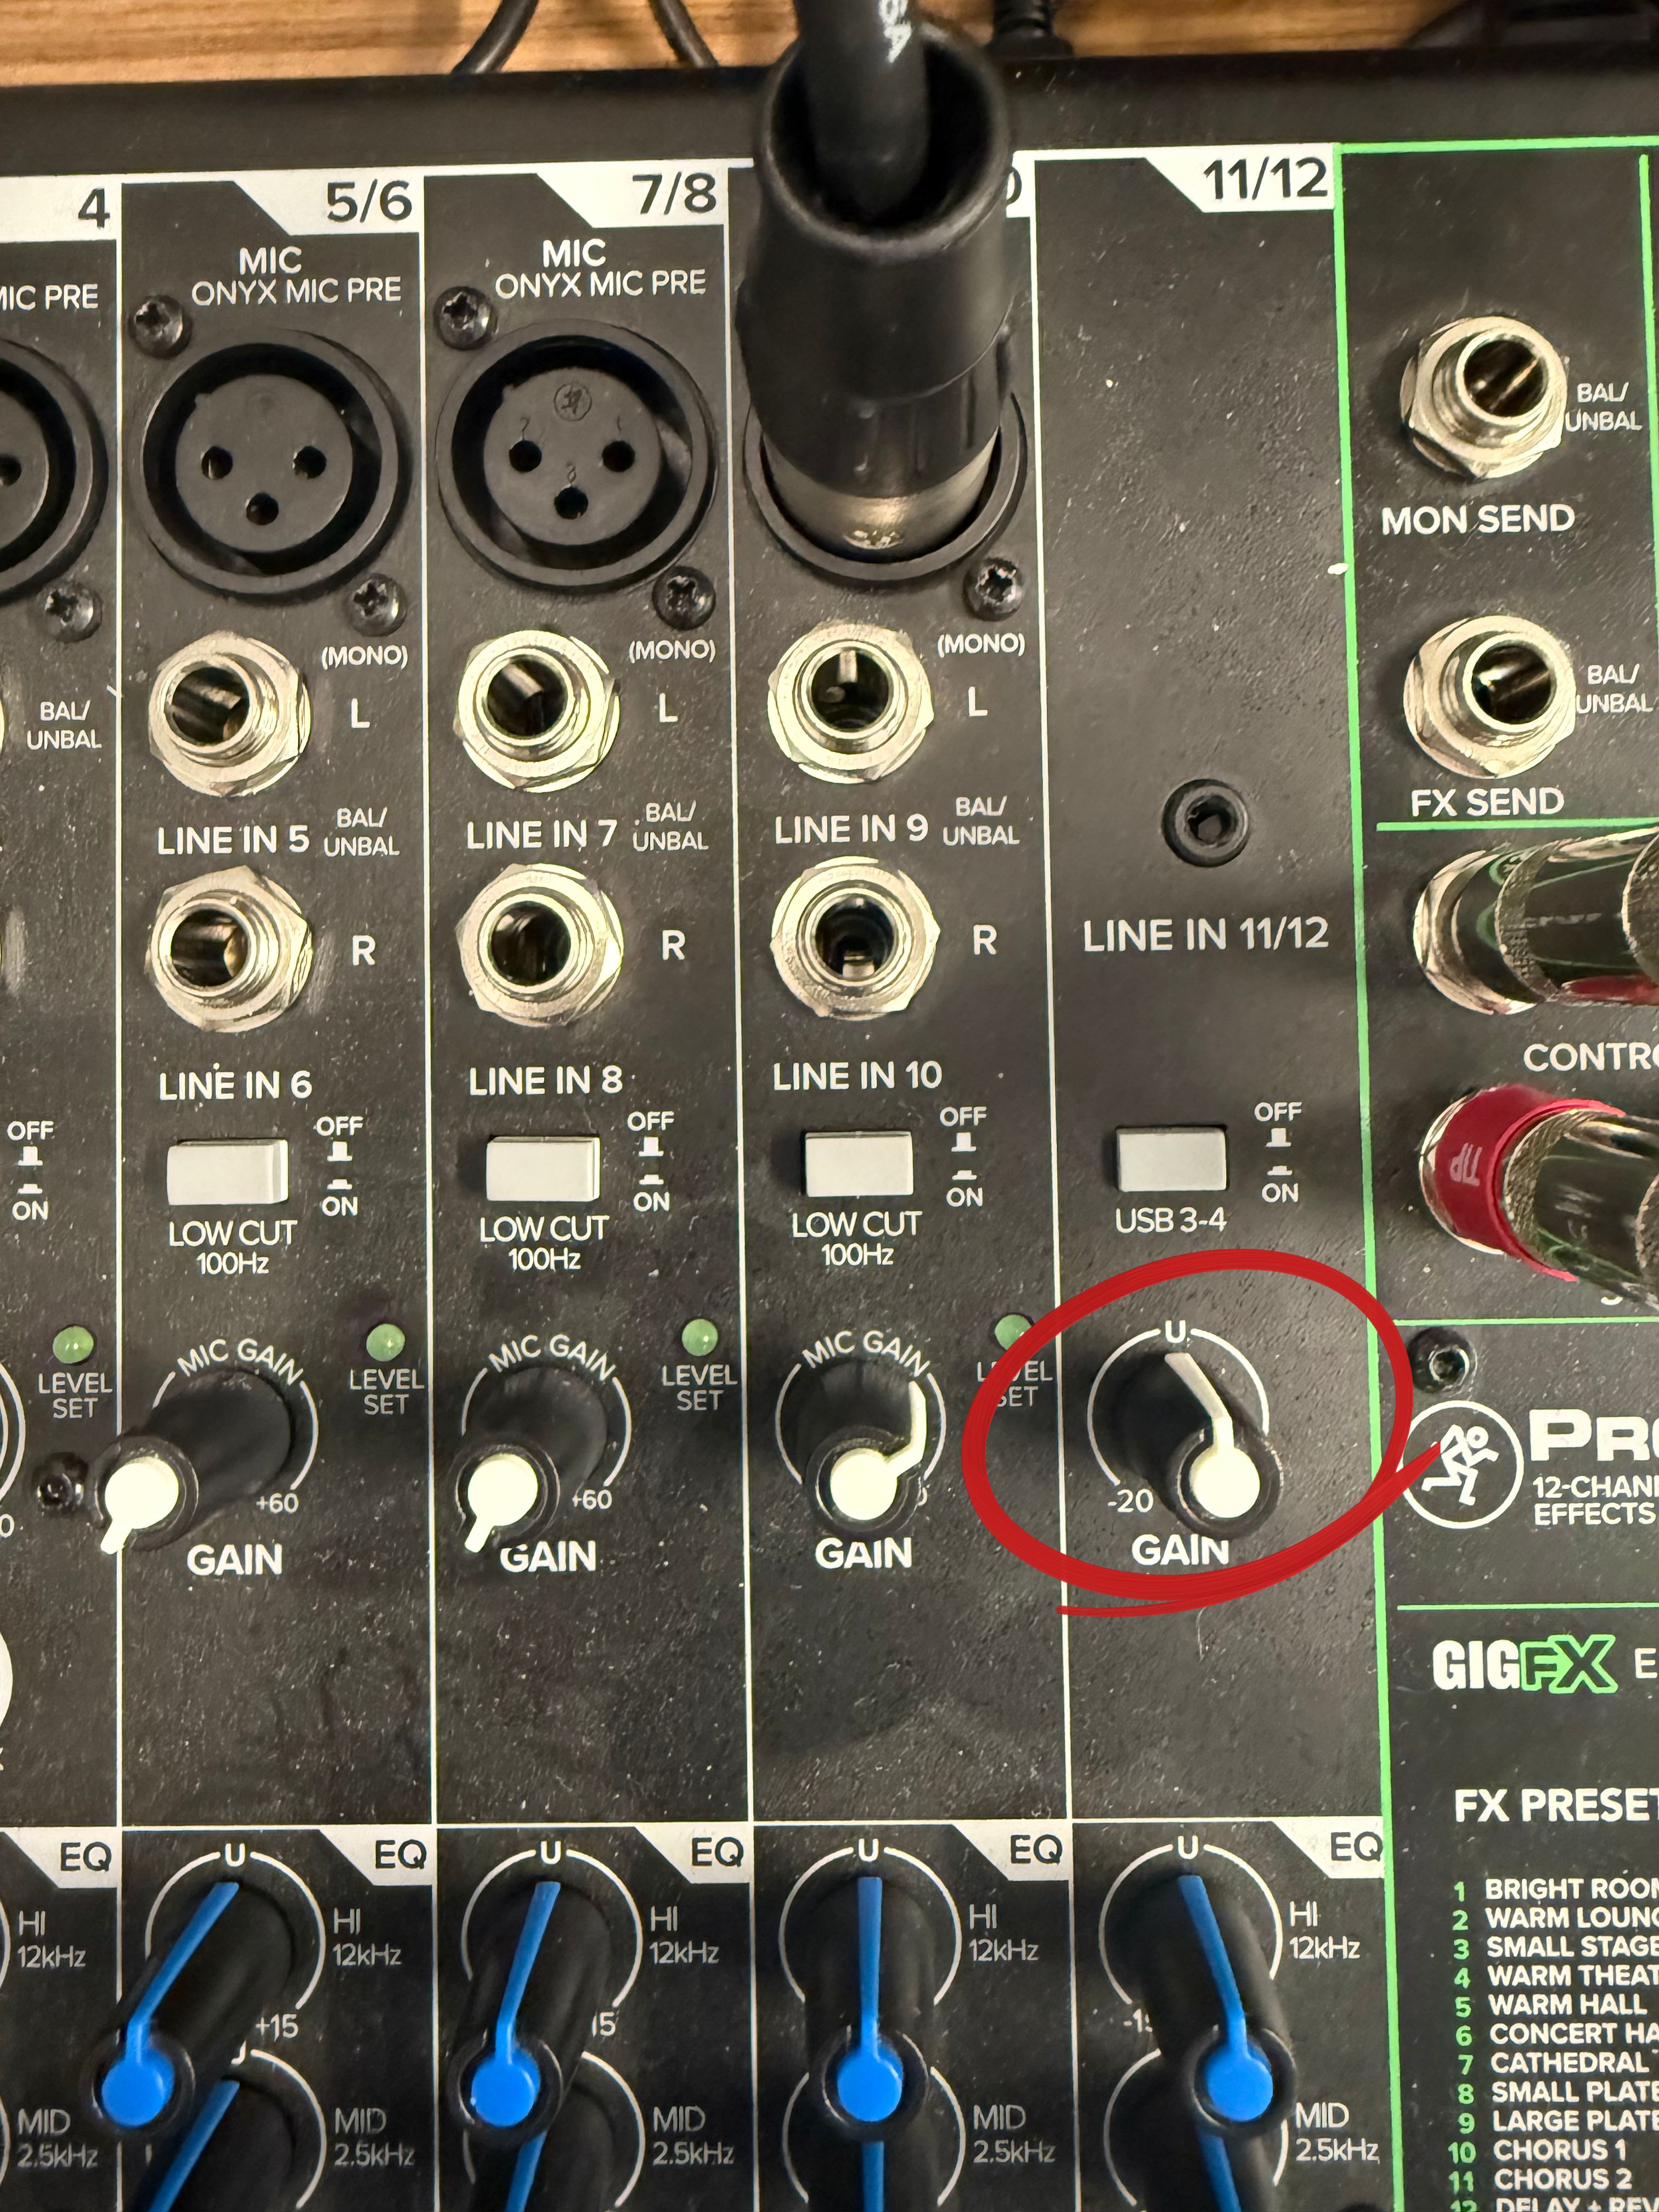
9. Set Gain knob on channel 11/12 to U
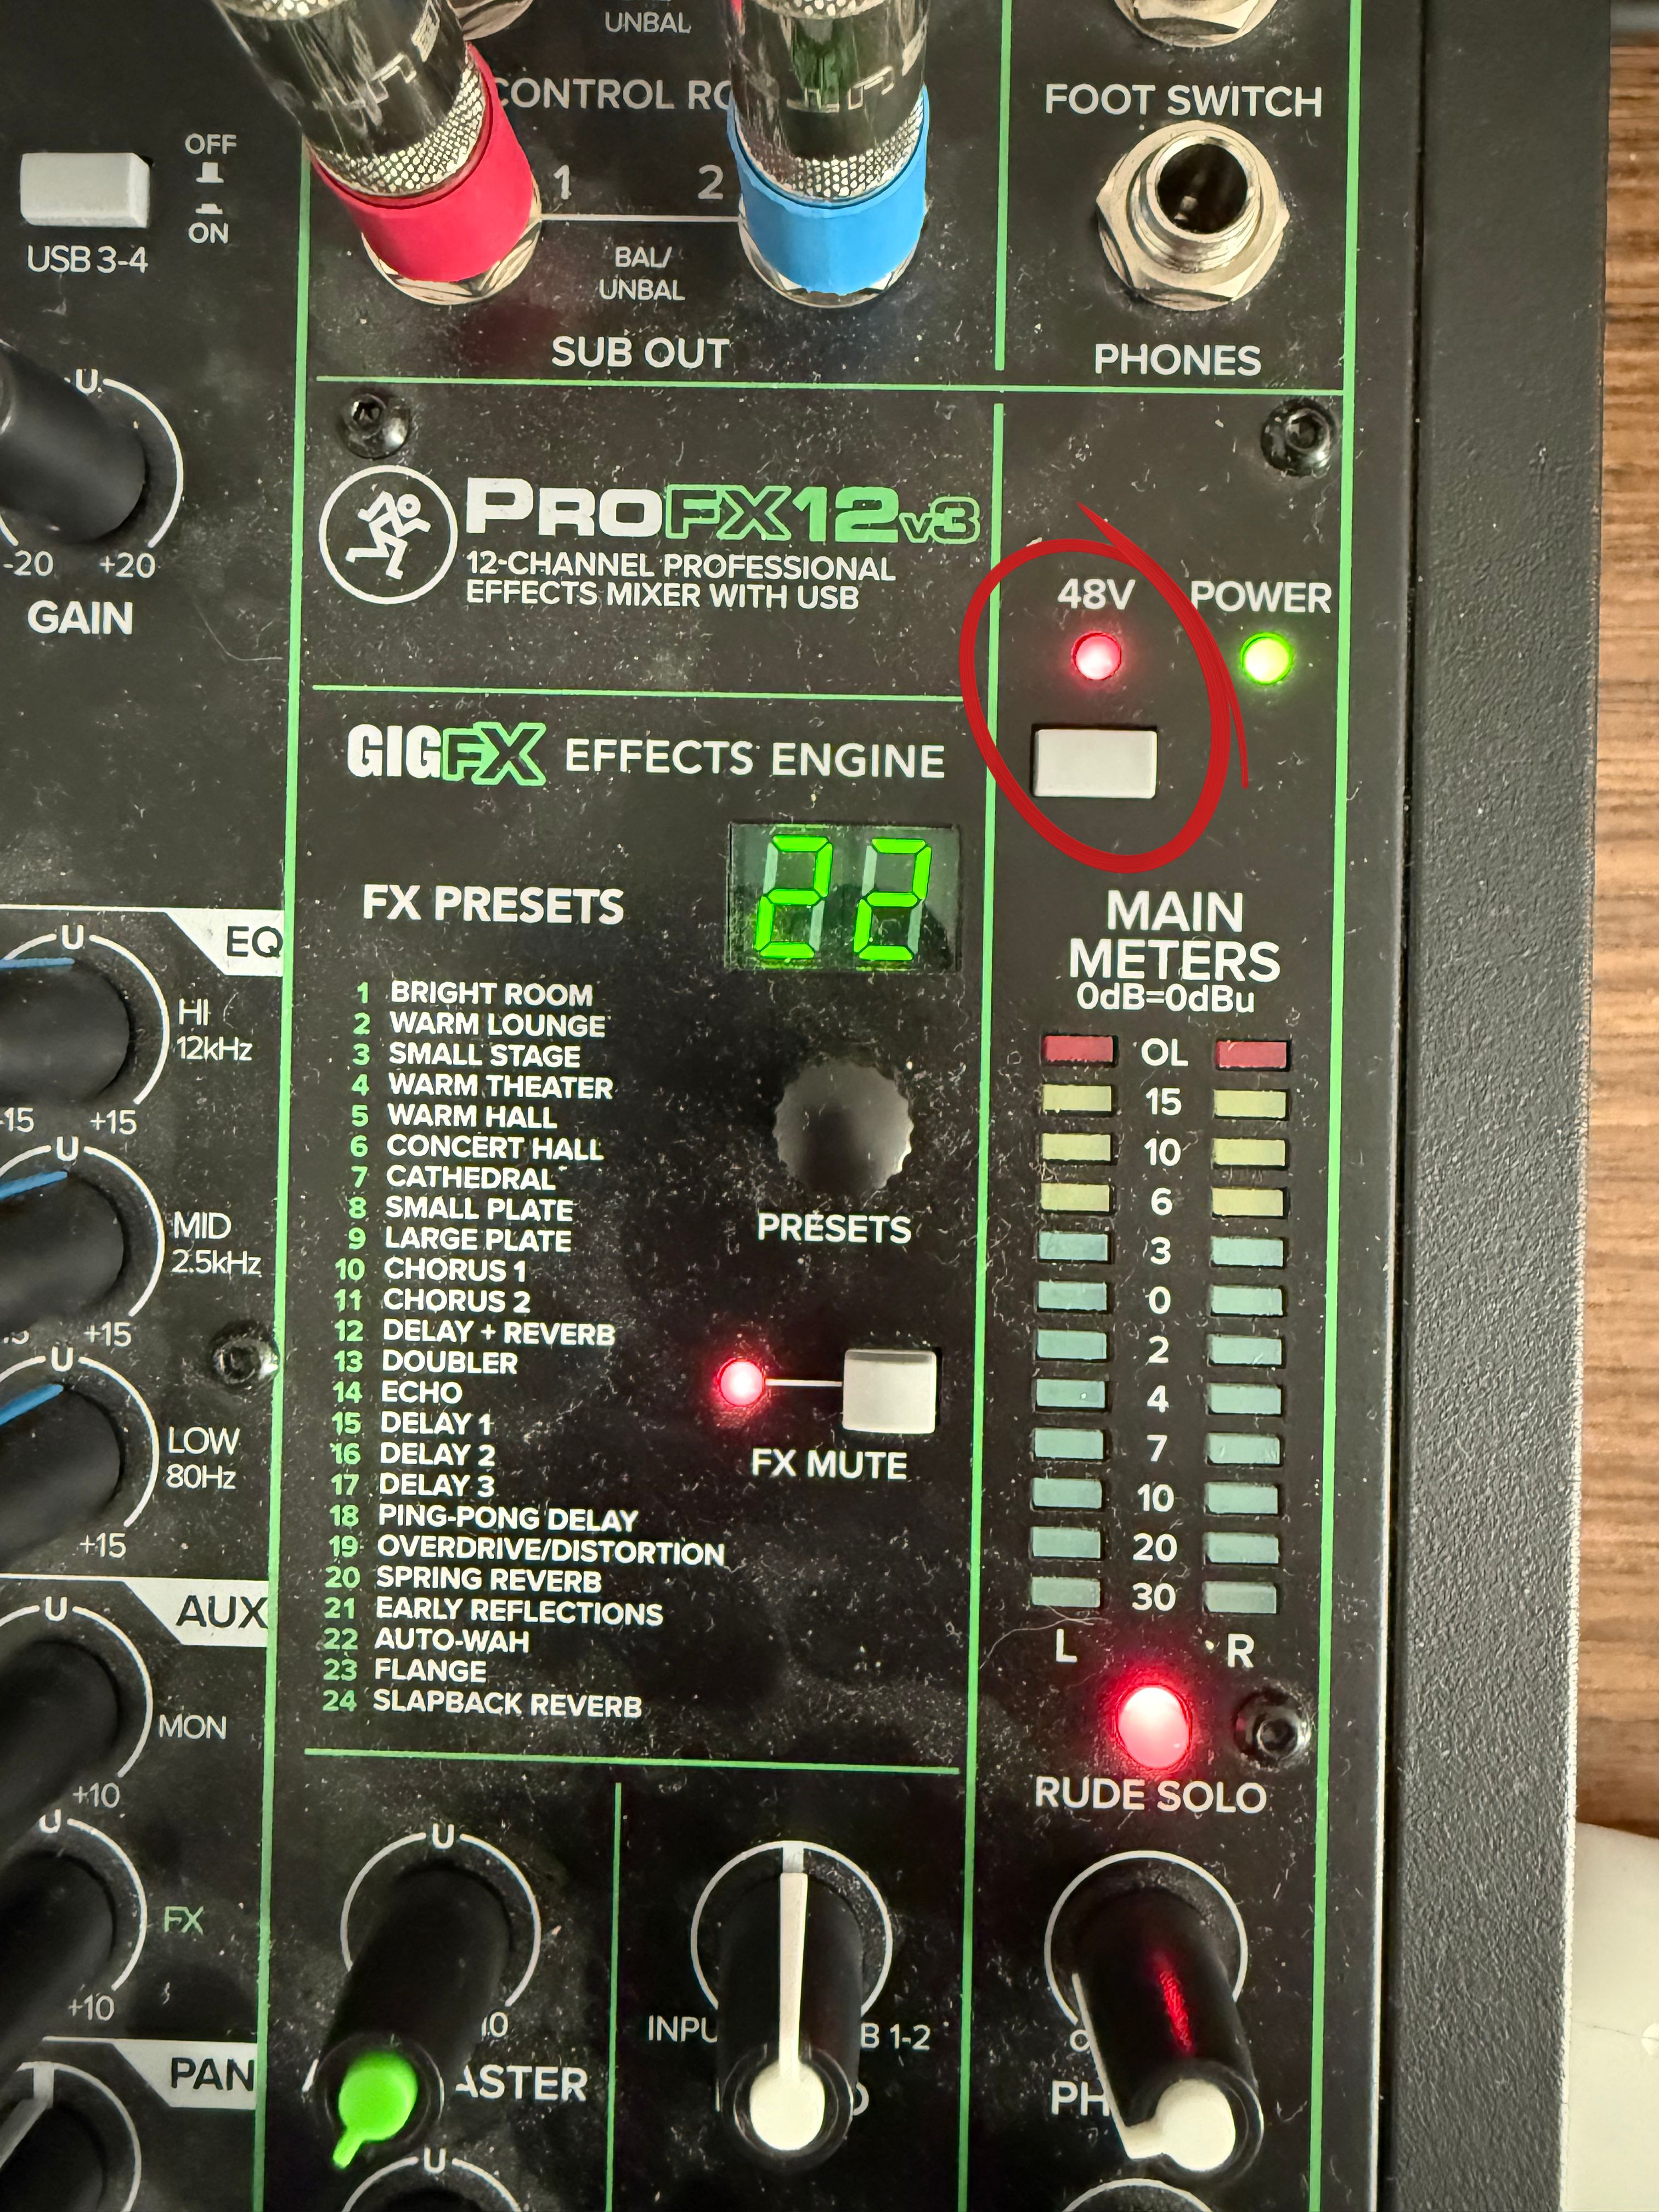
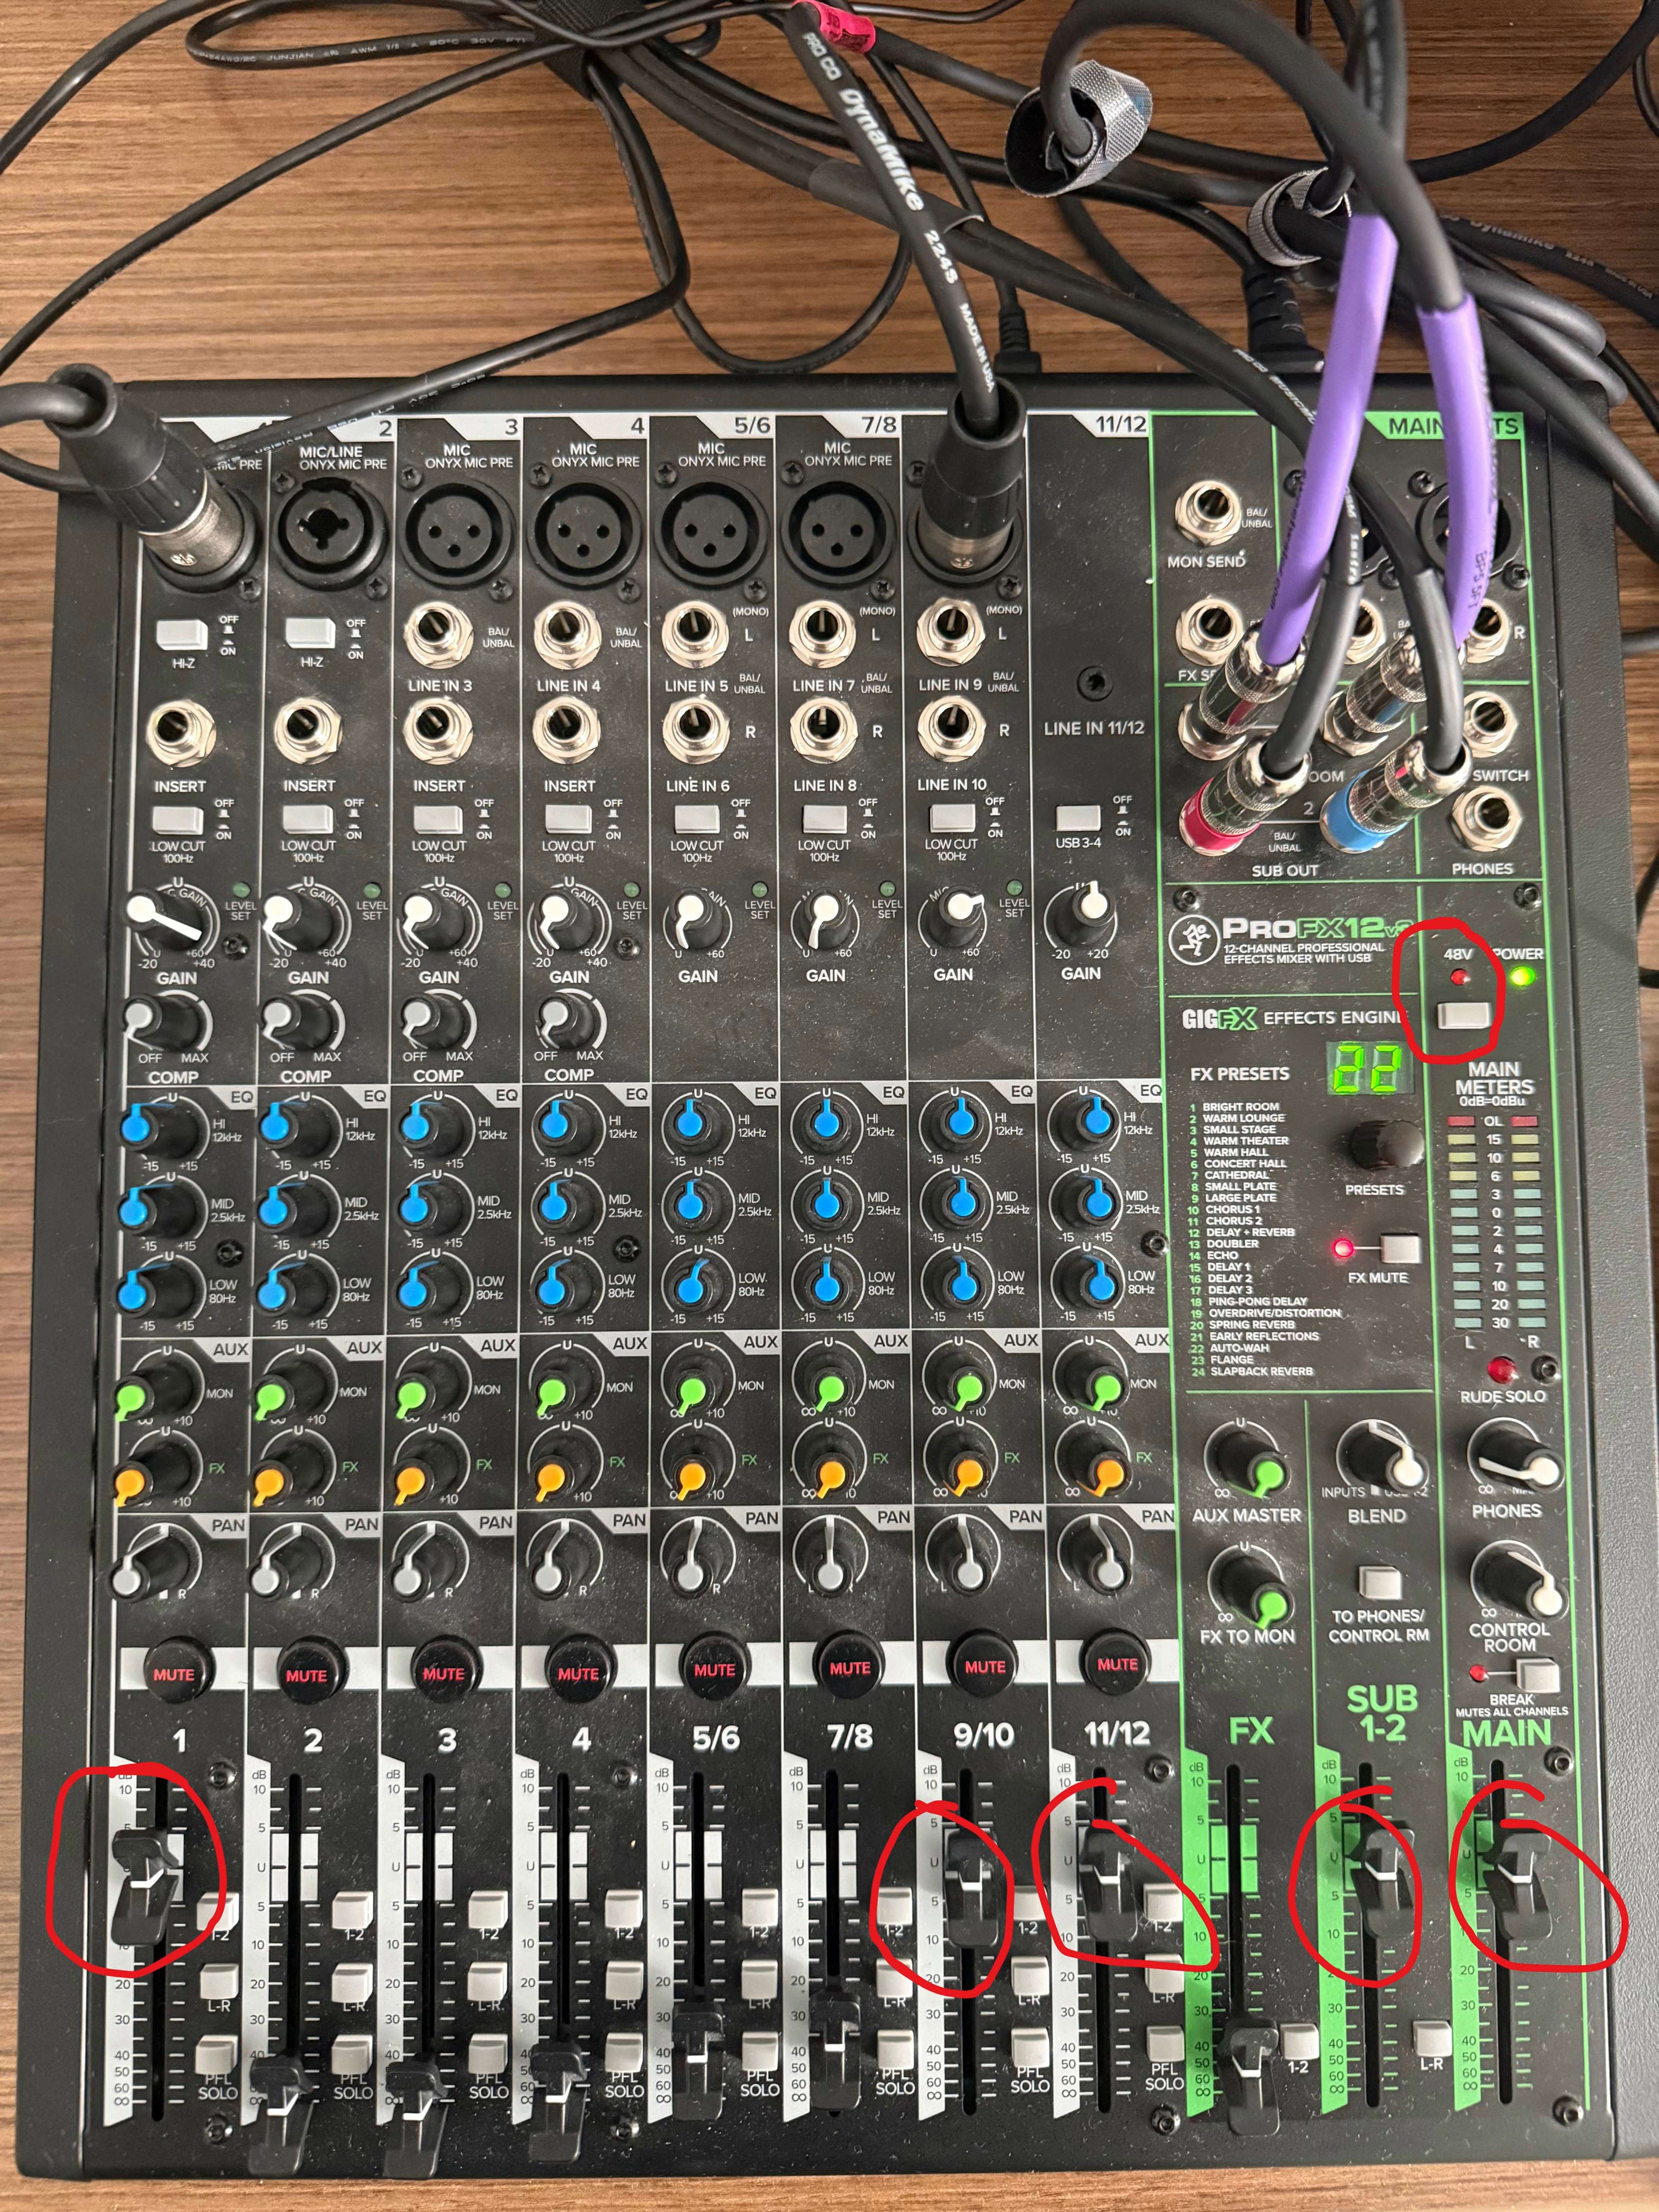
10. Once everything is plugged in press the 48V button
MAKE SURE THAT EVERYTHING IS PLUGGED IN AND SPEAKERS ARE MUTED BEFORE PRESSING 48V. TURN THE SPEAKERS ALL THE WAY DOWN BEFORE PRESSING 48V THEN TURN THEM BACK UP
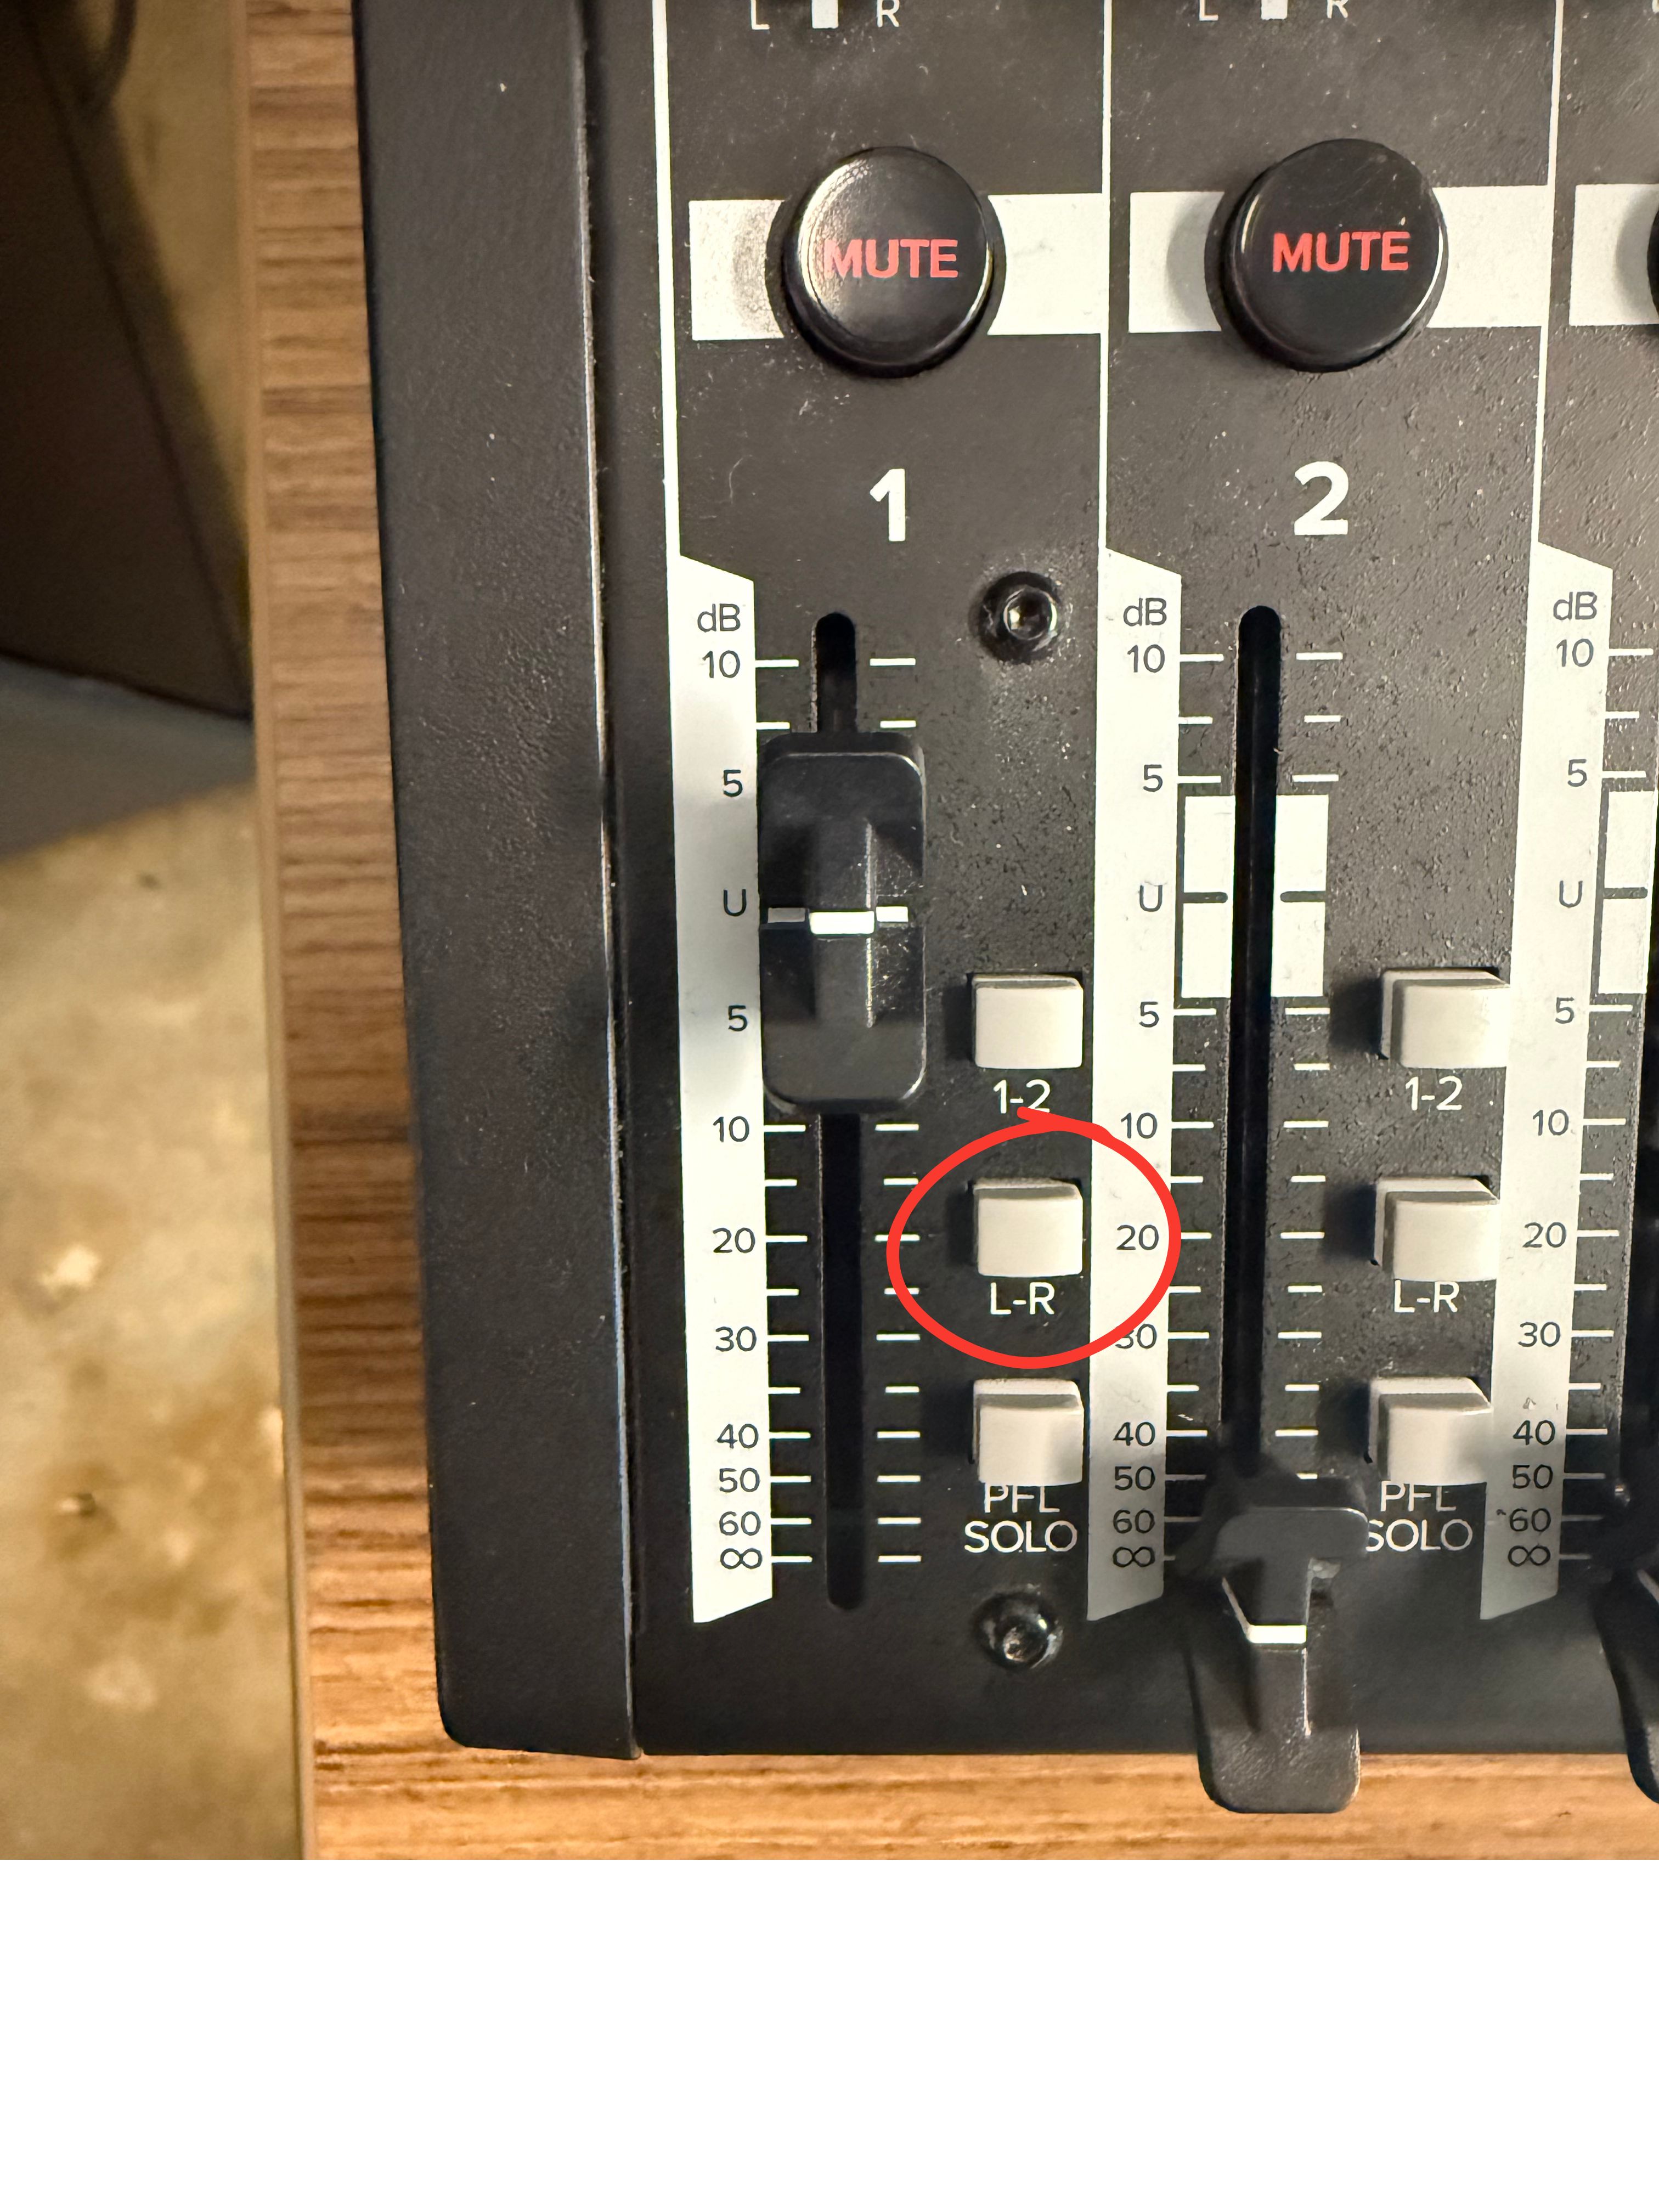
11. Press the L-R button next to the fader on Channel 1.
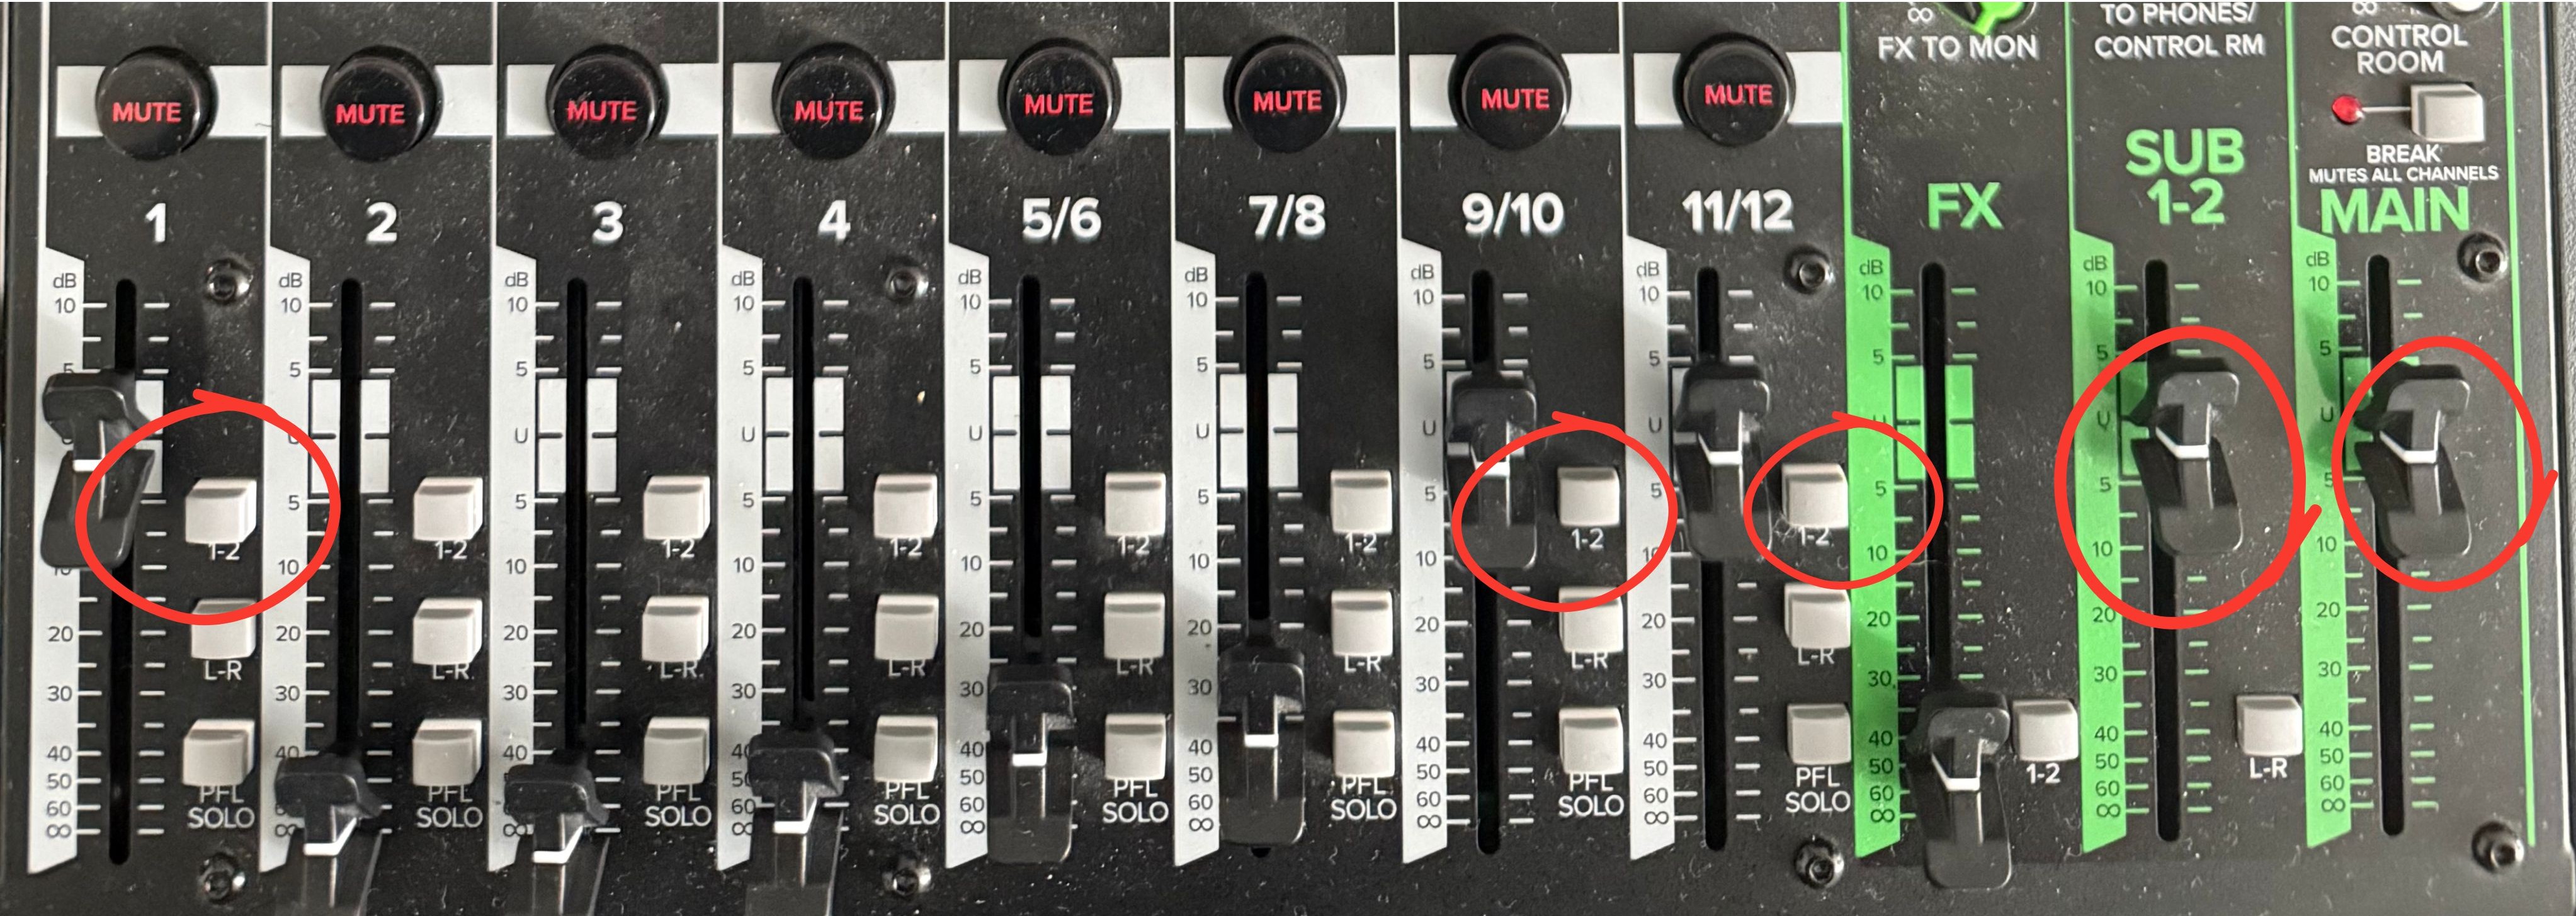
12. Pull the Main, SUB 1-2, Channel 1, Channel 9/10, and Channel 11/12 up to U and Press 1-2 button on Channel's 1, 9/10, 11/12
The 1-2 button allows for the person in the recording booth to hear the channel 1-2 is pressed on.
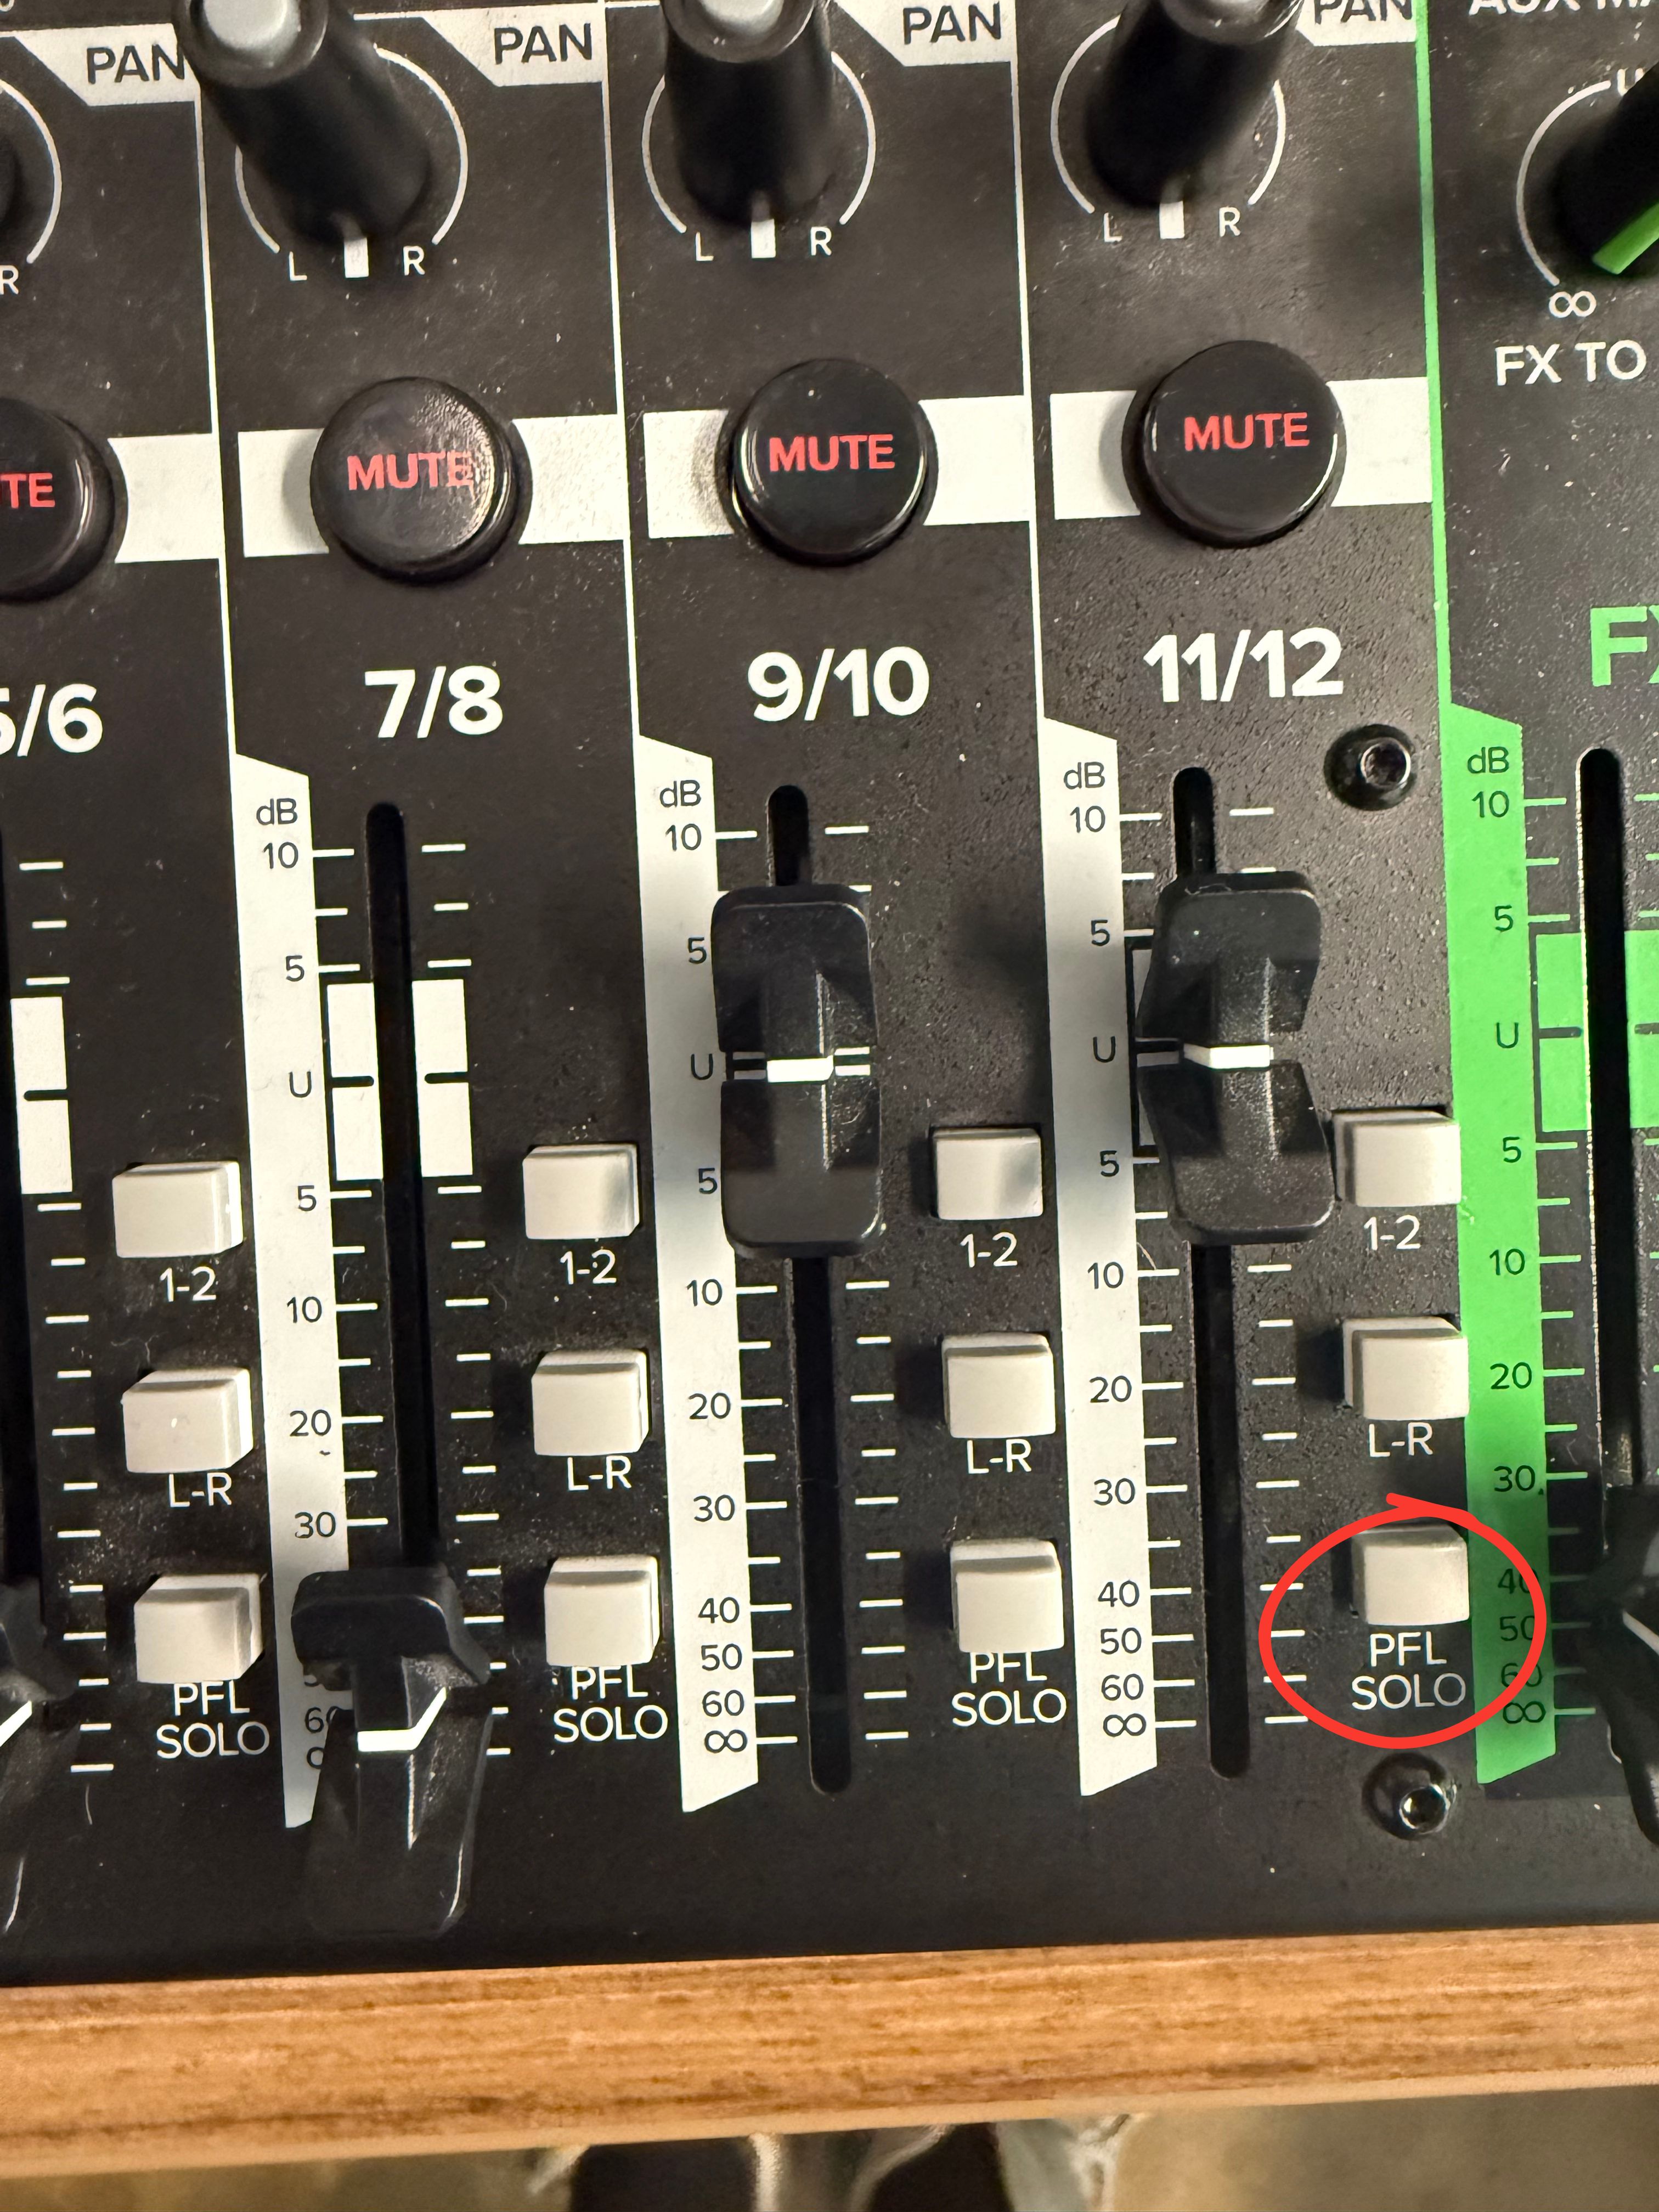
13. Press the PFL SOLO button on channel 11/12
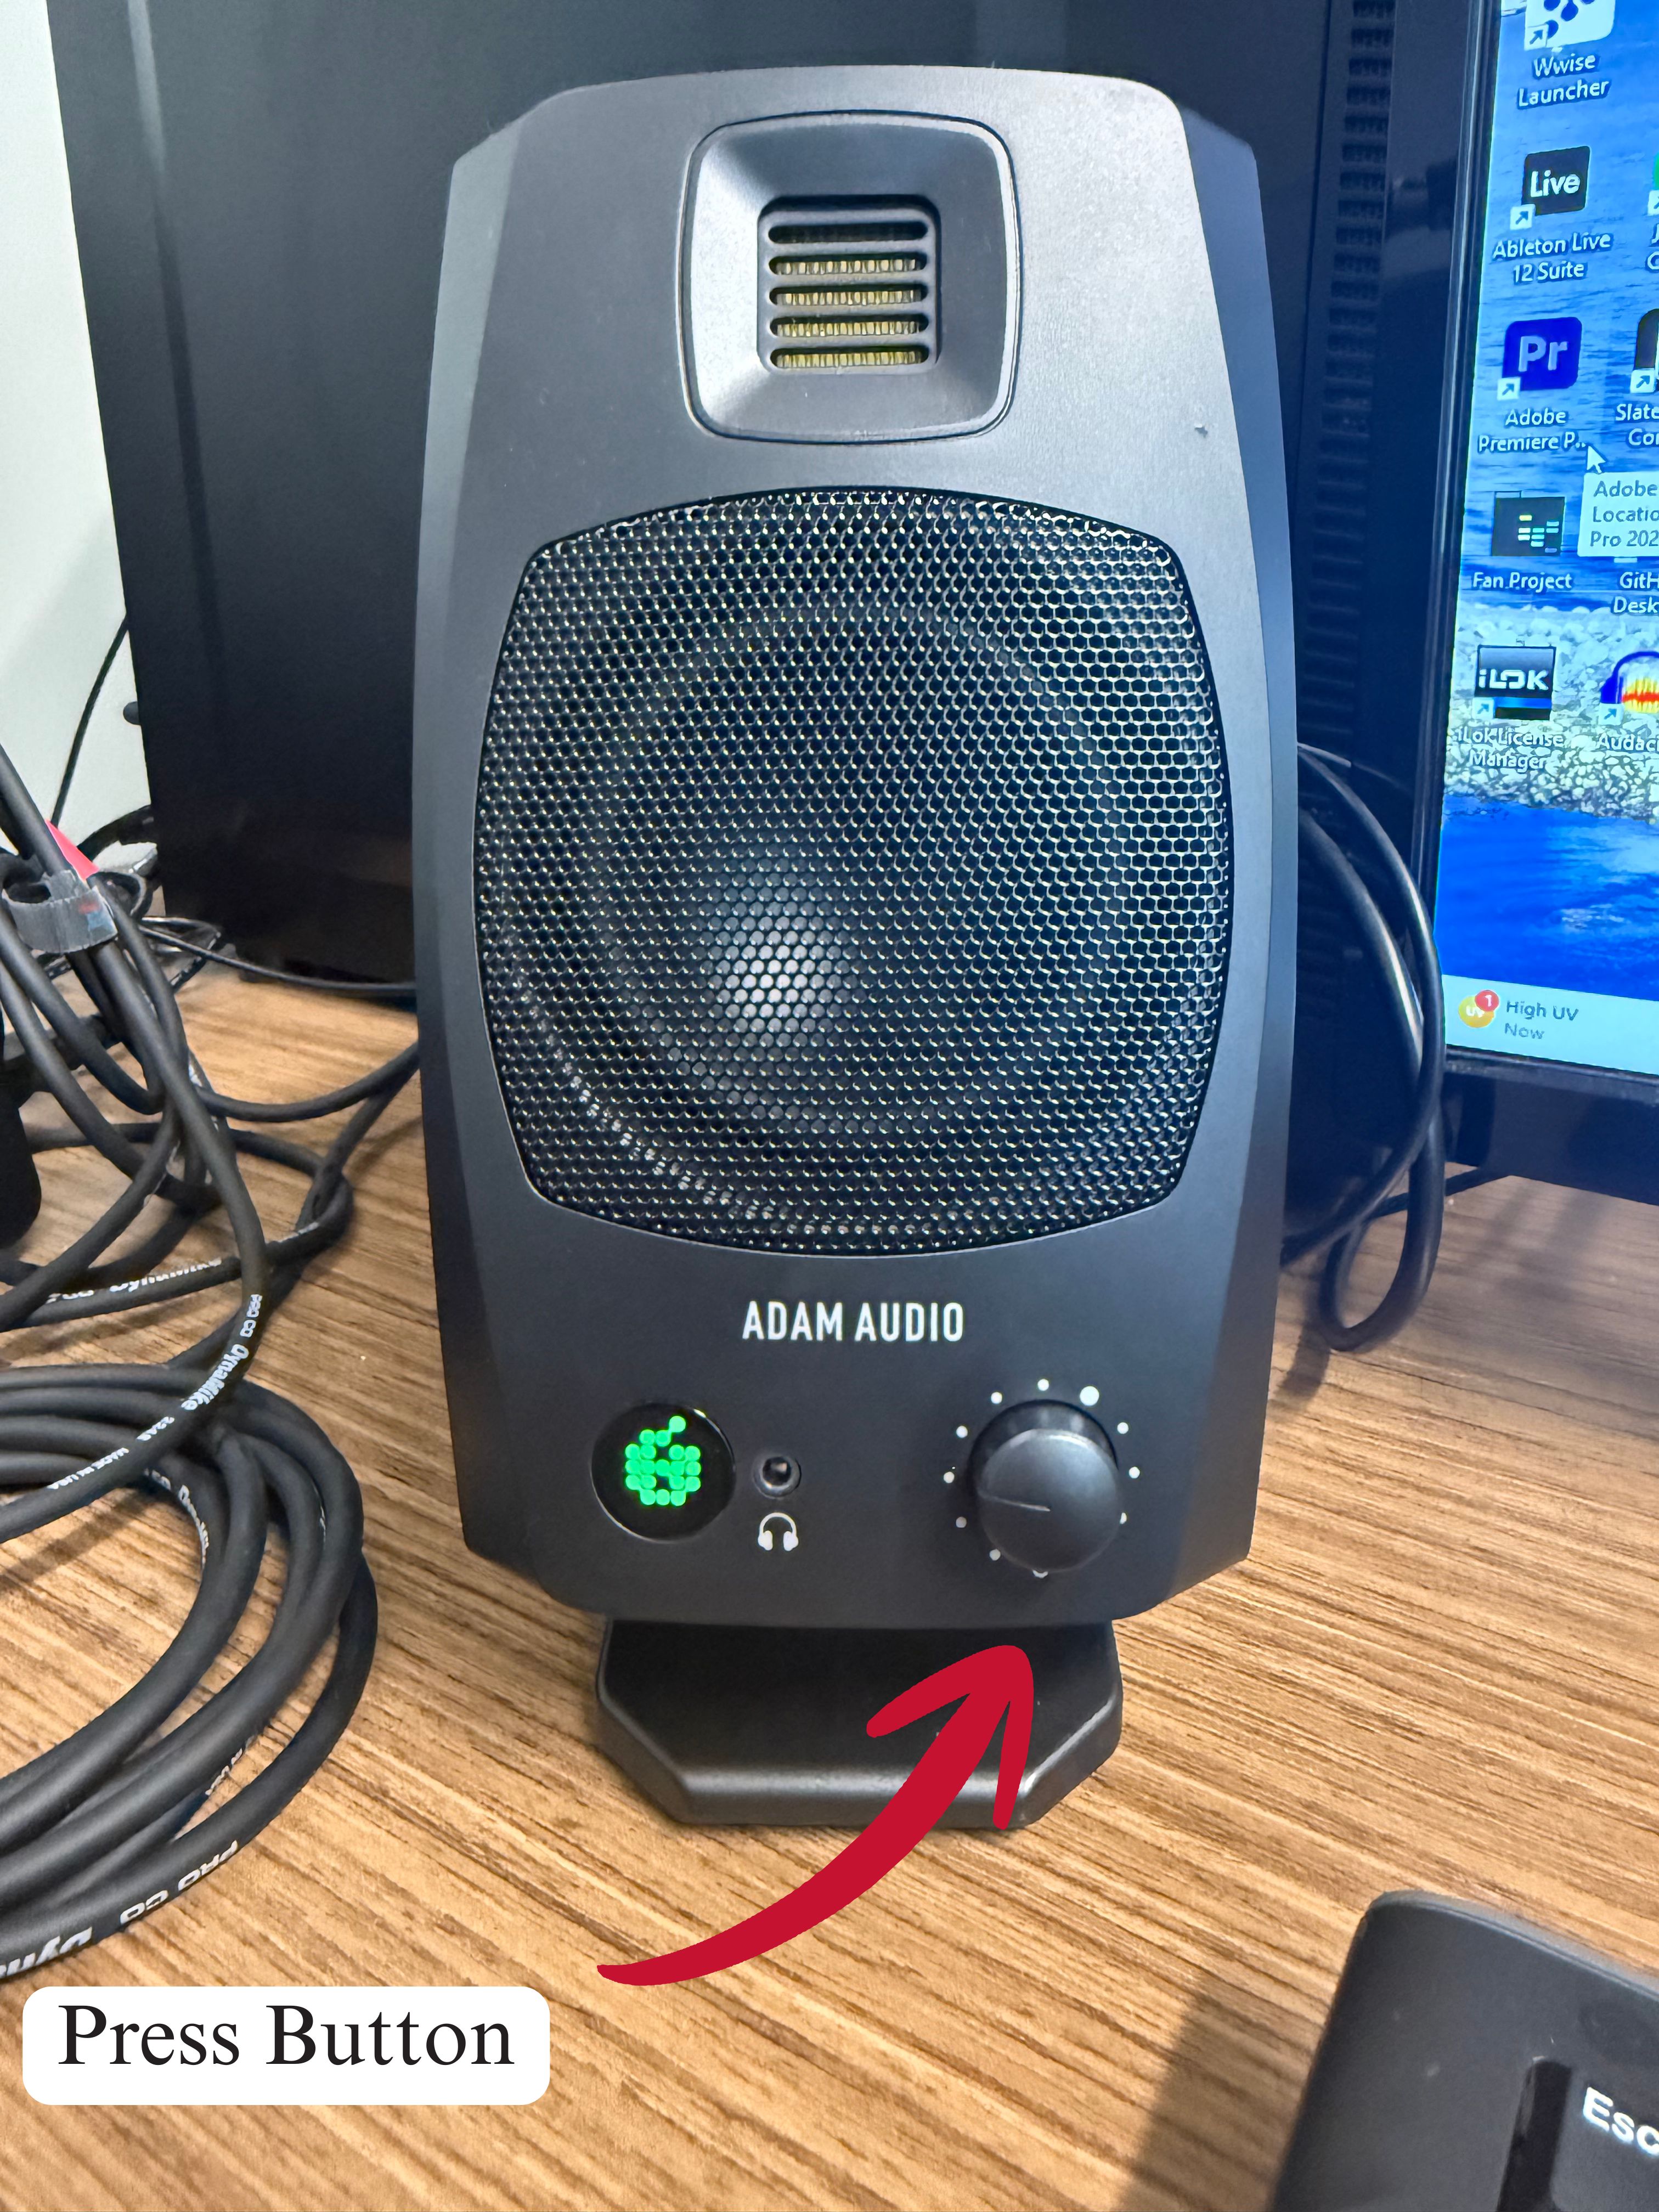
14. Press the dial on the speaker until the light is green
Reaper Setup
1. Open Reaper on the Computer
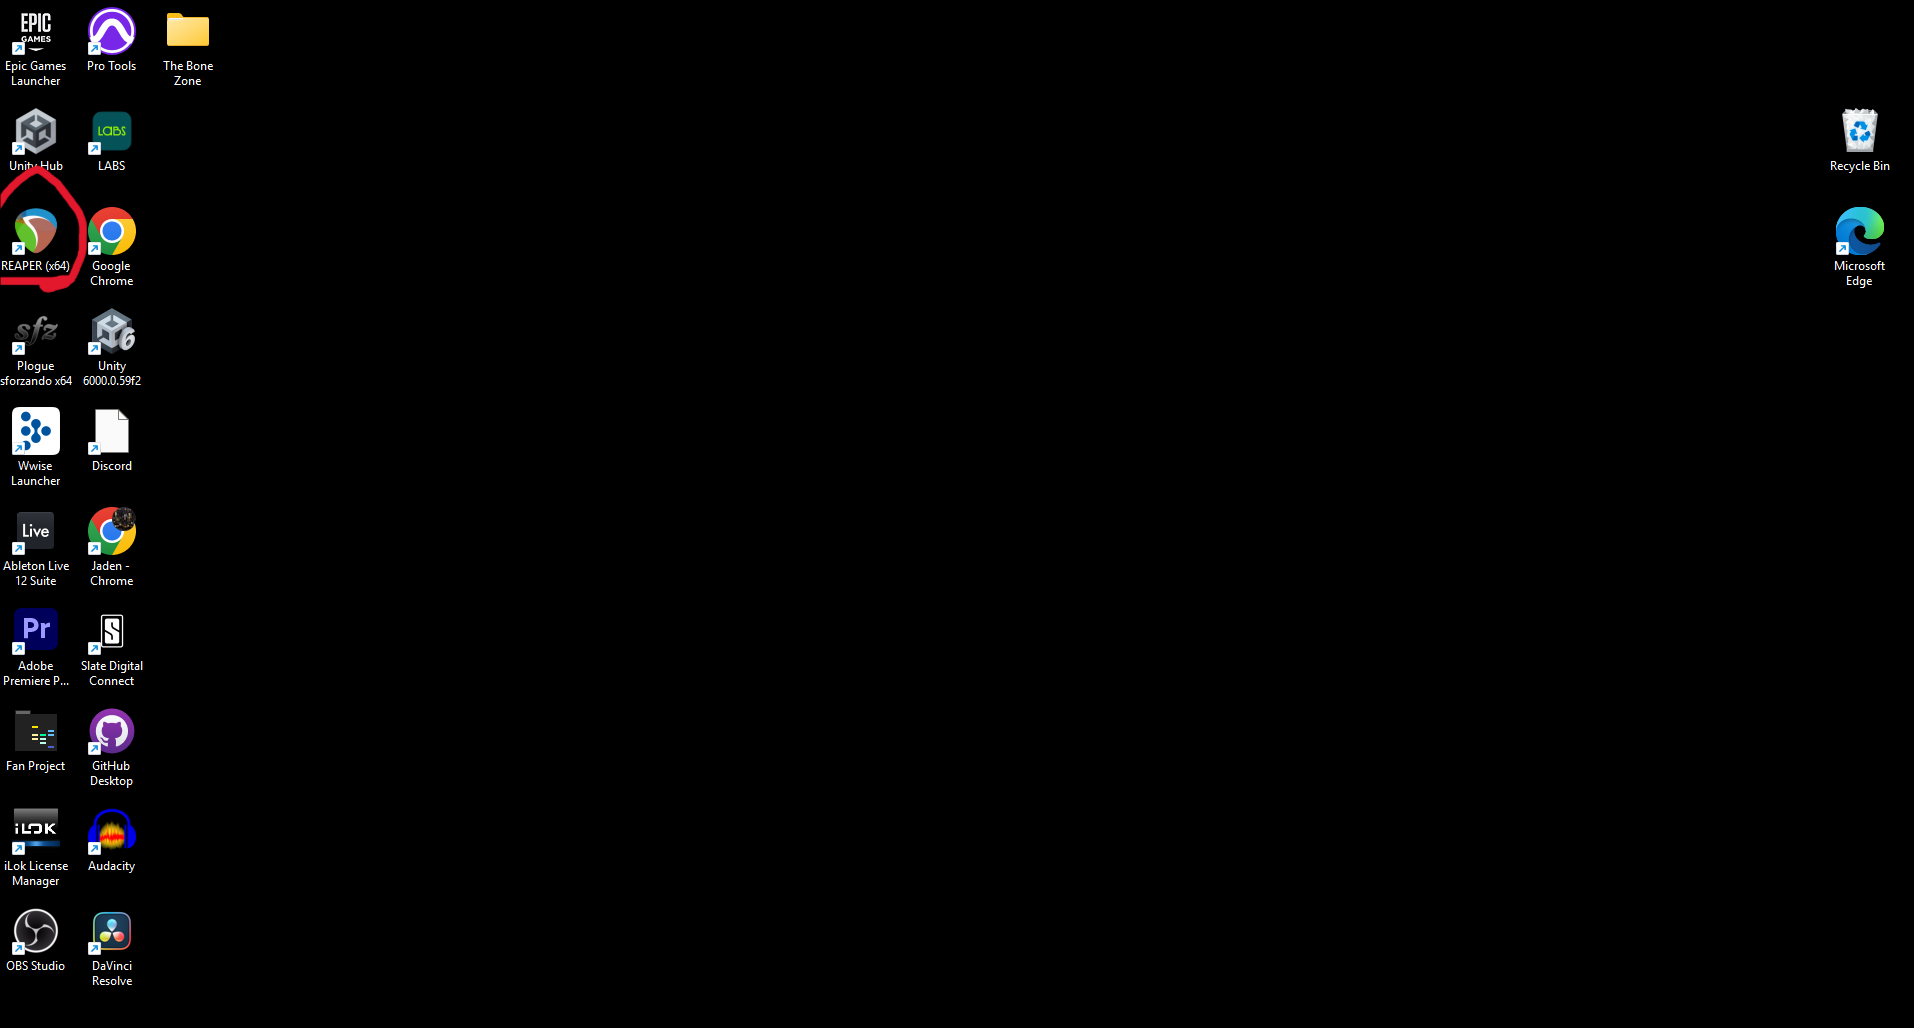
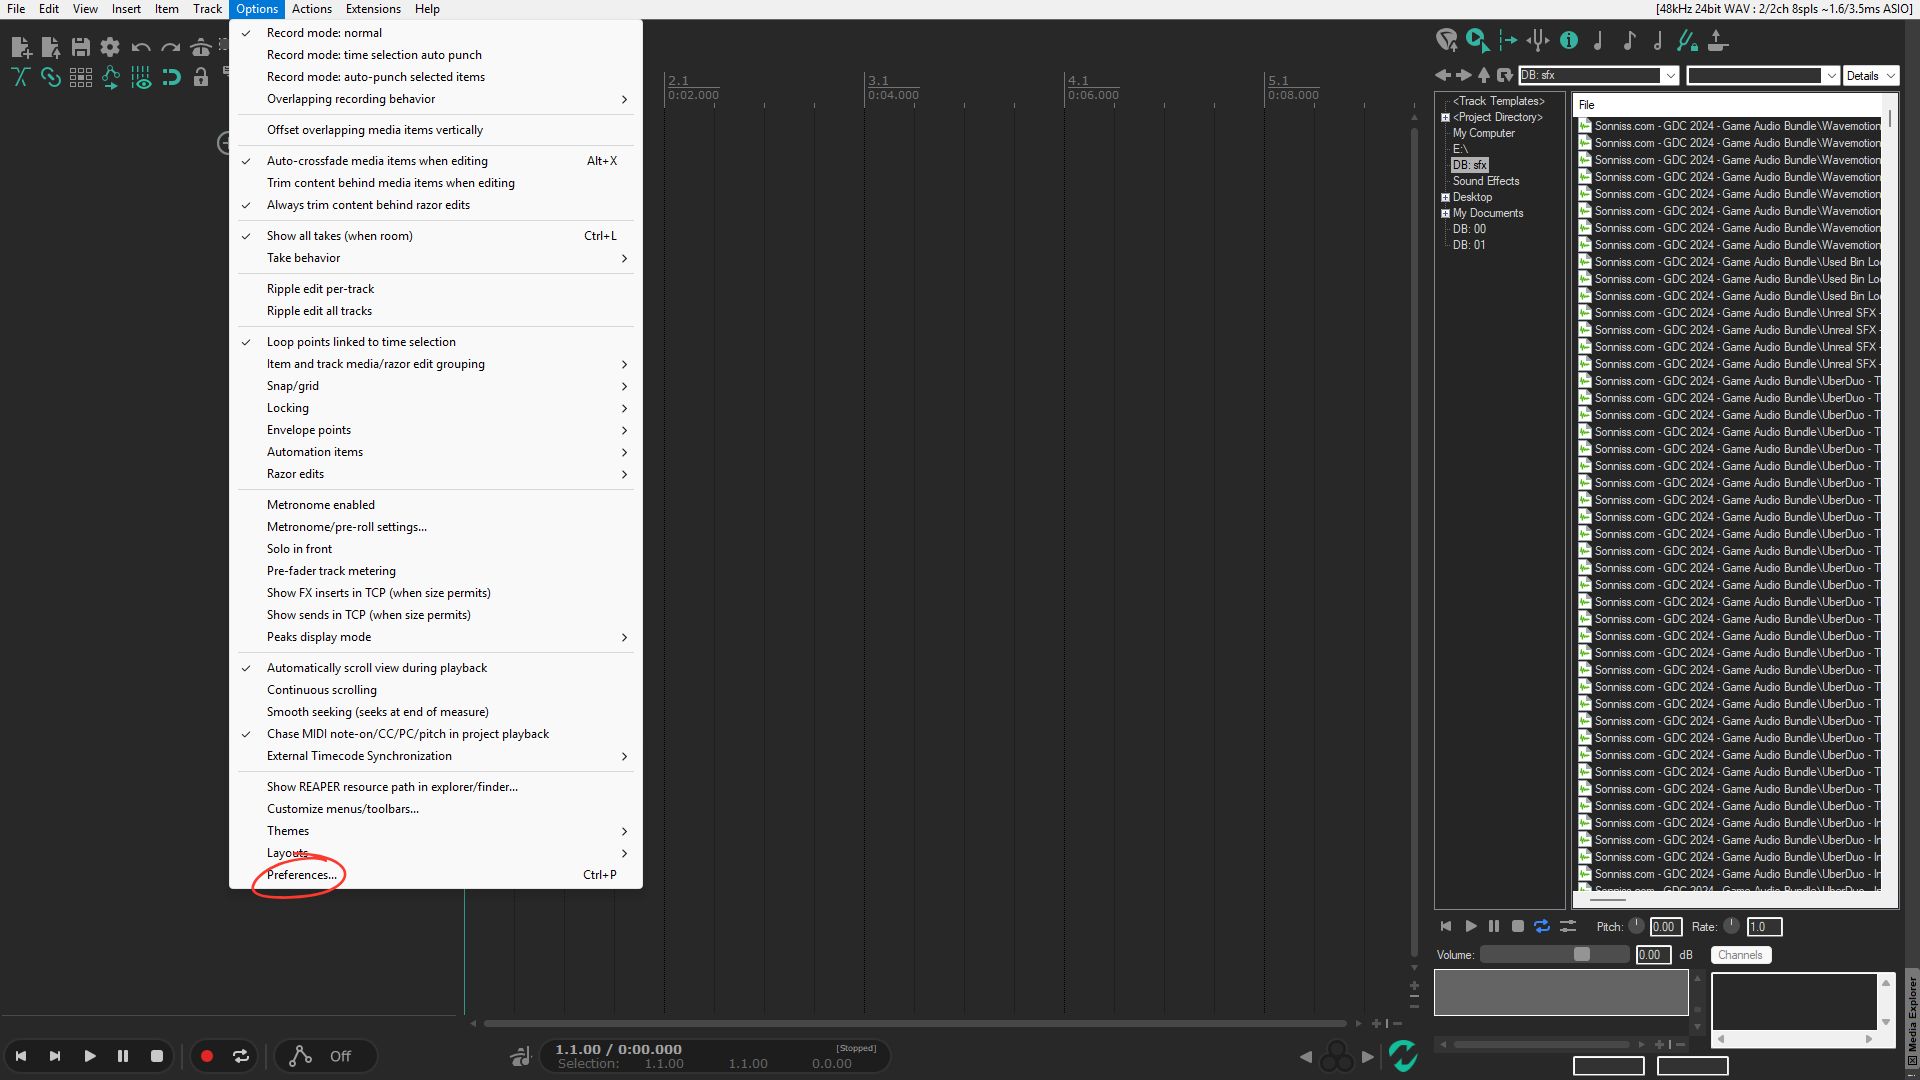
2. In Reaper go to the Options menu and press Preferences
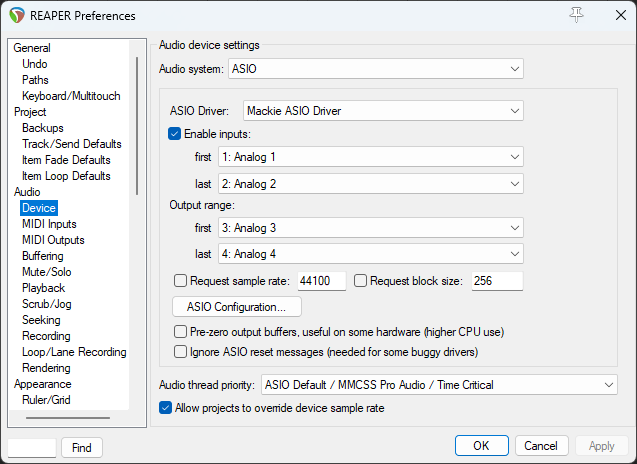
3. Scroll until you see Device and click it
4. Set Audio System to ASIO
5. Set ASIO Driver to Mackie ASIO Driver
6. Set Inputs to Analog 1 for first and Analog 2 for last
7. Set Outputs to Analog 3 for first and Analog 4 for last
8. Press Apply in that menu then press OK to close the menu
Graphic below is what it should look like
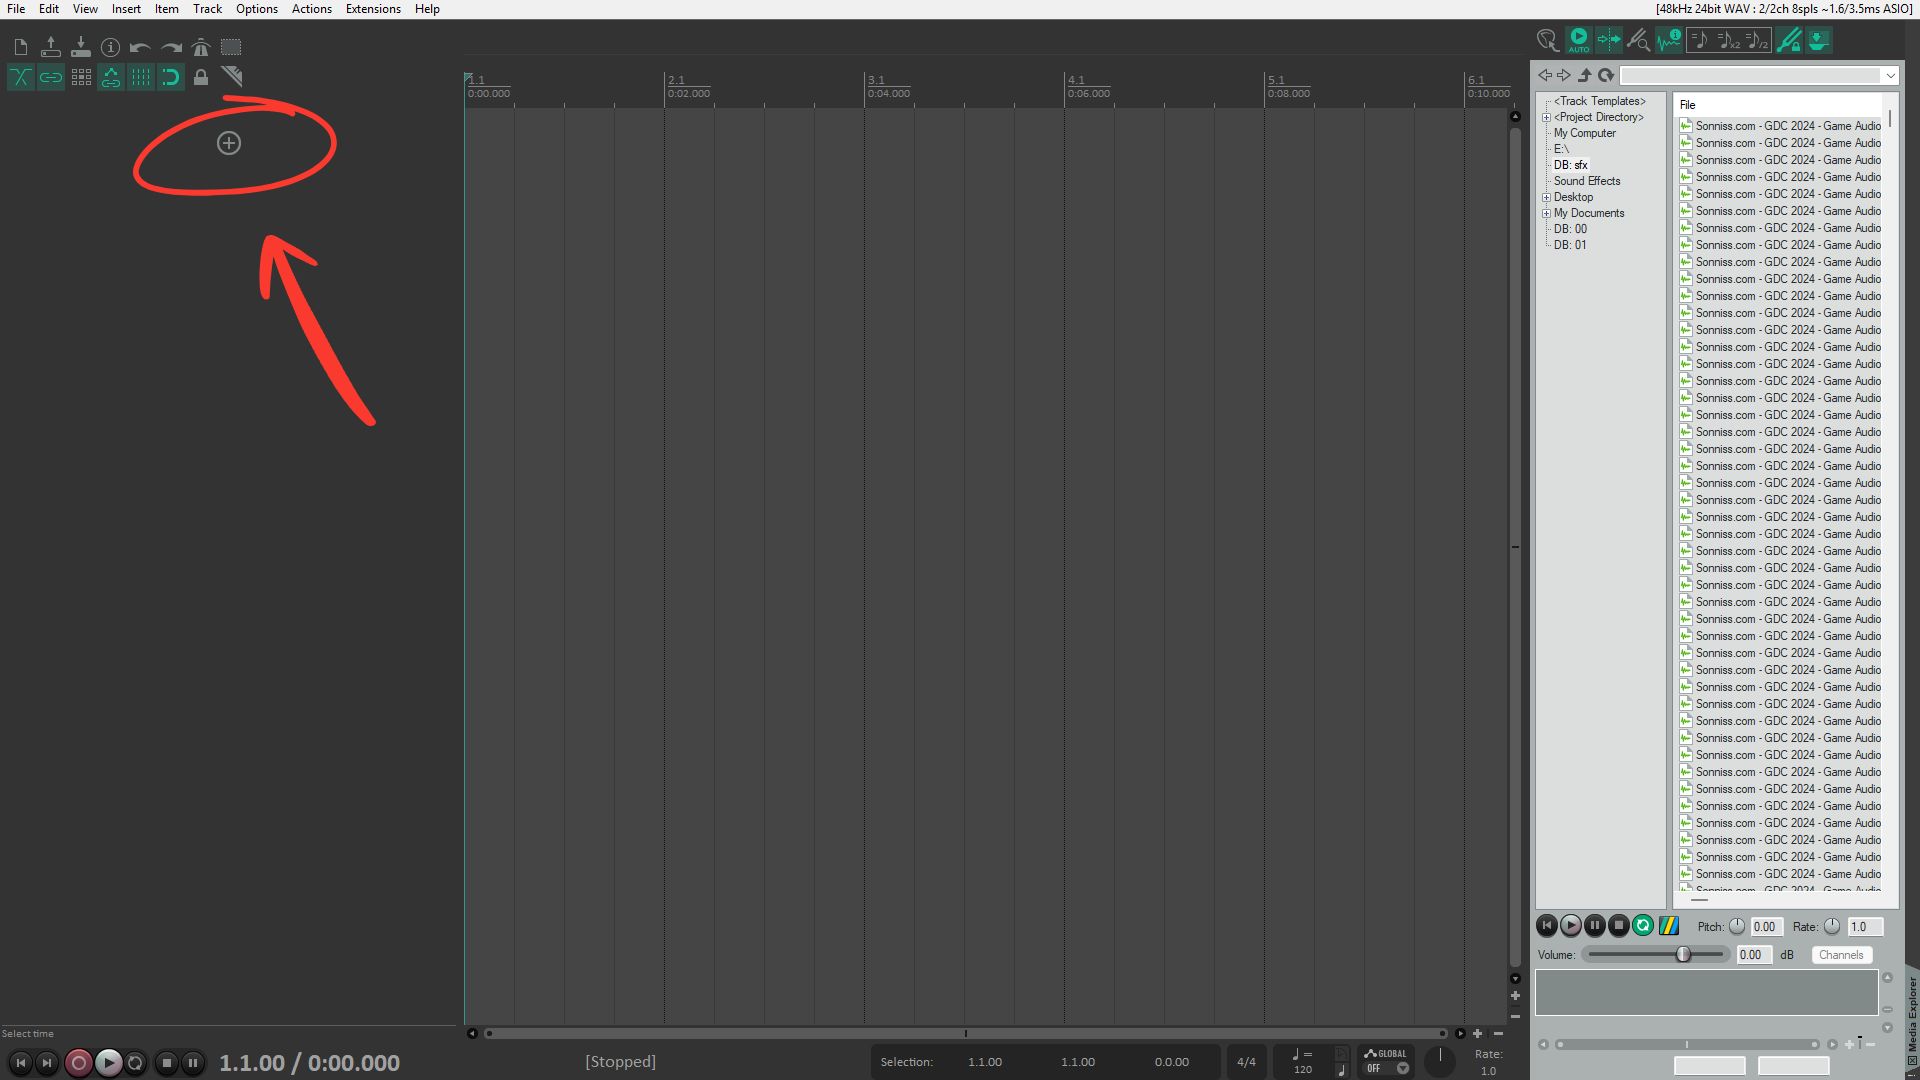
9. Press the Plus to make a track
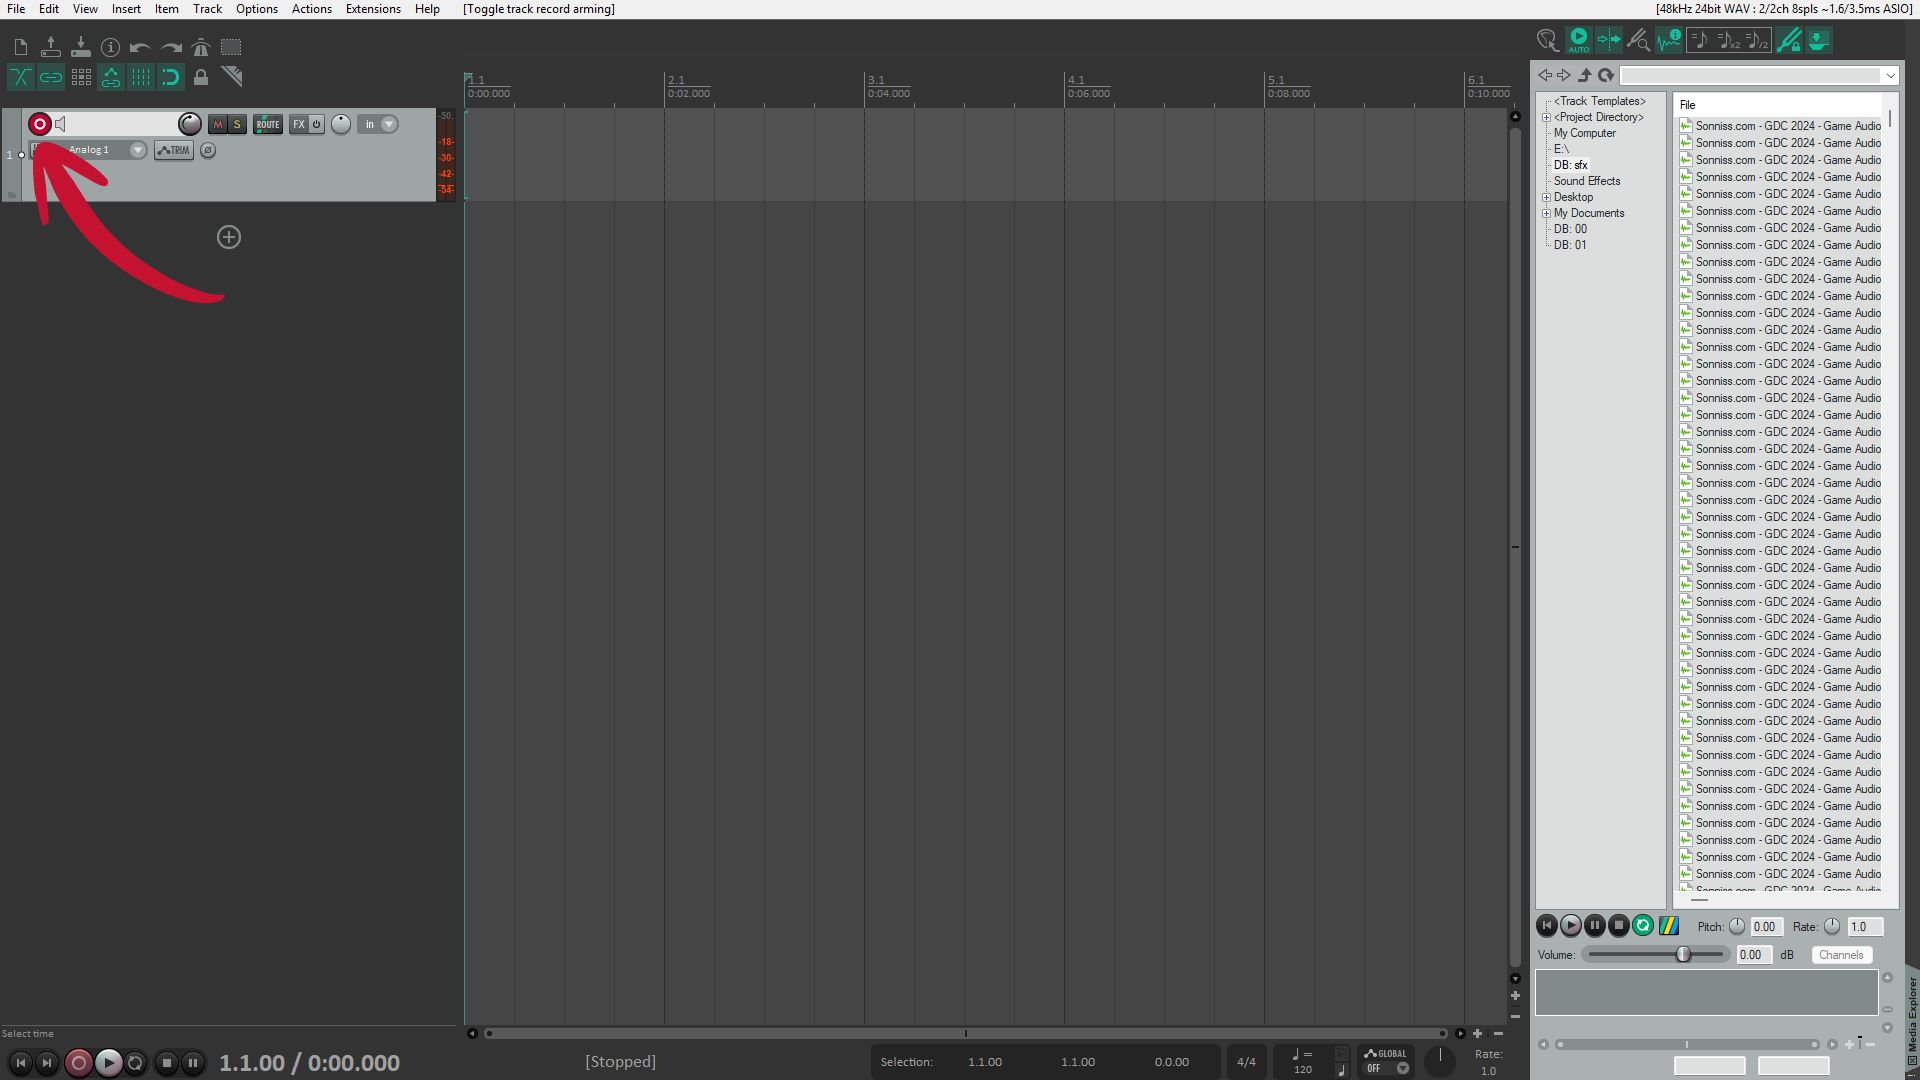
10. Press the red record button on the track
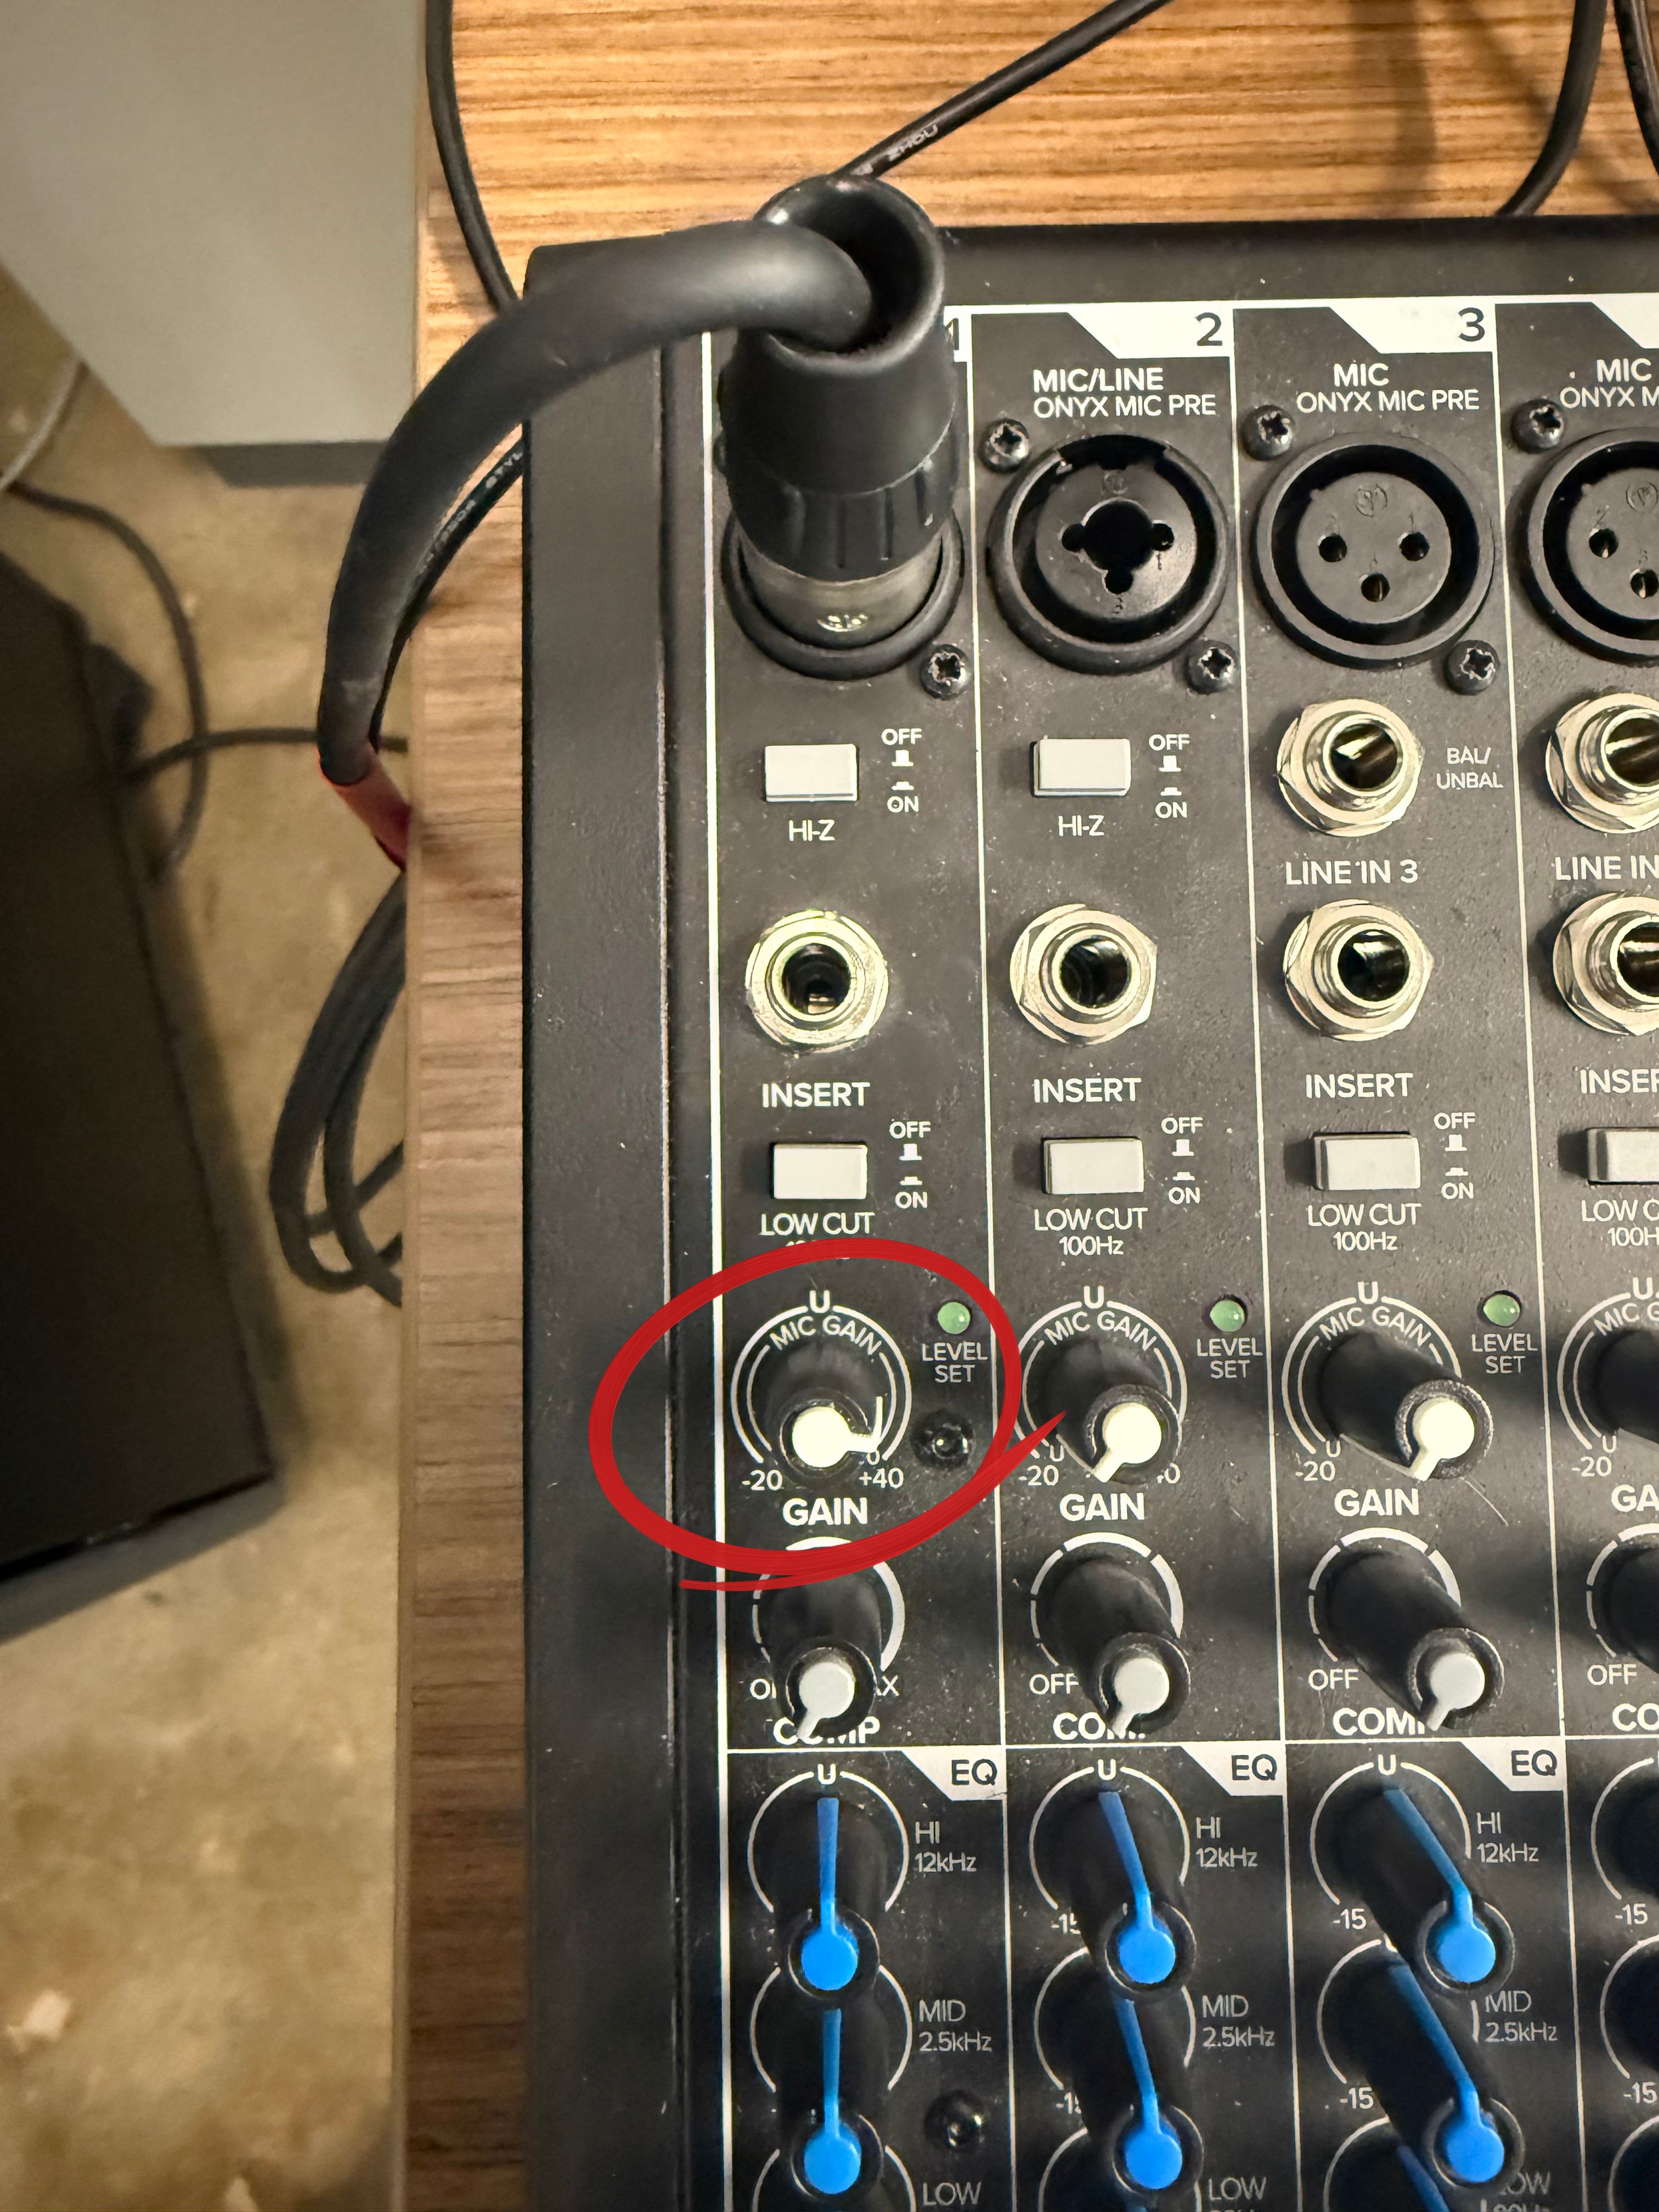
11. Use the GAIN knob on channel 1 to set the gain to a level that is before peaking
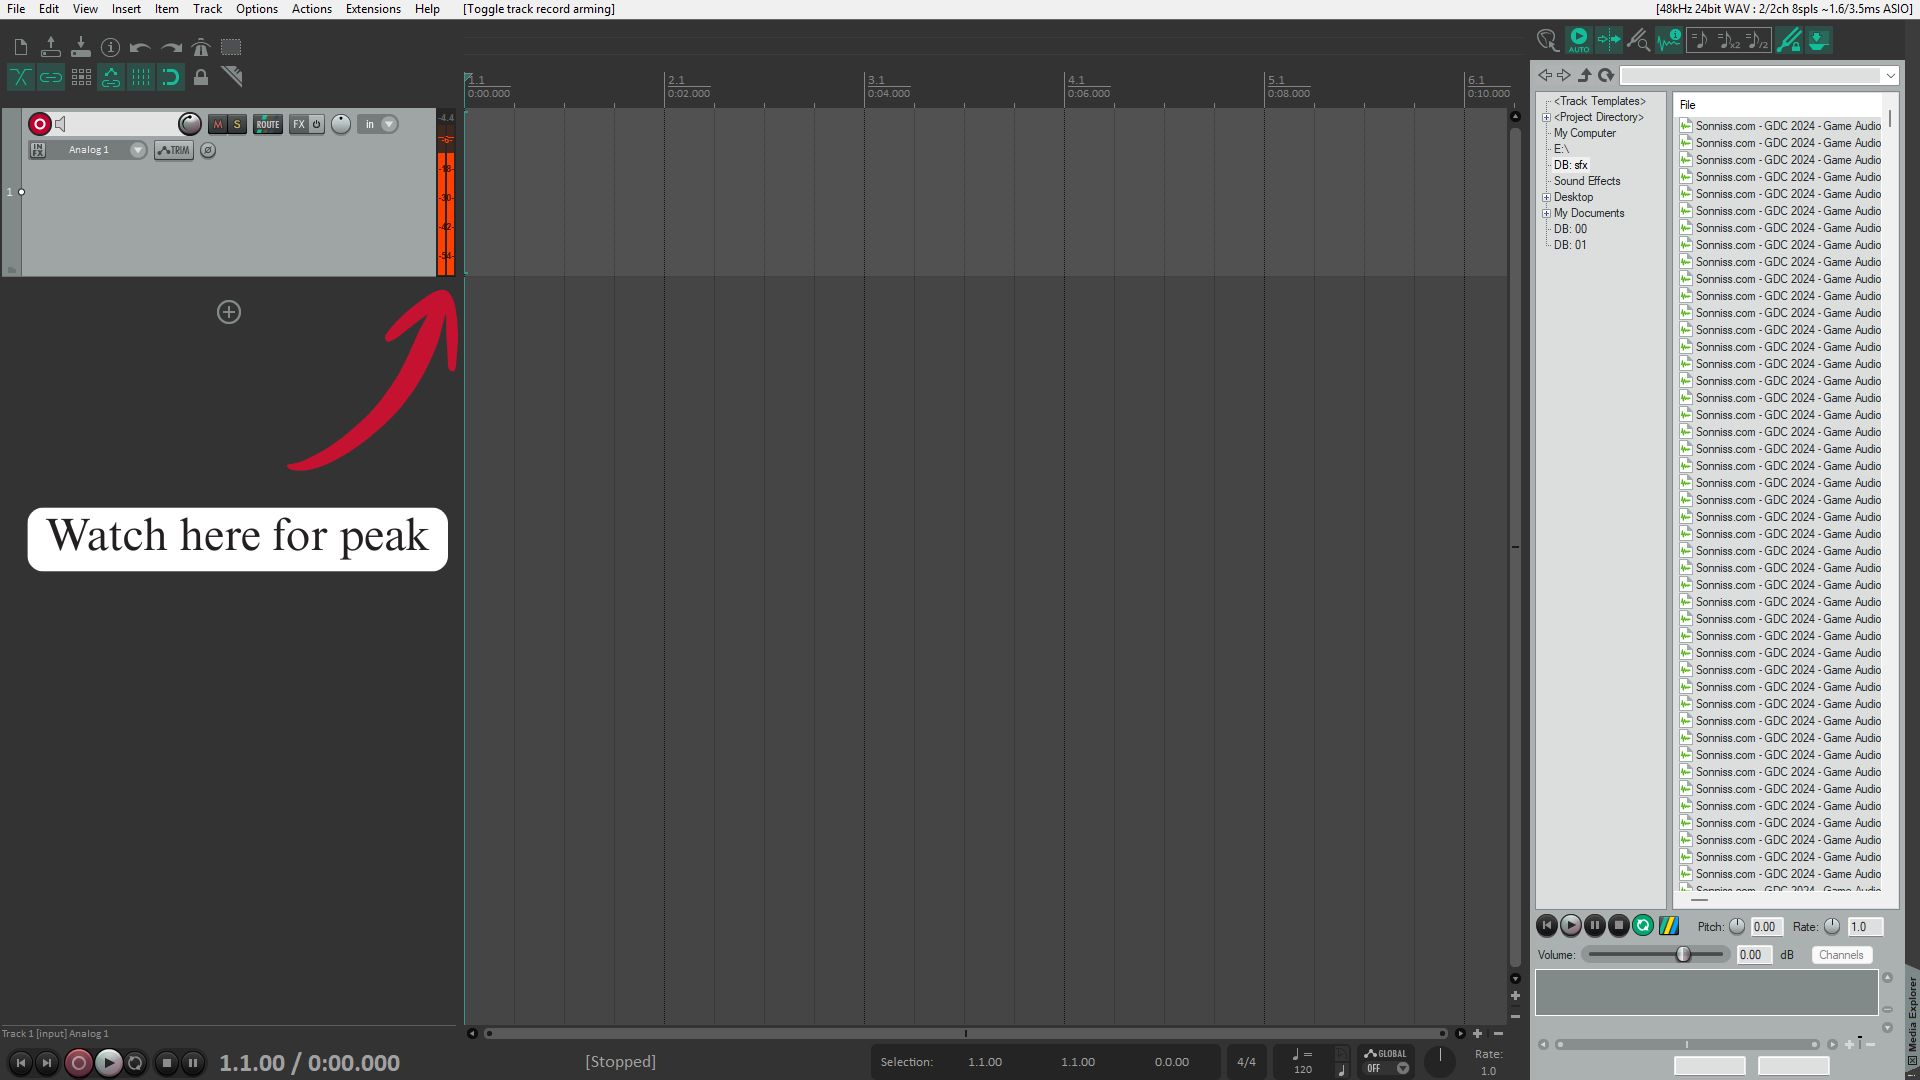
In Reaper, looking at the orange bar will show your audio level. If at the top of the bar is red that means your audio is distorting
12. Once ready press red record button at the bottom of the screen
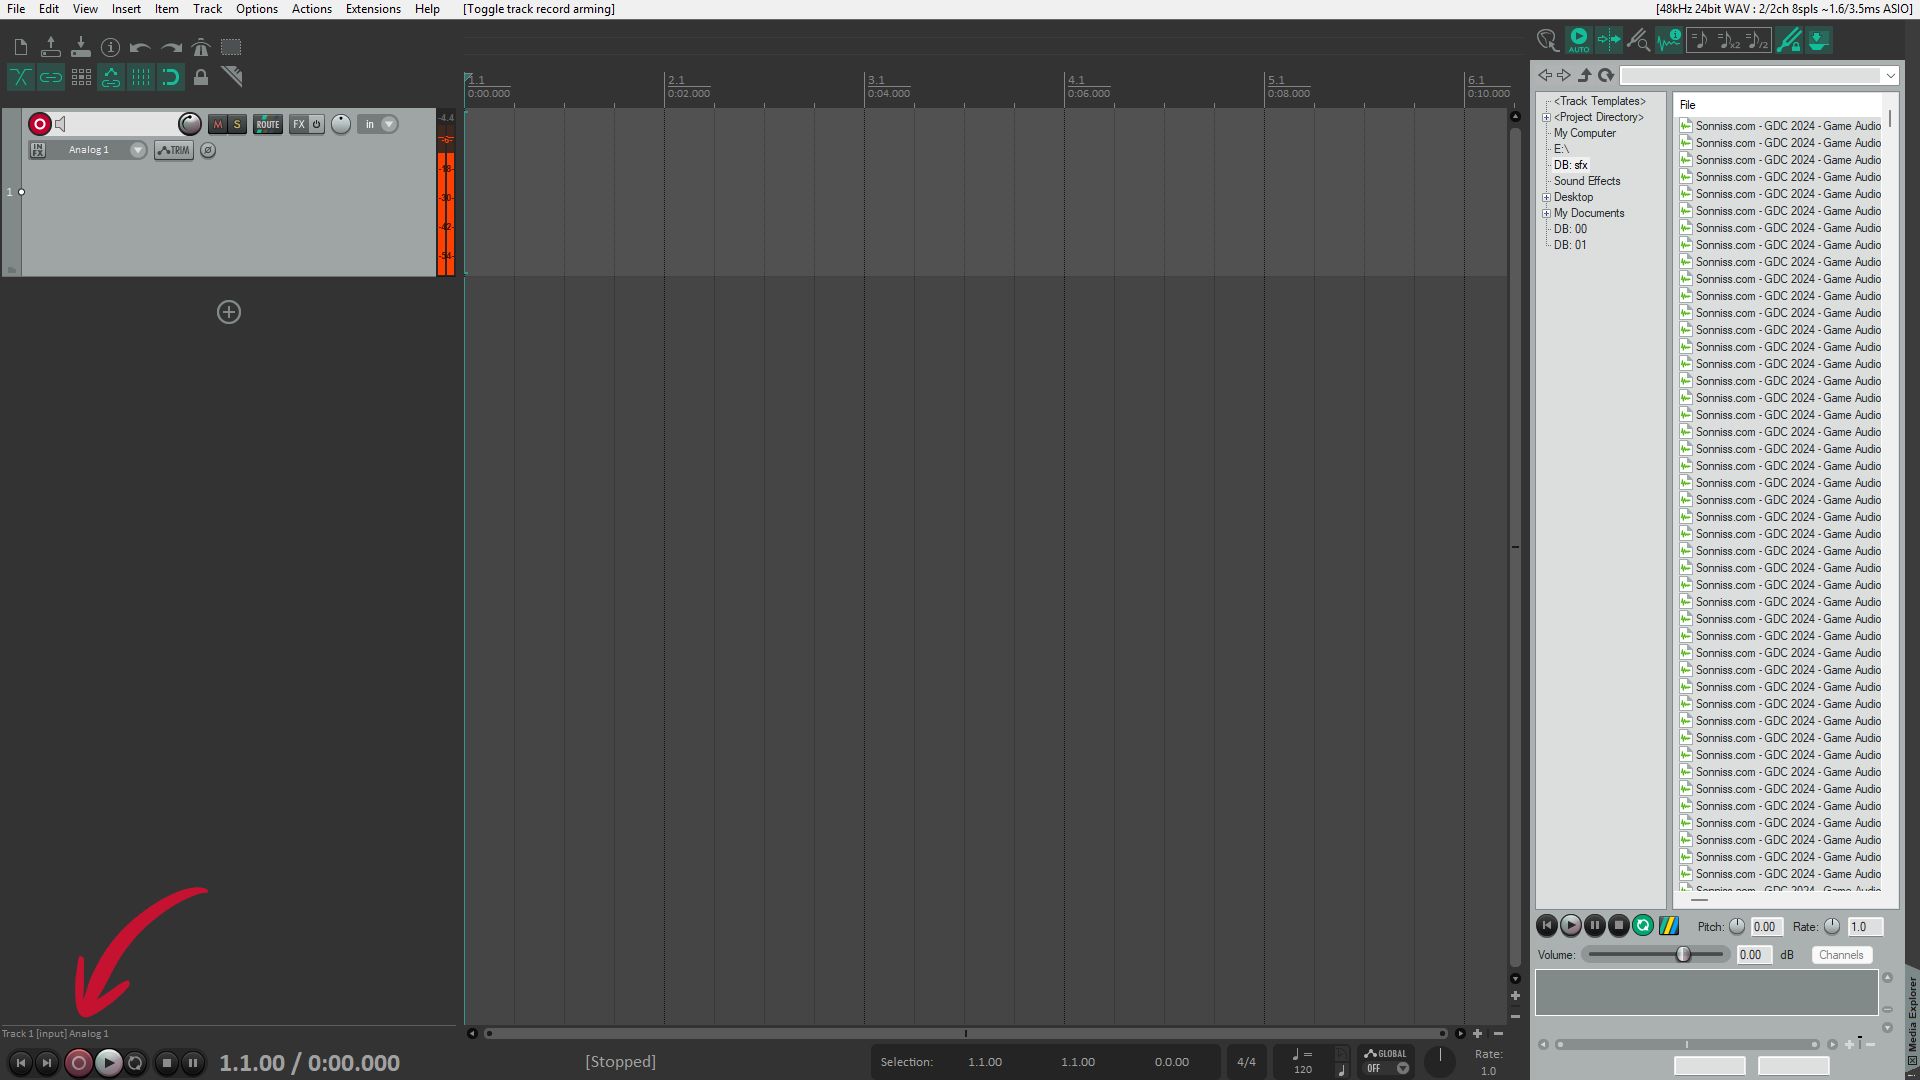
13. Once finished recording press the red record button at the bottom of the screen again
14. Click on the top of the timeline and drag the full amount of the clip
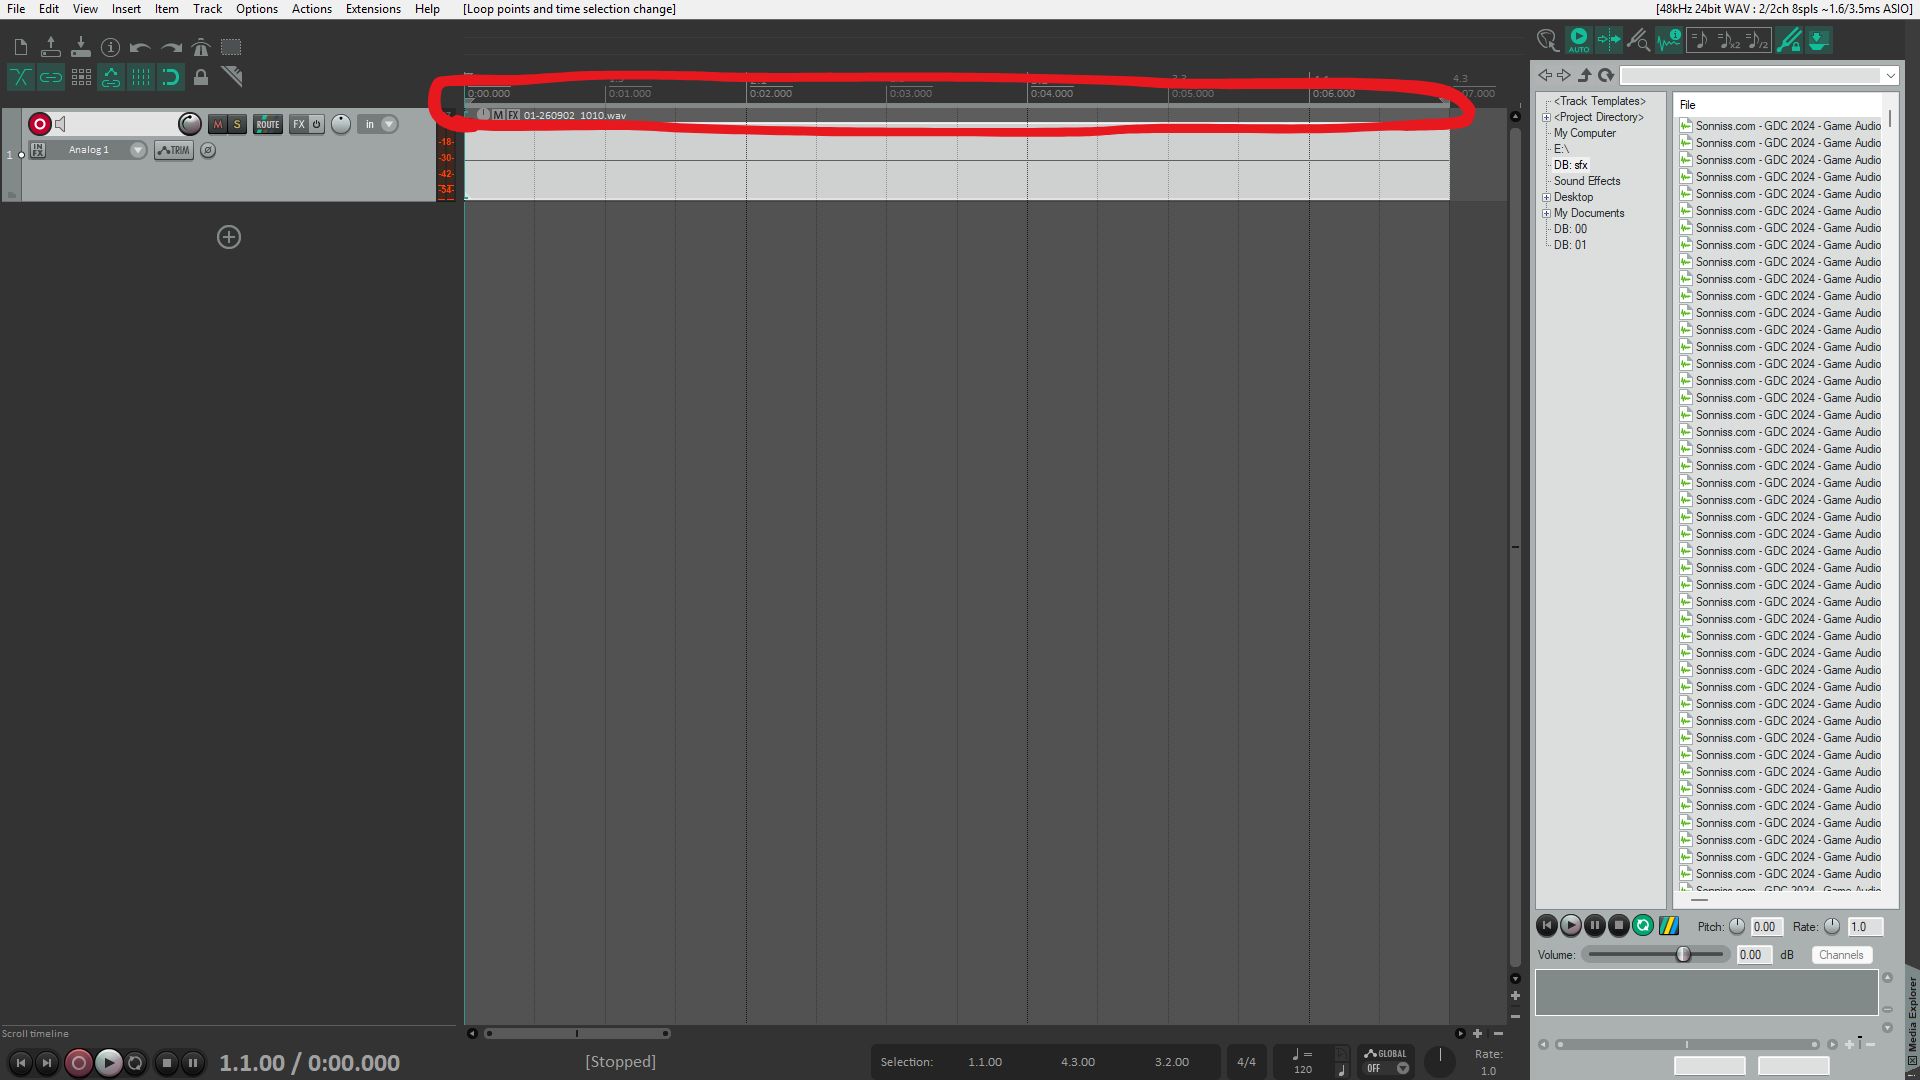
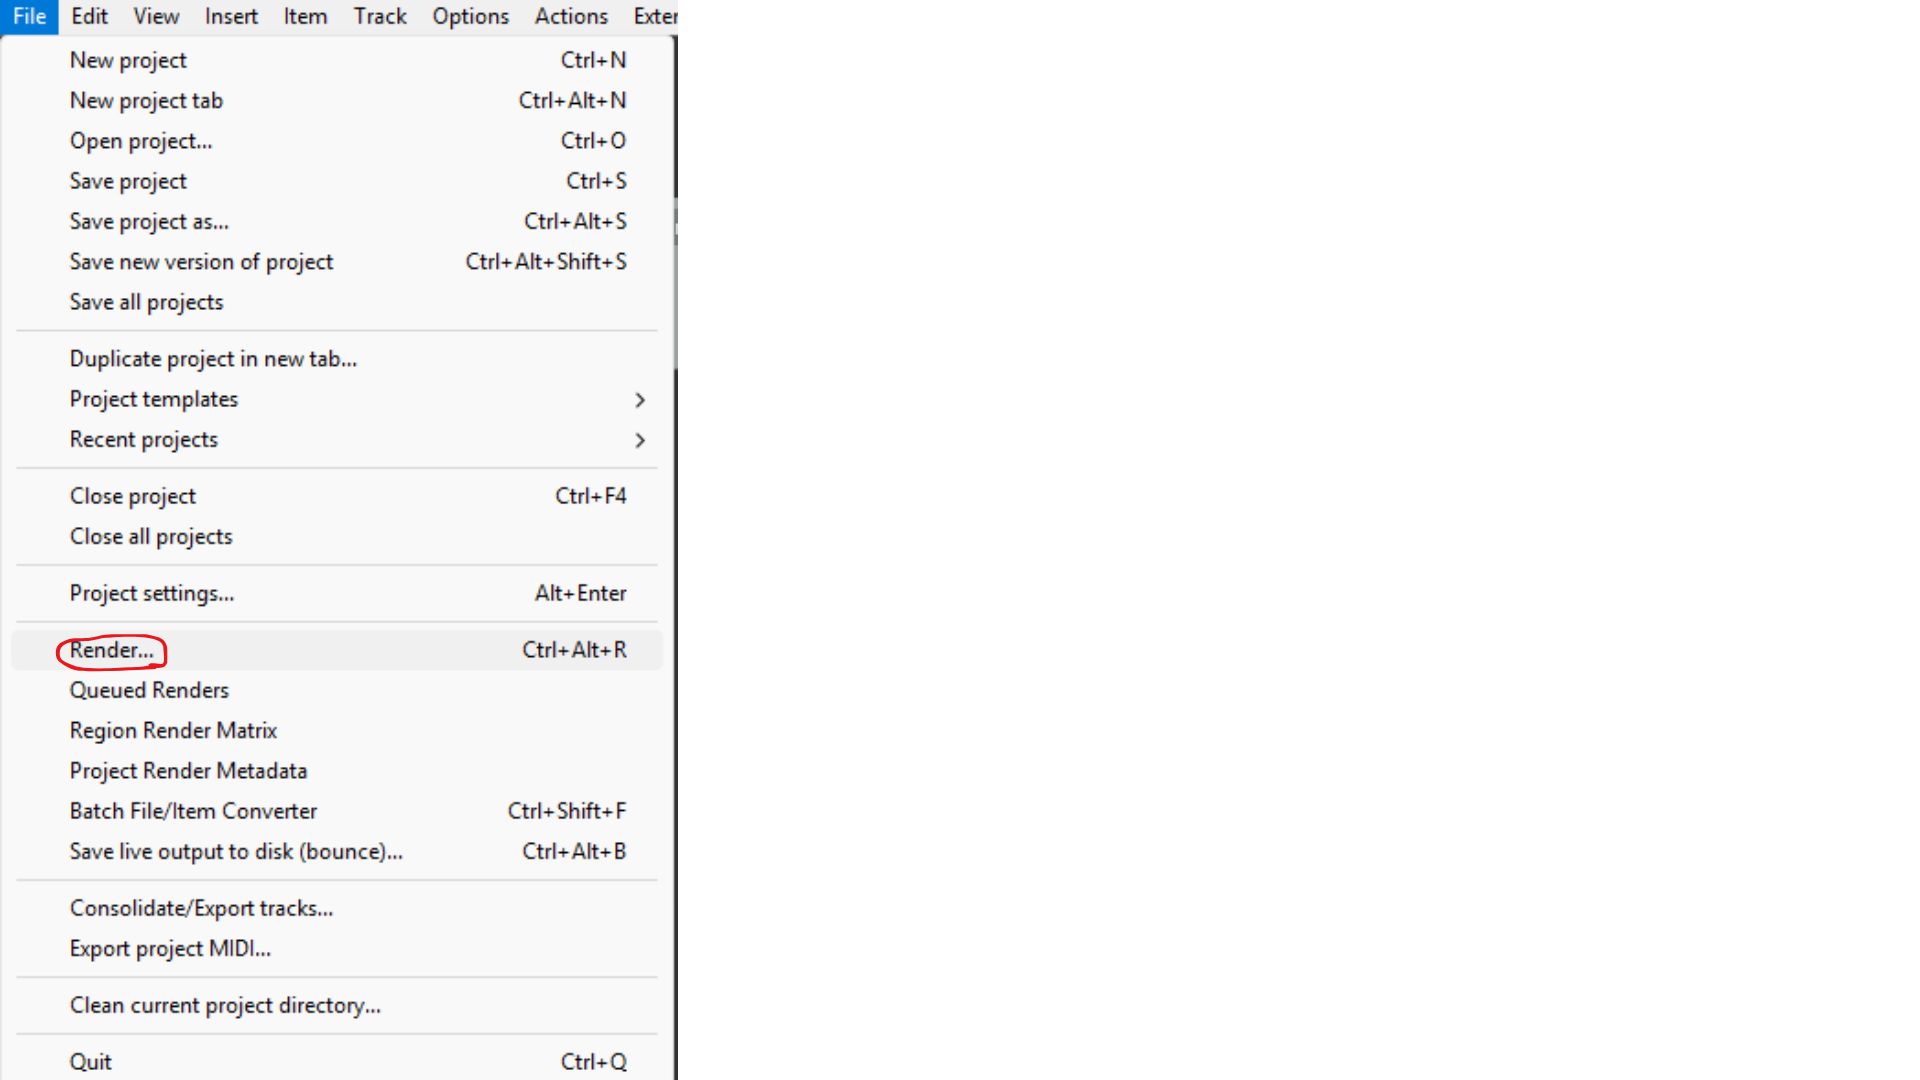
15. Select the Channel in Reaper and press file then Render
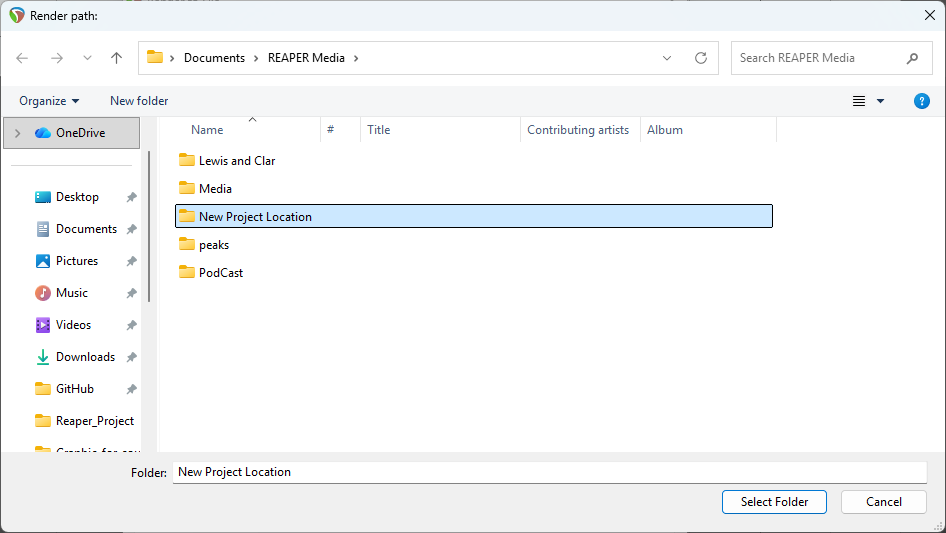
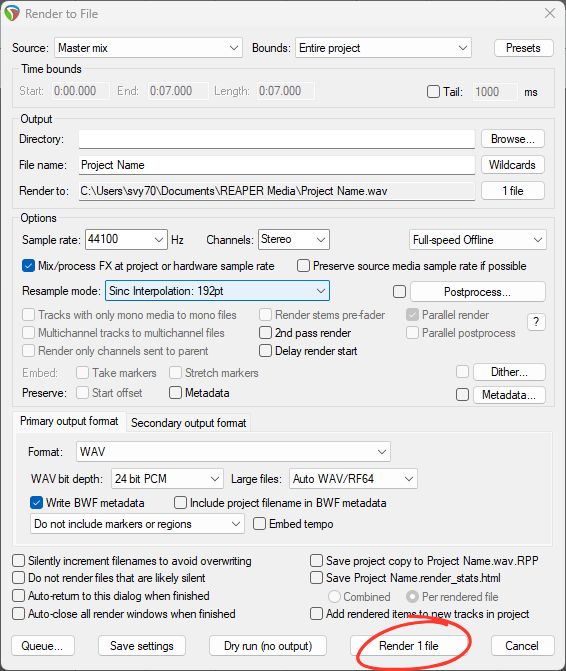
16. Name your file in "File Name" and click Browse then Browse for Directory to pick where it will be stored
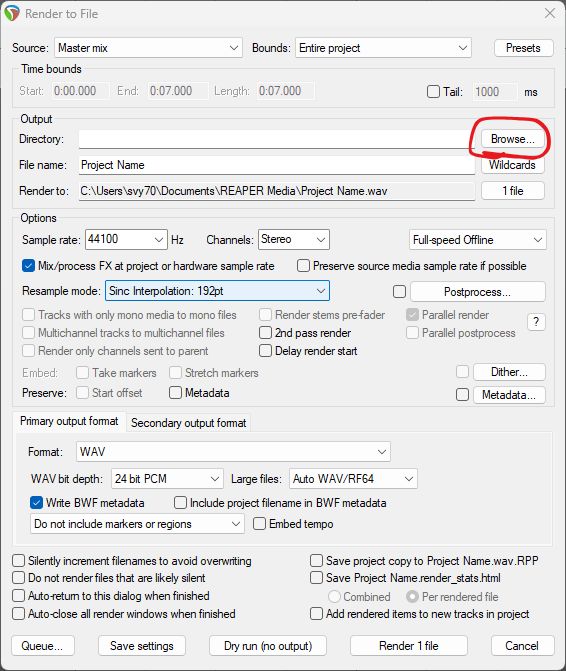
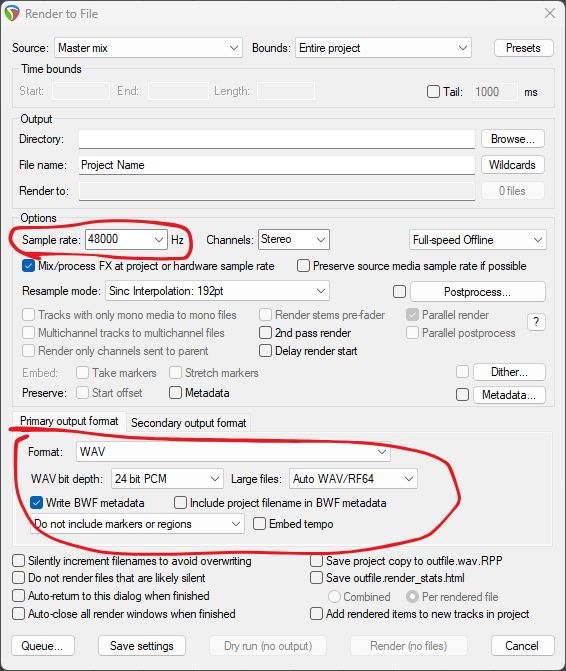
17. Make the Format WAV , WAV bit depth : 24 bit PCM, Sample Rate 48000 then click render
18. Click the red record button on the channel up top
19. Once finished with recording pull all faders down then press 48v
Make sure to pull faders down and turn the speakers all the way down using the knob on them before pressing 48v
20. Turn off the mixer from the switch on the back
Common Pitfalls
Things to check if you can't hear audio
Make sure all cables are plugged in securely
Make sure the cable connecting the mixer to the computer is plugged in securely
Make sure that phantom power (48V) is enabled
IF PHANTOM POWER IS NOT ENABLED MAKE SURE YOU TURN THE SPEAKERS ALL THE WAY DOWN BEFORE ENABLING IT
Make sure no MUTE buttons are enabled. (They are enabled is the button is glowing red)
Make sure the Break Button (This button is right above the MAIN Fader) is not enabled (If the red light is on that means it is enabled)
Make sure the USB 3-4 Button is enabled on Channel 11/12. ( This is above the Gain knob on Channel 11/12)
Make sure the channel the microphone is going into has the fader up.
Make sure the MAIN fader is up
Make sure the L-R button to the right of the Fader on Channel 1 or any mics in the sound booth is enabled
Make sure that PFL SOLO is only enabled on channel 11/12 (This makes it so that you are listening to what is being recorded in Reaper)
Things to check if the person in the booth can't hear audio.
BEFORE CHANGING ANY SETTINGS MAKE SURE YOU TELL YOUR TALENT TO TAKE THEIR HEADPHONES OFF
Make sure all cables are plugged in securely
Make sure the cable connecting the mixer to the computer is plugged in securely
Make sure the SUB 1-2 Fader is pushed up to U
Make sure the 1-2 button is enabled on the channel you want them to hear (Channel 9/10 is for talkback and 11/12 is for PC audio.)
Make sure the headphone amp inside the booth is turned up and plugged into power and into the wall
Make sure the cables from the Headphones are fully connected into the headphone amp and the headphones themselves.