
Vinyl Stickers
Prepping and Cutting Vinyl Tutorial
Preparing and Cutting
-
Attach your vinyl to the mat or feed your vinyl sheet into the cricket if large enough. Be sure sure that the ends line up with the white wheels meant to hold it.
-
Start a new sticker project and adjust your design space to match the size of your material.
-
Upload your image to the design space and align it with your material. (Note: arrange your image close to the edge so you to use as little of the vinyl as you can to save material).
- Hit the "Make" button in the upper right corner.
- You will have a preview of your image arranged on your material. Select material size and whether you are using a mat or not.
- Select "Continue" in the lower right corner.
- Select the type of vinyl material you are using.
- Feed your material into the Cricut by pressing the feed button (up and down arrows).
- Press the go button (flashing arrow) on the Cricut.
Transfering Design
1.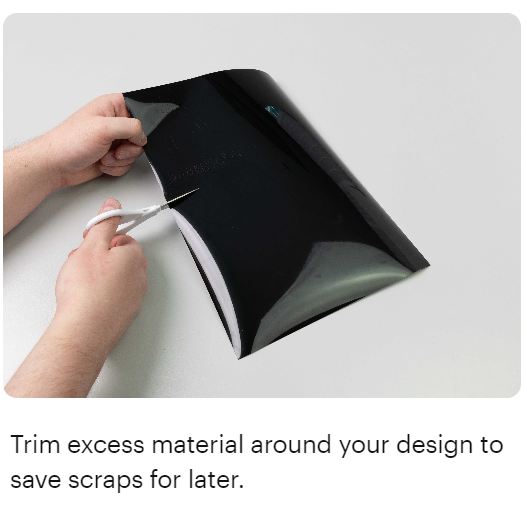 2.
2.
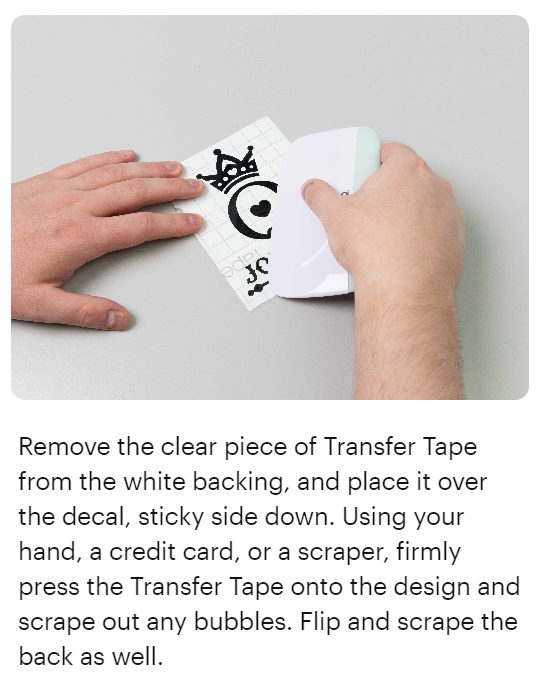
3. Cut out a piece of transfer tape (large enough to go on top of your vinyl design) and peel off the white part. Stick the clear, sticky part of the transfer tape onto your vinyl design, then use the scraper (rectangular equipment in the same location as the pens and weeder in the Cricut that’s flat but then “bulges” up) to press the tape against the design to make sure it sticks.
4. 
5. Peel off the transfer tape, and you’re done! (Note:If the vinyl keeps sticking to the transfer tape instead of your item, even after using the scraper, use your finger to hold the vinyl onto the item as you peel off the transfer tape.)