Animation Editing/Retargeting UMotionPro
About
We will be using UMotionPro, a third-party plugin for Unity, to re-target and edit our animations. UMotion is a complete tool with advanced features and runs as an independent plugin within the Unity editor. We won't be using any Unity features except the basics to get up and running.
I am assuming for this guide that you have not used Unity before. Game engines and software are updated constantly and parts of software gets deprecated so always keep in mind that sometimes there is an investigation portion if something appears missing.
If this is your FIRST TIME in Unity, check out this link before getting started: https://learn.unity.com/tutorial/explore-the-unity-editor-1#
Setup
Launch Unity Hub. Under the Projects tab, select New project. Choose 3D (Built-in Render Pipeline). On the right, create a project name. Be sure to uncheck Connect to Unity Cloud! Select a location, such as your Desktop, and when you are ready, select Create project.
You may need to sign-in to Unity Hub with a Personal License. You can use to sign in with Google and sign in with your SU credentials.
Your next step is to download UMotionPro here: https://drive.google.com/file/d/1mEKMc3H7dxucxabkgFGkOLFHYZnhCVTK/view?usp=drive_link
After downloading, either double-click or drag the file into your Unity project. When prompted, select the button to Import All. For some, a Consent Request window may appear to update some files. Select Yes.
Before moving to the next step, if you have not used Unity, it may be a good idea to take a moment and familiarize yourself with the editor, such as the Hierarchy, Inspector, Project window, Scene window, etc.
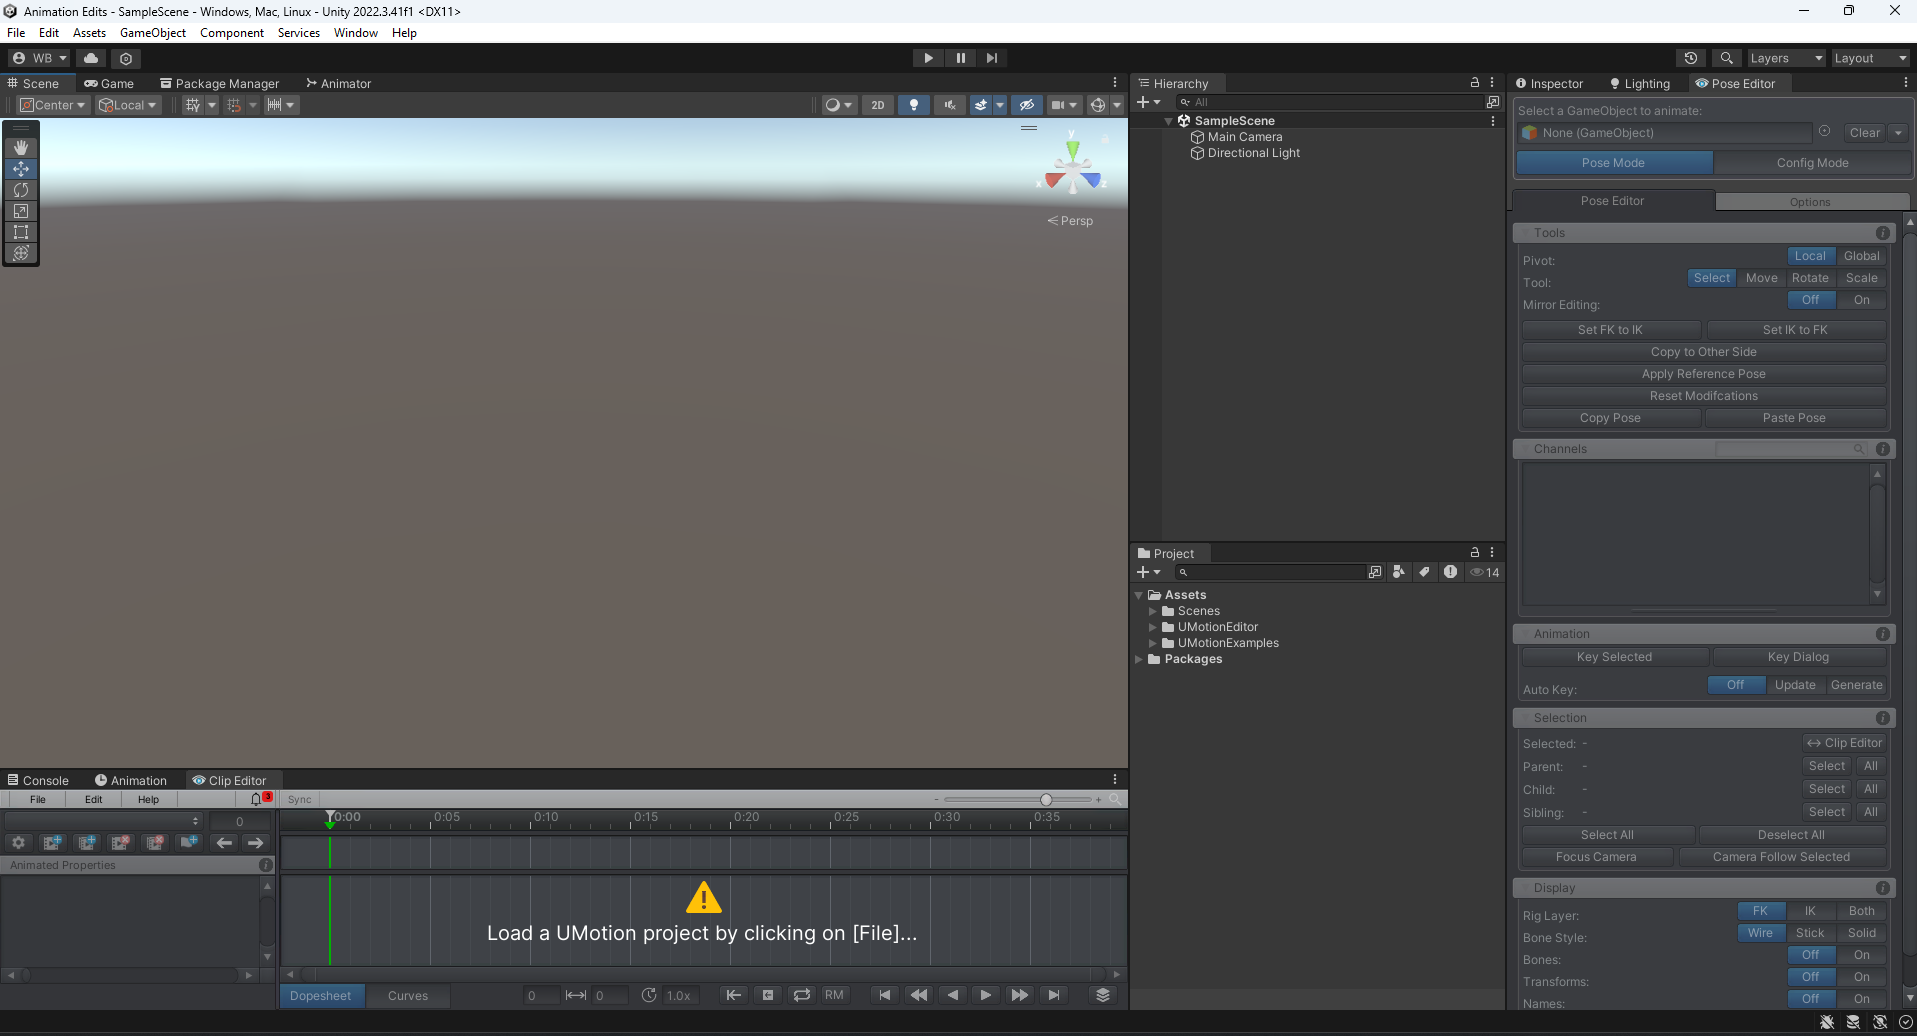
The last thing we need to do is open some windows for UMotionPro. There are two windows, the clip editor and the pose editor. The clip editor is where animations are made/edited. The pose editor is where the configuration for the humanoid character takes place. To open these windows, go to the top under Window/UMotion Editor/Pose Editor (and Clip Editor). Position them where convenient. I like to leave open my Hierarchy, Project window, and Scene window.
Now, let's import a character and animation. Create a folder in your project window and give it a name such as your character's name. Inside, you can drag and drop your animation files as well your character files. Textures and materials are not a big concern here so I am skipping that set up.
For each character AND animation file you import (typically as an FBX), you must set its animation type to Humanoid. Select one of your files and information will appear in the Inspector window. Select the Rig tab and under the Animation Type drop down, switch from Generic to Humanoid. Finally, click Apply.
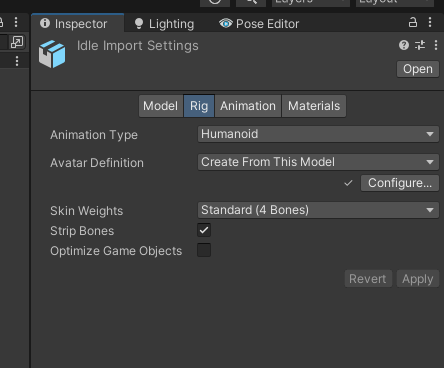
For humanoids, it is critical within Unity you change any character model or animation to humanoid. The number one issue people run into moving forward is missing this step!
UMotionPro
I recommend checking out the following playlist before getting started. The first 4 videos you should watch to get a sense of what I am about to cover below. https://www.youtube.com/playlist?list=PLI-5k9R34MAzGs-FomlWDZQXF93w6qyfD
Assuming you checked out the videos above, under the Clip Editor window, create a new project by going to File/New Project/Humanoid. Save the project in your character's folder you created earlier.
Drag your character from the Project window into the Hierarchy window or in the Scene window. In the Inspector tab, reset their Position and Rotation to 0, 0, 0. Afterward, switch to the Pose Editor tab.
Drag your character from the Hierarchy into the empty field Select a GameObject to animate inside the Pose Editor. Click Create Configuration and if UMotion detects Blend Shapes, select Add to Head.
Now back under in the Clip Editor, add your animations. Go to File/Import Clips and click on Add Clips. Select all your animations and click Import.
Verify your animation runs by selecting it under the drop down in the Clip Editor.
Export Animation
I have found the best way to export animations with the least amount of problems, good compression, and cross-engine compatibility is to export and bake the animation into an FBX file.
Close your UMotion project by going to the Clip Editor, choosing File/Close Project.
Find your character in the Project folder within Unity. Right-click on that character file and choose Copy.
Now, right click and Paste the character to a different folder location, such as creating a directory called Exports. This new character will receive the exported animations and will not interfere with the old character.
Reopen your UMotion project by going to File/Open Project in the Clip Editor. Reassign your character in the Pose Editor.
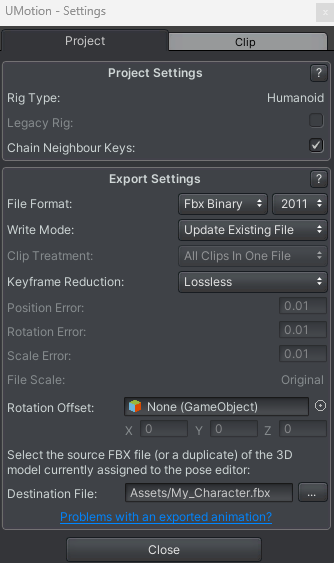
Now, go to File/Export/Export Settings. Change the File Format to Fbx Binary. Under Destination File, choose the button with the 3 dots and select your COPIED character. Do not choose your current character as the overwrite could make strange behavior within UMotion.
Close the window.
You can now Export your animations by going to File/Export/All Clips OR Current Clip within the Clip Editor.
Close out of your UMotion project when you are finished.
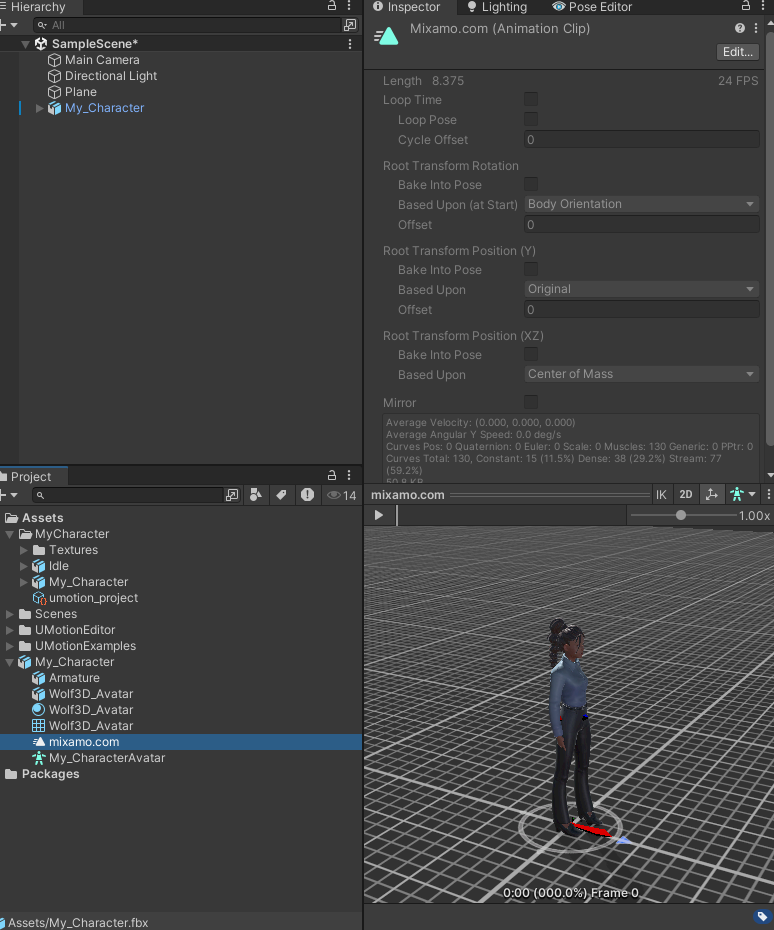
Find your exported character in the Project window. You can verify the animation(s) were exported correctly by collapsing the file and selecting your animation. The Inspector window will show the character and allow your to Play to preview.
You can now save this character FBX character with its new animations by navigating to its directory and making a copy somewhere. Hint: within Unity, right click on the file and select Show in Explorer to get there quicker.
Editing your animation (Optional)
There are many ways to edit your animation within UMotion. My approach is to generally start with a reasonably well recorded animation to start with that does not have major errors (such as frame skips) and to use Inverse Kinematics (IK).
This can be an involved process depending on your animation! If a lot of editing is needed, consider re-recording. Like 3D modelling, animation editing is a very creative/artistic process which is a skill that can improve over time!
For this, let's pretend our actor had their hand placed on a desk and we needed to align it with the 3D model desk we would be using. In this scenario, you would import your desk model as a guide object, place it within the scene near your character, preferably in proximity to the animation.
Open your animation in the Clip Editor and set the character in the Pose Editor as you normally would. Within the Pose Editor,Editor, switch to Config Mode at the top. You will find a button about halfway down called IK Setup Wizard.Wizard. Click it, leave the defaults the way they are, and select Create.Create. Your character will now have dark blue limbs. Switch back to Pose mode.mode.
Notice how your skeleton limbs (white) match the animation and the blue limbs (IK) are not moving? We need to convert our animation to IK as well! But first, let's go to the Pose Editor and find the Display section. Under Rig Layer,Layer, switch the button Both to just IK.IK. It makes the preview of the bones easier to follow. Now to convert your animation to IK:
Exercise: Take a moment and see if you can figure out how to convert the animation to IK
Solution: In the Clip Editor, with your current animation applied, go to Edit/FK to IK conversion. Then click Convert.
It may take a moment or several to convert to IK depending on the size/length of the animation.
Let's add a LAYER to our animation, something that will additively take the hand with the same animation, but adjust it to the point where it needs to "place on the desk."
In the Clip Editor, in the absolute bottom right, is a button that opens up Layers. Click it and you will notice we have a default layer called Base Layer. Click on the icon with the [+] to add another layer. Give it a meaningful name.
Within the Pose Editor, under the Animation section, switch Auto Key to Generate. This allows us to move items within the timeline of our Clip Editor and key frames will be added automatically.
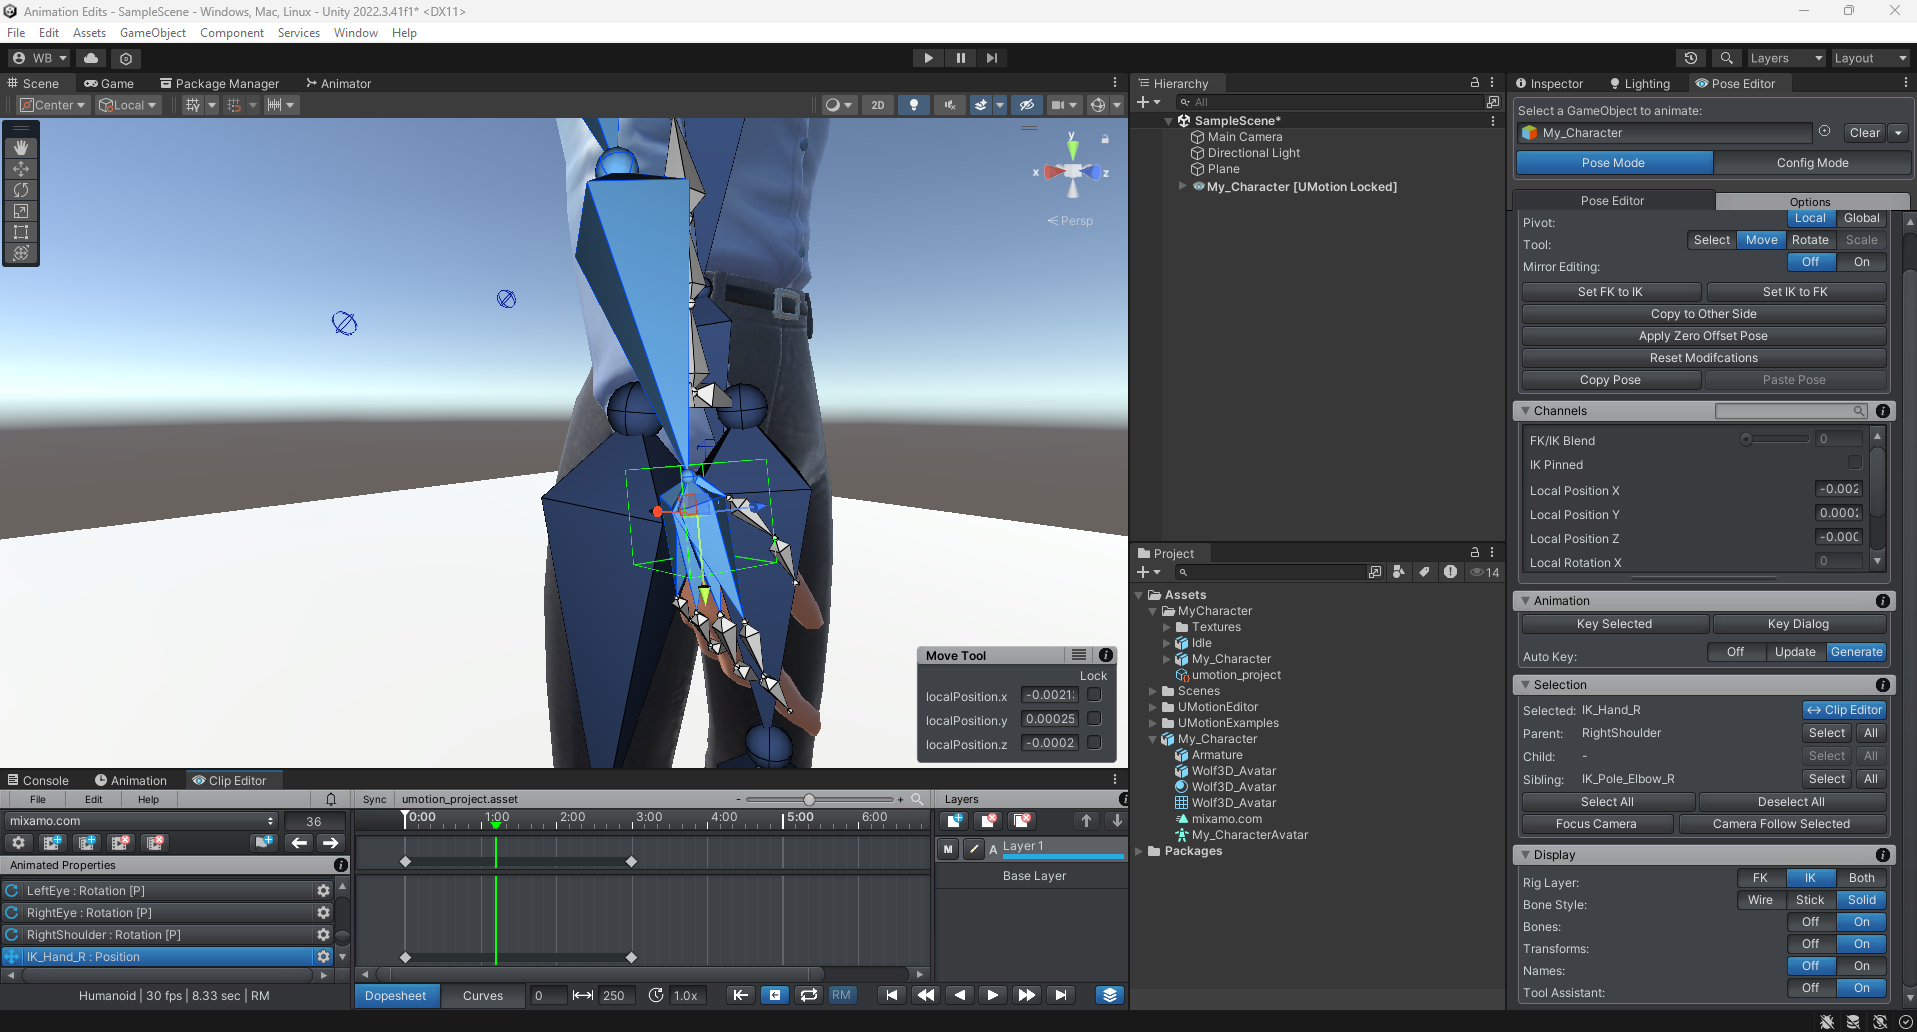
Scrub through your timeline to the point where an animation needs adjusted. If you click on the characters "hand" you will see a blue box with some translation controls. Feel free to adjust your character
Depending on how far you are in your animation time, you may need to move backward a few frames and adjust your hand "back" with a new key frame so that there isn't a dramatic compensation within the layer!
You can export your animation in the same process you followed above.
Where to go from here?
There are more advanced tutorials and concepts for UMotion, such as advanced editing and even creating animations from scratch. I provided their Playlists from YouTube below:
https://www.youtube.com/@SoxwareInteractive/playlists
For Unreal developers or those looking for advanced/complete animation capabilities, the animation sequencer suite within Unreal has become a game engine industry standard.