Using Metal Marking Spray
Steps for Using Metal Marking Spray
Step 1: Clean the metal surface to remove any residual grease.
Apply a thin, even coat of metal marking spray to the area slated for marking. To achieve a high-quality marking effect, the uniformity of the product coating is essential, which may require several tests and practice. Always use the product in a well-ventilated area or a designated spray room.
Please note: xTool doesn't provide or sell 'Metal Mark Spray'. You can purchase it from Amazon or Etsy.
Step 2: Get a stainless steel dog tag.
Step 3: Evenly spray the marking liquid on the surface using an airbrush or sprayer.
Remember to place a piece of waste cardboard beneath the metal. Also, use the marking spray in a well-ventilated area or a designated spray room for proper air circulation.
Step 4: Allow the surface to air dry for 3-5 minutes.
For optimal results, let the liquid dry naturally. It's not recommended to force it to dry using heat lamps, blowers, or fans.
Step 5: For substrates that shrink significantly, apply a second coat.
However, ensure the first coat dries for at least 30-40 seconds before applying the second one.
Step 6: Set parameters and initiate engraving.
Different metal marking sprays can produce varying sintering and engraving effects. It's recommended to conduct multiple test marks to achieve the best performance.
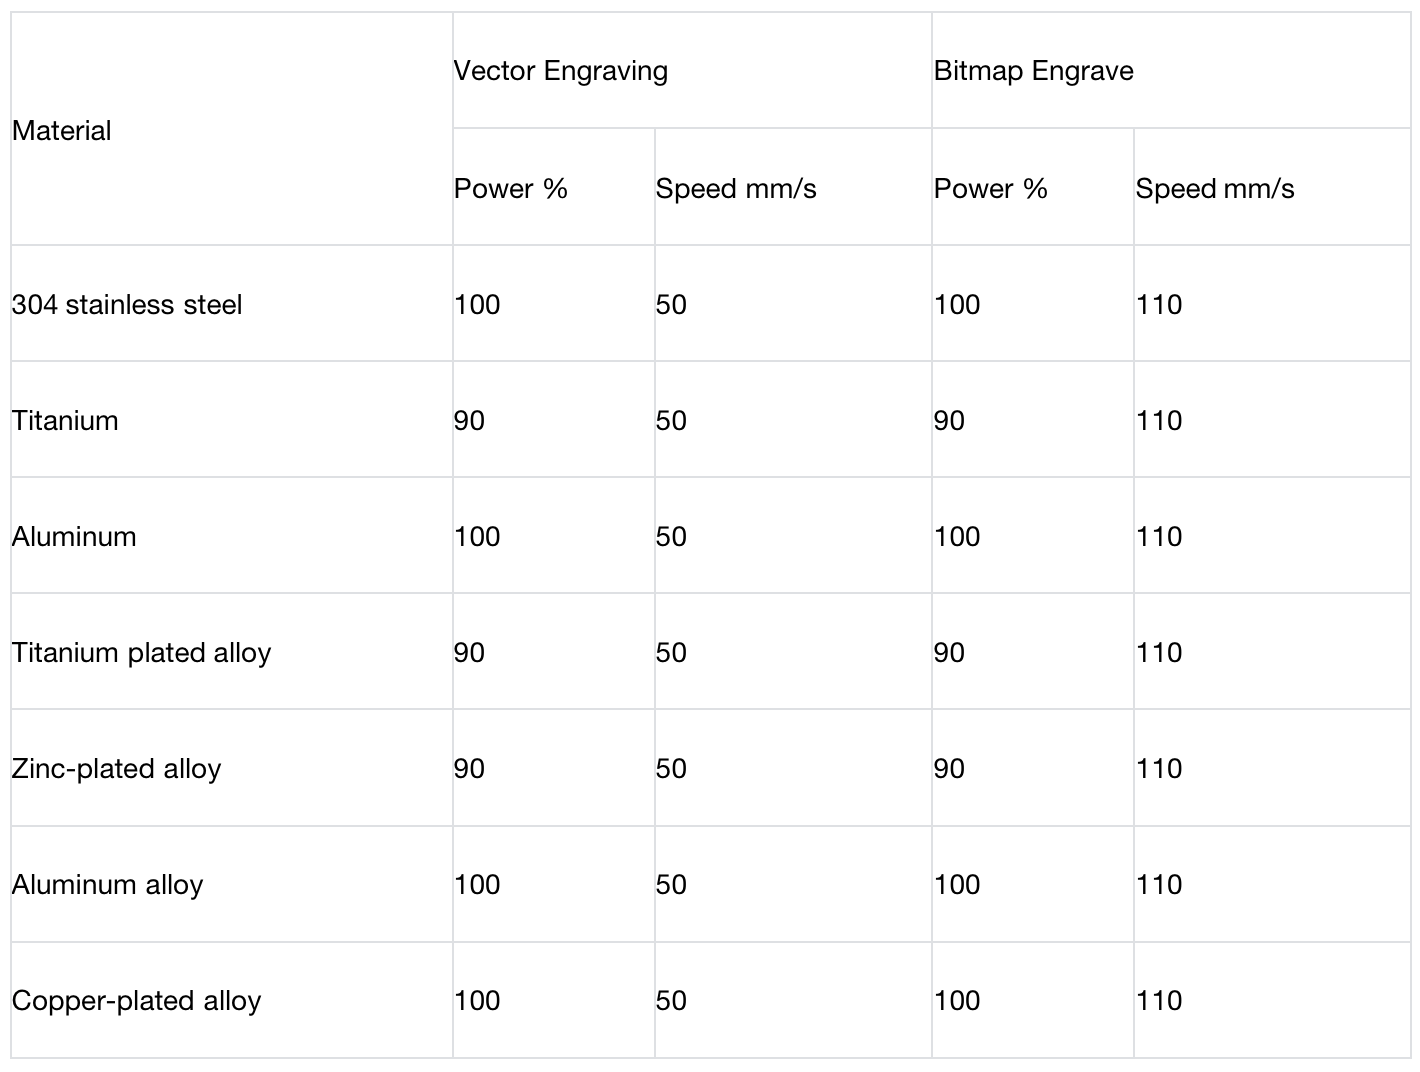
Recommended Parameters:
Step 7: Remove excess spray paint.
Wash with water or a damp towel or sponge. Typically, rinsing with running water for 3-5 seconds is sufficient to remove excess spray. If the engraved portion remains, a damp sponge and alcohol can be used for localized cleaning.