Resin Printing: CHITUBOX
Step 1: Obtaining and the model to print
First, you will need to make sure the file you would like to print is a .stl file. The slicer program only accepts .stl files, so something like .obj will not work.
-
To export a model as an stl file in Maya, first, go to Windows→Settings/Preferences→Plug-in Manager, then in the search bar, type in “stl”, and check the load and auto load boxes for the result titled “stlTranslator.mll”, then hit refresh, and close that window. Then, go to File, and instead of hitting export selection, click the box next to it. Under “General Options”, there is a drop down menu labeled “File type:”. Look for the “STLExport” option, then save and close that window. You can now export files from Maya in an stl format. Just make sure that when you do go to export the model(s), that you change the “Files of type:”drop down and select STLExport.
-
If you used blender to make the model, you can export as an stl without additional setup.
Then, you will want to make sure you are using a computer with the slicer software CHITUBOX installed. These computers are located in the Makerspace.
Step 2: Setting up the model to print
When you open CHITUBOX, you may need to log in. The login info for that is:
Email: scil-devices@su.edu
Password: scil1234
After signing in, you will be directed to the home screen. In the main screen there will be two buttons at the top of the window, one labeled “New Project” and one labeled “Open File”. “Open File” will add any file(s) you select to the current project, which may or may not already have models in it. “New Project” is best if you want to just print a specific model or models.

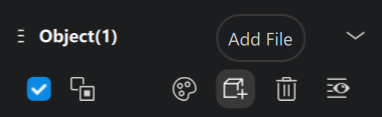
If you select “New Project”, you will still need to import the model(s) you wish to print. On the left hand side of the screen, there is a tab that has the project settings/information. Near the bottom of this tab, there is a section labeled “Object(0)”. Click the button that has a cube with a plus icon on it, which will say “Add File” when hovered over. When clicked, it will bring up a file explorer window, then select the file(s) you wish to add.
-
Click Left mouse button: selects model(s) in the scene(select multiple models at once by dragging or holding shift when clicking specific models
-
Hold Right mouse button: pans camera around the scene
-
Hold Middle mouse button(down on scroll wheel): moves camera side to side/up and down
From here, on the represented build plate, you can orient, change the size/scale, hollow, drill, duplicate, and mirror the model(s). You cannot add platform, split, cut, boolean, and the model(s) without paying for the upgraded version, which you will not do.
![]()
![]() Don’t use anything that has either of these two icons on them(they require the paid version)
Don’t use anything that has either of these two icons on them(they require the paid version)
Step 3: Adding Support Structure to the Model
Once you have your model(s) positioned and scaled to how you want them, you can start adding supports. To do this, start by clicking on the Supports button at the top of the window. This will change the options at the top of the scene window to Edit Support, Manual Support, Batch Support, Auto Support, Magic Support, Mirror Support, Raft, Overhang Detection, Cross Bracing, and Merge Supports. You will only be able to use the Edit Support, Manual Support, Auto Support, Raft and Overhang Detection functions

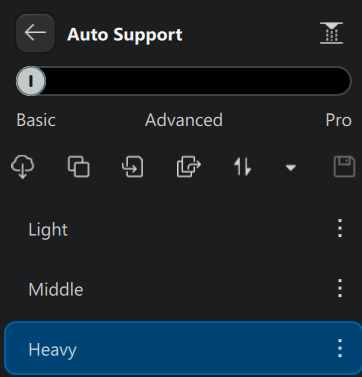
When in the support editing mode, there will be some red areas on the underside(s) of the model. This is showing where support structure is recommended in order to print the model successfully. The best way to add supports to the model is by clicking the Auto Support button, and then giving details to the slicer in the menu on the right side of the screen. The light and Middle support options can have a difficult time holding onto the model while printing, most commonly, the print will fall off the support structure part-way through the print, or the print will cure to the film at the bottom of the reservoir, and the supports will not be strong enough to hold onto the model and pull it back up. More often than not, you will want to use the Heavy support option. This option provides the strongest connection to the model, which will mitigate problems while printing.
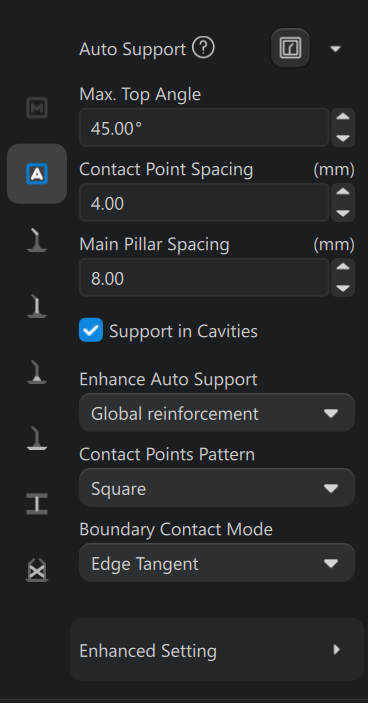
Under the Support Type tab, you can refine how you want the supports to generate, whether you want to change the shape/style of support, as well as change details about individual parts of the support structure.
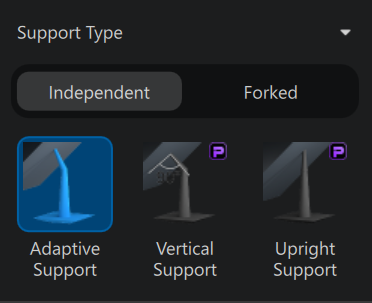

You will want to stick with Adaptive Support, and to not mess with the settings, however there may be instances where you need to change the settings based on the model you are printing. You can also manually add supports to the automatically generated supports, in case there is something specific that you think needs more supports. The other Support Type options are not available for us to use.
Next, you will want to give the supports a raft. While still in the Supports menu, at the top of the window on the right side, hit the Raft button. From current testing, leaving the raft type as “None” and the Model Lift Height setting kept at 5mm seems to work the best.
Step 4: Slicing the Model
Once you have added supports to the model(s), you are ready to slice the model. To do this, start by clicking the Slice button at the top right of the window. Don’t change either of the two settings that come up on the right side of the window.
After clicking the Slice button, there will be a tab on the left side of the window that shows the costs of the print. These costs include but are not limited to Volume, Weight, and Time. The volume refers to the amount of resin(in milliliters) that the print will use, the weight refers to the mass(in grams) of the print, and the time refers to how long(in hours and minutes) the print will take to complete. You will still need to save the file to print, which can be done by clicking on the grey Save button near the top middle of the window, then clicking the blue Save button on the right side of the window.
If you instead click the Slice and Save button, you will be able to save the file for printing first, and then show you the same things as mentioned above.
Regardless of which option you choose, you will need to save the .ctb file, which is the only file type that the resin printer accepts. You can save the file onto the orange thumb drive labeled RESIN PRINTER, which should be either in or next to the resin printer. Then, once the desired file is on the thumb drive, you can put it into the printer’s front facing USB port.
Step 5: Printing the Model
Finally, to start the print, make sure that the printer’s reservoir has enough resin for the print, and then on the screen at the base of the printer, click on the 3D Print button, and then select the file you wish to print, then hit the GO button. The printer will then run for the amount of time previously stated in CHITUBOX(as well as on the lcd screen on the printer once the print is started), and after that amount of time has elapsed, the print will be done and need to be washed and cured.
WARNING! You must wear gloves, a mask, and eye protection to refill the reservoir.
Additional Information
Functions not previously talked about, such as; hollow, drill, duplicate, and mirror.
The hollow function allows you to hollow out the inside of the model, and will let you determine the thickness of the walls of the print. It is not recommended to use this function unless you have a large model, as smaller models will be very fragile. Using this function can help with reducing the weight and amount of resin used for the print, which will help to make sure it does not fall off of the build plate due to being too heavy. Depending on the shape of the model, you may still need supports on the inside, to make sure that the model can be printed without falling apart due to overhang angles in the model itself.
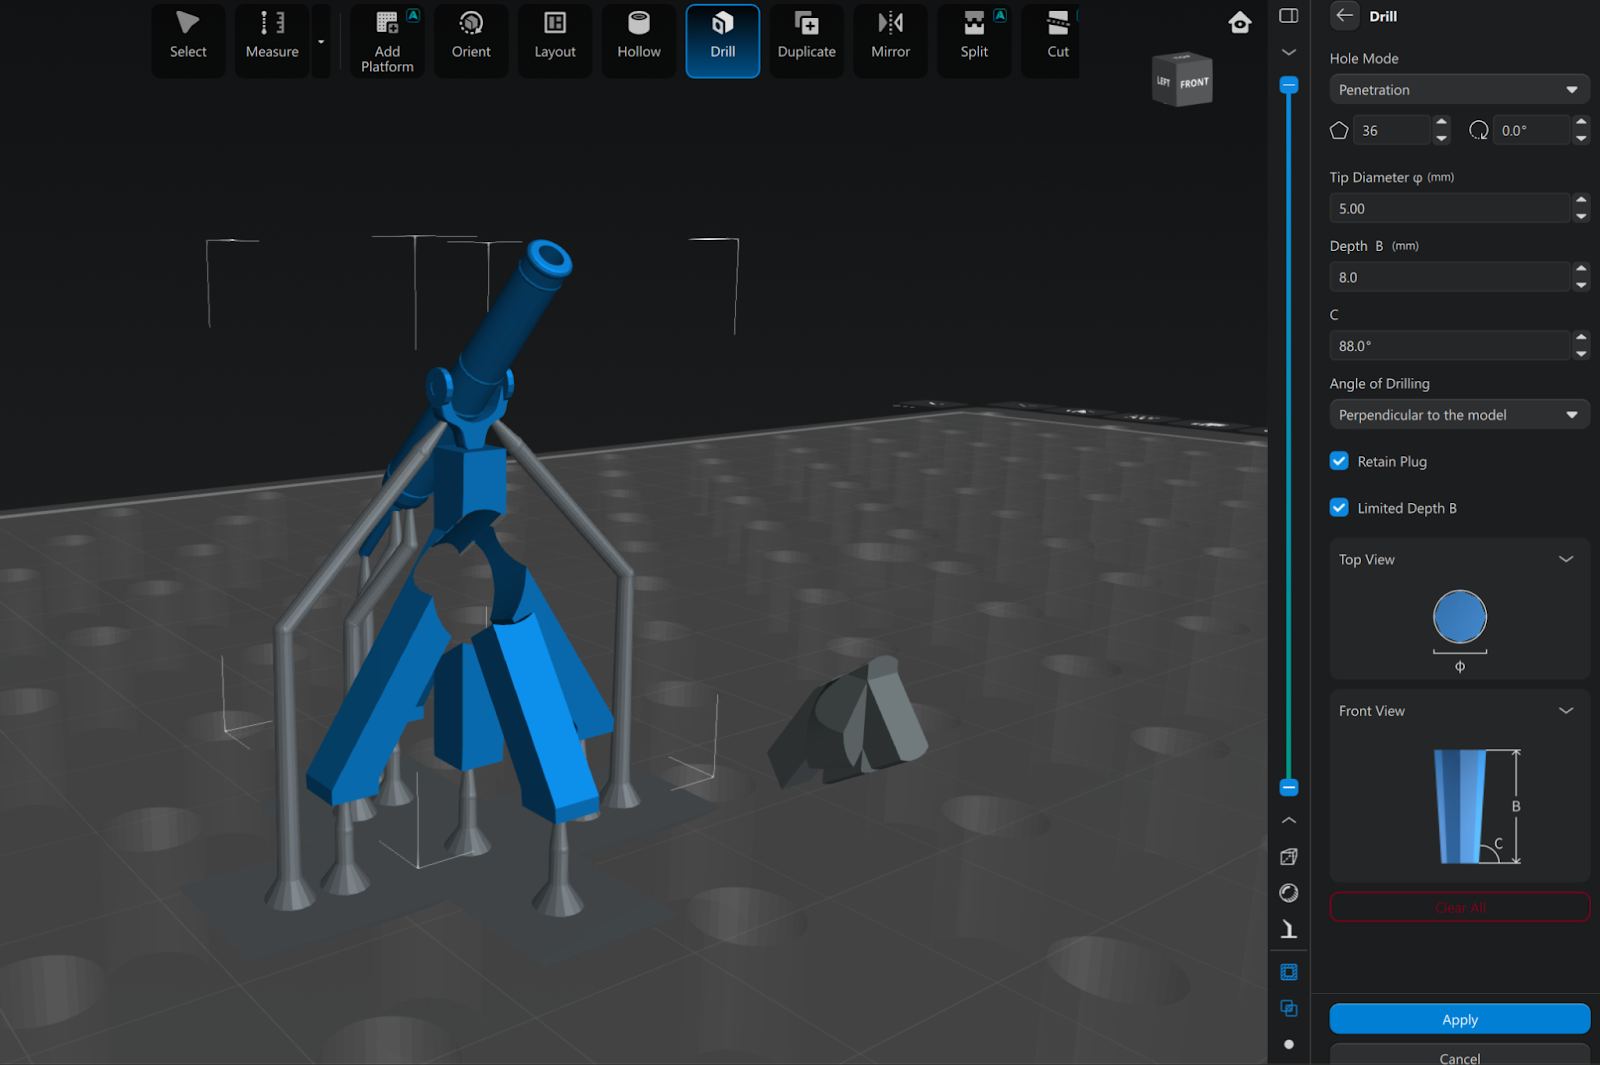
The drill function allows you to cut out part of a model, and print both pieces, detached from each other. (see below)

The duplicate and mirror functions do as the name suggests, and will allow you to either duplicate or mirror/reverse the model(s). The mirror function can just reverse the model on the selected axis, and you can optionally make a duplicate of the original model, and the model that is still selected will be the mirrored version.