Importing Animation
In your Project tab, right click and select create > timeline.
If using a read-only animation:
Import your animation to the Project tab. Select it (or the animation itself if included in an fbx package, denoted by a triangle icon) and select edit.

If the model you are using is humanoid, select Rig and change Animation Type to Humanoid. Click Apply.
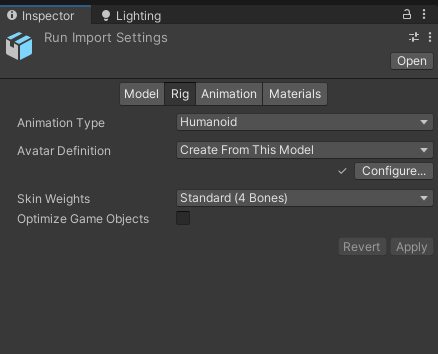
Import your model to the Project tab. Select it and select edit.
On the model, if the model you are using is humanoid, select Rig and change Animation Type to Humanoid. Click Apply.
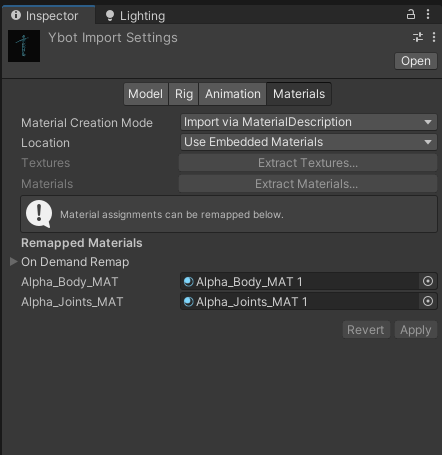
In the materials tab, click extract textures and select the same folder where the character is stored in the Unity project. Click extract materials and do the same. The blank "remapped materials" list should now populate with the correct materials.
Drag your model into your scene.
Create an empty object in the scene and name it "Timeline".
Add the component playable director to "Timeline".
In the Project window, right click and go to create > timeline. Name it "Sequence".
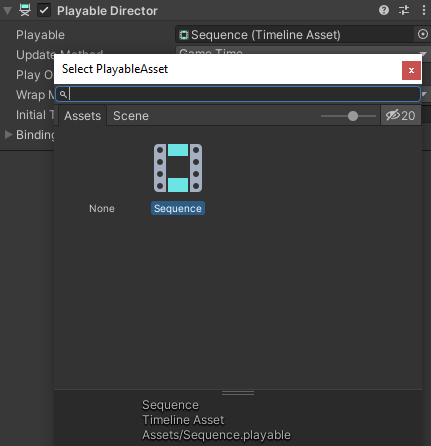
Click on "Timeline" in the hierarchy and change the Playable Director's Playable to "Sequence".
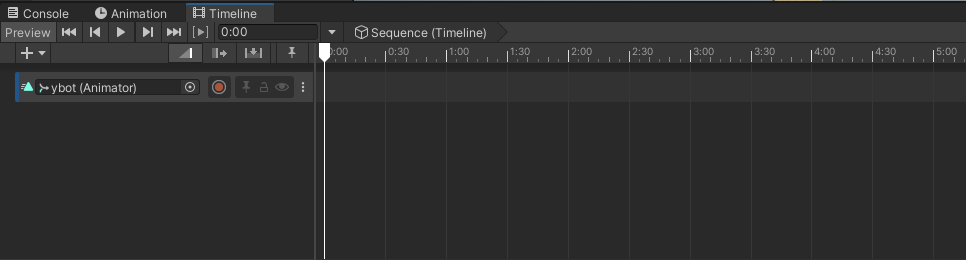
Go to window > sequencing > timeline to show the timeline window. You may want to drag this somewhere into your setup.
Right click in the empty left area of the timeline window and add an animation track.
Select or drag the model you want to animate to the blank box currently labelled "None (Animator)". This will make it so any animation placed on the section of the timeline applies to that model.
Drag the animation from earlier into the timeline.
Press the play button in the timeline to watch it play in the editor.
*Note: if the animation moves your model, select the animation in the timeline and change the Clip Transform Offsets to match where you want your model to be.