UE Facial Capture (Recording)
About
This guide covers using the mobile app Unreal Live Link to record ReadyPlayer.Me facial animations with ARKit using an iPhone/iPad Pro. I know many iPads issued by SU will work, but if they don't SCiL has iPads available. By the end, you should have a working facial animation that can be paired with body animations and audio.
I chose ReadyPlayer.Me for several reasons: there is character customization, standardized face morphs/blend shapes, standardized character bone rig, and others.
The previous tutorial covers setting up your character. You must do so before proceeding!
Any Apple device that uses FaceID can be used. In this guide, SCiL iPads are being used.
Getting Started
Verify connection
It is IMPORTANT that both the workstation and the iPad are on the SAME NETWORK.
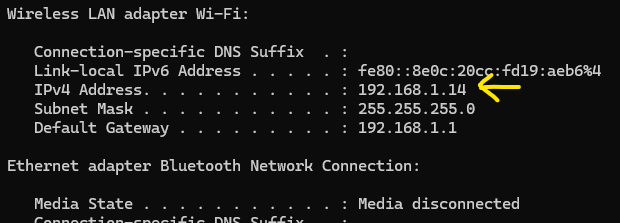
For the workstation, open a command-line prompt and type in:
ipconfigLook for IPv4 Address that matches you connection type (Wi-Fi vs Ethernet). This is the address that you will enter into the iPad.
When you are ready, launch Live Link on the iPad. Select Live Link (ARKit) and press Continue. Press the [gear] icon in the top left. Tap the button Live Link under Streaming. You can leave the Subject Name alone but press Add Target. Add the IP address you obtained from the command-line in the previous step and enter 11111 in the Port. Exit the menus and return to the full scene where your face is being recorded.
Open the Unreal Project if it is not already opened. Open the window Live Link located in the menus at top under Window/Virtual Production/Live Link. If everything is running properly, you should see the iPad under the Subject Name area. Notice the yellow dot when it is NOT tracking your face, and green when it is. You can close the Live Link window.
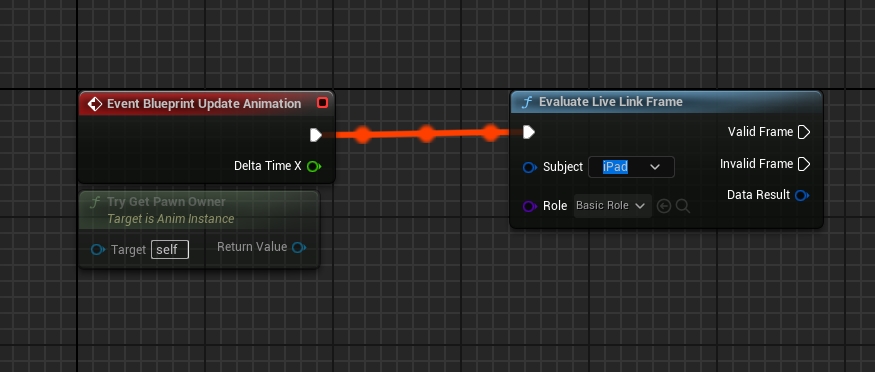
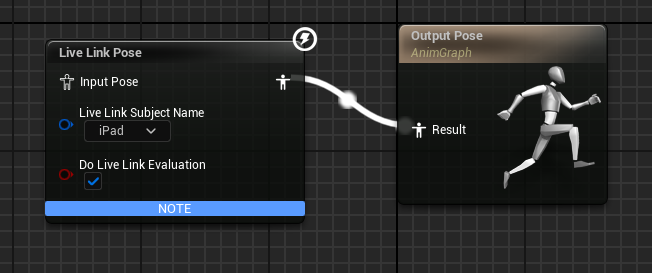
Remember when I said to keep an eye out for the Subject drop downs in both nodes of the Animation Blueprint?
Visit your animation blueprint and in both the Event Graph tab and Anim Graph tab, the two Live Link nodes you added, assign the iPad in the drop down. Then hit Compile and Save.
Verify everything is working
This is a moment to take to verify everything is working. While using the iPad, you should notice your ReadyPlayer.Me character is now following your face, including your eyes! if it is not working immediately, close the editor and reopen.
From here, I like to run through various facial expressions or even lines and watch how my character emulates the movement. Whether it is you doing the recording, or an actor. I think it's important here to try the character so you can adjust your own facial expressions to match the expected facial expression you desire when recording.
Recording
In the Take Recorder window, you will notice a [+ Source] button. Press this button followed by From Live Link and then select the iPad source. The iPad should appear in the source window. Click on the iPad (not the yellow toggle) to review details in the panel underneath. Uncheck Use Source Timecode. You can also change the Subject Name to your character's name.
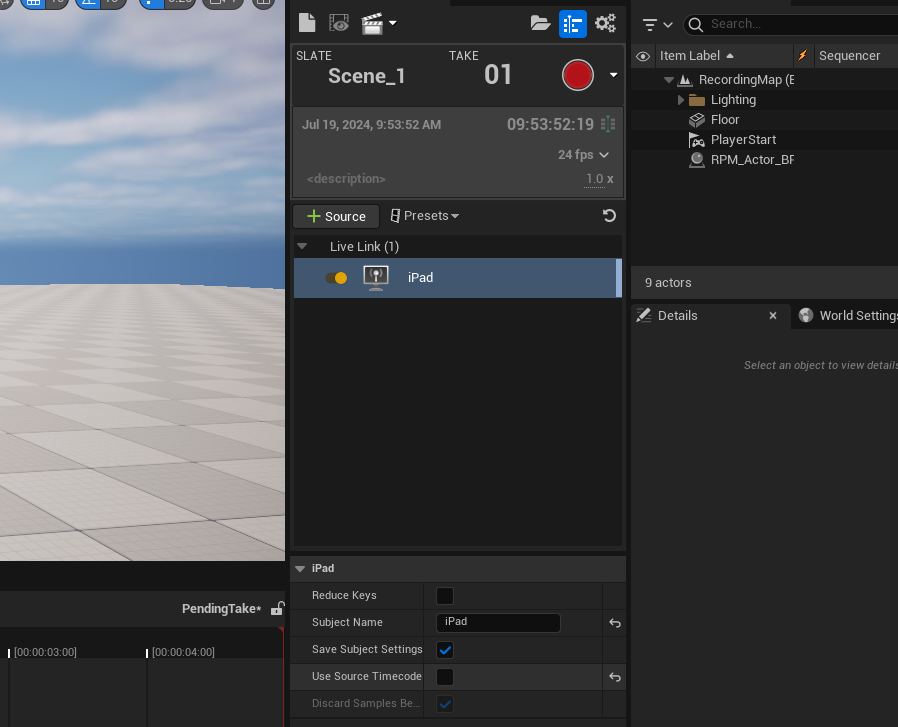
Unchecking this button uses time based off the engine. I recommend this because it will always be a consistent time versus the time based off the recording.
You will notice some information before recording, such as Slate information, Take, and Description (see image above). Feel free to edit these values with each new recording so that information matches with your take sheets.
Notice above the description that the default fps is set to 24 fps? This is one of the cinema standards. You may feel compelled to use a high frame rate so that your experience "looks good." Unlike a game engine's standard FPS, this is the interval that key frames are taken. This is independent from the actual Tick/Update loop of the engine and will look the same regardless of CPU speed. I recommend for good performance/balance to leave this alone and keep animations in general at no more than 29.97.
To record, fill out the appropriate information. Press PLAY to enter play mode first. Press F8 to center your camera up. This is only cosmetic so you are able to view the character as you record. When you are ready, press the red record button in the Unreal editor (not the iPad). Press the same button again to end the recording.
Afterward, a recording will be saved in your Content Drawer as Cinematics/Takes/etc.
Baking/Exporting
If you open up your recordings, you will notice there are two recordings for each take. One recording is what you will use and the other you will find empty.
You can test the recording. Exit play mode if you are still in play mode, and navigate to the take in the Content Drawer. Mine was saved under 2024-07-22/Scene_1_01_Subscenes. Double click on the file, close the content drawer, and you should be able to see your animation in the sequencer. Scrubbing or pushing Play will show your live link character previewing the animation.
Now drag your character actor from the Outliner into the sequencer. Unreal will complain that the animation is read-only. Click the lock icon in the top right corner of the Sequencer window to unlock. Try dragging your your character back into the sequencer.
Holding shift, select both the character AND the animation in the Sequencer. Right click on them and select Bake Animation Sequence. Save this somewhere useful and named with a good convention. The saved animation will be a green-bar Animation Sequence asset in your content browser. You can open it up and preview.
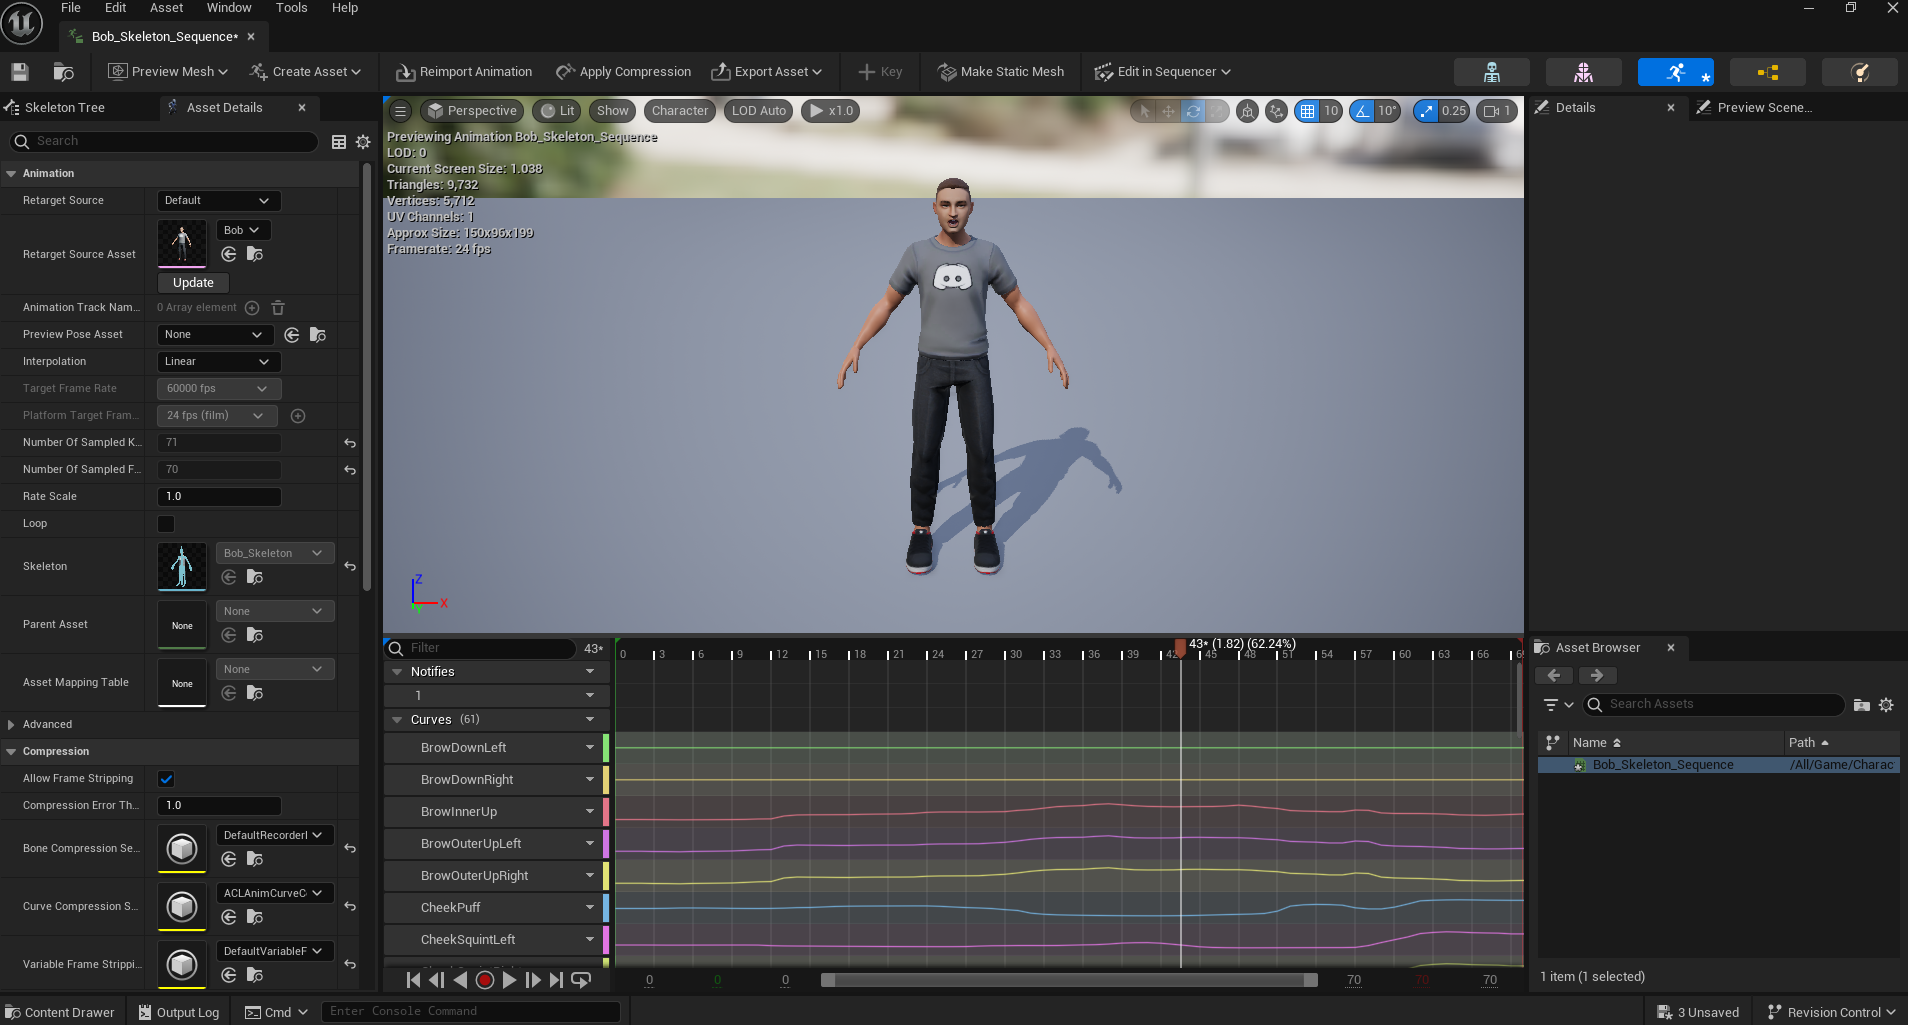
Notice the key frames are added?
Using Recorded LiveLink
Where to go from here?
You can migrate your character and animations to your WORKING project. Do not delete this project until you have finalized all your facial animations.