Adobe Audition - Introduction
This page will cover using Adobe Audition for post-production editing. To learn about specific features, view the left-hand view and navigate to any of the listed topics that interest you. If you do not see what you're looking for, consider adding a section to this page!
Video Tutorial
IF AT ANY POINT IN THESE TUTORIALS YOU SEE A VIEW BEING USED THAT YOU DO NOT HAVE, YOU CAN FIND IT BY NAVIGATING TO Window, THEN LOOKING FOR THE VIEW YOU ARE MISSING
Audition is a useful tool for editing sounds in need of doctoring, layering, or polishing. If you do not have a sound to play around with before reading through this page, you can access free-to-use sounds here.
IMPORTING THE SOUND
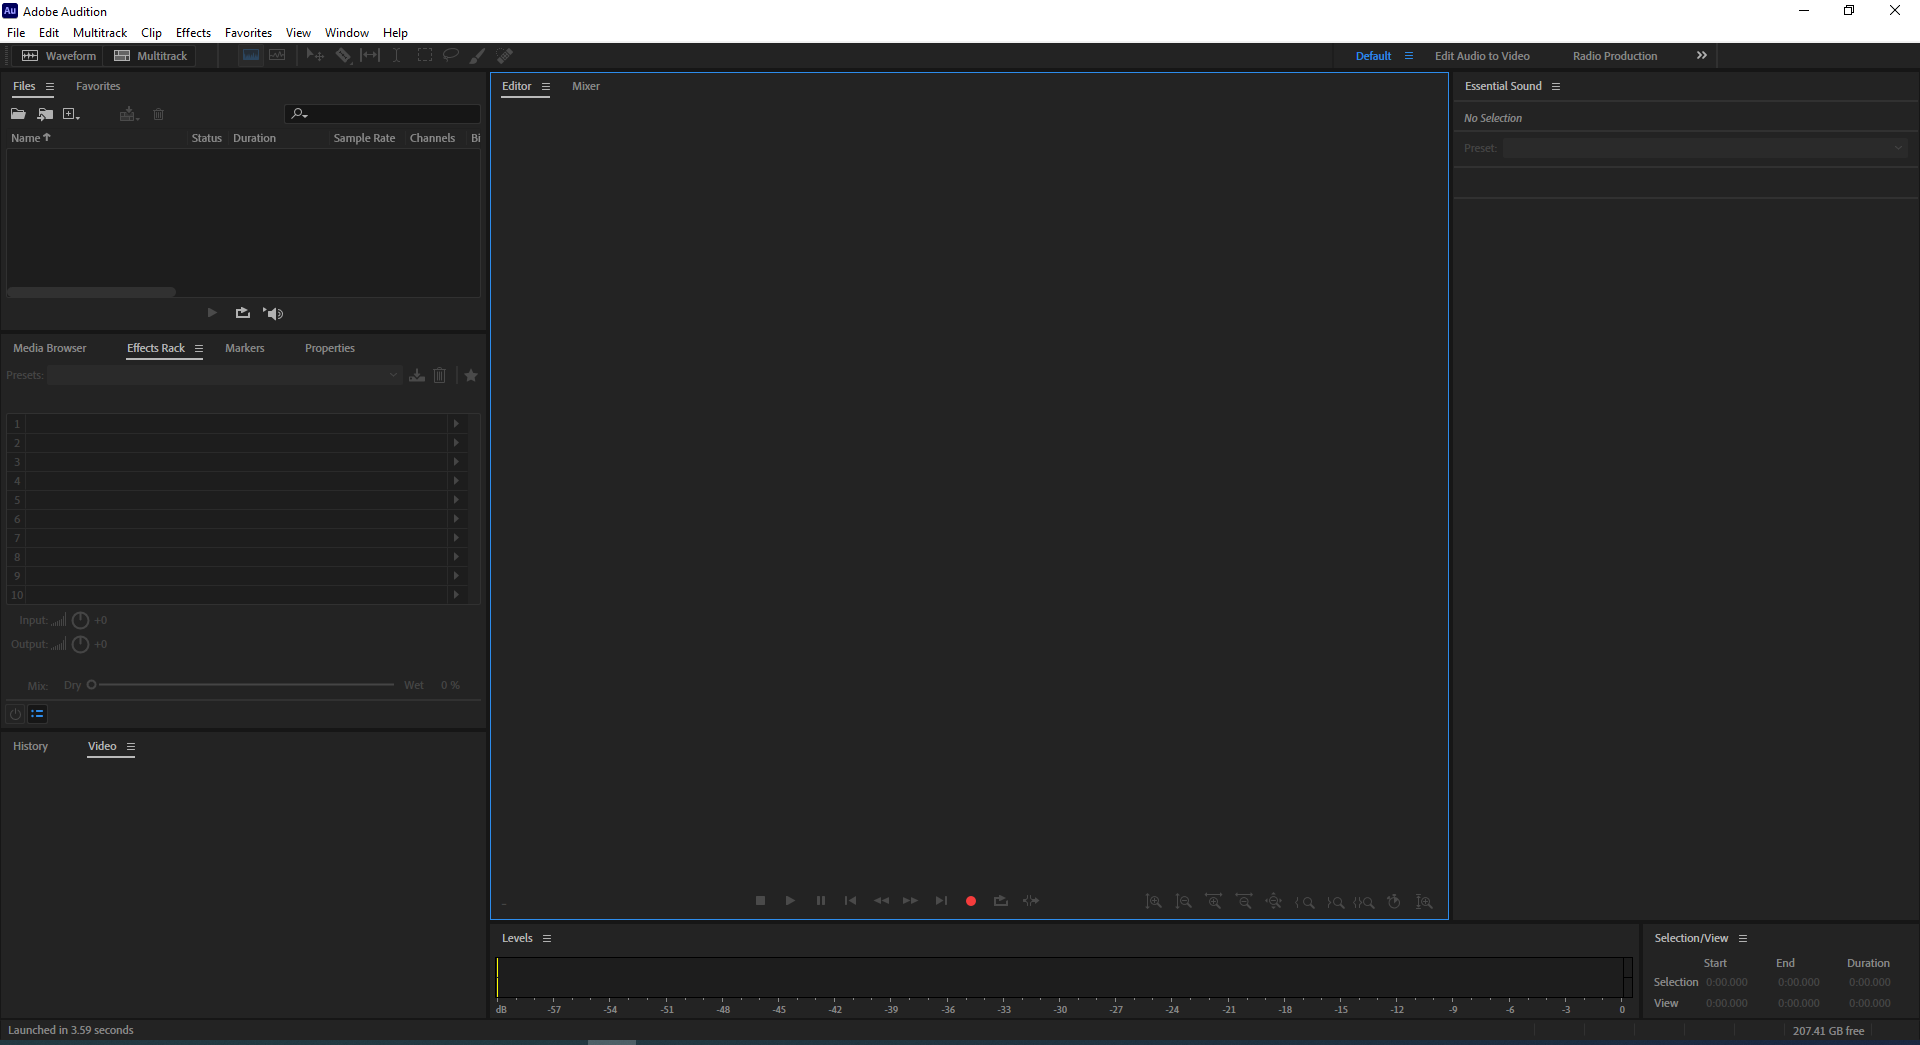
Currently, we are in the waveform editor, which is handy for editing a single sound. You can change to Multi-track editor, but that will be approached later on. The waveform editor is known to be a 'destructive editor', meaning the changes you make to a waveform in these cannot be undone unless you use Ctrl + Z or Command + Z
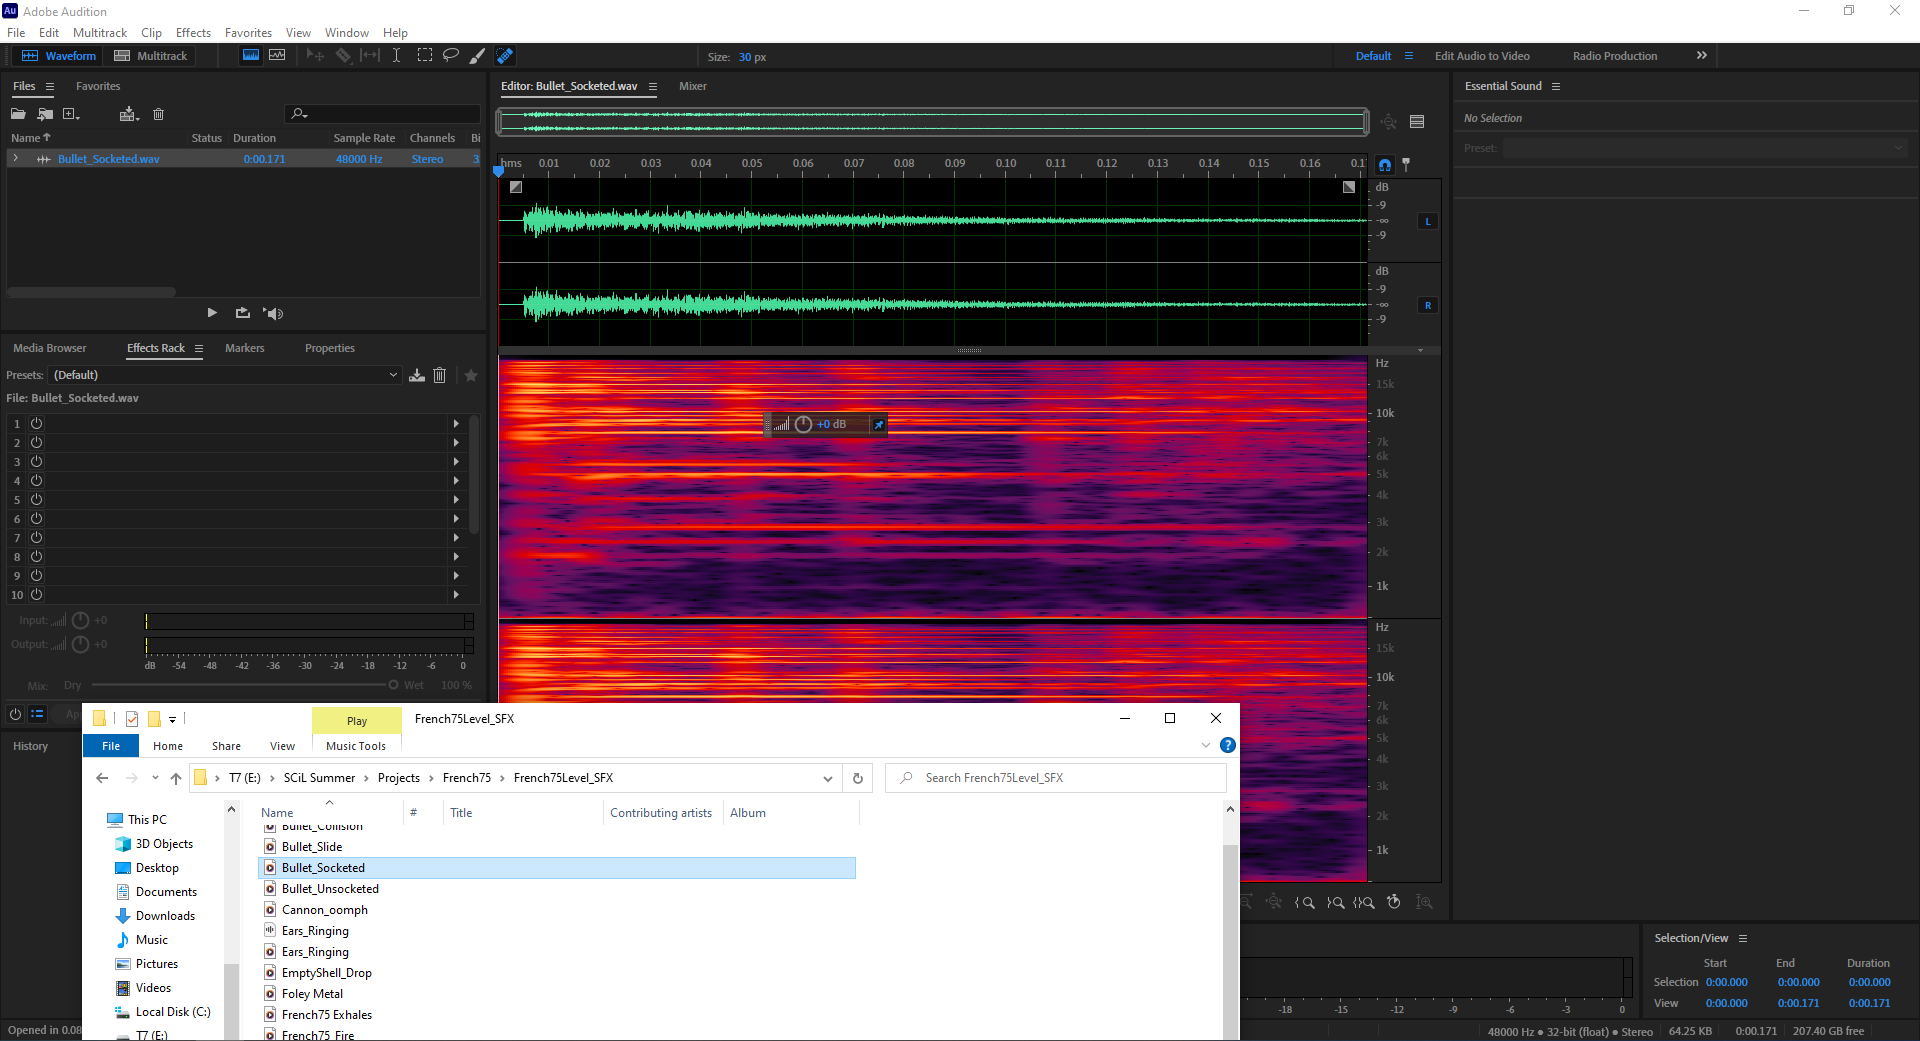
In the Files view, beneath the Waveform editor and Multitrack buttons, I have dragged and dropped my Bullet_Socketed .wav file into the view. You can see it has appeared and displays various information. You can resize this view to better display information by dragging the borders around, or you can click, hold, and drag the File tab to relocate it with a different view or as its own view.
(The Bullet_Socketed .wav file is part of a sound library created and used for the French75 VR experience. Audition was used to edit some of its sounds, you can view it in the SCiL lab or see more about it here.)
If you lack a sound to import into Audition and don't feel like going to Freesound.org for a quick download, you can always record a sound. To do so, navigate to File --> New --> Audio File, then name and create a file. It will appear in the file view and now you can record something.

Make sure your input and output devices are set the way you want them. To access these Audio Hardware preferences, navigate to Edit --> Preferences --> Audio Hardware.
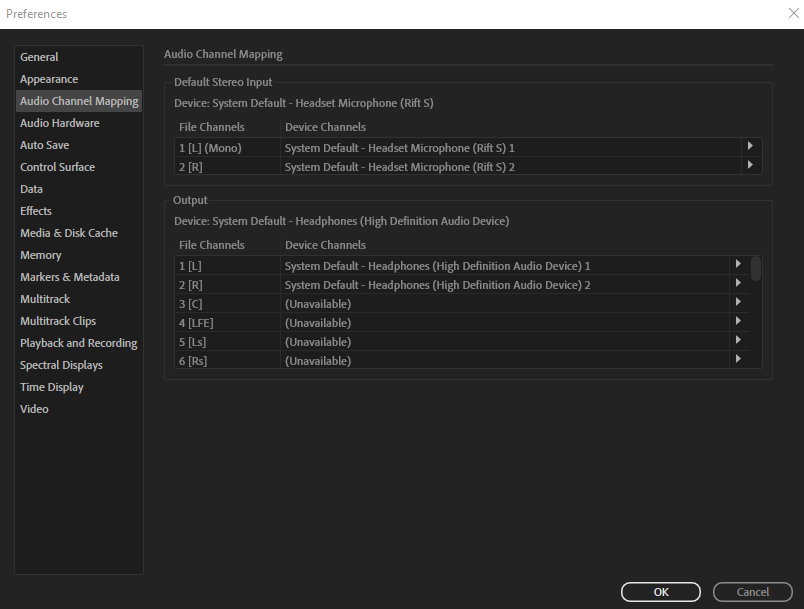
While still in the Preferences window, click Audio Mapping and double-check whether or not your Device Channels are mapped to the device you want to hear audio through.
Lastly, consider using the iso booth, if you're in the lab, for a higher quality recording than the computers in the lab will get you with its standard equipment. You can learn more about using the iso booth through the Using The Iso Booth chapter.
Changing Volume
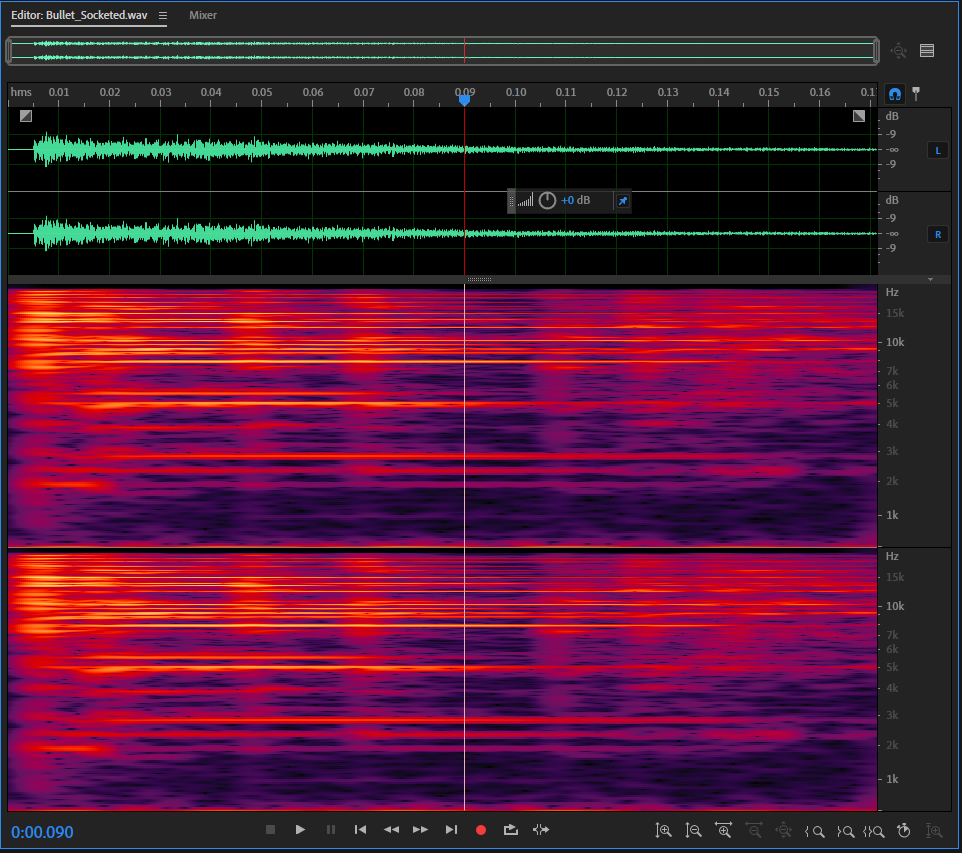
If you've recorded a sound using the red record button at the bottom of the editor view or obtained your sound in any other way, there are a couple of ways for changing the volume. The first you'll notice is probably the gain knob near your waveform that can be turned to change the levels of your clip. This is a manual method that can yield nice results but you risk excessive changes for certain portions of your waveform.
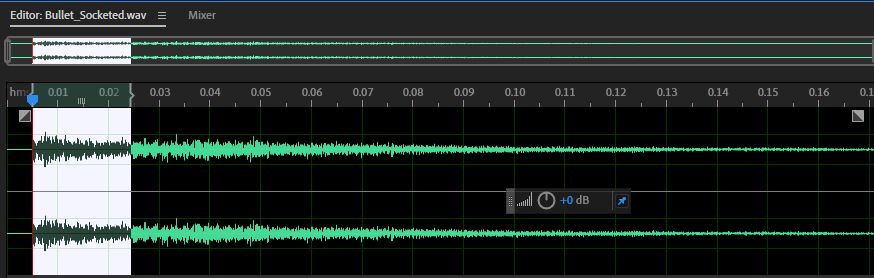
You can change the levels for a specific part of your clip as a workaround. Simply click and drag the area of your waveform you would like to change, then adjust the gain knob as desired.
To zoom in/out on a clip, you can use Ctrl or Alt / Command or Option + Scroll Wheel to toggle the zoom on your clip in various ways. To scroll left or right in your clip, hold Shift + Scroll Wheel. You can also hover your mouse over the timeline when using your scroll wheel to zoom in or out. The timeline displays the amount of seconds in your audio clip, and changes depending on how zoomed in you are.
Another way of adjusting the audio is by navigating to Favorites --> Normalize to -0.1 dB and clicking that option. Doing so will make your waveform the loudest it can be without clipping.
Adding Effects
Amplitude and Compression: This can make your SFX sound louder, smoother, or nicer.
Delay and Echo: Can delay the time a sound is played, or have it echo at a specified rate and level (i.e. eighth notes, sixteenth notes)
Filter and EQ: Used to focus on the high or low end of a sound's frequency range, as well as boost one of these ranges.
Modulation: Additive effects that manipulate your sound with layering, pitch bending, or phasing.
Noise Reduction / Restoration: Used to remove background noise, though can also affect the sound you WANT to hear. Use carefully. Restoration can take a weak part of your clip and sometimes bring it back.
Reverb: Extends the decay of your sound, making it so it takes longer for the sound to taper off.
Special: Special effects that vary in functionality and can be played around with. (I like the Distortion effect)
Stereo Imagery: For context, stereo audio is two channels of audio for your left and right ear. However, when both sounds play, there is a 'middle channel' effect. Using Stereo imagery effects, you can decide what to do with this middle channel sound. For example, removing the middle sound completely. (See video here)
- An example of using stereo imagery shown in the video is how during a recording of a band, the speaker points out how the vocalist tends to always be positioned in the middle during these recordings. Using the 'Center Channel Extractor' from the Stereo Imagery Effects List, he is able to isolate the singer's voice and ignore the instruments playing more in the right and left channels.
Time and Pitch: Time and pitch allow you to harmonize or tweak the pitches of your audio clip in various ways.
Multitrack Editor
The Multitrack Editor is a non-destructive editor. Any trims, cuts, edits, or effects added to a sound here will not permanently save to your individual audio files being edited together in this view. That being said, you can edit multiple audio files in this view, so let's set that up.
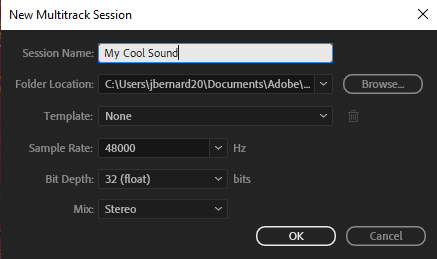
Start by going to File --> New --> Multitrack Session, then name your session whatever you would like. Once done, click 'OK'.
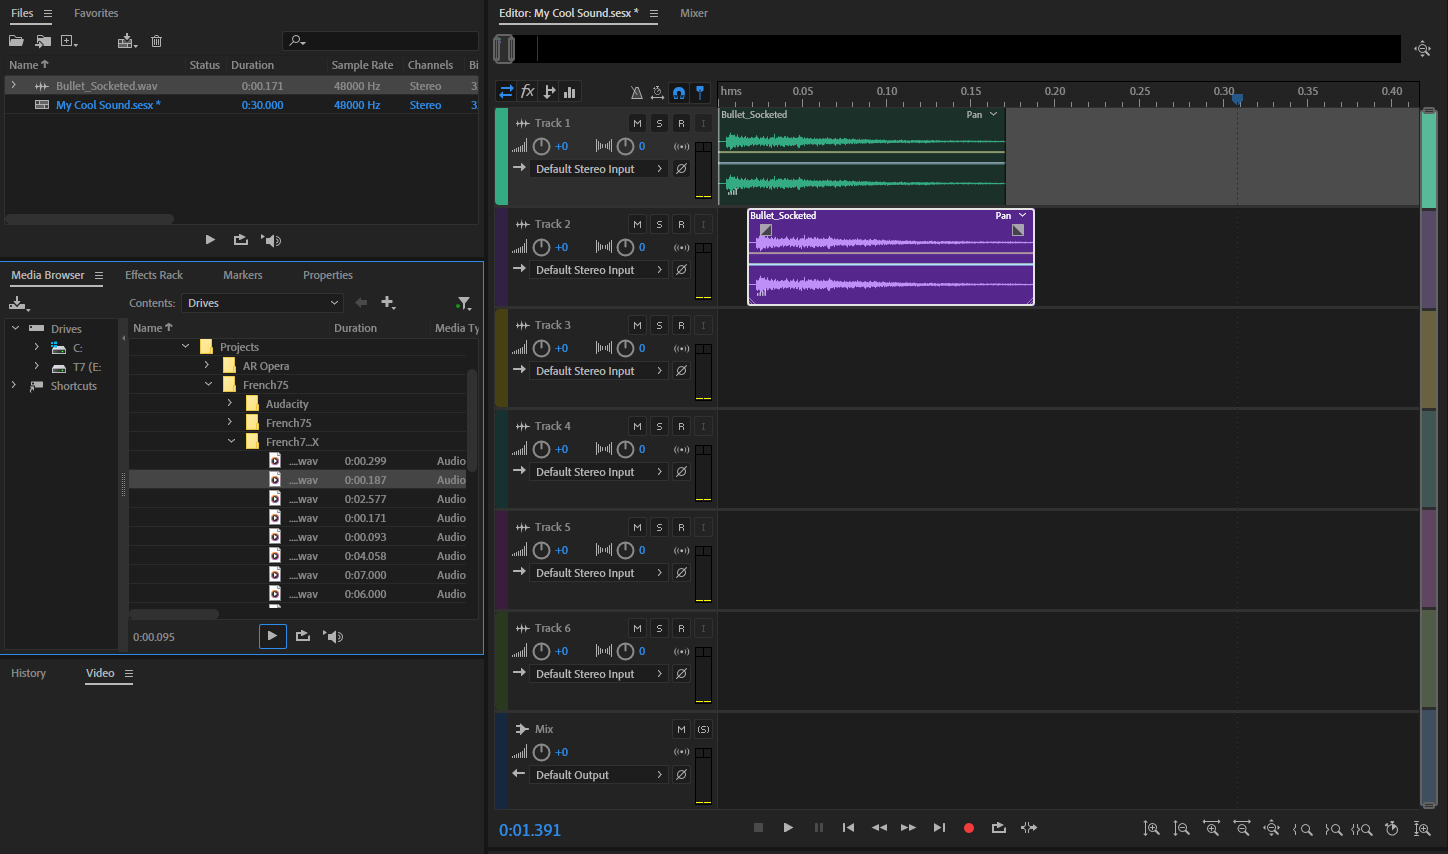
Your multitrack session will be created. You can see we have multiple tracks we can drag audio into.
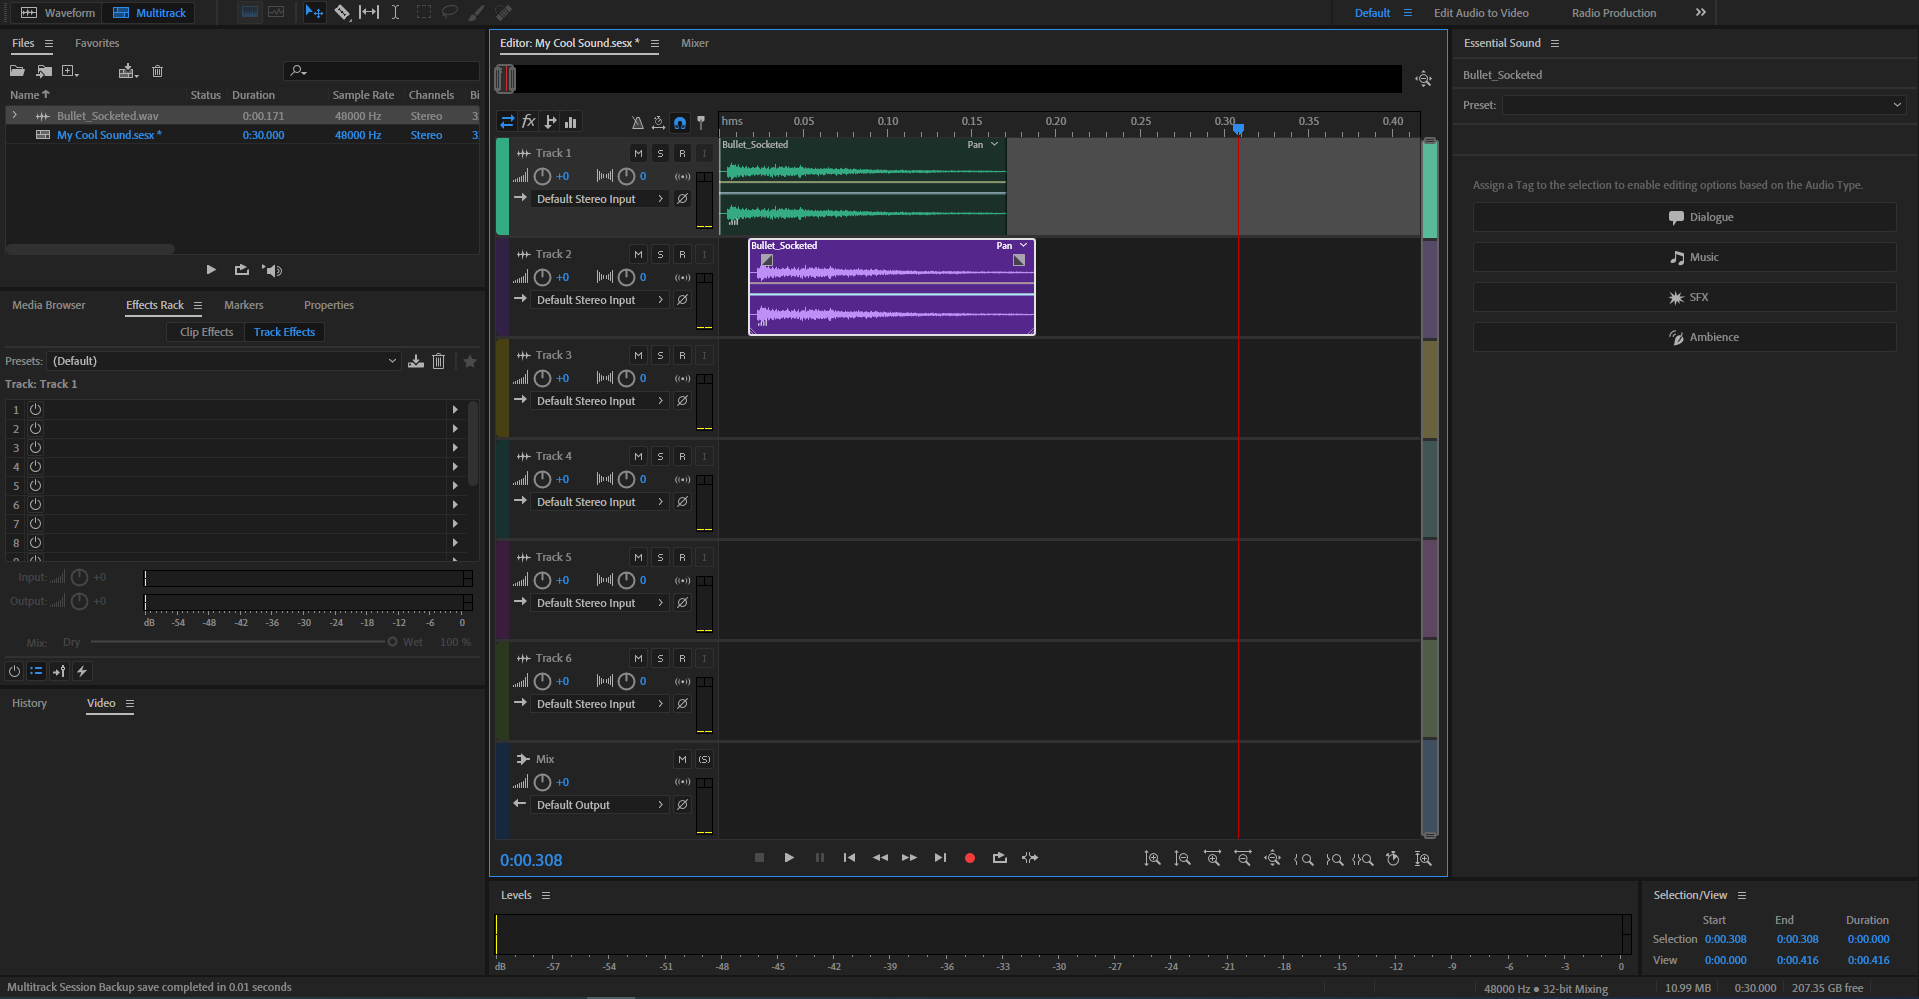
This is a multitrack editor, so it makes sense to have multiple clips to edit. I dragged in two audio clips and as I dragged them in, was able to determine where on the timeline they would be placed before letting go of my right-click.
To zoom in/out on a clip, you can use Ctrl or Alt / Command or Option + Scroll Wheel to toggle the zoom on your clip in various ways. To scroll left or right in your clip, hold Shift + Scroll Wheel. You can also hover your mouse over the timeline when using your scroll wheel to zoom in or out. The timeline displays the amount of seconds in your audio clip, and changes depending on how zoomed in you are.
An easy way to search for more files to add is through the media browser view. You can search through your files there and once you find downloaded sounds, can preview them with the play button beneath.
You can also toggle the Auto Play button, the rightmost button on your bottom toolbar in the Media Browser view. This enables a feature where any audio file you select while browsing will automatically play, making previewing your sound a more-seamless process.
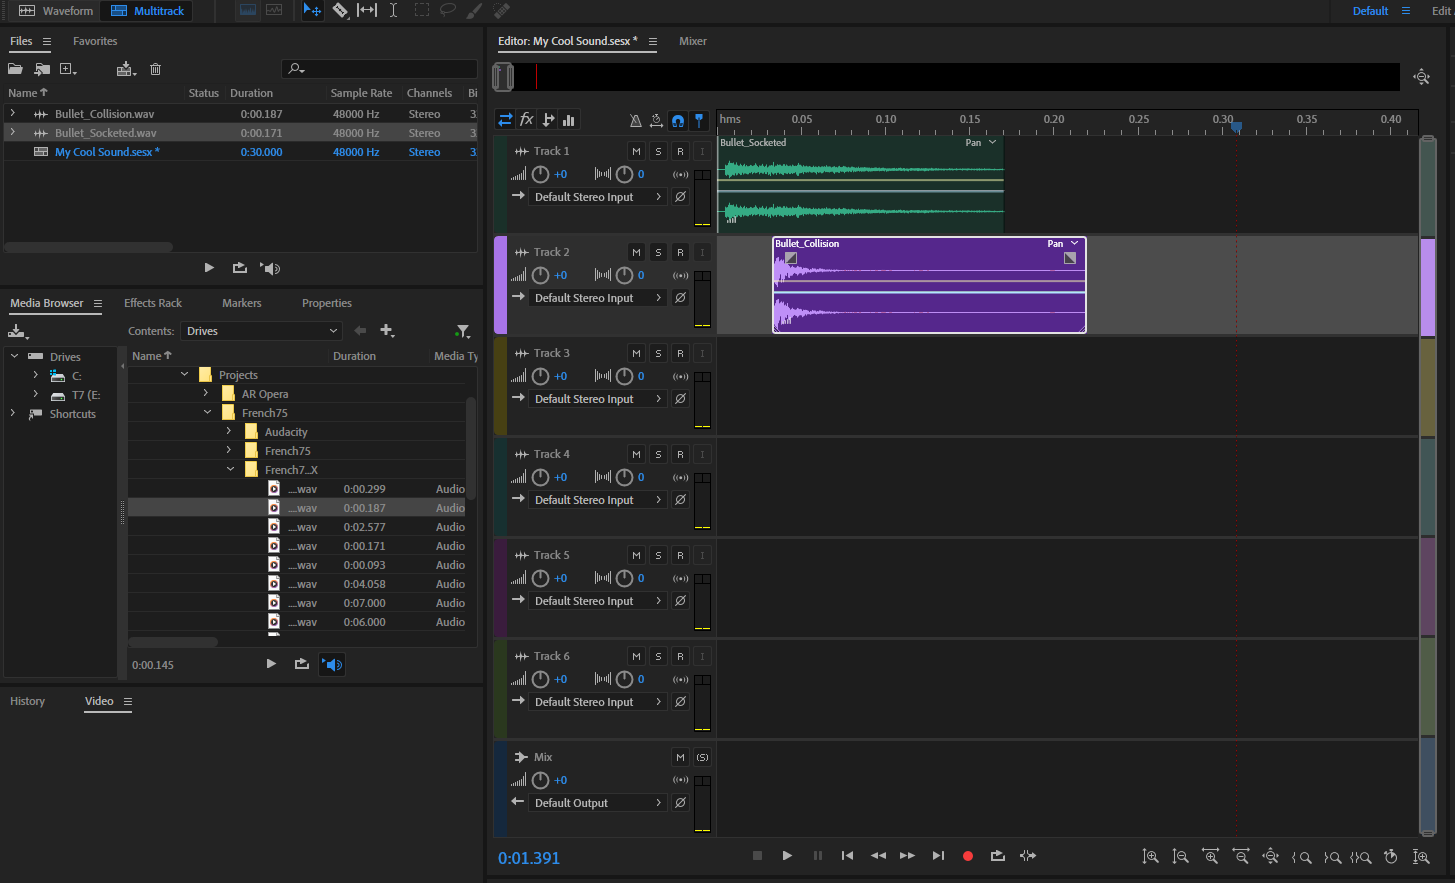
When you drag and drop your desired clip into the Editor, a new Audio clip is created in your files view. This can be edited in the waveform editor, should you want to make changes specific to that sound.
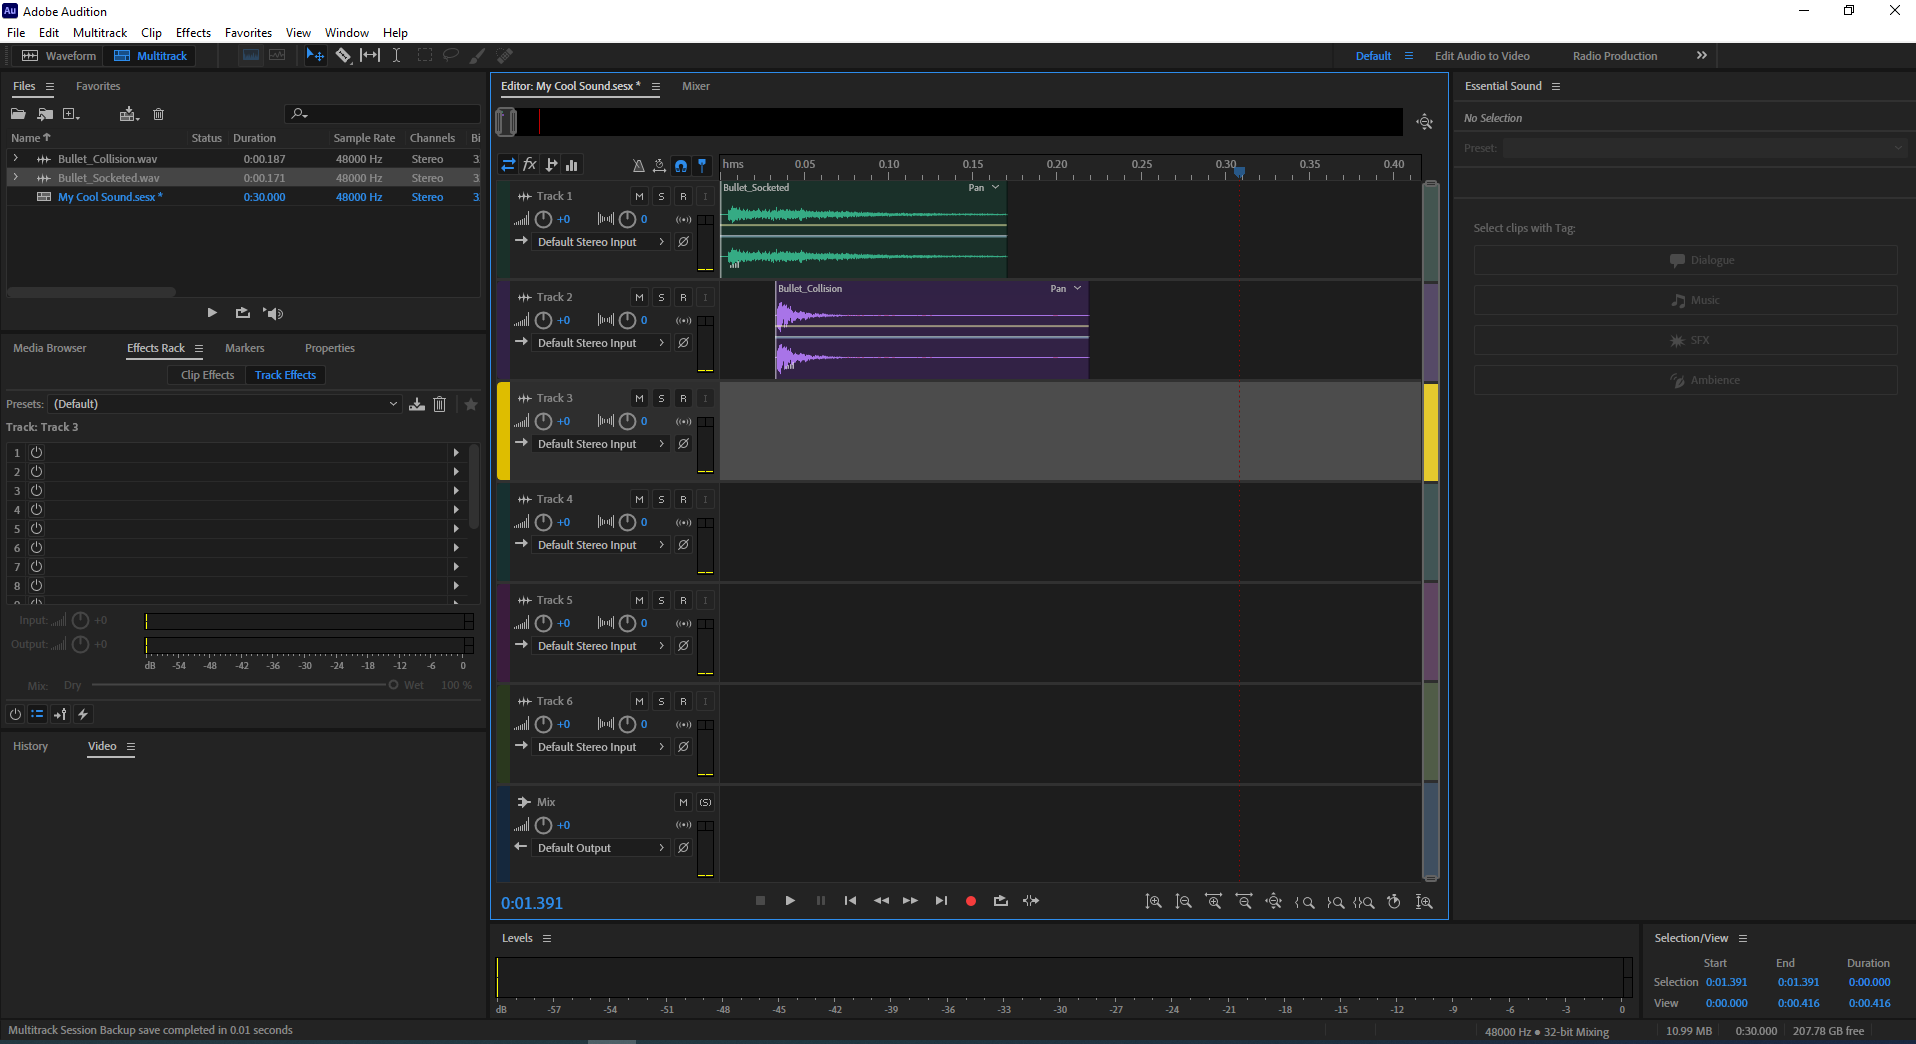
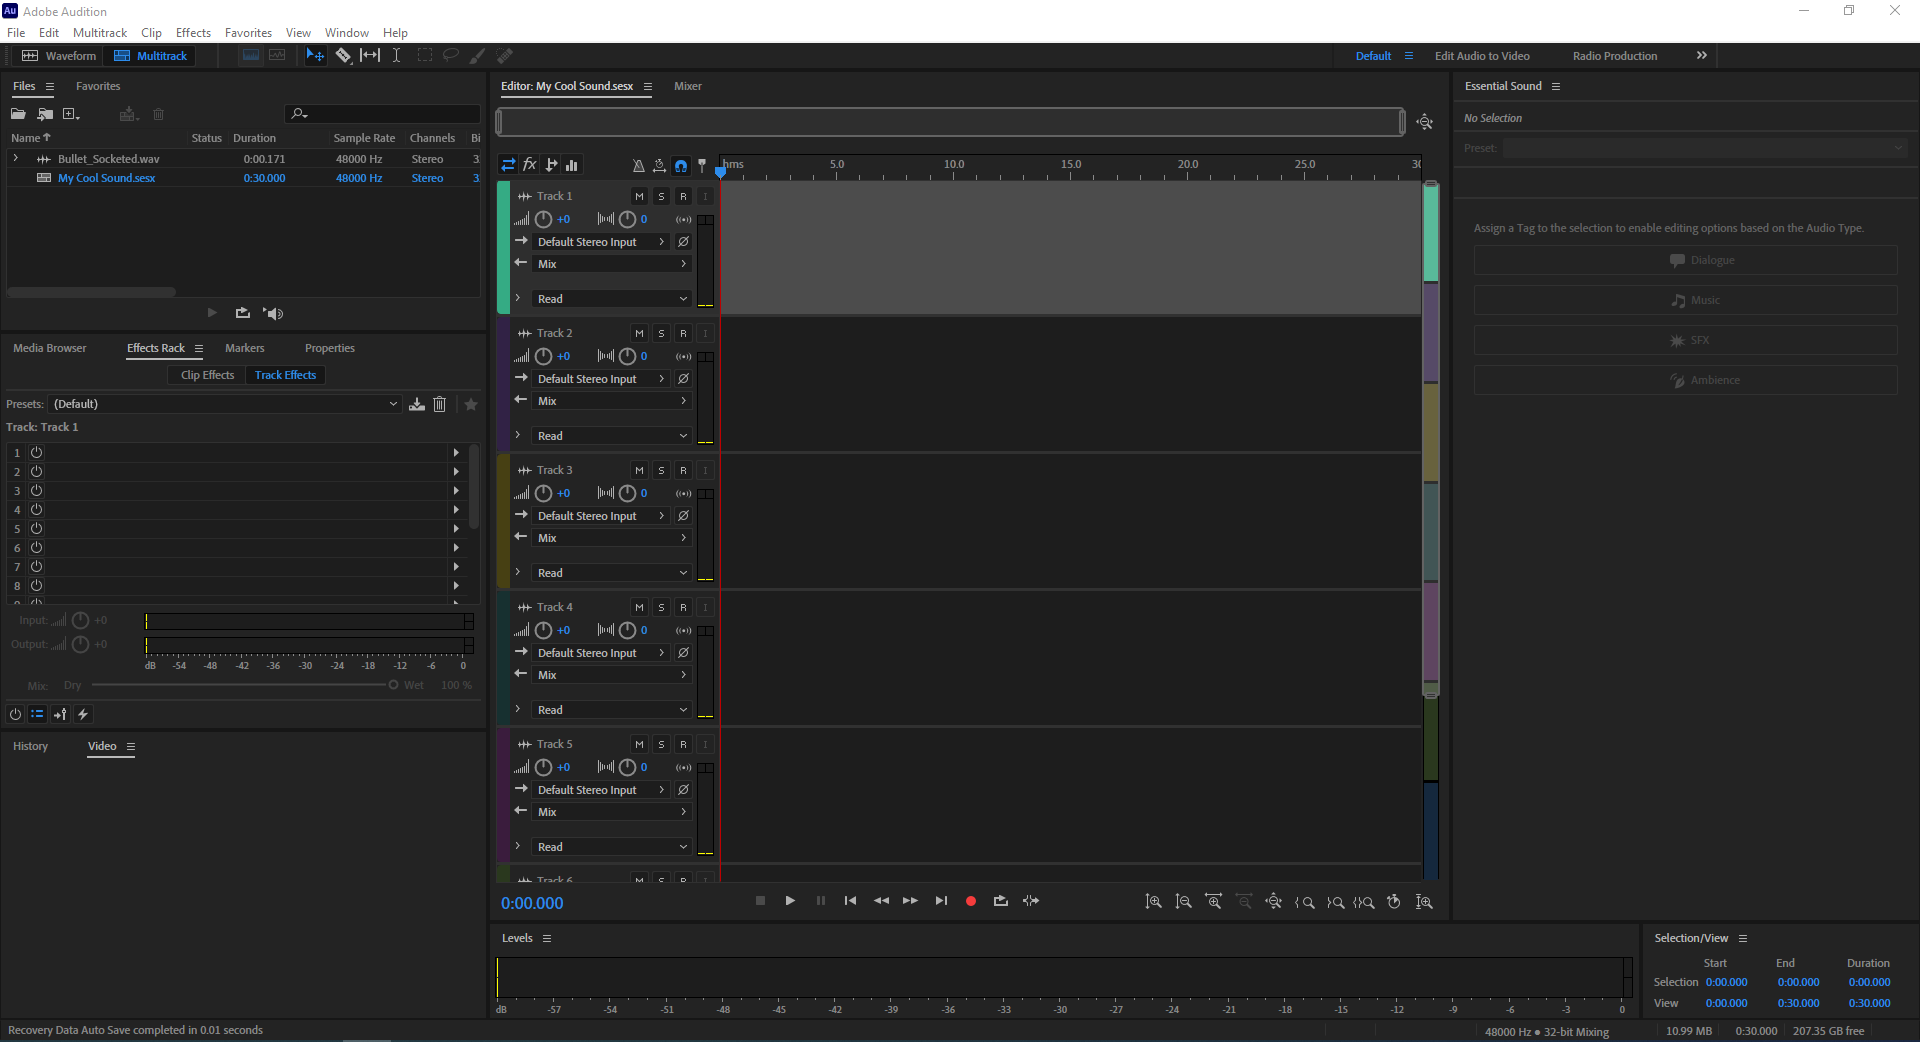
Adding effects to your channels can be done through the Effects Rack view. This rack will show the effects you have enabled for whichever track you have selected. In the example above, I have track 3 selected, and so above the effect slots you can see "Track 3" shown as the current track we can apply or disable effects.
When an effect is added to a track, you can see the power button icon turns green in the Effects Rack. Clicking that icon will revert it to its original state and disable the effect, though it will not delete it. This allows you to test your sound with and wihtout an effect.

Taking a closer look at a track, there is some information to digest...
Starting with the track panel, the left knob changes your track's overall volume. The other knob is for panning to the left or right ear.
The dropdown, currently labeled "Default Stereo Input" provides a shortcut to your Audio Hardware settings and lets you switch between mono or stereo. (Mono plays audio through one channel, and stereo plays through two)
R is the Record button. Enabling this will set the track to live mode, and when you record, it will create a clip for that track.
I is the Input button. When enabled, this track will be listening for input from whatever device is selected. This is also the device that will capture audio, should your track be ready to record.
The icon under the record button is your Sum To Mono button. This initiates the process of summing the channels of a multi-channel format (left and right channels in stereo) into a single mono channel and dividing the output by the number of channels being summed. The info present in all channels is preserved while the differences are canceled out.
Beneath the aforementioned button is the Reverse Polarity button. If you click this button, you probably wouldn't notice a difference, and that's because it's simply flipping your audio signal 180 degrees. For this button to have use, you would be using it with two audio tracks, as a means of achieving a fuller sound. (More on polarity, plus Phasing)

Moving to the clip, there are a few bits of information that can appear on it as you're editing...
The waveform envelope icon in the bottom left functions like a slider when hovering your mouse over it. It can adjust the overall volume of the clip by dragging left or right.
The FX icon is an indicator that effects have been applied to the track and are affecting the clip.
The grey squares on both top corners are your fade in/out sliders. They can be dragged left and right to determine the endpoints of a fade in/out. If you drag up or down, the shape of the line will bend. You can also hold certain keys while dragging to obtain various effects:
Shift - Fixes either fade duration or shape
Alt - Apply symmetric fades
Ctrl - Change the fade's shape
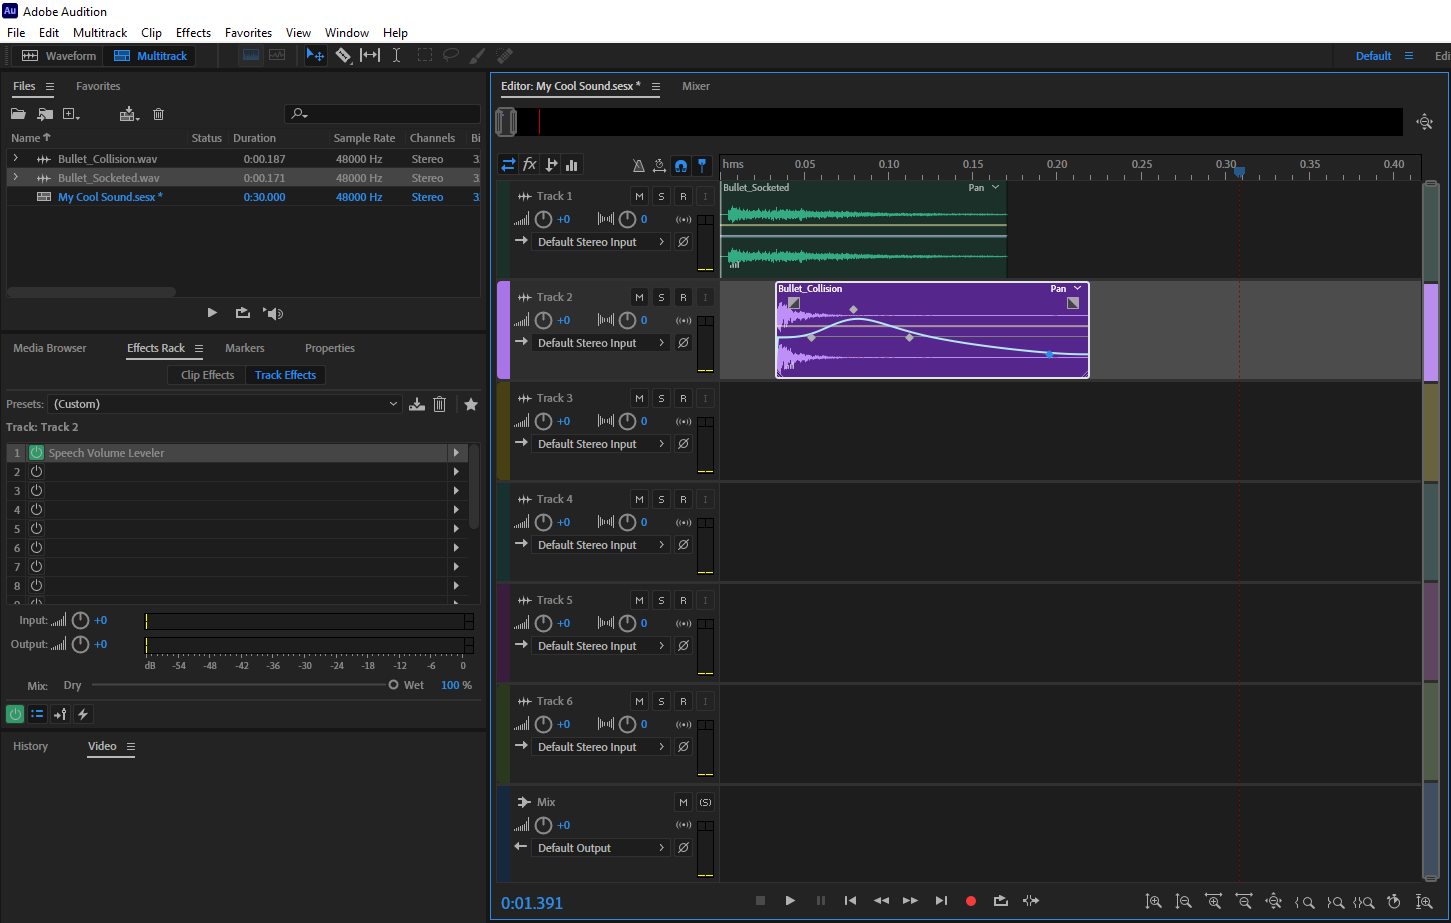
The blue line with points on it is your volume automation line, whereas the semi-transparent yellow line is the panning automation line. If you click one or the other, it will become highlighted and show you any points that have been added. You can add points by clicking somewhere on the line, can undo the action with Ctrl/Command + Z, or can use the select tool then right-click and choose "Delete Selected Keyframes."
The automation line starts off with a pointy waveform when you add points to it, however as you can see in the picture, my line is smoother. To do this, simply right-click 6the automation line and enable Spline Curves.
Rendering
Using the knowledge above, you're ready to begin experimenting with Audition and using it to record, mix, and polish audio.
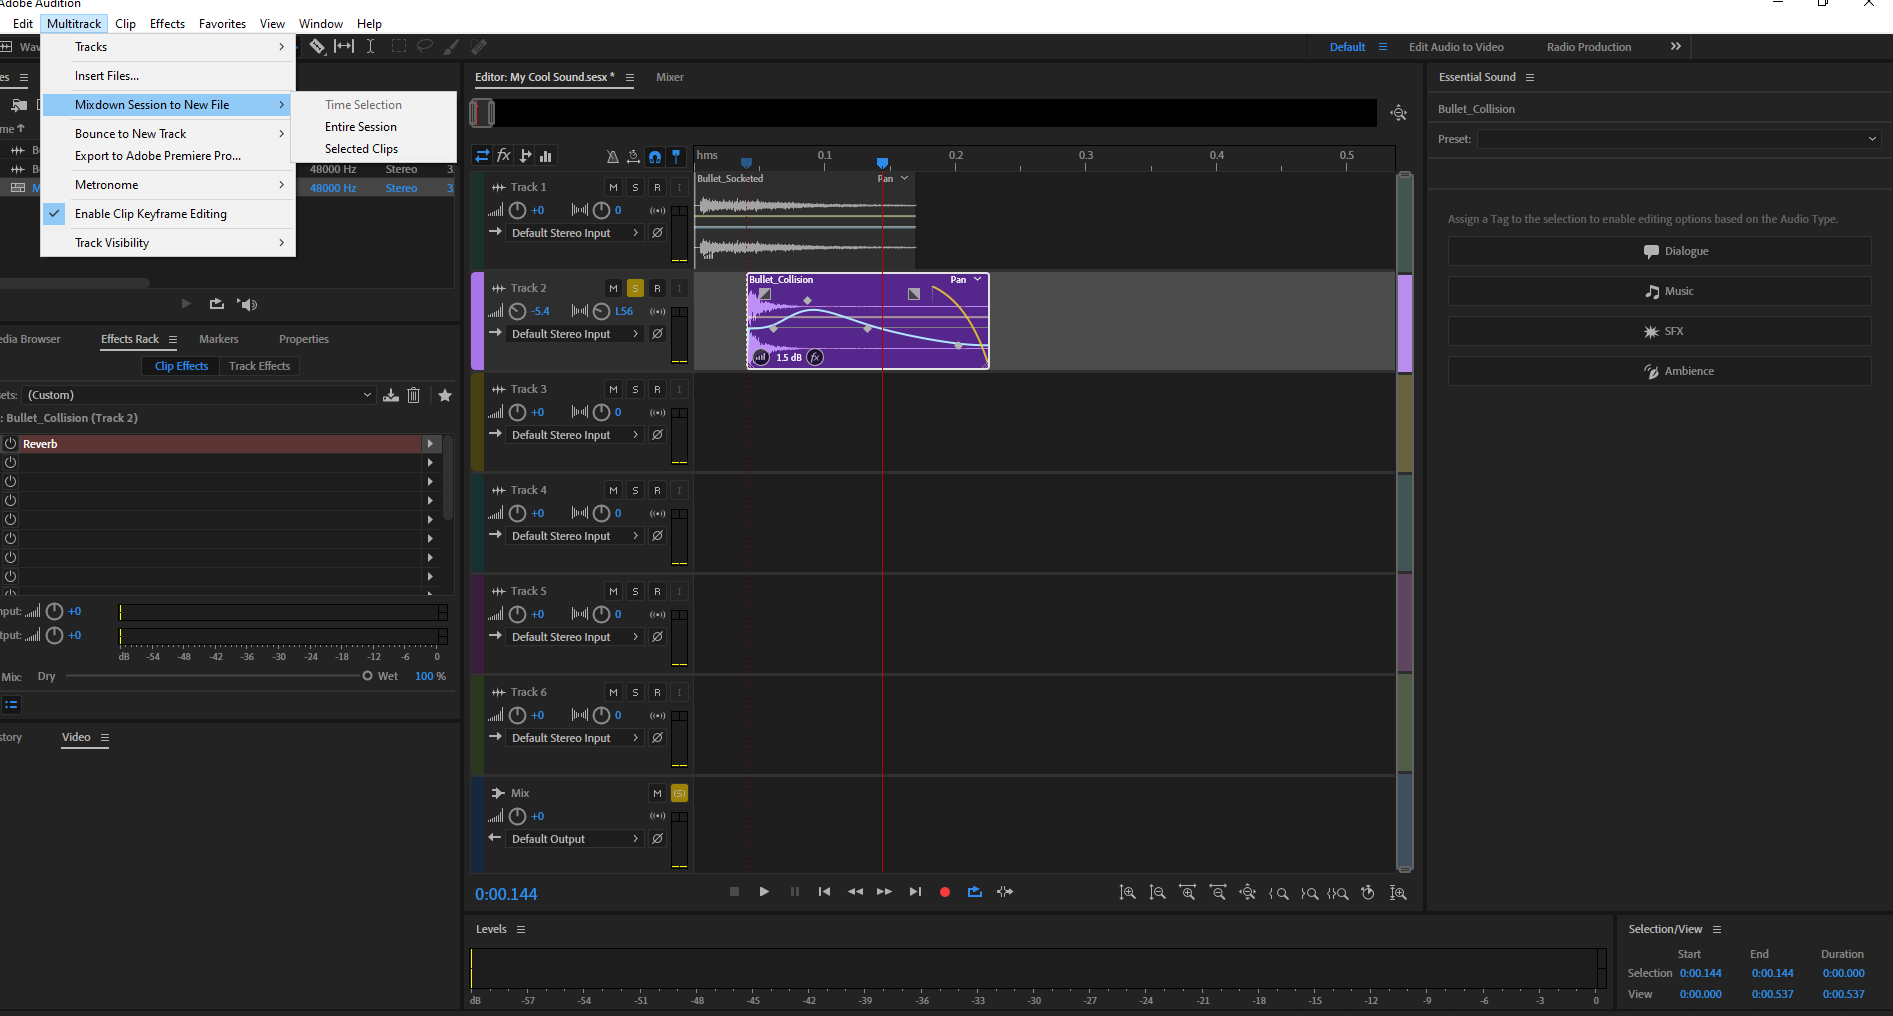
When you Mixdown a multitrack session, you are taking all tracks with audio and combining them into a single audio file. To do this, go to Multitrack --> Mixdown Session to New File --> Entire Session, then select that option.
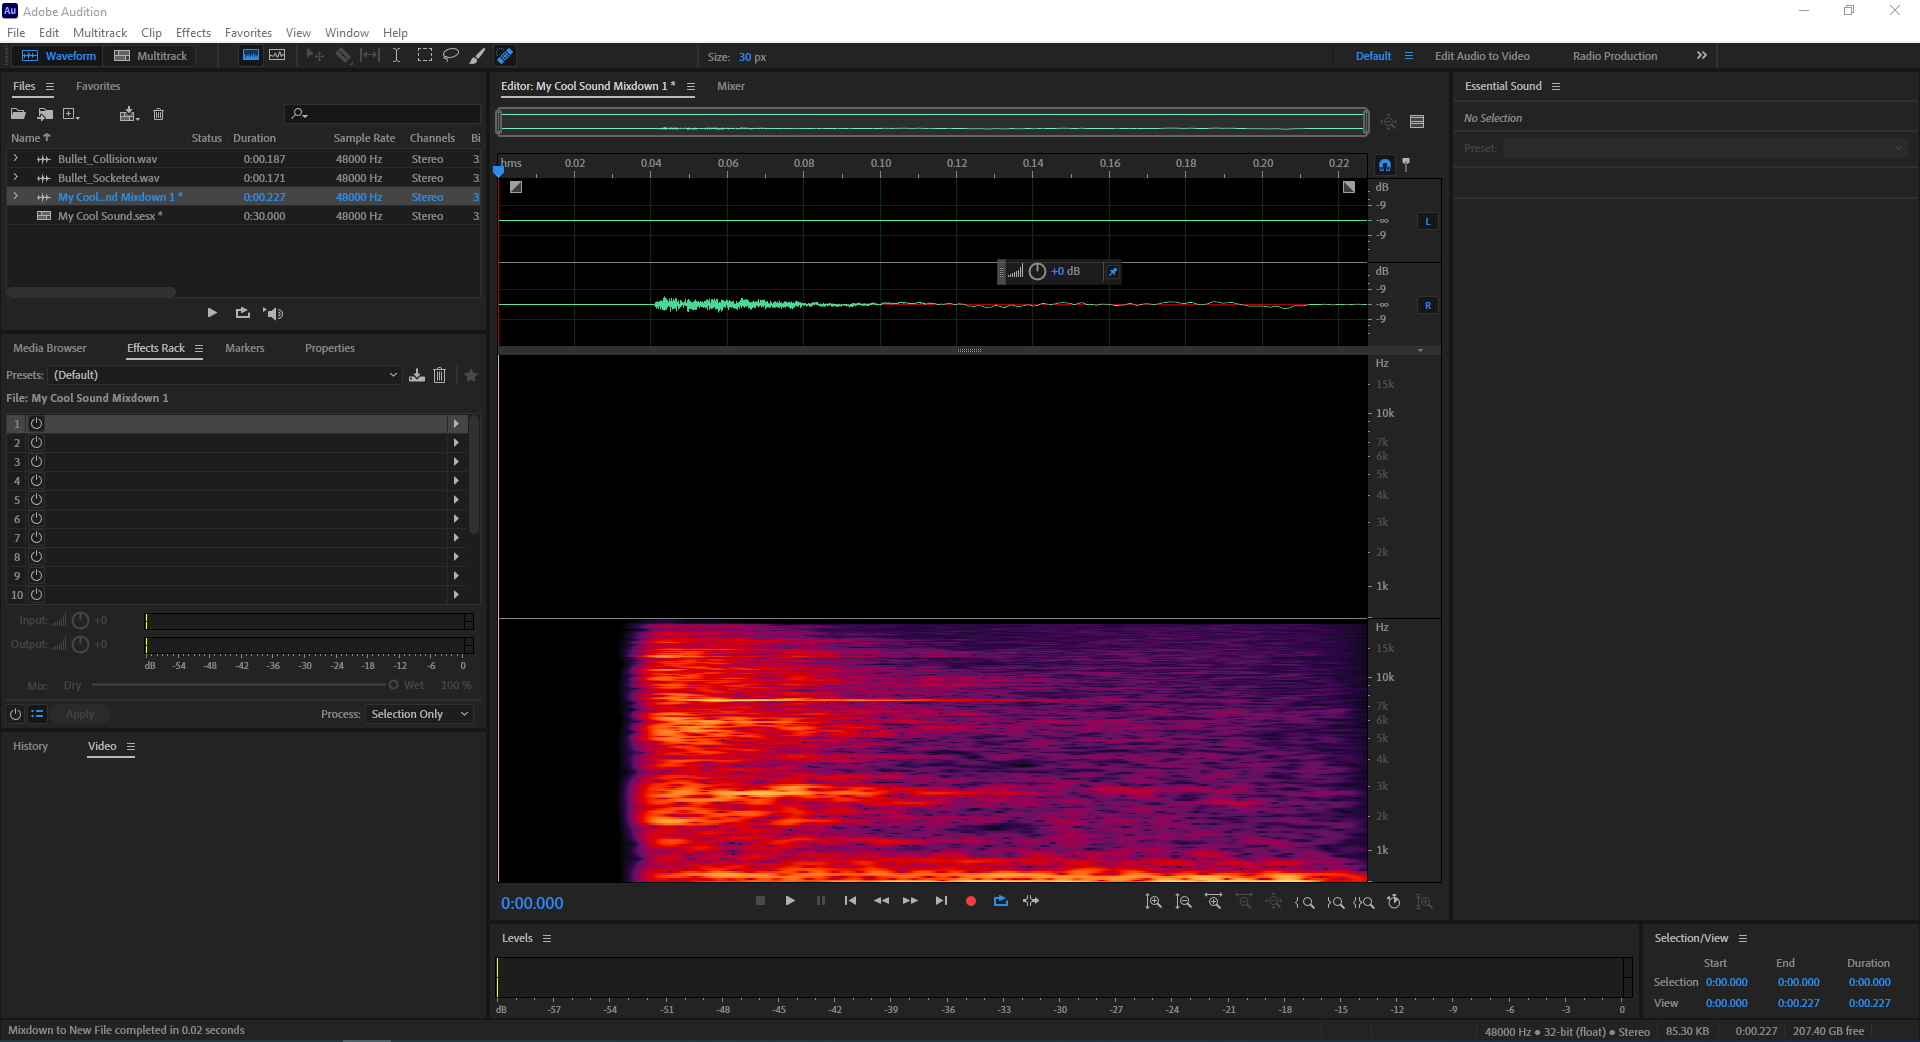
Since the file is to be rendered as a single wave file, Adobe Audition creates a new waveform file that appears in the File View. This is your Multitrack Session's render, where all sounds have been put into a single channel.

To save your track as an audio file, go to File --> Save As and the window above will appear. You can name your file, specify the directory, choose a specific audio file type, and view the format settings to double-check they're correct.
Helpful Videos
Good Job! There is plenty more to learn about Adobe Audition.
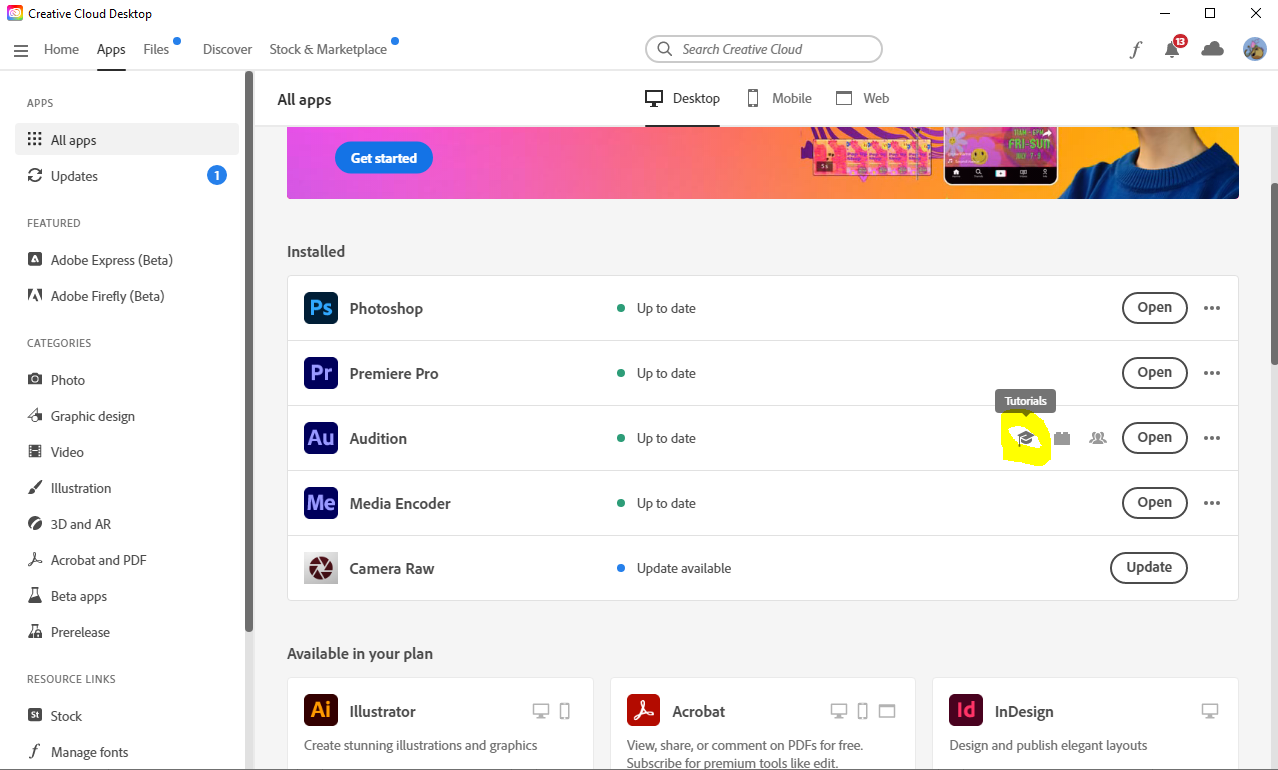
Like with any Creative Cloud product, you can access tutorials for the product by opening Creative Cloud, selecting an application like Audition, and clicking the graduation hat icon.
Below are some Audition videos that may interest you.
REMOVING BACKGROUND NOISE - Link
RADIO VOICE EFFECT - Link
VINTAGE VOICE EFFECT - Link
MOVIE TRAILER VOICE EFFECT - Link
PODCAST EDITING (Has good editing tips in general)- Link
Good Luck and have fun!