Ambisonic Plug-ins
This page references an ARVR Alumni's senior capstone project. The project is an immersive experience of the SU Marching Band's first performance at Shentel stadium. Two GoPro Max's and 4-channel Ambisonic mics were used to capture video and 360 audio.
Words that are highlighted like this will be defined in the DICTIONARY dropdown menu at the top of this page.
DICTIONARY
Ambisonic: A surround sound format, providing audio sources in a full sphere for the listener.
AmbiX: The modern standard for ambisonic audio formats, used widely and distributed to media platforms, like YouTube.
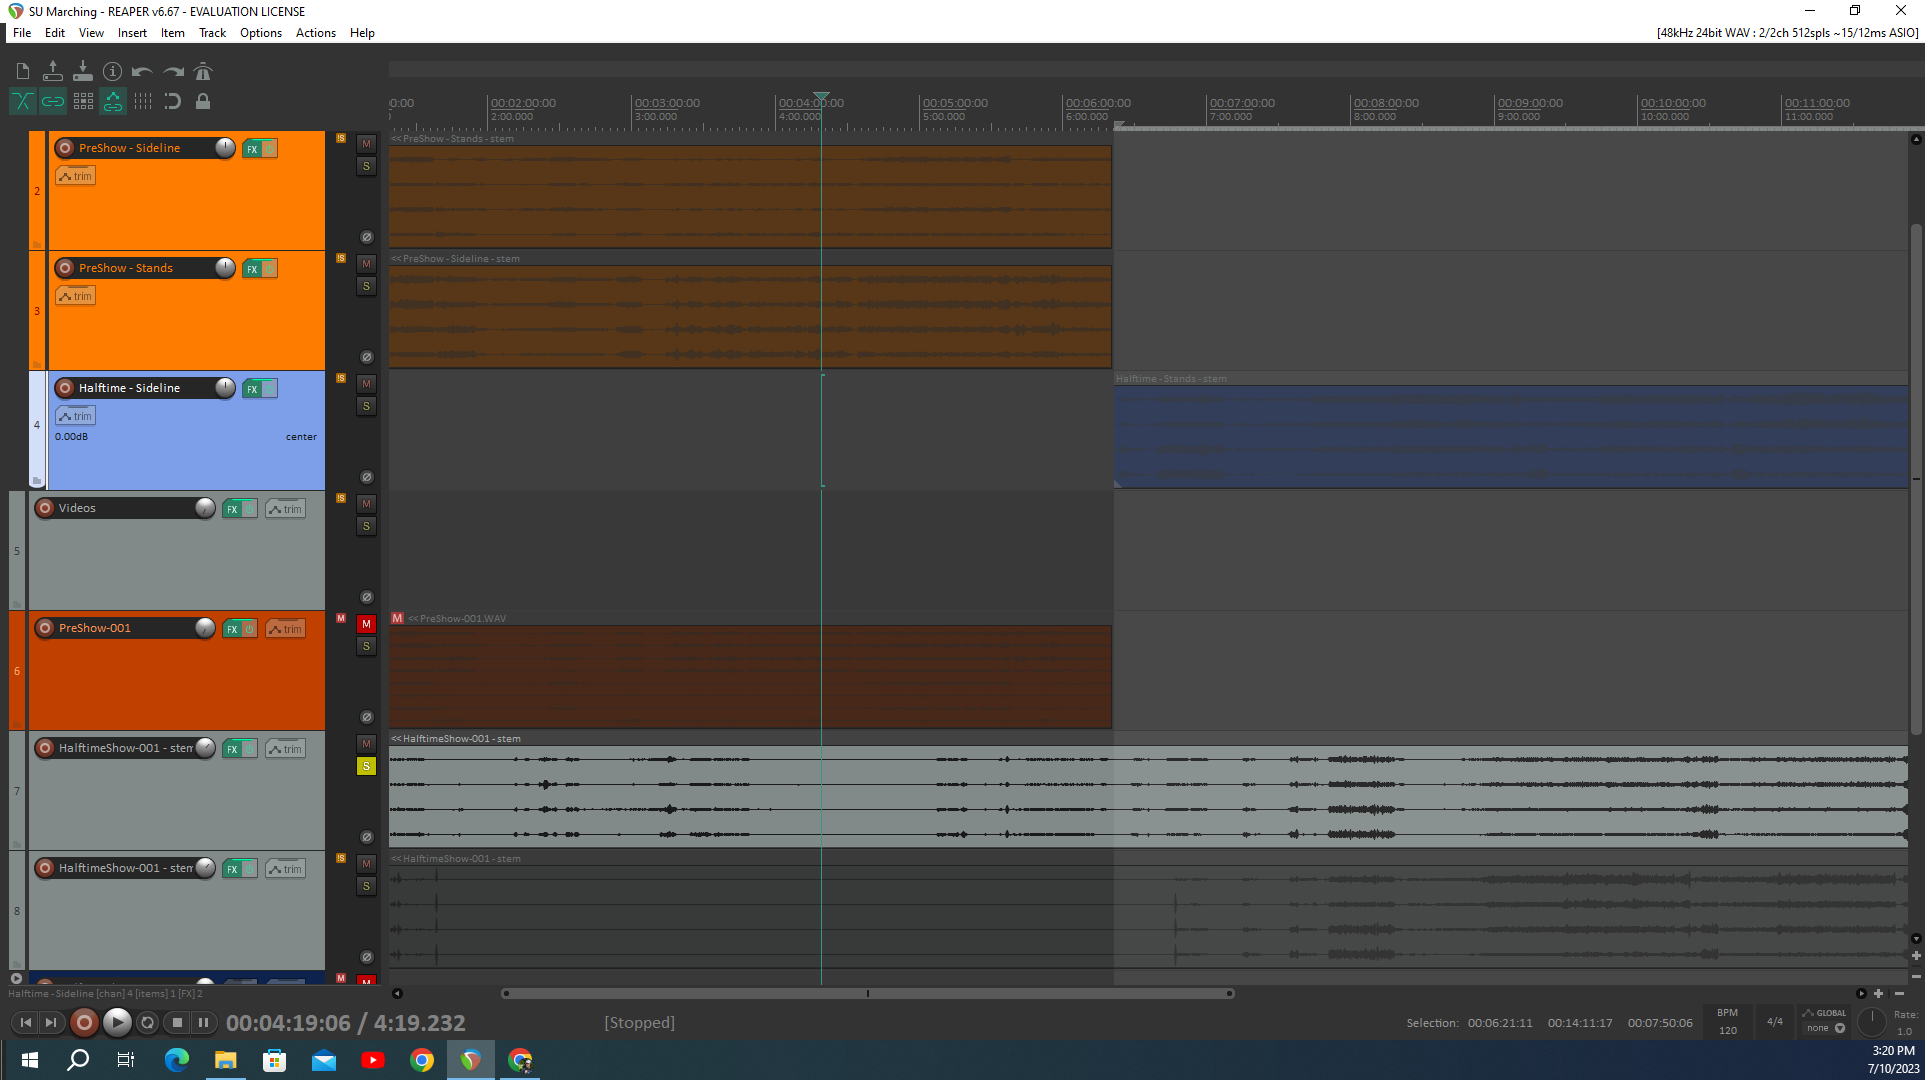
You may be familiar with Reaper and have done recording or mixing on a project, but doing the same thing for ambisonic audio requires different tools and knowledge. This page goes over helpful plug-ins, providing their use cases, how to acquire them, and getting them to appear in a Reaper project.
Many of these plugins are a part of the IEM Suite download, which you can find through the link here.
AMBI MICRO
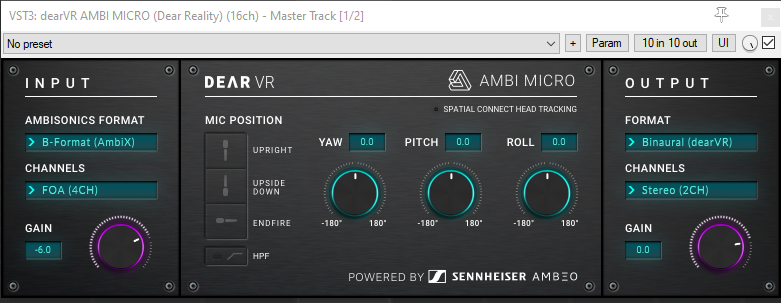
AmbiX or B-Format is an ambisonic audio file format that possesses the spatialized properties of surround sound audio. A-Format and B-Format are two standard formats for ambisonic audio, which you can learn more about here. In short, we recorded with a four channel mic and the raw audio is in A-Format, but must be converted to possess the needed spatial properties, which can only be understood in B-format. To convert the recorded audio into the correct format, you click the drop down in the top-left where it says Ambisonics Format, then select "B-Format (AmbiX)." Furse-Malham is an older format of ambisonic format that achieves ambisonic quality with a different configuration. Under Channels, we know that a 4-channel mic was used, so FOA (4CH) is what we select.
For the Output "Binaural (dearVR)" will take our ambisonic input and feed it to stereo output with spatialized properties. Channels should stay set on "Stereo (2CH)". If the alignment of audio does not sound right when you do this, you will have to move over to the dearVR AMBI MICRO plugin, or the Binaural Decoder plugin to adjust the rotation properties of audio. To help with properly adjusting the audio space, have the 360 video pulled up with the audio file and use your ear to figure out where the audio should align.
Multi - EQ
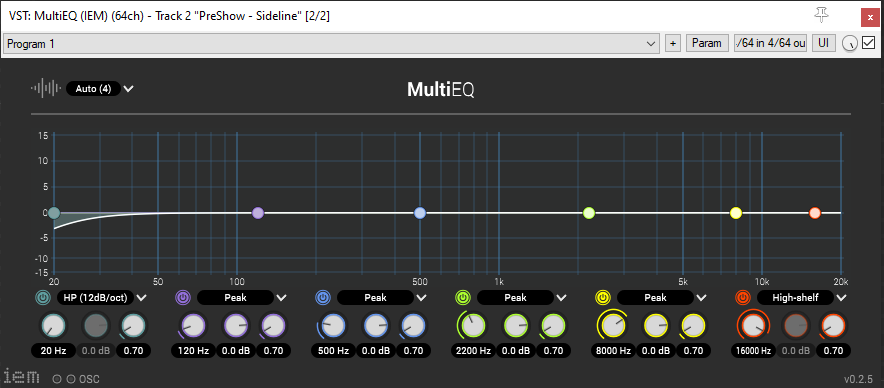
If you have ever scene an Equalizer before, that is essentially what this is, just for ambisonic audio. The only catch is that when you playback audio, there is no visualizer to show how the low/mid/high frequencies fluctuate. You will have to use your ear and play with the nodes to remove a range of frequency you believe needs changing. (ex. removing a low hum by lowering the purple node, muffling any low frequencies in the audio clip.)
Omni Compressor
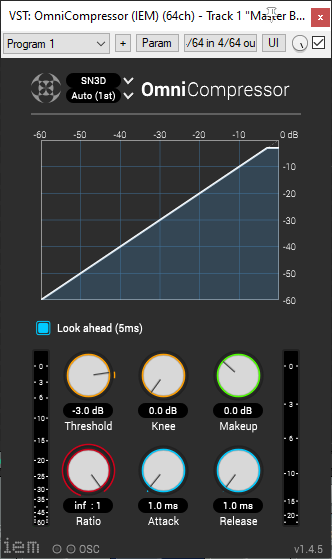
The Omni Compressor is like a compressor, but for ambisonic audio. You can put a gain threshold on the audio, like done in the image above with the top left knob, to prevent audio levels from peaking over a specific decibel value.
RODE SoundField
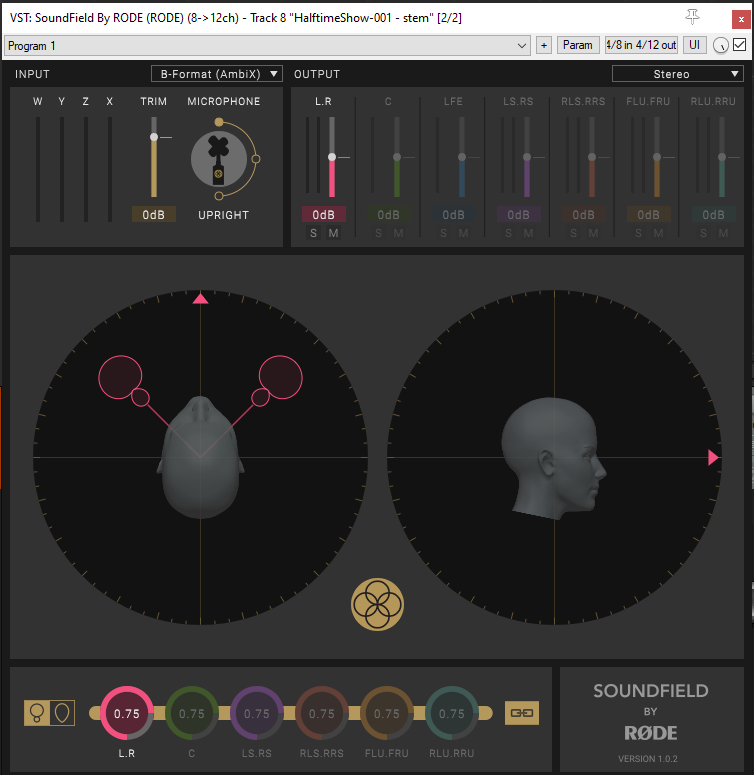
Firstly, make sure at the top you have the Output set to "Stereo" and Input to "AmbiX", if this is for the marching band Reaper project. SoundField can be used to tweak the audio spatialization of your different channels (remember, we captured four channels of audio with the ambisonic mic).
AMBEO A-B Format Converter
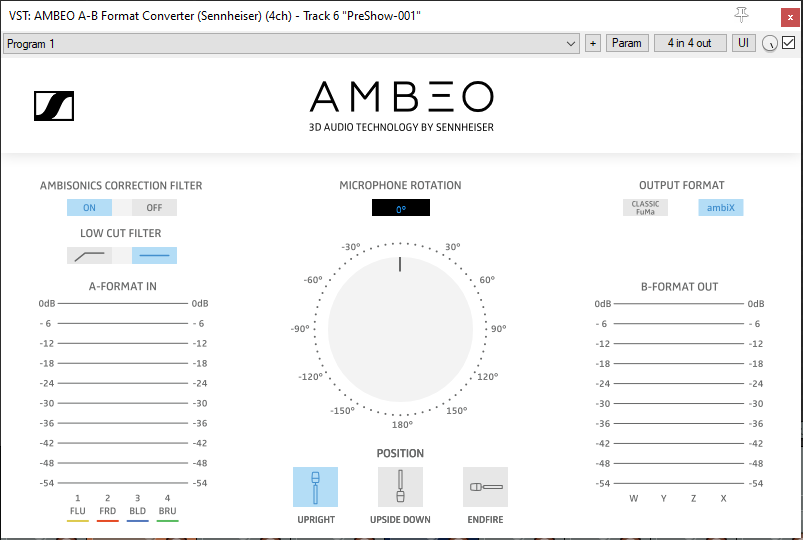
Part of how you configure this plug-in is determined by what was done during the recording process. When the marching band performance was recorded, the mic was facing upright with the logo pointed towards the bleachers. each go pro was facing frontwards as well, so when we convert the audio on this plug in, the location of the marching band audio should be right in front of us, just like in the video recorded with the GoPro Maxes.
The Ambisonic's Correction Filter should be turned on. This keeps track of any changes in the HRTFs from our Binaural Decoder. To reiterate, the filter will recognize changes in audio details and make sure they make it to the output format, such as pitch, yaw, and rotation.
If the 4-channel mic and GoPro was not aligned during the marching band performance, we could look at a playback of the video to see where audio instances should be occurring, then adjust the knob on this plug-in to pan the audio to the appropriate position.
Equirectangular - Spherical Audio Pan Tool

This is another panning tool, like in the A-B Format Converter, that has many options for adjusting the positioning of your audio.
FB360 Encoder
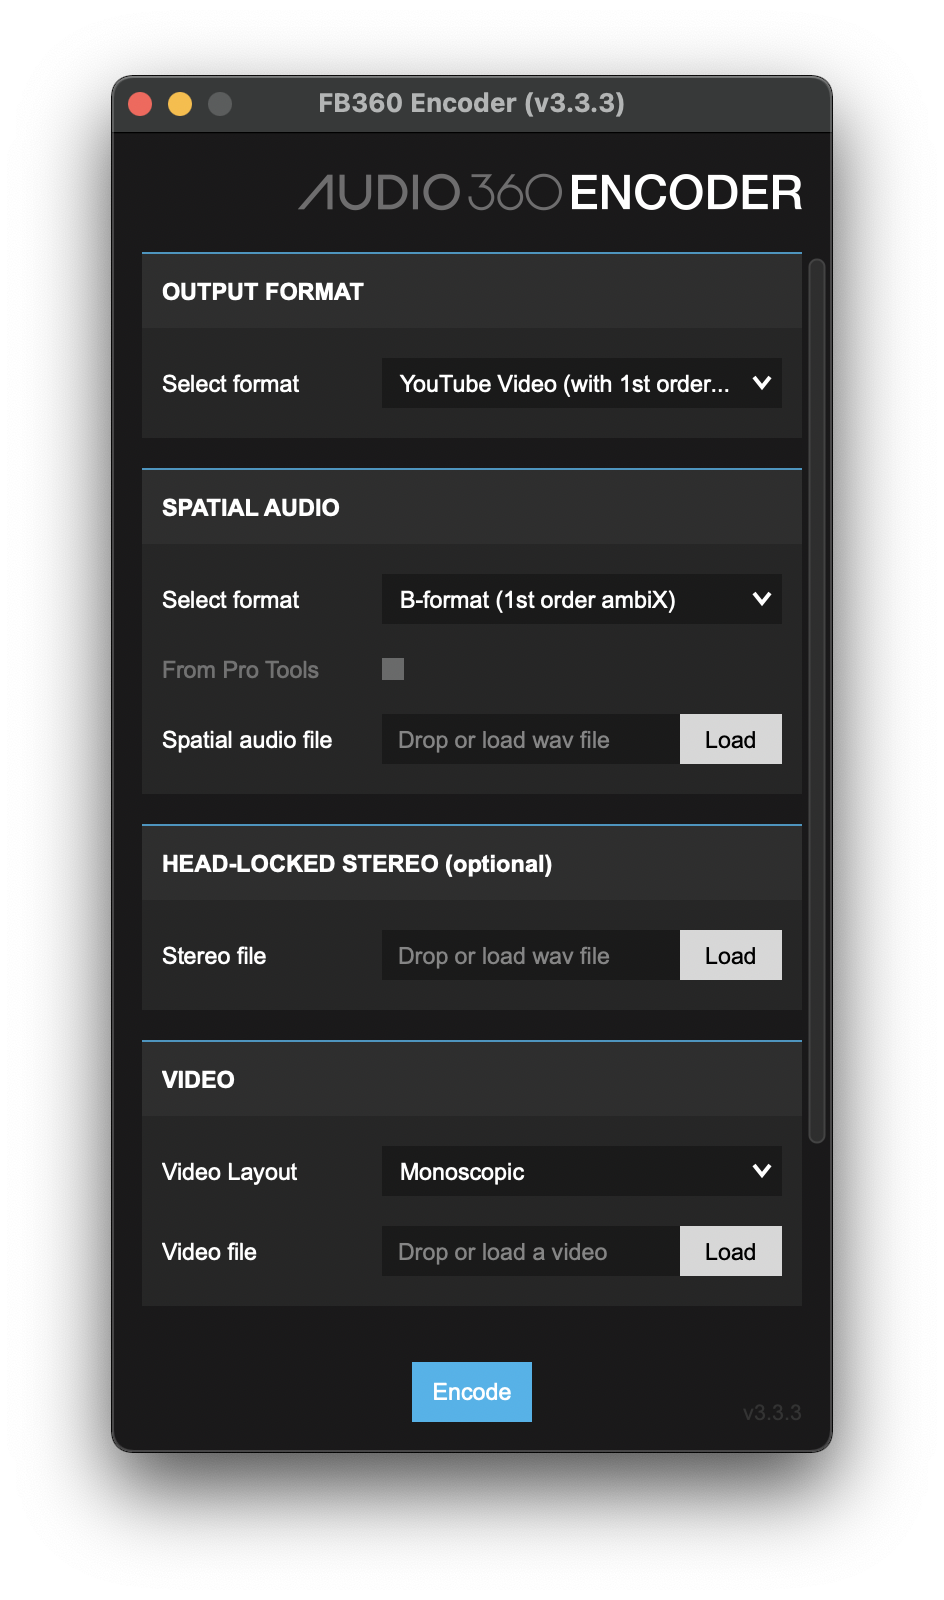
When combining your final audio render with the 360 video, you will use the FB360 Encoder. Instructions on downloading it can be found here. Make sure your format is chosen, the rendered audio file is provided, and the video it belongs to is provided, before clicking Encode at the bottom.
When you get to the downloading Python step, consider downloading pyenv, if you're downloading python on a lab computer. This application manages different versions of Python and can ensures that having multiple versions of Python on a computer, if there are any, will not mess with anything. (LINK)
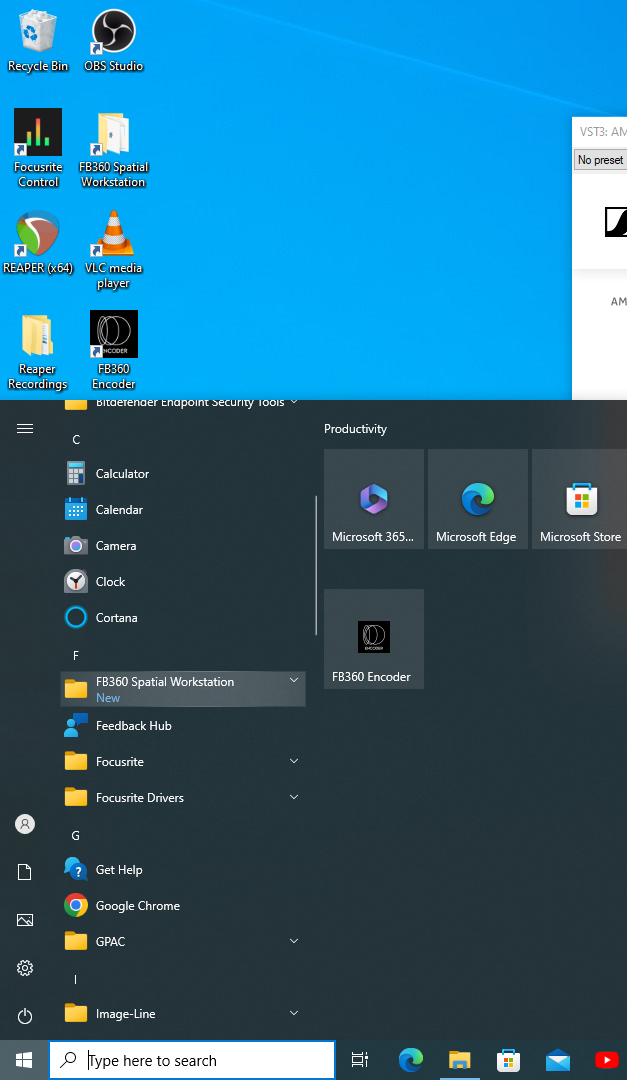
When you download FB360 Encoder, you can find the application through your desktop and either pin it to your start menu, pin it to your taskbar, or drag and drop it on the start screen to have quicker access to it.